
Planning Pergola Levels for a Sloping Terrace
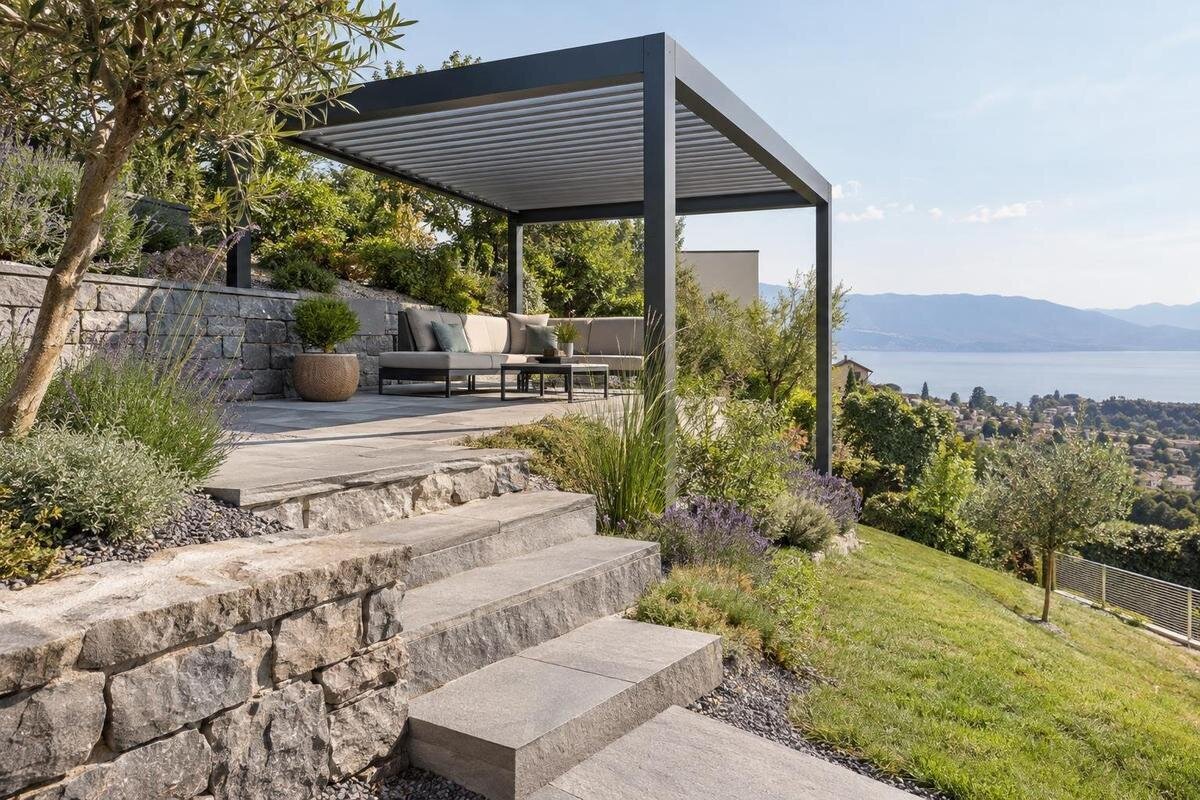
Pergola planning
On a sloping terrace, the paving level and pergola roof level are related, but they are not the same design decision. The terrace may fall to move surface water; the chosen pergola has its own specified frame geometry and post arrangement. Record the finished level at every proposed support, then compare it with the model drawings, required clearances, drainage routes and anchoring information. A slope is neither automatic approval nor automatic rejection: the question is whether an approved arrangement works with the measured elevations and the actual substrate.

01
Terrace falls and pergola roof levels
A terrace is often laid with a fall so rainwater moves towards a drain or outlet. The pergola frame above it has its own design geometry, set out in the chosen model’s technical information. Those two planes do not have to match simply because they sit one above the other. At the same time, do not assume every pergola can stand level over a sloping floor: permitted support heights and post arrangements vary by model and must be confirmed rather than improvised. Think of the paving as the finished walking and drainage surface, and the frame as a separate structure whose beam and roof levels must be planned against it. If the terrace falls in two directions, the distinction applies at every support, not just along the longest edge.
For a clear design, put the proposed paving surface and intended pergola geometry on one site drawing, but show them as separate information. A plan indicates the footprint and post positions; a section or elevation shows the height relationship. Trying to make the roof follow the floor may alter clearances or water routes without addressing whether the model permits it. First establish the roof geometry in the model documentation, then check whether the terrace’s support points can meet it. Keep the existing surface levels distinct from the proposed roof datum; recording both against one reference helps prevent the floor fall being mistaken for a frame slope.
Survey the terrace at the proposed post positions
Do not judge a terrace fall by eye or by measuring only from one edge to the other. Put the proposed post centres on a plan and take level information at each one, along with points where the surface changes direction, meets a step or reaches a drain. Use one fixed reference level, often called a datum, so every reading can be compared on the same basis. Note local dips, raised joints or a change in paving as well as the broad fall; these can affect an individual base even when the terrace appears regular. On a short terrace, an overall average can conceal the one high or low support point that controls the design. If accurate measurements are difficult, ask an installer or surveyor to take them.
Record whether the figures are for today’s surface or the final build-up. A terrace awaiting paving can change height when its finish is installed, so ask the person responsible for the surface to confirm the proposed finished level at each support. Mark the threshold, wall line, steps, drains and outer edges on the same sketch, and add dated photographs with recognisable reference points. The listing for the Bloomcabin Pergola model gives an area range from 9 to 24 m²; that is not a slope allowance, post-height range or substitute for a level survey. Use the area range to compare space requirements, and the level survey to assess how the frame would sit above the finished terrace.
02
Set the roof height against the building and openings
Choose the intended beam and roof height with the building and everyday movement in view, not only by looking at the terrace corners. Check doors and window openings, shutters, handles, vents, eaves, balconies and any wall fittings. For an opening door, mark its full swing; for sliding doors, include the track and operating clearance. The lowest relevant beam position matters for people walking beneath it, while a frame near the façade may interfere with a window or service outlet even if the far edge has ample headroom. Note exterior lights, pipes, shutter housings and other projections too. Use actual measurements and the final ground level, not a clearance estimated from a photograph.
A wall-mounted scheme brings the façade connection into the level plan as well as the post-side ground elevations. The roof line at the house may be constrained by openings, eaves or the construction behind the finish; a convenient height is not evidence that the wall can accept the connection. The Bloomcabin Wall Pergola is a distinct model to assess, but its name does not establish that a particular wall, fixing position or sloping terrace is suitable. Check the model-specific arrangement and have an appropriate professional review the actual wall construction and clearances. Where the façade build-up or support material is unknown, establish it before deciding the connection height.
Post heights above a sloping surface
Once the intended roof plane is known, compare it with the finished surface at each post. With a level frame, the distance from the finished surface to the beam is smaller on the uphill side than on the downhill side. Where the surface falls in two directions, a single measurement across the width does not describe all the corners. Write the surface elevation beside each labelled post on the plan, so the installer can see each condition rather than relying on an average slope. Use the actual base location, not the corner of a nearby paving tile, as the reference point. These individual readings show the height differences that the approved post arrangement needs to accommodate.
Do not assume that packers, trimmed posts or a raised base can be used to accommodate those differences. Such changes affect how the frame is supported and whether its geometry matches the drawing; an adjustment that looks minor can be structurally significant. The Bloomcabin Bioclimatic Pergola is one option to check against measured levels, not a promise that its supports can be varied on site. Ask for the allowed post arrangement and approved base detail for the selected configuration before treating any level difference as resolved. A method used for another model should not be assumed to apply.

03
Keep the terrace drainage working
Keep terrace drainage as a separate part of the layout. Mark the direction surface water currently travels, where it enters a channel or gully, and any low point where it collects. Then plot the pergola posts and supporting works against those routes. A post location that covers an inlet, narrows access for cleaning, interrupts a channel or creates a barrier across the flow may leave the terrace working differently from the way it was designed. Existing marks, silt lines or ponding after rain can help identify water movement, but unclear drainage calls for assessment rather than guesswork. Keep access to the drain in mind after the post positions are fixed, not just during setting-out.
Also separate terrace runoff from rainfall landing on the pergola. Do not assume the chosen roof directs water to a particular side or includes a collection outlet: consult the model drawings and note any discharge point they show. If there is no defined collection arrangement, establish where water will fall relative to doors, walls, walkways, drains and neighbouring areas. The pergola should not be planned as though its roof changes the terrace drainage automatically. Agree a route that does not send water towards a threshold or a place the terrace cannot handle; do not block or divert an existing drain to make the footprint fit. If the drawings leave the water path unclear, ask the installer to explain it before fixing the layout.
Roof levels in elevation and section drawings
Show the roof geometry on an elevation or section, not just as a rectangle on a plan. A plan can locate posts but cannot show how intended beam heights relate to a high corner, low corner, adjacent eaves or door head. Include the designed roof line and underside where available, and view it from the uphill and downhill edges. This can reveal a frame that clears a doorway on one side but intrudes on an opening or circulation path on the other. If the model’s technical information specifies a roof orientation or pitch, retain that geometry in the site review rather than tilting it to mirror the paving. A path approached from the high side can have a different clearance issue from the downhill edge.
A terrace may fall across its width, along its length or in more than one direction. Mark the slope direction and roof plane separately so nobody mistakes a diagonal difference for a uniform rise. Label each post in the views to match the plan, so its ground level and beam height can be read together. For the Bloomcabin bioclimatic model, compare the selected configuration’s technical drawing with the site’s measured elevations. A product photograph cannot show whether the proposed roof plane will clear a particular opening. If the surface falls in two directions, one side view may not show the difference at every post; ask for views that cover both directions.
04
Check the ground beneath every support
The paving or terrace finish is not, by itself, evidence of a suitable anchoring surface. Beneath it there may be a structural slab, a separate build-up, a membrane, a drain, a void or material that changes across the site. Establish what supports each proposed base and provide that information with the pergola drawings; do not treat a tile or surface layer as the structural anchor. The Bloomcabin Pergola product page identifies a model, but it cannot establish what lies below your terrace or whether a fixing is suitable there. Use reliable construction records or a site assessment where the substrate is uncertain. Mark any known drainage routes or services shown on drawings so possible conflicts can be reviewed rather than guessed at.
Pay particular attention to support positions near a terrace edge, a change in level, a drain trench or a retaining structure. Ground close to a drop may not have the same support conditions as the central terrace, and an existing wall must not be assumed to serve as a pergola footing or fixing point. The required anchoring drawings and structural assessment need to relate to both the selected pergola and the actual substrate. There is no single footing size that can be taken from the terrace slope alone; a qualified professional must assess the ground and approved anchoring detail for the site. A general dimension from a different installation is not a substitute for that evidence.
Match the model’s approved post layout to the site
Compare models by their documented post positions and permitted height arrangements, not only by roof area or an attractive photograph. For each option, ask for a drawing that identifies the intended footprint, posts, beam and roof levels, anchoring approach, and any restrictions that matter on a sloping site. Confirm in writing whether the recorded elevation differences can be accommodated using an approved arrangement. The Wall Pergola listing is one model to include when comparing options, but a wall-mounted description does not answer whether its posts and façade connection align with your site. Base the comparison on the exact size and configuration you intend to order, and confirm whether an alternative is a documented variant or a change needing separate approval.
Treat changes from the documented layout—moving a post around a drain, shortening or extending supports, altering the roof line, or changing how the frame meets a wall—as design questions, not routine site adjustments. Ask who can approve the change and whether the resulting arrangement remains covered by the model’s installation information. A generic drawing for a different size or layout may not answer the question for your chosen configuration. Keep the response with the survey and drawing so the installer, supplier and any structural professional are working from the same version, rather than assumptions made from a catalogue image. This can catch a mismatch before an order is placed or work begins.

05
Arrange a site assessment when levels or supports are uncertain
Arrange a site assessment where the surface build-up is unknown, the terrace changes level near a proposed post, supports sit near an edge or retaining wall, drainage conflicts with the footprint, or a wall connection is being considered. It is also needed when the model’s approved arrangement does not clearly cover the measured levels. A qualified installer can check the practical set-out, while a structural professional may need to assess the support and anchoring evidence; the expertise required depends on what is unknown. For an assessment of the Bioclimatic Pergola model, provide the exact configuration and relevant drawings rather than asking for a general view about pergolas on slopes. A modest overall gradient can still have one local support point that determines whether the arrangement is suitable.
Provide the level sketch, proposed post centres, final-surface build-up, photographs, drainage points, access constraints and any available terrace or wall drawings. Ask the reviewer to confirm the intended roof height and post arrangement against those facts, identify missing substrate evidence, and state what happens if an on-site level differs from the plan. Clarify who is responsible for confirming anchors and resolving conflicts with a drain or opening. A useful assessment ties its answer to a named model and drawing, rather than giving a generic assurance that pergolas can go on slopes. Record any assumptions so a later change to the paving, a drain or a post position prompts a review.
Coordinate finished terrace levels and installation records
If the terrace is unfinished, agree the pergola set-out against the final walking surface, not a temporary screed or the current top of an unfinished base. Ask the paving contractor to confirm final levels and the drainage path at proposed supports, and pass those figures to the pergola installer before the model layout is settled. A change in paving thickness can alter the available post-to-beam height and threshold clearance even if post centres stay in place. If the surface is already complete, record its actual levels and condition; do not use an old drawing as a substitute for what is on site. Any later change to the terrace finish should prompt a fresh comparison against the approved heights.
Keep one coordinated record: the plan and post positions, common-datum level readings, intended roof geometry, door and façade clearances, drain and water-discharge routes, substrate evidence, and the model’s approved post and anchoring details. If comparing the Bloomcabin Wall Pergola model, use the same site measurements, but check its own height and connection requirements rather than transferring details from another model. Keep the agreed drawing with the installation enquiry and clearly identify any later revisions. This gives the paving contractor and pergola installer a shared reference and makes changes to the surface levels, post positions or wall connection easier to identify before work proceeds.
Frequently asked questions
Can the pergola roof be level while the terrace slopes?
Geometrically, a level frame can sit above a sloping surface, so the paving fall and roof plane need not match. However, the difference changes the height between each support and the frame. Check that the chosen model’s approved post arrangement accommodates the measured levels and that its anchoring details suit the site.
Should I make the pergola roof follow the paving fall?
Do not assume it should. Follow the roof geometry specified for the chosen model; tilting a frame simply to mirror the terrace may change clearances or depart from its approved arrangement. Plan the roof’s rainwater route separately from the terrace’s surface drainage.
What should I measure on a sloping terrace?
Record the finished surface level at every proposed post position using one fixed reference level, or datum. Also mark changes in the surface, thresholds, steps, drains, edges and nearby openings. If the terrace is unfinished, record the intended final surface levels rather than relying on temporary ones.
Can pergola posts be fixed through the terrace paving?
The paving finish alone does not show whether the surface beneath can support the pergola or accept the specified anchoring. Establish what lies below each proposed support and compare that information with the model’s approved anchoring details. Ask a qualified professional to assess the substrate if it is unknown.
What information should I give an installer?
Share a plan showing the footprint and proposed post positions, level readings, final surface build-up, drainage points, nearby doors and walls, and any available construction drawings. Include the exact model and its relevant drawings. This gives the installer and any structural professional the information needed to assess the actual site.
Treat the terrace and pergola as two coordinated plans: one for the surface fall and one for the frame geometry. The layout needs to preserve drainage while meeting the selected model’s roof, post and anchoring requirements. The deciding detail is the relationship between each measured support level and the approved post arrangement—not the terrace’s overall slope alone.
