
How to Reduce Pergola Splashback Near Seating
PERGOLA PLANNING
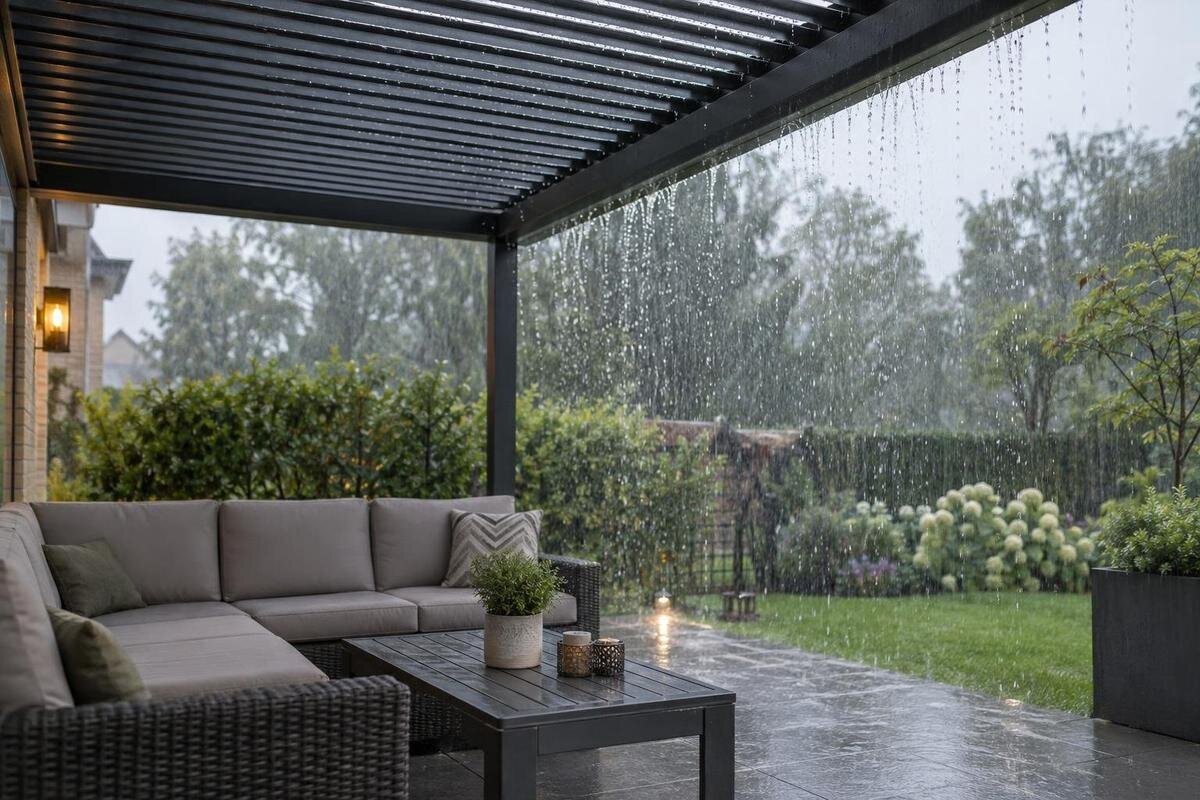
Rain can reach a pergola seating area from below even when the space overhead is covered. Drops landing on nearby paving may rebound onto chair legs and cushions; water flowing across the patio can also collect where people sit. The answer depends on the route: exposed hard paving, a low point, a step, or rain arriving from an adjoining garden. Observe where water first lands and where it ends up before moving furniture, changing the surface or considering a side screen. This guide focuses on ground-level splash and separation from the seats, not on how a pergola roof drains.

Why rain splashes from paving into a pergola
Rain striking hard paving just outside a pergola can break into droplets that travel outwards and upwards. If water has collected in a shallow hollow, later drops may make it splash again; a thin flow crossing the surface can also reach chair feet without forming a deep puddle. The distance depends on the paving, its wetness, the angle and intensity of rain, wind and nearby steps or walls. There is no dependable clearance that works at every site. An overhead cover changes what falls directly from above, but it cannot prevent nearby ground from sending water towards the seating. Treat exposed paving as part of the seating layout, not as an unrelated border.
Look at where the damp marks appear. Fine spots on the lower part of a chair leg, droplets on the outside of a cushion, or a narrow wet band just inside the paving edge can point to floor-level splash. Broad wetting across the top of a seat or across a vertical screen may suggest that rain is travelling sideways or reaching the area from above. Several routes can occur at once, so one wet cushion is not enough to identify the cause. Compare the same places after different showers and note whether marks begin at ground level. If sheltered surfaces become evenly damp without obvious droplets, investigate another moisture source rather than assuming the paving is responsible.
Trace the wet path during rain
Observe from a dry, sheltered position during a manageable shower. Write down which side gets wet first, where rain first strikes the paving, where water begins to move, and whether a low point forms before the chairs are affected. Sketch the pergola outline alongside posts, doors, steps, drains, furniture and nearby garden beds; this makes the route easier to explain to an installer or paving contractor later. Record the wind direction and whether the wet patch changes when the wind shifts. Do not go onto slick paving during heavy rain just to inspect it. A safe view and a note made once conditions ease are enough to begin.
Take a second look after rainfall ends. A puddle may remain where the first drops landed, or water can arrive from a higher part of the patio after the shower has passed. Note whether the same seats are affected each time and whether a small, temporary furniture move changes the result. If you are planning a pergola as well as mapping the patio, compare the seating footprint with the listed area for Bloomcabin Pergola, shown from 9 to 24 m². That area range is only an initial comparison: it does not give exact outer dimensions, post positions or a guarantee of dry space. Use dimensions for the specific version before setting the layout.
Follow runoff, puddles and patio falls
Start with water’s full route across the patio rather than the last puddle beside a chair. Rain may run from a higher paved section, enter from a path, spill off a step, or arrive from an adjoining planted area before collecting near the pergola. After a shower, follow the damp line back to its highest visible point and note changes of material or level. Check behind planters as well as on open paving, since pots can conceal where water is collecting. The wettest patch is often an endpoint, not the source. If the same pattern recurs, a sketch with arrows from the source to the seat can help a professional distinguish a surface-fall problem from a local low spot.
Keep drains and gullies visible; pots, leaves, mats and chair legs can hide a blockage or slow the route. Do not cap an outlet or simply push water towards a doorway, wall or adjoining surface: a remedy needs an appropriate destination for the runoff. A change in paving level can affect a threshold and neighbouring surfaces, so a repeated puddle merits more than a cosmetic patch. Ask a paving or drainage professional to assess existing levels and outlets where water lingers or crosses a walking route. The pergola’s position and the patio’s drainage are related layout decisions, but they may need different specialists.
Choose paving and planting around the seating edge
Very smooth, hard paving can make the impact of raindrops more visible, especially when a thin layer of water lies on it. A textured finish may reduce rebound, but texture alone does not solve pooling or an unsuitable fall. Permeable paving can reduce water on the surface only if its bedding and underlying ground can take and release the water; a porous-looking top over a saturated or sealed base may still stay wet. Joints that drain well can also become blocked by silt or organic debris. Choose a finish for its full build-up, upkeep and use around chairs, rather than judging a dry sample tile on its own.
The most practical surface may differ by zone. Keep the chair area stable and comfortable to walk on, while a properly designed planted or permeable strip beyond it may soften the edge if the ground can drain appropriately. Loose gravel may shift under chair feet or be kicked onto a path; bare earth can turn droplets into muddy spots. A mat may hold water underneath or conceal a puddle, so it should not be used to hide a drainage fault. If you are considering a structure such as Bloomcabin Bioclimatic Pergola, assess the surrounding surface separately: choosing a pergola does not resolve the patio’s drainage or splashback.

Move seating beyond the observed wet strip
Move the seats before committing to building work. Pull chairs and cushions away from the wettest paving strip, then check that people can still pass without stepping through a puddle or squeezing between furniture and a wall. In a compact layout, put the most-used seats on the inner side and keep the exposed edge for occasional access. Turning the table may bring chair backs and legs away from the splash path without changing the whole arrangement. A trial move is useful because a small change may help, but judge it through more than one rain direction rather than assuming a single observation covers every condition.
Mark the complete furniture footprint, not just the tabletop: allow for chairs pushed out, a person getting up and the route between the door and the seats. A scale sketch or removable markers on dry paving can show whether the outer chair line crosses the damp zone; avoid loose sheets underfoot, which can become slippery. The Bloomcabin Pergola range is listed by area from 9 to 24 m², but an area figure alone cannot establish how much usable seating space remains around a particular model. Check the exact external dimensions and supports, then overlay them with doors, drains and the wet boundary. Leave room to move furniture without blocking outlets.
Use side screens for rain from an exposed side
An enclosure or side screen may be useful where rain reaches the seating from one exposed direction, but it addresses that route rather than water bouncing up from the ground. Note whether the wet side is consistently the same and whether people need a clear walking route or an open view there. A screen can change where water falls and may leave the paving at its lower edge just as wet. Do not assume that a generic curtain, sheet or panel can be added to a pergola. Compatibility, approved fixing and any operating limits depend on the exact model and configuration.
Ask for model-specific information before choosing a side treatment: which enclosures are suitable, under what weather limits, and what the evidence says about exposed edges. The Bloomcabin bioclimatic model identifies a product, but that identity alone does not establish screen availability or performance at your site. Confirm whether a proposed enclosure can be used with the exact version and how it affects everyday access and ventilation. For splash control, pair any appropriate screen with a floor plan that manages the wet edge. If water is still reaching the seat from below, screen selection has not resolved the main cause.
Assess walls, fences and adjoining edges
A wall, fence or raised planter can shelter one direction from rain, yet hard edges may also guide water onto the paving below. Look for a narrow wet line along a boundary, a route from a step, or a corner where sideways droplets and ground splash meet. Do not infer that the sheltered side is dry simply because it is close to a building; nor does a wet strip beside a wall automatically mean the wall is the source. Check the surface in front of the boundary and the route by which rain reaches it. Keep your explanation specific to the pattern you can observe, rather than assuming every damp edge has the same cause.
For a wall-mounted layout such as Bloomcabin Wall Pergola, map the exposed edges and the ground-level water route separately from the wall connection. Mark nearby doors and thresholds, then note whether water collects between the proposed seating position and the building. Compare the exact model drawings with this plan so that the relationship between the structure, wall and paving is clear. If a side treatment is being considered, identify which exposed edge it would address and discuss compatible options with the supplier or installer. Retain the paving assessment even if one side is more sheltered: a wall attachment cannot correct a puddle or determine where ground-level splash will land.
Fit the pergola footprint around seats and routes
Post positions and walkways can matter as much as the nominal covered area. Draw the outer footprint on the patio and mark the observed wet strip, then place the table and chairs in their in-use positions. Check whether a pulled-back chair falls outside the footprint, whether a post interrupts the natural route, and whether a door opens onto a puddle. A dining arrangement that fits on a plan may be awkward when a chair is occupied, and a convenient path should not run through the low point. This exercise can reveal that moving or rotating the table is more effective than enlarging the covered area.
When comparing the structure with the existing patio, use the Bloomcabin Pergola listing to identify the model, then obtain dimensioned information for the selected version. Plot its outer measurements and support locations alongside doors, drains and furniture. Unlike a trial furniture move, this plan needs to show the fixed constraints that will remain after installation. Check both the everyday seating arrangement and the space needed when chairs are pulled out. If there is not enough room to keep access clear and seats away from the wet edge, reconsider the arrangement before ordering. Do not move or alter structural supports yourself to make furniture fit; have the installer assess any proposed change.

Read weather evidence for the exact configuration
Weather statements for a pergola should be read alongside their test conditions and configuration. Ask what the evidence covers: the model, roof position, whether sides are open or enclosed, the direction and strength of rain or wind, and any stated limits. A controlled observation in one setup cannot automatically be extended to a different site or an untested combination. For this particular problem, distinguish roof performance from floor protection: a roof document does not by itself tell you whether raindrops will rebound from your paving or how water crosses the patio. Request relevant information, but keep the ground conditions in the assessment.
The Bloomcabin Bioclimatic Pergola page is a starting point for identifying the product, not evidence that a seating area will remain dry in every shower. Check the documentation for the exact model and any suitable enclosure configuration; compare the described conditions with the side exposed at your home. If an answer is unclear, ask what has been observed and under which setup rather than relying on a broad phrase such as weather-resistant. Keep the relevant model information with your patio plan so the installer, enclosure provider and paving specialist are working from the same proposed arrangement.
Review the result after changes
After changing the layout or surface, review the result in ordinary rain and again when the wind comes from a different direction. Note whether the first wet patch has moved, whether the old puddle still forms and whether the chairs stay outside the splash line. If the paving looks dry but cushions become damp, revisit the diagnosis instead of adding another layer of screening. Clear visible debris from drainage points and keep furniture from blocking them; routine observation helps distinguish a one-off shower from a recurring route. No single trial can guarantee dry seating in every weather condition, but repeated patterns show which part of the plan needs attention.
If the cause remains unclear or a persistent low spot affects the patio, bring your observation sketch and photographs to a paving or drainage professional. Include what changed after each adjustment, rather than showing only the final wet patch. When a pergola change is also being considered, use the Wall Pergola listing to identify the model being discussed. Ask the installer and surface specialist to work from the same plan, with the wet boundary, seating and access route clearly marked. Agree which part of the problem each proposed change addresses. This keeps work on the structure separate from work intended to route surface water away from the seating.
Frequently asked questions
Will a pergola roof stop rain splashing onto the seats?
Not if rain is rebounding from nearby paving or runoff is crossing the patio. Roof cover and ground-level splash are separate issues, so trace the wet path before changing the roof or adding an enclosure.
How far back should chairs be from the paving edge?
There is no single distance that works everywhere. Observe how far the wet strip reaches in different rain and wind conditions, then place regular seating beyond it with room to walk around the chairs.
Will textured or permeable paving solve splashback?
Not necessarily. Texture may reduce visible rebound, while permeable paving depends on the layers beneath it being able to take water. Pooling, paving falls and the surrounding ground still need attention.
Can a side screen stop splashback?
A suitable screen may address rain entering from an exposed side, but it will not necessarily stop water bouncing up from the paving. Check compatibility and performance information for the exact pergola configuration.
How can I tell floor splash from rain blowing in sideways?
Droplets low on chair legs and a narrow wet band near the paving can suggest floor splash. Broad wetting on seat tops or screens may point to sideways rain. The patterns can overlap, so observe more than once.
Drier seating usually comes from addressing the specific route rather than enclosing every side. Moving a chair clear of the wet strip may be enough; persistent pooling calls for advice on the surface, while rain entering sideways may call for a compatible screen. These are separate remedies, so note which one changes the result. A practical layout keeps the regular seating, walking route and water path from competing for the same patch of paving. The overhead cover is only one part of that ground-level arrangement.
