
Will a Pergola Work Beneath Low Eaves or an Overhang?
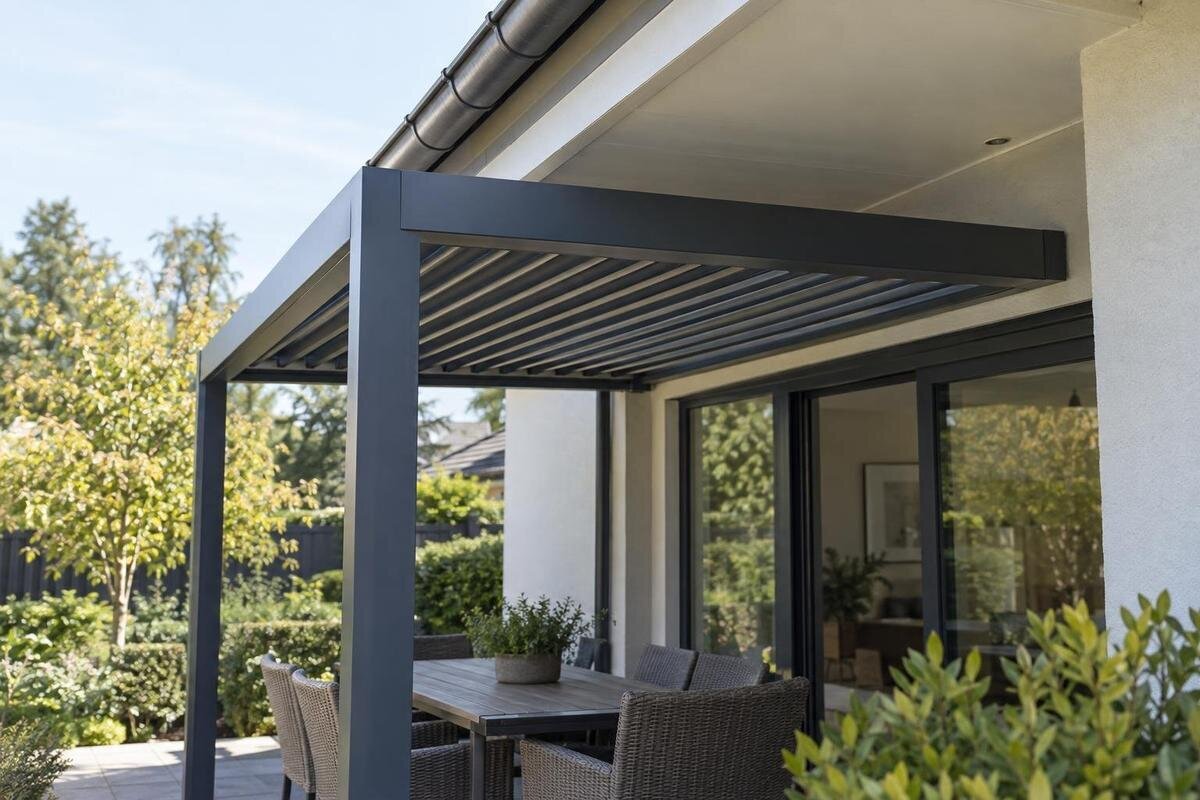
Pergola planning
A pergola can sometimes fit beneath low eaves, but the answer depends on the clear space for its complete assembled shape and the work needed to install and maintain it. Measuring from the paving to the soffit is only the beginning: the gutter, downpipe, opening doors or shutters, roof-edge movement, wall connection and cleaning access may all affect the position. This guide explains how to survey those constraints and what drawings and site evidence to obtain before settling on a layout.

01
The complete frame must clear the eaves
A roof overhang is not an automatic reason to rule out a pergola, but it reduces the space in which the complete frame can sit. Treat the proposal as a three-dimensional layout: the roof edge may limit height and depth, while walls, doors, posts, gutters and downpipes affect its position on the patio. A plan view can show that the footprint fits yet miss a collision above it. A frame that clears the fascia at one corner may meet it elsewhere if the soffit, paving or building line is uneven. Check the full outline across the proposed area, not just one apparently clear point.
Keep structural connection separate from geometry. A freestanding frame might sit near a wall without touching it, whereas a wall-mounted arrangement needs a suitable fixing line and space around the eaves. These layouts have different constraints; do not shorten, notch, raise or shift structural parts to make a catalogue size fit unless the manufacturer and responsible installer approve the change. When considering the Bloomcabin Pergola, compare its exact assembled dimensions with the available space beneath your overhang. Include the assembly details in that comparison, rather than relying on the footprint alone.
Measure from the finished surface to the lowest obstruction
Measure from the planned finished surface, not from bare ground if paving or a raised deck is still to be installed. Establish the proposed floor level at each post and note any slope or change in paving height. From those points, measure vertically to the lowest obstruction: this may be the soffit, fascia, gutter, pipe, bracket, light, vent or another projection. Repeat at the corners and along the frame, including the outer edge beneath the overhang. One reading beside the wall can miss a stepped soffit, sloping terrace or gutter that projects farther at one end. Record the lowest point rather than averaging the results.
A tape or laser can record the levels, but the site sketch matters as much as the numbers. Draw a plan and side elevation, label each measurement, and mark the wall face, eaves edge, gutter projection and proposed post centres. Note where a downpipe turns near a post and whether a drain, step or threshold changes the usable footprint. If the paving is not built, ask the builder for its planned finished level and use that as your reference. To assess the regular Bloomcabin pergola, compare your survey with a drawing for the exact configuration and ask the supplier to clarify any missing height or projection measurement.
02
Include the assembled height and installation space
Do not take the post length or a product title as the total installed height. Ask for a dimensioned drawing showing the distance from the mounting surface to the highest fixed part of the assembled structure, including caps, brackets, trim or a roof edge that projects above the main beams. Confirm what reference the drawing uses and whether levelling feet, base plates, a raised surface or the specified mounting method alters the finished level. If the design includes adjustable panels, screens or other moving pieces, identify their highest position as well as their closed or resting position. Ask whether optional parts change the dimensions. A catalogue photograph cannot resolve a close clearance; request the figures in writing.
Then check the space needed to assemble the frame. Components may need room to be lifted, turned or joined, and the installer may need access for tools or equipment at the wall and post positions. A pergola that clears the eaves once complete may still be difficult to fit beneath a low soffit if there is no room to raise a beam into place. Tell the installer about steps, narrow access, wall returns, nearby windows and obstructions along the approach before choosing a model. If you are considering the Bloomcabin Bioclimatic Pergola, ask for its assembled dimensions and installation clearance so both the finished position and the assembly process can be assessed.
Check doors, shutters and moving components
Survey the house’s openings and equipment as well as the roof edge. Open nearby doors, windows and shutters through their normal range, and include handles, awnings, external blinds, vents and access panels. Mark the path each moving item takes and the point at which it projects furthest; a door may clear a post but strike an upper beam, while a shutter may need space that is not obvious when closed. Check that people can reach handles and operate the openings as intended. Note which openings are used regularly, rather than basing the layout on a closed-door photograph or assuming an opening will seldom be used.
If the proposed pergola drawing shows an adjustable roof, screen or other moving component, check its full range of movement against the soffit, fascia, gutter, wall and windows. Ask what clearance is required at its most extended position and whether assembly, adjustment or servicing needs access from above or from the side. Do not assume the closed position gives the maximum height, or that an obstruction can simply be used as a stop. For the bioclimatic model, request drawings that show how any moving parts operate and the clear space they need throughout their movement.

03
Keep the roof edge separate from the frame
Unless the approved design details a connection, leave an intentional separation between an independent pergola and the house roof edge. The roof covering, fascia, gutter and pergola are separate elements, and changes in temperature, wind or building movement can make them shift relative to one another. Contact can scrape finishes, transfer force or damage rainwater fittings; a gutter is not a support beam, and a soffit is not a convenient bearing surface. The required gap depends on the actual frame and eaves, so avoid guessing from a photo or copying a gap seen at another property. Have the installer confirm clearance along the roof edge using the relevant drawings and site conditions.
Look for details that reduce the gap: projecting tiles, a deep fascia, brackets beneath a gutter, a downpipe bend or an eaves line that changes along the patio. Record the closest point and check whether any component can move or must be removed for maintenance. Do not push a beam into the overhang to gain headroom, fix through the gutter or use fascia screws as a workaround. If the only layout that appears to fit depends on the house roof holding the pergola, pause for a structural assessment and approved anchoring drawings. When discussing Bloomcabin’s bioclimatic model, show the installer these roof-edge details so the proposed separation is clear on the site drawing.
Confirm the wall is suitable for a connection
A wall-mounted layout can remove the need for posts close to the house, but it does not automatically solve limited headroom. The wall connection still needs a suitable height and fixing line, and the overhang may cover the area where the bracket would have to sit. Render, cladding, insulation, a cavity or an uneven finish can conceal the load-bearing substrate; the visible surface is not proof that it can accept the proposed anchors. Keep the gutter, fascia and soffit out of the assumed load path unless the approved design explicitly says otherwise. Ask for the mounting detail before deciding that a wall connection will clear the roof edge.
Have a competent installer or structural professional identify the wall construction, inspect the proposed fixing locations and consider records for concealed services and waterproofing. The anchoring drawing must correspond to the exact pergola configuration and substrate, not merely resemble it. Provide the information needed to assess the supporting material and connection; a general product image or generic anchor sketch is not enough. For the Bloomcabin Wall Pergola, establish whether the proposed fixing height leaves enough room beneath the eaves as well as whether the wall is suitable. If the substrate or clearance cannot be confirmed, revise the position rather than moving holes or altering the frame on site.
04
Preserve access to clean and inspect the gutter
Gutter access is an ongoing maintenance requirement, not just a question for installation day. A frame immediately below a gutter, a panel that blocks access from above or a post beside a downpipe can make inspection and clearing awkward. Before fixing the layout, ask how the gutter, joints and outlet will be reached and what access method the owner or maintenance contractor actually uses. Mark where access equipment can stand, whether there is room to reach the whole run and whether a beam would obstruct the approach. Do not assume the pergola itself can be climbed or used to support access equipment unless its documentation expressly allows that use.
Include access in the drawing: show the outlet, downpipe, brackets, places where debris is likely to collect, nearby windows and any path needed to carry tools or remove collected material. Decide whether routine cleaning can happen without dismantling the pergola; if not, agree another maintainable arrangement with the relevant tradesperson before locating the posts. Check that the pergola will not conceal a leak or prevent a gutter joint from being inspected. If you choose a wall-mounted Bloomcabin model, consider access along the wall as well as around the posts, particularly where the gutter sits directly above the proposed connection.
Keep roof drainage routes clear
Trace the existing roof’s water path before placing posts. Note gutter outlets, downpipe routes, drips from the eaves and any signs that water overflows or splashes at a joint. Mark where water could land on proposed posts, brackets, paving, a doorway or the route people use. An overhang may keep some rain off while still directing a concentrated flow from an outlet or leak onto the pergola; do not assume the roof edge is a reliable shield. Nor should the new structure be treated as an extension of the house gutter. Keep the current drainage visible and have any proposed change designed by the appropriate tradesperson.
On the site plan, show downpipes, drain covers, inspection points and thresholds so the frame does not block access. A column should not conceal a route that needs checking or make cleaning a pipe difficult. If the intention is to connect roof discharge to a pergola drainage system, confirm that the specific product and installation documents permit that arrangement and set out the connection; otherwise plan for the systems to remain separate. Ask the installer to resolve likely drips, splash or overflow conflicts before anchoring positions are final. Check that any ground-level outlet remains reachable after the posts are in place.

05
Mock up the layout at full size
A drawing is useful, but a full-size mock-up can reveal where the overhang makes a corner feel cramped or where a beam would cross an opening. Mark the post centres and outside edges of the upper frame with removable tape, string or light markers, and indicate the lowest eaves line; do not attach markers to the gutter or roof covering. Look at the outline from inside the house and from the patio, and walk the normal routes to doors and seating. Check sightlines from standing and seated positions. A mock-up can help assess perceived headroom and circulation, but it cannot show whether the wall or ground can support the finished structure.
Review the outline with doors, shutters and windows in use, and at times when the terrace is normally occupied. Check that handles remain reachable, a door can open as needed, furniture can be moved and cleaning around the posts is practical. Consider whether the frame would reduce useful daylight through nearby windows or make the low side feel visually closed; the effect depends on the house and intended use. If the outline feels cramped or conflicts with routine access, try another position or configuration before final structural details are agreed. A floor plan alone cannot reveal every sightline.
Confirm the fit with a site-specific drawing
For a tight installation, send the supplier or installer a measured plan, a side elevation showing the overhang and gutter, clear photographs of the wall and floor, and notes on nearby openings, drainage and surface finishes. Label each measurement and distinguish confirmed dimensions from estimates; include the proposed finished paving level and closest eaves point. Ask for the exact assembled height, projection, movement envelope and installation clearance for the selected configuration, including any optional parts. If you are assessing the regular Bloomcabin model, identify it by name in the enquiry and request a marked-up drawing showing the model on your actual site. Do not rely on a catalogue picture or verbal assurance that it should fit.
Where the pergola is to be anchored to a wall or ground, the assessment must also address the actual substrate and proposed anchoring arrangement. Ask for the required structural assessment, approved anchoring drawings and evidence of the substrate; these details depend on the site, so do not accept one footing size as suitable for every surface. A qualified professional should resolve the connection, movement clearance and any unusual interaction with the eaves on site. If no arrangement preserves headroom, gutter maintenance and usable access together, the selected configuration may not be appropriate. Changing its position or model is preferable to improvising an attachment.
Frequently asked questions
What should I measure before comparing pergola models?
Measure from the intended finished surface to the lowest projection above the full proposed footprint, including the gutter and any pipes or fittings. Record the levels at several points, then mark the eaves, posts, doors and drainage routes on a plan. This gives you a site outline to compare with model-specific dimensions.
Is there a standard clearance beneath low eaves?
There is no single clearance that suits every pergola and roof edge. The required space depends on the complete assembled height, any moving parts, the installation method and the eaves details. Ask for the exact model drawings and have the installer confirm the clearance for your site.
Would a wall-mounted pergola solve limited headroom?
Not automatically. Wall mounting changes the support arrangement, but the mounting height, overhang and available fixing area still affect the fit. The wall material and proposed anchoring details also need to be assessed. Check both the dimensions and the substrate before settling on this layout.
Can a pergola sit beneath an existing gutter?
Possibly, if it clears the gutter, does not obstruct water flow and leaves a practical way to inspect and clean the gutter and its outlets. Decide how routine maintenance will be carried out before fixing the pergola position. Do not use the gutter as a support.
Can the fascia or roof edge support a pergola?
Do not assume that it can. Use such a connection only if it is specified in the design and a qualified professional confirms that the supporting material and anchoring arrangement are suitable. Request the relevant structural assessment and approved anchoring drawings; otherwise, revise the layout.
A pergola can work beneath low eaves when its full dimensions and operating clearances fit, the roof edge is not being used as a support, and the gutter remains accessible. Measure from the finished surface, check fixed and moving parts against the lowest projections, and have the proposed anchoring assessed for the actual substrate. If the drawing cannot show adequate clearance and a workable maintenance route, revise the layout before committing.
