
Planning a Pergola Before Building Your Patio: What to Decide
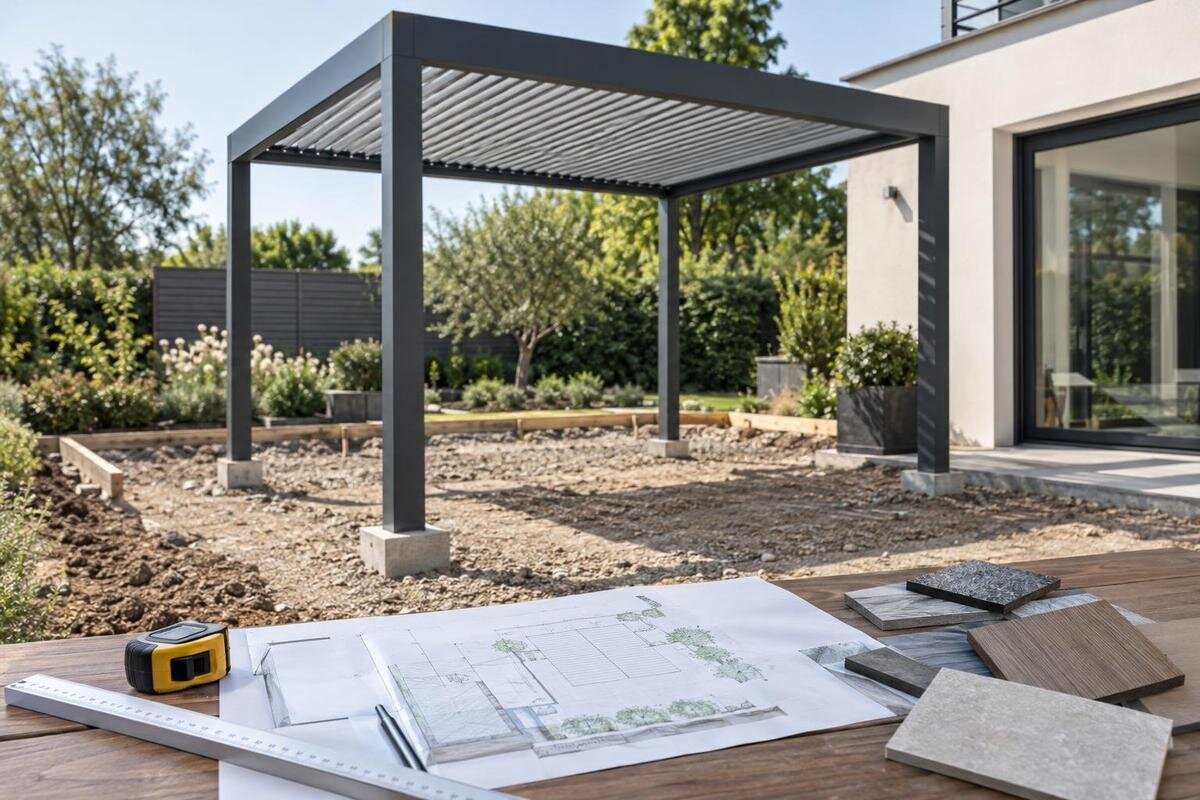
Pergola and patio planning
Building the patio first can make a pergola feel like a later purchase, but the structure can affect set-out, foundations, finished levels, water management and service routes. Decide enough while the ground is accessible: its position, approximate footprint, support or wall interface, and any powered features you intend to include. Cosmetic choices may be left open if the supplier confirms they do not change these interfaces; fixing points, clearances and work sequence should be agreed before excavation or paving makes changes costly.

Bring the pergola into the patio layout
Treat the pergola and patio as one coordinated project, even when separate firms supply or install them. A patio drawing that shows only paving patterns and furniture can miss the pergola’s supports, wall connection, working clearances or access to fixing points. The structure can affect where paving ends, whether a door or path remains clear, what must be concealed beneath the surface and how the finished level meets the house. If those interfaces emerge after paving is complete, even a small change may involve cutting finished work or moving a drain. Agreeing the broad layout early gives everyone a common starting point.
At the first design meeting, distinguish decisions that must be fixed now from choices that can remain open. Confirm the intended position, whether the pergola will stand independently or connect to a wall, its approximate external footprint, and any drainage or service routes. Finishes and optional extras can sometimes be chosen later, but only if the supplier confirms they do not alter support positions, clearances, wiring or the installation sequence. Mark each item as confirmed or provisional on the drawing, with a date and revision. Use the same house orientation and reference points across the plan, so each contractor is working from the same set-out rather than a separate sketch.
Measure the complete pergola footprint
Measure the complete outside envelope, not just the patch of paving you hope to shade. Record the overall length and width, the outermost points, and the post or wall positions using the supplier’s measurement definitions; note any projection shown on the drawing rather than estimating it from a photograph. Then map the usable space around that outline. Doors and shutters need to open, chairs need to move, and a route to the garden or other outdoor areas should stay clear. Include boundaries, steps, drains, outdoor units and planting that cannot move. Take dimensions from fixed features, such as a wall corner, instead of relying on an unfinished paving edge.
Use a scaled plan and, where height or the house connection matters, elevations as well. The listing for the Bloomcabin Pergola gives an area range of 9 to 24 m²; that figure does not identify the exact length, width or support coordinates of your selected configuration. Ask for those dimensions in a drawing, together with the reference points the patio contractor should use. Check whether the quoted measurements are between supports or overall, and how any projection is treated. A stated square-metre area helps narrow a choice; it is not a set-out plan for the paving or foundations.
Choose a freestanding or wall-mounted layout
Decide whether the structure is to stand independently or connect to the house before the patio edge is fixed. A freestanding arrangement must be set out within the usable area and coordinated with boundaries, drainage and buried services; a wall-mounted arrangement makes the façade and its openings part of the interface. The Bloomcabin Wall Pergola can serve as the product reference when you ask for project-specific details, but the name alone does not establish whether your wall is suitable or where fixings belong. Ask for the exact configuration and connection to be shown against the actual house, not just a generic garden image.
For a wall connection, identify the proposed fixing zone relative to doors, windows, vents, eaves, gutters and existing services. Ask who will confirm the wall construction, any preparation or openings, and how the work will be finished around the connection. Those details may affect the height and alignment of the patio as well as access to the wall during installation. If a freestanding version is being considered instead, have its support positions shown on the same plan. Compare the layouts for usable clearance and contractor access, then record the chosen arrangement before groundworks begin.
Set out support positions before groundworks
Foundations and fixing points need to match the chosen configuration and the site; the paving contractor should not have to guess them from a roof outline. When discussing a regular pergola option, request a dimensioned fixing plan that identifies the exact support or attachment positions, their offsets from reference lines, and the surface or base the installation requires. Ask the supplier to confirm which drawing applies to the quoted configuration and whether any site-specific review remains. Do not infer post centres, number of supports or footing dimensions from the product name, coverage area or a showroom photograph. These are details to confirm for the actual project, not estimate from appearance.
Before excavation or concrete work, have a suitably qualified professional review the ground and proposed fixing detail and specify any foundation requirements. Ask the groundwork contractor to check for existing drains, ducts and other buried services through the proper project process before digging. Mark service routes and support locations on the coordinated plan, and agree who measures and signs them off. Set a hold point before anything is covered: the pergola installer or responsible professional should confirm that the prepared bases match the agreed drawing. Keep that record with the patio plans, especially if the site levels or set-out change during the work.

Coordinate patio levels and drainage
Finished levels affect thresholds, clearances, fixing heights and how water behaves around the house. Show the existing sill or threshold, proposed patio level, steps and any changes in level on a section drawing; an overhead plan alone cannot show whether a door still clears or where the pergola sits vertically. Note which level is provisional until the patio build-up is confirmed. For a Bloomcabin Bioclimatic Pergola, ask for written details of water management for the exact configuration. The model name alone is not enough to establish where water is directed or discharged.
Coordinate the patio’s falls, channels, drains and discharge route with the pergola information and existing site drainage. Ask the contractor to explain the intended route for water from both the paved surface and any product components intended to collect or release it, including what happens at an outlet or overflow. Do not assume a nearby drain can accept a new connection, or that water will run harmlessly away from a wall. The person responsible for drainage should confirm the layout and applicable local requirements before paving is fixed. Keep the route accessible where it needs inspection or maintenance, as specified by the relevant professional.
Plan power and other services before paving
Decide before the patio is closed whether the pergola plan includes powered parts, lighting, an outlet nearby or a future service point. Do not assume that an accessory is included just because a product image shows it, or that every configuration has the same electrical requirements. Use the bioclimatic pergola model listing as an identifier when discussing your choice, then request written confirmation from the supplier of the options and connections applicable to that exact configuration. The electrician can then locate supply and control points in relation to the structure, house and planned furniture, rather than being asked to find a route after the surface is finished.
Have a qualified electrician specify and carry out electrical work to the requirements that apply locally; this article is not installation guidance. Agree who provides any conduit, cable, connection, controls and final testing, and who is responsible for access and weather protection at each interface. Apply the same coordination to irrigation, garden lighting or an outdoor kitchen if they are part of the plan. Record entry points and routes before they are covered, and keep a dated photograph or as-built note. A carefully marked route can help prevent later drilling through a service, but it does not replace the electrician’s drawings or instructions.
Match the final drawing to the quote
Before committing to a final configuration, ask for a dated drawing that matches the quote and shows plan dimensions, height, attachment or support locations, and its position against the house and finished patio level. Check how the supplier defines each measurement; overall outside dimensions, spacing between posts and usable clear area are not interchangeable. The regular pergola listing identifies a product to discuss, but the project drawing should identify the exact selected version, not leave the installer to interpret a catalogue image. If a custom change is proposed, have its effect on supports, fixing, water handling and services confirmed in writing.
Read the written quote alongside the drawing and mark any mismatch before approval. The record should name the model and selected dimensions, state which preparation and installation tasks are included, and identify items that remain excluded or provisional. Add agreed service provision, the drainage interface and any boundary between patio preparation and pergola installation to the appropriate scope. Where a detail is not yet confirmed, name who will supply it and by when relative to patio completion. Retain the accepted revision and later changes together; conversations on site are easy to remember differently once one contractor has left and the next is ready to work.
Define each contractor’s scope and handover
Separate contractors need a clear interface rather than an assumption that the builder or pergola team will handle everything. Write down who surveys and sets out the position, who confirms the foundation or host wall, who excavates and prepares the fixing base, who handles services and drainage, and who installs and finishes the paving. If choosing a wall-mounted configuration, specify who verifies the wall interface, arranges any approved preparation or penetrations, and restores surrounding finishes. This does not prescribe a construction method; it identifies the questions each contractor must answer before their part of the work is priced and scheduled.
Set out prerequisites and handover points for each task. For example, state what information the installer needs before the patio is completed, how the base or wall will be checked, who protects finished paving during assembly, and who is responsible if a later trade damages it. Include removal of spoil and packaging, making good, access for inspection and any agreed final sign-off where relevant. Avoid vague phrases such as installation included unless the quote explains what that covers. Record any positioning tolerance the installer needs, along with who will check it at handover. Clear boundaries prevent gaps, such as each firm assuming the other is providing a fixing, connection, surface preparation or final adjustment.

Plan delivery access and installation sequence
Walk the delivery route from the unloading point to the patio, measuring narrow gates, turns, stairs, overhead restrictions and the place where components can be kept safely. Tell the supplier and installer about shared access, parked vehicles, landscaping or steps that limit movement; do not assume a package can be carried through simply because people can pass. When considering a bioclimatic pergola configuration, request its packing and handling information, including any restrictions on access or storage. Confirm who arranges unloading, who is present to receive the components and whether the work area must remain clear while the patio contractor is on site. Agree a temporary storage area that does not obstruct normal access to the property.
Agree the sequence with the people who will install the structure and finish the patio. Ask whether the bases must be prepared, checked or left accessible before paving; whether the pergola is to be assembled before or after final surfacing; and what protection each stage requires. The answer may depend on the actual fixing method and the contractor’s instructions, so there is no universal sequence to assume. Build the confirmed steps into one programme, allowing enough time for checks and handovers between trades, and check current lead times and delivery arrangements directly with the supplier before setting dates. If the sequence changes, update the programme and any affected drawings, and tell every contractor involved.
Check local approvals and keep a final record
Before ordering or starting work, check which permissions, owner approvals or insurer notifications apply to the actual property and design. Requirements can depend on the site and proposed work, so do not infer them from a neighbour’s pergola or from a generic online article. Ask the relevant local authority or a planning professional about applicable consent, and ask your insurer or property manager if coverage or shared-building rules need confirming. If a contractor offers to handle any approval, state exactly what that service covers and obtain the written outcome for your records. Verify these points locally rather than relying on assumptions.
Arrange a final check before the patio’s finished surface is laid: compare the accepted pergola drawing with the ground set-out, finished-level plan, support or wall interface, service routes and drainage. Resolve discrepancies with the supplier and contractors responsible before the work is covered. Photograph concealed services and prepared fixing locations, record measurements from permanent reference points, and file the approved drawings, quote, scope and any consent correspondence together. Keep the record accessible to anyone returning to complete the pergola work. It is more reliable than memory or a photograph of the completed patio, and helps show what was agreed if the plan changes.
Frequently asked questions
When should I choose a pergola if the patio is being built first?
Decide its position, approximate footprint, support arrangement or wall connection, and any drainage or service interfaces before excavation. You may be able to choose cosmetic details later, but confirm in writing that they will not change the fixing plan, clearances or installation sequence.
Can the patio be completed before I choose a pergola model?
Only if the key interfaces are already agreed. Before the surface is finished, confirm the fixing locations, finished levels, drainage route and any service provision. If those details depend on the model, wait for its project drawing rather than relying on a general product image.
Does the area in square metres show where the supports go?
No. An area figure does not establish the exact length and width, the position of supports, or the fixing requirements. Ask for a dimensioned drawing for the configuration you are considering, and check which measurements the patio contractor should use for set-out.
Who should confirm the foundations and fixings?
Ask the supplier to provide the requirements for the chosen configuration. A suitably qualified professional should review how those requirements relate to the site and ground conditions, and the relevant contractor should confirm the prepared work against the agreed drawing. Do not estimate foundation details from a photograph.
What should I check if the pergola will be wall-mounted?
Have the proposed fixing zone shown against the actual wall, doors, windows and existing services. Confirm who will assess the wall, coordinate any preparation or penetrations, and finish around the connection. A qualified professional should verify the interface for the actual property and design.
You do not need every optional detail fixed on day one, but the pergola’s footprint and fixing interface should be clear before the patio is finished. Agree levels, drainage, services, contractor responsibilities and the installation sequence against one current drawing. That way, the paved area is built around a real configuration and documented handover, rather than an image or an assumption that can only be tested after the work is complete.
