
Planning an Outdoor Exercise Space Under a Pergola
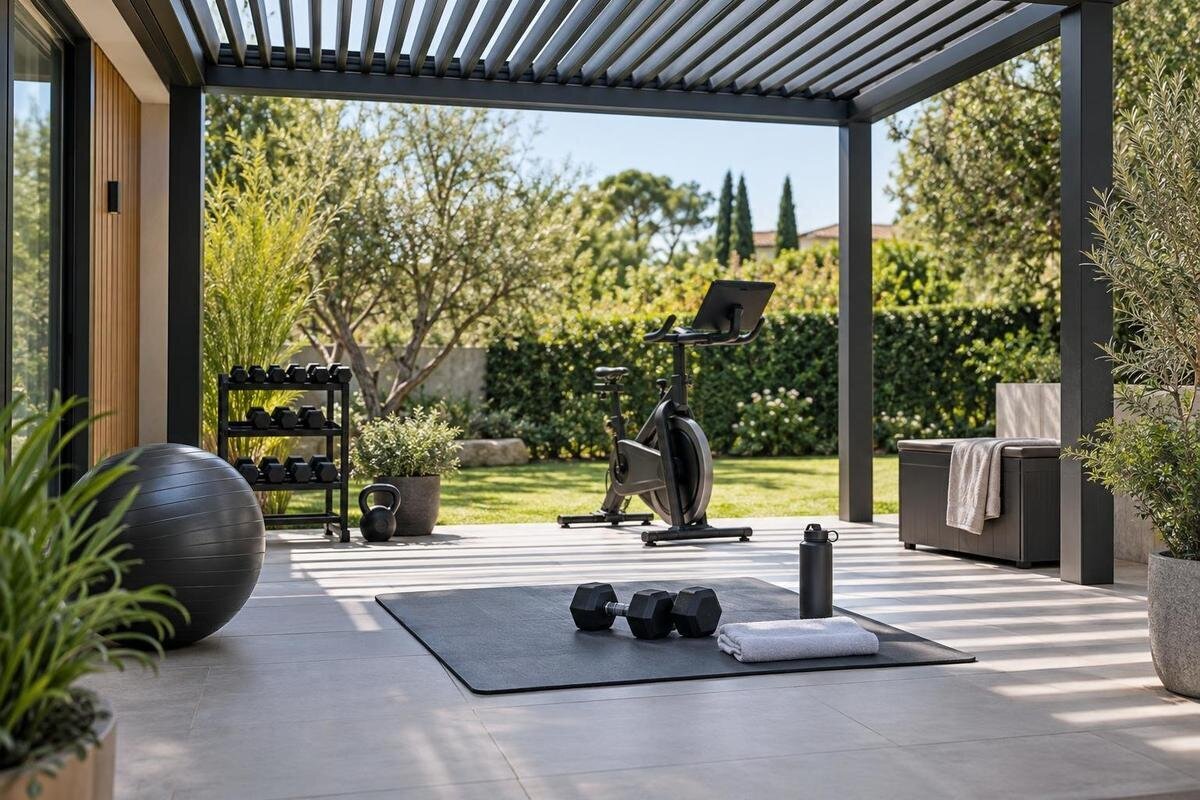
Outdoor exercise planning
An outdoor exercise area under a pergola needs enough room for movement and secure footing, not just a suitable roof outline. Map the movements and equipment you actually use, then check the surrounding clear floor, access route, surface grip and changing exposure to sun or rain. Treat any overhead attachment as a separate structural question: suspension equipment needs approval for the exact structure and use.

Space for your usual exercise routine
An exercise area is easier to size when you list your usual movements rather than label the space a generic gym corner. Include mat work, standing mobility, steps in more than one direction and any portable equipment you actually use: each takes up a different footprint. Note whether you travel forwards or sideways, reach overhead, turn, or move between standing and floor positions. The aim is to identify the broadest routine you expect to repeat, not to make the pergola fit every activity you might try one day. If two people may use the space at once, treat that as a separate arrangement; paths that suit one person can overlap when both move. Record the footwear and mat size too, since these affect the layout you will test. Decide whether you need room to move between several stations or only one activity at a time.
Take the list outside and measure a continuous area for each activity instead of estimating from a photograph or the pergola's roof area. Write down width and length separately, including equipment that stays in place. The Bloomcabin Pergola range lists sizes from 9 to 24 m², but this is not the clear floor available for your routine. Compare the chosen configuration's dimensions with your activity area, allowing for access and structural elements shown in its plan. Keep the actual outline in view: a generous total area can still be awkward if its shape does not suit your movements.
Measure the full movement area
Clearance is the space you occupy while moving, not just the spot where you stand to begin. For side steps, turns or reaching movements, mark the outermost points you expect to reach and keep a continuous buffer beyond them. A mat marks out the space for floor exercises, but arms, legs and changes of direction can take you beyond its edges. If a piece of equipment needs you to step on or off, include that action as well. Check head and arm room below the lowest part of the structure, without treating an allowance from a generic diagram as a universal standard. Test the plan against each user's routine and reach rather than relying on an average.
On the site plan, show columns, walls, gates, door swings, steps and the route people regularly take across the terrace. Beside a house, the exercise area must not block an opening or obstruct a common passage. When comparing the Bloomcabin Wall Pergola product page, check the configuration's dimensions and projection against these features. Draw a clear entry and exit route separately from the exercise footprint, so the same strip of floor is not allocated to both. If a regular route crosses the activity area, consider whether turning or repositioning the layout would separate them.
Keep equipment outside the movement path
Place portable gear so the active area remains continuous. A bench, bicycle, step or free-standing rack takes up more than its base when someone approaches it, gets on or off, or moves around it. Account for that working space and for objects you set down between activities; do not place them where a moving foot or hand will cross their outline. Put the largest item on the drawing first, then add the mat and smaller pieces. If this combination forces you to carry equipment across the middle of the area each time you switch tasks, the layout is likely to feel cluttered even if the floor area looks adequate on paper. Plan where a user can pause without blocking the next movement.
Use actual measurements for each piece of equipment and the pergola configuration, not proportions guessed from a catalogue photograph. Compare the Bloomcabin Pergola product options with the equipment footprint and access route on your plan. Leave room to handle each item without clipping a post, wall or another piece of kit; the clearance depends on the object and how it is used. Position the mat so its edges do not fall beneath equipment legs or across an uneven joint. For folding equipment, map both its working footprint and its parked footprint. This shows whether the layout works during use, not just whether the objects fit.
Check the floor under real conditions
Traction is something to test on the actual floor, not guess from the name of the paving or decking. Walk, turn and try the movements you intend to use in the footwear you normally wear; test the mat too, because its upper surface and underside can behave differently. Check the floor when dry and in any damp conditions that realistically form part of outdoor use. A surface that feels secure while standing still may feel different during a pivot or a step, so check more than one point in the exercise area. If the floor or mat slips, change the setup or leave that patch unused rather than trying to work around it. Do not rely on a photograph or material description as a substitute for trying the surface.
Look across the whole movement zone for uneven joints, loose stones, grit, dust, leaves, raised edges or spots where a mat curls. Small changes matter more when the routine crosses them than when the area is used only for sitting. Try the mat after routine cleaning and after it has been lifted and put back; make sure it lies flat and does not shift during the movements planned. Follow the floor and equipment makers' care instructions instead of applying an unverified coating or covering. If the surface changes at the route in, include that transition in the plan and check that the mat or footwear will not catch there. A loose mat edge can become a problem even when the surrounding paving feels secure.

Observe where the shade falls
A roof outline is not the same as a shaded exercise floor. The sun's position changes during the day and the shaded footprint moves, while open sides can leave the marked area exposed. Observe the planned location at the hours you expect to use it; note whether the mat and the outer movement envelope are shaded, not just whether the pergola looks shaded from the house. If you use the space at more than one time or season, record the difference rather than relying on a single visit. This reveals whether the shade falls where the routine needs it or whether the activity would have to shift within the footprint. Make observations from the position of someone using the mat, not only from indoors.
For the Bloomcabin Bioclimatic Pergola, check the exact configuration's roof details rather than inferring shade coverage from the model name. Establish whether roof elements can be adjusted and how any adjustment affects coverage, then compare that information with your site observations. If a detail important to your layout is not specified, ask for clarification before relying on it. Nearby walls and bright surfaces can also affect how exposed the area feels. Assess the whole exercise area, including the space used for reaching and stepping, rather than judging comfort from a single shadow line.
Allow for wind and rain
Plan for an outdoor area to change when the weather changes. An open-sided pergola is not an indoor room, and a roof does not automatically keep every part of a terrace dry or sheltered; wind can carry rain into the exercise zone, while a damp floor can affect grip. Consider the direction from which the site is exposed and what happens to the full movement area after a shower, not only the patch directly below the roof. If a session relies on equipment or a surface staying dry, decide where it can be moved and what conditions would mean taking the activity elsewhere. Lightweight items may also be affected by wind, so consider where they are kept during a break. Do not assume an overhead cover makes the terrace suitable for exercise in all weather.
Keep weather checks separate from assumptions based on product names or photographs. Read the specified performance and care guidance for the exact pergola configuration, including any conditions under which its roof or accessories should not be used; an image cannot answer that. Lightweight mats and small accessories can shift or collect water, so put them away when appropriate and inspect the floor before laying them out again. If rain runs from a roof edge or crosses adjacent paving, do not draw the active area through that route without checking how it behaves. A practical fallback space is more useful than treating a pergola as weatherproof by default.
Do not hang equipment without structural approval
Suspension trainers, rings, pull-up bars and resistance bands attached to the structure must be treated differently from equipment resting on the floor. Pulling, swinging or repeated movement can transmit changing forces to the pergola; exercise loads are not equivalent to a static decoration or equipment placed on paving. Do not assume a beam, louvre, cross-member, post, wall fixing or decorative part is suitable just because it is within reach. Reserving clear floor for an activity does not establish that the structure can support it. Keep this structural question separate from the layout assessment.
Before considering an attachment, obtain model-specific structural approval for the exact configuration, fixing point and exercise use from the manufacturer or a suitably qualified structural professional. This needs to cover dynamic exercise forces, the mounting location and how the structure is installed. Use the Bioclimatic Pergola model listing to identify the product being discussed, not as evidence of an anchor rating. Do not select hardware or calculate a load from a photograph. Resolve this technical decision before attaching suspension equipment; if approval cannot be obtained, choose equipment that does not rely on the pergola.
Consider privacy, airflow and neighbours
An exercise area may feel exposed even when it is partly shaded. Stand at the planned mat position and consider views from nearby windows, neighbouring terraces and the route into the garden. Choose an orientation that offers reasonable privacy while leaving enough room to move away from walls and doorways. Include the footprint of any proposed screen or side panel, and confirm that it is offered for the exact configuration before adding it to the drawing. More enclosure may alter airflow and wind exposure, so assess the proposed arrangement as a whole. A screen that blocks one view may leave another sightline open.
Exercise can bring repeated impact, music or equipment noise closer to neighbours than a quiet seating area does. Consider the time of use and where any speaker faces; the routine should not depend on loud audio. At dawn, dusk or after dark, check that floor edges and stored items are visible from the exercise position. When comparing the Bloomcabin Pergola page, review any listed side options in relation to the sightlines you identified. Treat privacy, noise and visibility as separate considerations: screening a view does not by itself resolve the other two.

Store equipment without losing clear floor
Storage needs a place of its own, not the last strip of floor beside the mat. Measure the parked footprint of each item and its container, then mark where it will go before and after use. Include the route from the house and the space needed to carry bulky equipment through a doorway; a storage corner that blocks the exit is not convenient. Leaving weights, handles, shoes or bottles within the movement area turns a clean layout into an obstacle; putting everything in the only passage creates a different conflict. A storage outline helps show whether the pergola area can support the tasks around exercise as well as the movements themselves. Follow equipment care guidance when deciding whether it can remain outdoors.
If the terrace also serves dining or family use, decide which furniture moves, where it goes and how the area will be reset. Clearing the floor should not mean carrying chairs through an active exercise area or leaving kit in an exit route. For a wall-side arrangement, compare the wall-mounted Bloomcabin Pergola dimensions and installation requirements with both uses. Draw two complete layouts, showing furniture and equipment in their working and stored positions. If resetting the terrace takes too long, the designated exercise zone may need more space or a simpler equipment list.
Choose a configuration from a measured plan
Bring the measurements together on a plan before choosing a model. Draw the terrace boundaries, access points, the widest movement envelope, equipment working space, storage and any area that needs to remain clear. Add the proposed pergola footprint only from its stated dimensions, and distinguish the overall covered area from uninterrupted floor inside the supports. A headline square-metre figure does not describe the footprint's shape or where it sits on your site. Compare the drawing against the actual product configuration; if it is only an illustrative arrangement, label it as a concept until measurements and site conditions are confirmed. The plan should show how the exercise zone, not just the roof, fits the terrace.
Use a size or layout discussion to resolve the questions still marked on your plan: the movement area's position, access, roof coverage and any proposed structural attachment. Compare the Bloomcabin Bioclimatic Pergola product details for the exact version under consideration. Keep missing dimensions or unspecified features visible as open questions rather than drawing them as guaranteed. This gives a consultation a clear purpose: to establish how that configuration fits your measured exercise area and terrace. It also makes it easier to compare alternatives without losing track of the floor space your routine needs.
Frequently asked questions
How do I work out what pergola size I need for exercise?
Measure the widest movement area in your usual routine, then add the equipment footprint, access route and storage space. Compare that plan with the stated dimensions of a specific configuration, not just its total area. The shape and usable floor space matter as much as the headline square metres.
How much clear space should I leave around an exercise mat?
There is no single allowance for every activity. Mark the full area you occupy when reaching, stepping, turning and moving between standing and floor positions. A mat shows where floor exercises happen, but it does not include the full range of your arms, legs or movement.
Can I hang a suspension trainer or resistance bands from a pergola?
Only if the exact structure and attachment point have model-specific structural approval for that exercise use. Do not assume a beam, post, roof element or fixing can take the changing forces involved. A product name or general description is not approval.
Will a pergola keep the exercise area shaded and dry?
Do not assume that it will. Shade depends on the exact configuration and the sun's position, while wind can carry rain into an open-sided space. Check the product information and observe the site at the times you expect to exercise.
What floor surface is best for outdoor exercise?
There is no universal answer. Test the actual floor and mat in the footwear you use, including in any damp conditions that are realistic for the site. Check that the mat lies flat and stays in place during the movements planned.
The useful measure is the clear floor space left for the movements you intend to do. When the activity area, entry route, surface and storage work together, you can assess how a pergola fits the layout. Any overhead exercise attachment still needs model-specific structural approval. If the planned uses compete for the same space, a different position or a simpler equipment list may work better than relying on the roof area alone.
