
Propagating cuttings successfully in a greenhouse
Bloomcabin Greenhouse Journal · Propagation edition
Propagating cuttings successfully in a greenhouse
A cutting is not yet a miniature plant. It is living tissue that must retain moisture, form new roots and adapt to an independent life under carefully balanced conditions.
In a greenhouse, propagation becomes a repeatable growing practice rather than a matter of finding a lucky windowsill. Match the cutting method, clean preparation, airy medium, filtered light and regulated humidity to each plant.
For a permanently equipped propagation bench, the Classic aluminium greenhouse offers clear space, usable roof ventilation and protected working conditions for organising a reliable daily propagation routine.
Starting materialHealthy, correctly identified stock plants—never shoots visibly stressed, diseased or affected by pests.
PositionBright, filtered light, a tempered medium, even moisture and fresh air rather than a permanently closed, wet chamber.
Growing onRepot only when well-branched roots can support the cutting beyond its protected environment.
A greenhouse offers more than warmth. It separates the sensitive rooting stage from outdoor weather and lets you adjust light, humidity, air and temperature individually.
Fresh cuttings have leaves that lose water but no developed roots to replace it. They also need oxygen at the base, an evenly moist but airy medium and enough gentle light to keep the tissue active without overheating. Outdoors, a hot afternoon, drying wind, heavy rain or a cool night can quickly upset this balance. Under glass, shading, ventilation and watering can be managed far more precisely.
Do not keep the greenhouse permanently hot and humid. Excess heat increases water loss, while constant condensation and saturated substrate encourage rot and disease. A good cutting bench creates a moderate microclimate within the larger greenhouse: clean, sheltered, lightly shaded and ventilated when needed. The aim is controlled protection, not an airtight enclosure.
Check 01 · Starting material
The stock plant comes before the tools
The quality of the stock plant remains visible in its cutting. Choose a vigorous, true-to-type plant that is well watered but not softened by recent overfeeding. Leaf spots, distorted new growth, webbing, aphids, spider mites, feeding damage, or black soft stem sections are reasons to reject it. Rooting does not automatically remove systemic infestations or other problems carried by a cutting.
For many herbaceous and semi-ripe cuttings, the cooler morning is useful because shoots are usually well hydrated. Put cut material into shade immediately, work in small batches and insert it promptly. Flowers, buds, fruit and seed heads use reserves needed for root formation, so they are normally removed.
Choose vigorous, pest-free shoots with normal leaf colour and true-to-type growth.
Take material only from clearly labelled plants you are permitted to propagate.
Choose non-flowering shoots at the right maturity, rather than impressive but exhausted tips.
Water the stock plant the day before if needed; never cut drought-stressed growth.
Check 02 · Choose a method
There is no universal cutting
Growth habit and tissue maturity determine the method. Many stem cuttings need a node, where leaf attachments and root-forming tissue occur. Leaf, stem, cane and root cuttings work only in species able to produce roots and shoots from that particular tissue.
Softwood
Young, flexible growth
Young shoot cuttings are often taken from late spring into summer, for example from fuchsias, pelargoniums, coleus or basil. They often root quickly, but dry out just as quickly.
Semi-ripe
Partly matured shoots
Suitable for rosemary, lavender, sage, many evergreens and ornamental shrubs, often in mid to late summer. Leaf reduction and controlled humidity are often useful.
Hardwood
Dormant, fully woody sections
This method suits currants, willows and some woody plants. Leafless sections lose less water, but must be cut at the appropriate dormant time and kept correctly orientated. Do not confuse the top and bottom ends.
Leaf and cane
Plant parts specific to each species
African violets and many begonias can make plantlets from leaves. Cane cuttings suit plants such as dieffenbachia or dracaena. A leaf that forms roots cannot necessarily produce a complete new shoot.
Root
Dormant potential below ground
Root cuttings work only with selected perennials, such as phlox or oriental poppy, which can form shoots from root sections. They are a separate method, not a replacement for stem cuttings.
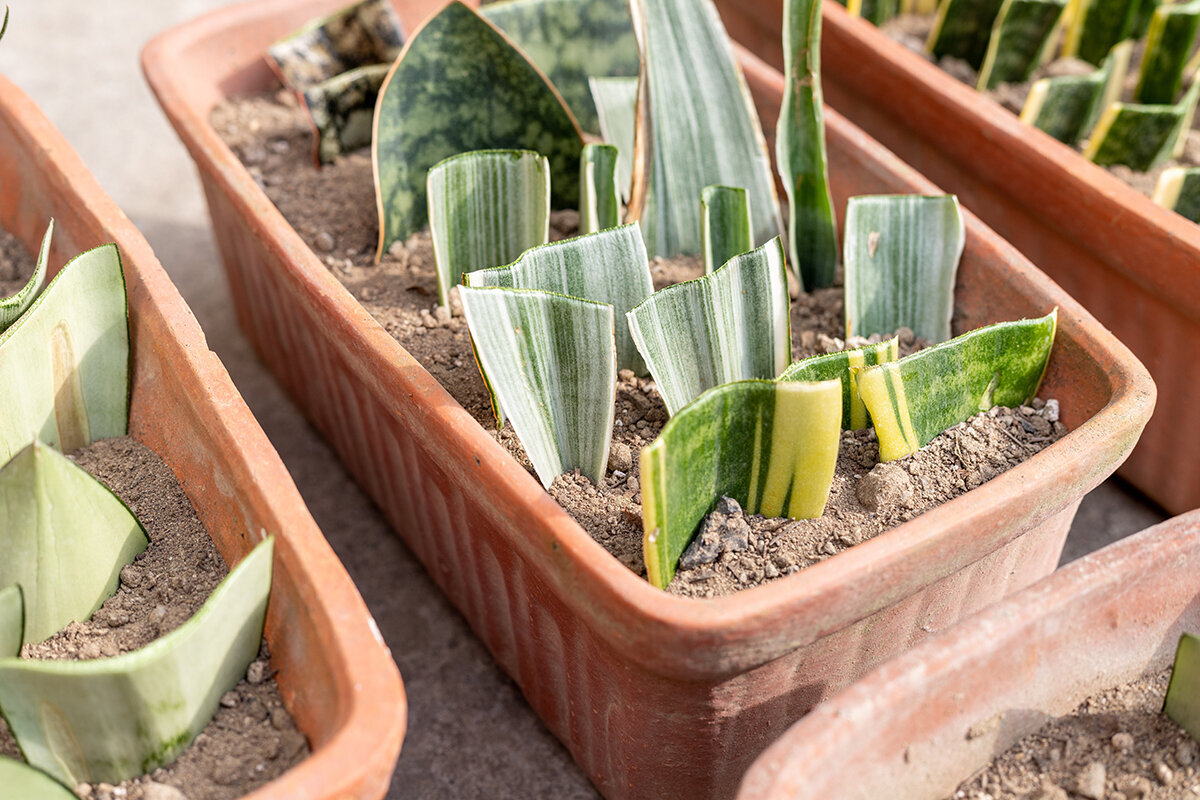
Succulent exception
Treat the wound by species
For some succulents, the cut surface must dry before inserting. Persistently high humidity is often counterproductive for rot-prone species; follow reliable species-specific guidance.
Check 03 · Precise cuts
Prepare cleanly, quickly and deliberately
Use a sharp knife suited to the shoot or suitable secateurs. Crushed tissue is not a clean cut. Clean the workspace and containers before starting, and disinfect tools between stock plants or batches—especially for valuable collections and plants intended for sharing. Make a hole in the moistened medium with a dibber or pencil. This prevents damage to delicate basal tissue and any rooting treatment during insertion.
01
Hygiene
Start with clean trays, labels, tools and hands, plus fresh propagation substrate. Unwashed pots and garden soil do not belong on a cutting bench.
02
Take the cutting
For a typical tip or stem cutting, take a healthy tip or vigorous stem section. Node number and length depend on the species; do not force a universal measurement.
03
Limit water loss
Remove lower leaves that would sit in the medium, along with flowers and fruit. If large leaves cause problems for the cutting or spacing on the bench, halve them neatly rather than removing all functioning leaf area.
04
Check orientation
Stem and cane sections must be inserted the right way up. Differently shaped top and basal cuts can guide hardwood cuttings, but the specific species method remains decisive.
05
Insert and label
Place the required node in the medium, firm it gently and water sparingly. Label the species, variety, date, method and, where relevant, stock plant or batch number straight away.
Basal cut · lower node · leaf area · substrate line
Anatomy of a cutting
Read the anatomy first, then adapt by species
The classic leafy stem cutting is a useful starting model, not a rule for every plant. Consult species-specific information before wounding woody stems, burying nodes, reducing leaves or applying rooting hormone.
- Basal end: goes into the pre-moistened medium; cut cleanly and avoid any crushing.
- Lower node: sits in the medium for many standard stem cuttings, while remaining leaves stay above it.
- Remaining leaf area: supports the cutting, but excessive area increases water loss.
- Upper bud or tip: stays above the medium and later develops into visible new growth.
- Insertion depth: deep enough for stable contact, but never so deep that leaves or soft tissue rot beneath the surface.
Check 04 · Controlled climate
Create a rooting climate, not a wet chamber
Fresh leafy cuttings usually benefit from raised humidity because they cannot temporarily replace enough water. High humidity must not mean stagnant, dripping air. Aim for firm leaves, a fresh-smelling growing area and an evenly moist, oxygen-rich root zone.
Filtered lightChoose bright indirect light or light shade. Direct summer sun through glass can overheat leaves beneath a transparent cover.
Humidity coverA clear cover or polythene tent limits water loss. Vent or open it when condensation remains constantly present.
Tempered mediumBottom heat can help warmth-loving or slow-rooting plants. Check the medium with a thermometer instead of heating the entire greenhouse continuously.
Air exchangeUse roof vents, doors or air movement thoughtfully. Leaves need fresh air, but should not stand in a strongly drying draught.
DrainageRaise trays, use containers with drainage holes and never allow the medium to remain waterlogged.
In Malta, a closed greenhouse can heat up rapidly on bright days for much of the year, while cooler nights may still occur in winter. Check the cutting bench at the warmest time of day, not only in the morning. In high summer, covers without shade and air exchange are insufficient. During cooler spells, the greenhouse buffers weather extremes but does not replace appropriate cold protection for sensitive plants.
Check 05 · Rooting substrate
Give the base water and air at once
A suitable medium is clean, structurally stable, free-draining, fine enough for the cutting size and firm enough to hold it upright. Ordinary garden soil is usually unsuitable: it compacts in small containers, wets unevenly and may introduce pathogens, insects or weed seeds. Moisten the substrate evenly before inserting cuttings and let all surplus water drain away.
| Medium | Air pore volume | Water retention | Use and note |
|---|---|---|---|
| Perlite-rich mix | High | Medium | A light starting point for many houseplants and soft stem cuttings. It drains quickly, so small propagation cells must be checked before they dry completely. |
| Coco coir with perlite | Medium to high | Medium to high | Useful where moisture should remain more even without losing pore structure. Use clean components and do not compress the medium heavily when filling. |
| Coarse sand with peat or coir | Medium | Medium | A classic mix when clean components of suitable grade are available. It gives stable support, but may be heavier and more compact when repotting later. |
| Water rooting | Low at the base | Very high | Practical for a few easily rooted houseplants. Roots formed in water often need gentle adaptation when transferred to substrate; the water must also be checked and changed regularly. |
Check 06 · Root development
Do not confuse callus, new leaves and roots
Some species make callus before roots, while others root directly from nodes or suitable tissue. A cutting may also produce a new leaf from stored reserves while its root system remains weak. Do not repeatedly pull the shoot. Instead, look for steady new growth, a firm hold under a very gentle check, pale roots at drainage holes or in transparent propagation pots, and a root ball that holds together without becoming matted.
Repot only when several roots are branching and can support water uptake outside the humidity cover. Choose a moderately larger pot with a slightly more nutrient-rich substrate suited to the species. Water evenly after planting and keep the plant bright but out of direct midday sun. Open the cover for increasingly longer periods over several days. This hardening-off stage is crucial: a cutting may be rooted but not yet adapted to drier air and stronger transpiration.
Phase 1Freshly inserted: the tissue is hydrated, but functioning new roots are still absent.
Phase 2Root initiation: callus or first roots appear; air and substrate moisture still need close observation.
Phase 3Branched roots: enough structure for gradual hardening and careful repotting without unnecessary stress.
Check 07 · Troubleshooting
Read the symptom and alter its cause
Remove visibly rotting or mould-covered cuttings immediately before more plants are affected. Assess other failures calmly: the same symptom can have several causes. Change only one or two conditions first and record the batch response.
Problem A
Wilting despite wet medium
The cutting may be losing more water than it can absorb, or the basal tissue may already be damaged. Heat, direct sun, excessive leaf area, unsuitable insertion depth or early rot are possible causes.
Correction: Soften the light, inspect the base for rot, raise humidity briefly and ensure the medium is moist but not saturated.
Problem B
Dark, soft stem base
Rot often follows overwatering, poor drainage, contaminated material or a closed cover with constant condensation. Rooting hormone cannot compensate for an oxygen-poor root zone.
Correction: Remove affected cuttings, clean containers and tools, restart with fresh porous medium and provide controlled air exchange.
Problem C
Bleached or dry leaves
Greenhouse glass and a transparent cover can intensify sun exposure. Cuttings need usable light, but unprotected leaves can overheat before new roots supply water.
Correction: Move to a bright position without direct midday sun, shade temporarily and check conditions during the warm afternoon.
Problem D
Mould, algae or stagnation
Persistently wet surfaces, old medium, weak light, unsuitable temperatures or the wrong maturity of starting material can slow development. Some plants simply need more time.
Correction: Improve hygiene and spacing, remove dead leaves, check temperature and compare the season and cutting method with reliable species-specific guidance.
Check 08 · Batch records
Every batch improves the next
Propagation becomes more reliable once it is no longer treated as a one-off experiment. Keep a small notebook or weatherproof label system at the bench. Your own microclimate matters more than a general calendar: a shaded bench on the north side behaves differently from a bright east-facing position. Malta’s strong sun, seasonal winds and cooler winter nights can also change greenhouse conditions considerably.
Record failures as carefully as successes. The aim is not a perfect percentage, but learning which stock plants, maturity stages, media, positions and timing produce robust young plants in your greenhouse.
Example bench record
BatchH-26 · semi-ripe rosemary · eight cuttings
SourceNon-flowering, pest-free side shoots; cut in the morning
MediumMoistened coco-perlite mix in a clean propagation tray
EnvironmentBright filtered light; ventilated cover; tempered bench without direct sun
ObservationDay 8: no wilting; day 18: firm hold; day 25: branched roots
LearningNext batch: take fewer, more even cuttings and reduce leaf area slightly more.
Questions from the greenhouse
FAQ
Use these answers as a starting point and consult additional species-specific expert information for valuable, woody, protected or difficult-to-root plants.
Do all cuttings need rooting hormone?
No. Many easy-rooting houseplants and herbaceous species, including coleus, pelargoniums and pothos, manage without it. For slow or difficult plants, a rooting treatment may help. If it is regulated as a plant-protection product, verify current Maltese authorisation for the intended use, follow the label and dose sparingly. Decant powder or gel into a separate clean container; never return leftovers to the original pack.
Should the humidity cover remain closed all day?
Not automatically. A cover protects fresh leafy cuttings from drying out, but must be checked and ventilated daily. If leaves remain dripping wet, the medium is saturated or fungal growth appears, increase opening time and review light, watering and air exchange. Succulents and rot-prone species often need little or no cover.
Can I put cuttings directly into greenhouse soil?
Clean containers and fresh, porous propagation substrate are usually the better choice. Bed and garden soil are harder to keep evenly moist, may compact and can introduce unwanted organisms. Small pots, propagation trays or shallow pans also make it easier to label, check, separate and move different batches.
How long does greenhouse propagation take?
It depends on the plant species, cutting method, season, condition of the stock plant and bench climate. Soft shoot cuttings may root comparatively quickly, while woody material often takes much longer. Do not follow a fixed date; wait for several branched, supporting roots.
What equipment is particularly useful for a cutting bench?
Prioritise a level, easy-clean bench, reliable drainage, shading, temperature monitoring, ventilation options and enough space to keep batches separate. The Classic aluminium greenhouse provides a durable, accessible framework with varied options for seasonal use. The Classic aluminium greenhouse helps you plan a clearly arranged propagation area with controllable ventilation.
Sources and further reading
Reliable foundations for your propagation bench
More from Bloomcabin: Made-to-measure aluminium greenhouse · Classic aluminium greenhouse · Aluminium greenhouse with accessible roof vents
- Germany’s Julius Kühn Institute – guideline for certifying ornamental plant propagation material
- Community Plant Variety Office – Community plant variety rights
- Environment and Resources Authority – invasive alien species of Union concern
- University of Illinois Extension – Propagation
- University of Illinois Extension – stem, leaf, root and cane cutting methods
- Royal Horticultural Society – Propagation Techniques
