
Replacing an Old Awning with a Pergola: Preparing the Site
Pergola project planning
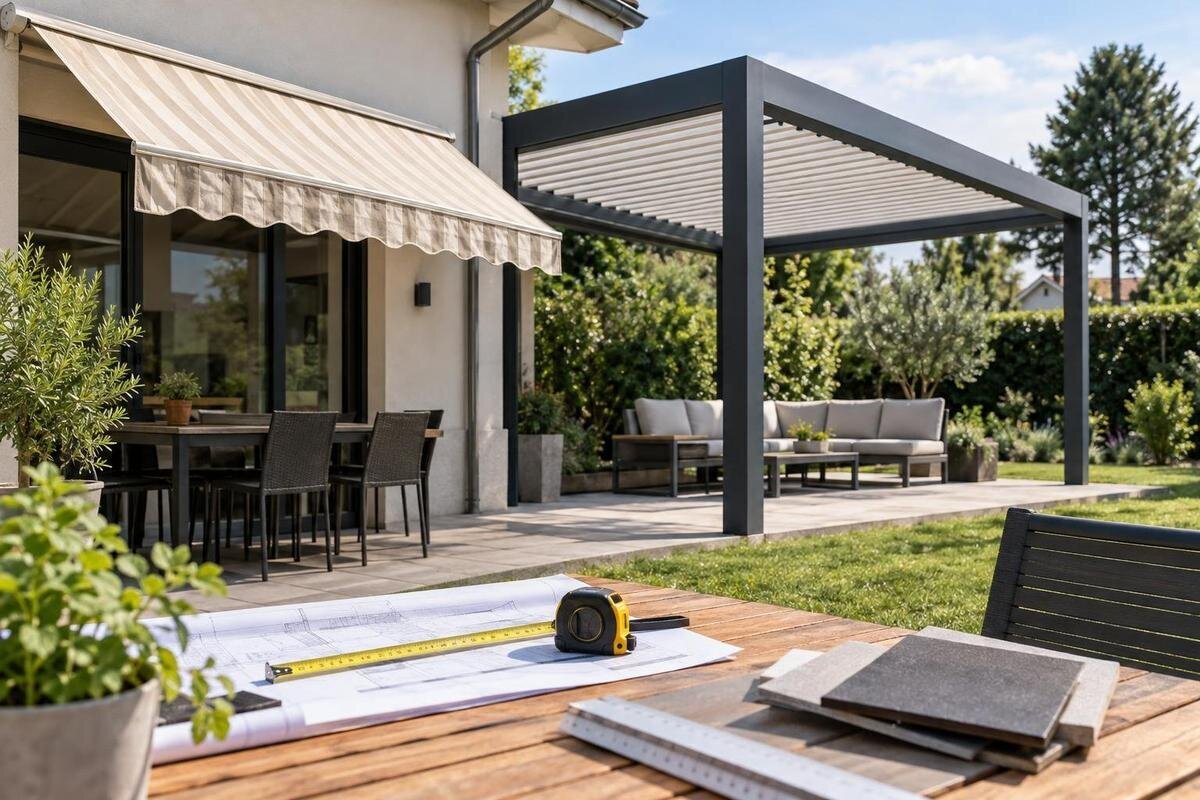
Replacing an old awning with a pergola is not just a matter of taking one frame down and putting another in its place. The awning may have left wall anchors, a motor cable, patched render or a drip line; the new layout may put supports, attachment points and rainwater outlets elsewhere. Until removal exposes the wall and terrace, some repair work remains uncertain. The practical task is to record what is there, agree who removes and repairs it, and check the proposed footprint, drainage, access and local approval route before installation. That preparation makes the drawings and quotation more useful.

What the awning can leave behind
Replacing an awning means working with surfaces that already have fixings and have been exposed to the weather. Removing fabric, a cassette, arms, rails or any posts may reveal bracket holes, cracked render, discoloured paint, loose tiles, old sealant or cable routes. Some installations leave only minor marks; others conceal damage that becomes visible during removal. Treat the condition as unknown until it is visible, rather than assuming the new work can begin as soon as the old frame is down. Before removal, agree how newly exposed defects will be photographed and priced, so everyone can distinguish existing wear from damage caused during the work. Note where the old fabric or frame protected the finish; colour differences may remain after a sound repair.
Set out the proposed structure from the supplier’s drawing for the configuration being quoted. Mark the intended footprint, wall interface and support positions instead of tracing the awning’s canopy edge: its outline is not a reliable guide to new fixing centres or posts. If the enquiry is for the Bloomcabin Bioclimatic Pergola, include that exact model name and request the current drawing for the proposed configuration. A catalogue name does not establish site dimensions or fixing locations. Keep the drawing version with your measurements, and note any later amendment, so the installer, repair contractor and owner are working from the same layout.
Photograph and measure the existing installation
Take wide photographs from several angles before the awning is disturbed, then close-ups of each bracket, frame end, cable entry, visible crack, stain and paving condition. Include a fixed feature, such as a door reveal or building corner, in the wider views so positions can be located later. Record dimensions that explain the existing installation: height above the finished terrace, projection, width, bracket or support positions, and distance from nearby openings. Mark estimates as estimates; a photograph cannot establish the material hidden beneath plaster or the depth of an anchor. This is a record of what is there, not a substitute for measuring the proposed pergola.
Make a separate site sketch for the proposal, using a consistent reference point and units. Add the new footprint from the quotation drawing, along with known drains, thresholds, downpipes, lights, taps, air-conditioning equipment and visible service routes. Mark concealed or uncertain items as unknown rather than presenting them as confirmed. Label the sketch with the product being considered, such as Bloomcabin Pergola, and distinguish the proposed layout from the existing awning measurements. Keep dated photographs, measurements and revisions together. If a dimension changes after removal, mark the change clearly rather than leaving the installer to reconcile two apparently current versions.
Agree the removal and making-good scope
Do not assume that the team supplying or fitting the new pergola will also remove the awning or make the old surface good. Separate the scope into removal and disposal; any electrical disconnection; inspection and repair of the wall; paving or base repairs; and installation of the new structure. Ask who is responsible for each item, what is excluded, and how a defect discovered after removal will be assessed before extra work proceeds. If different trades are involved, name the handover point: for example, whether the pergola installer receives a bare wall and prepared paving, or whether preparation is included in its work.
Agree the sequence before booking removal. Taking the awning down early may expose the area to sun or rain and leave an unfinished wall; leaving it in place may prevent a proper check of proposed fixing locations. Coordinate when photographs are taken, when the old unit is removed, when electrical work is handled and when patching can start. For a powered awning, have a qualified electrician deal with the supply and associated controls; do not treat the old cable as safe to cut or reuse. Also settle who protects doors, glazing, paving and nearby property, and who removes debris at the end of each stage.
Check old fixings and concealed services
Old brackets are not a ready-made fixing plan. Their anchors may be in a different position, chosen for another design, damaged during removal or secured in a substrate that is unsuitable for the new arrangement. Render, tile and paint are finishes; they do not reveal what lies behind them. Have the installer or relevant structural professional identify the wall construction and specify how redundant anchors are to be removed, retained or repaired. Do not assume a hole can be enlarged, reused, filled or covered until the method is agreed. For a quotation involving the Bloomcabin Wall Pergola, ask for the fixing detail for the actual configuration and have it checked against the site, not against an awning bracket’s position.
Check for services before any new drilling or cutting. An old motor cable may pass close to its brackets; lights, sockets, plumbing, irrigation or other conduits may also run through the wall or beneath the terrace. Use available building drawings and ask the relevant qualified tradesperson or installer to identify uncertain routes before work starts. A cable that is no longer used may still need proper isolation and removal, while a service that remains in use must not be treated as clear simply because it is absent from an old sketch. Mark confirmed and suspected routes on the site plan, and update it if removal reveals anything unexpected.

Coordinate wall repairs with the new layout
Once the brackets are removed, inspect the exposed finish before choosing a repair. Small holes in painted render, damaged masonry, a cracked tile and a loose section of plaster are different jobs; a surface patch may hide a problem without restoring a sound finish. Ask the appropriate repair professional to assess the material and extent, especially where the wall is soft, cracked, damp-stained or appears to have moved. Record what will be repaired and whether the work includes only old fixing points or a larger area. If matching tile, paint or render matters, locate spare material or note the existing finish before anything is discarded.
Agree the order of repair and pergola setting-out so that old holes are not patched on the assumption that the final fixing pattern is settled. The selected design and site check should determine the new positions; only then can the repairer and installer coordinate the finish. Specify who removes abandoned anchors, seals openings, restores paint or tile and clears waste. Clarify whether colour or texture matching is an allowance rather than a guaranteed invisible repair. Follow the repair material’s stated preparation and curing requirements before new work is fixed into the area. Put any remaining cosmetic mismatch or wall condition outside the agreed scope in writing.
Check support positions and paving
Check the ground as carefully as the wall. If the old awning had posts, photograph their base plates and note holes, cracks or uneven tiles; if it was wall-mounted, do not assume the new structure will need no ground work. Proposed support positions may not match old bases, paving joints or any buried foundations. A paving tile is a finished surface, not evidence of what lies beneath or whether it can accept a new fixing. Have the installer and, where needed, a suitably qualified professional assess the actual substrate and support detail before the surface is cut or drilled. Do not infer a foundation design from the old awning.
Set out support positions from the confirmed drawing and check them against drains, channels, thresholds, steps, paving edges and the route across the terrace. A simple tape outline can help you spot an awkward post near a door or walkway, but it is only a visual planning aid, not an installation measurement. If you are considering the regular Bloomcabin pergola, use the drawing for the quoted configuration to show the proposed support positions alongside the paving joints and existing bases. Share this plan with whoever is checking the paving and services, so conflicts with a drain or an unverified pipe can be resolved before work begins. Note uneven levels and changes in finished floor height for the installer to review.
Confirm where rainwater will go
An awning’s drip line may sit directly beneath its edge, while a new pergola may direct water through another part of the frame or leave it to fall elsewhere; the actual route depends on the selected system. Do not assume that a gutter, outlet, downpipe or connection to a drain is included. Request the water-management detail for the configuration being quoted. If you are considering the Bloomcabin bioclimatic pergola, ask the supplier to identify the applicable discharge points on the current drawing and state what is supplied versus arranged on site. The product name alone does not define the water route.
Map existing surface falls, gully positions, downpipes, thresholds and places where water already collects. Check the proposed discharge in relation to doors, the building wall, neighbouring property and pedestrian routes; do not direct it towards a threshold or assume an existing drain can take a new connection. Note any staining or ponding that is already visible, and have a competent local professional review a proposed connection or change to surface drainage. Record the agreed route in the installation scope. This is easier to coordinate before repairs and paving work than after an outlet has been positioned.
Keep openings and everyday access clear
A layout that fits the terrace on paper may still interfere with the way the house is used. Mark the proposed footprint alongside external doors, windows, shutters, vents, lights, taps, air-conditioning units, drain covers and anything that needs access for cleaning or maintenance. Check the full movement of doors and shutters and the route people take from the house across the terrace; note steps, narrow passages and furniture that needs to remain usable. Use the quoted drawing for actual clearances, not the old awning’s projection. If the layout needs to change, request a revised drawing before wall repairs or paving marks are treated as final.
Where a wall-mounted arrangement is under consideration, pay particular attention to openings, services and future access on the mounting wall. For the wall-mounted Bloomcabin model, confirm the mounting height and clearances with the supplier or installer and record them on the proposed layout. Show which windows and shutters open into that area and which taps, utility equipment or maintenance points must remain accessible. This lets the installer consider the wall as a whole rather than checking each fixing position in isolation. If anyone else relies on a route across the terrace, mark it on the plan and agree how access will be managed while the work area is in use.

Plan delivery, storage and the work sequence
Plan how the removed awning and new components will pass through the property. Check the gate, corridor, stairs, turns, lift or doorway along the proposed route, including any low overhang or finish that could be damaged. Ask the supplier or installer for package and handling information relevant to the order; finished pergola dimensions do not tell you the length or number of packed components. Confirm where temporary storage can be kept without blocking doors, drains or shared access, and how the terrace and glazing will be protected. Do not leave these arrangements until the delivery day, when removal and installation crews may have different access requirements.
Agree a simple sequence: record the existing condition; remove and dispose of the awning; address electrical work and exposed defects; complete agreed wall or paving repairs; confirm the set-out; then receive and install the new structure and clear the site. The order may change if a contractor needs to inspect after removal, so record the handover and who decides when the next stage can begin. For an order involving Bloomcabin’s wall-mounted pergola, keep the model and configuration name consistent across the quotation, drawing and delivery communication. Request order-specific access details rather than making assumptions from the listing, and allow for temporary protection if the area is open between trades.
Record the quotation, responsibilities and local checks
Ask for a quotation that identifies the selected model and configuration, the drawing version used, the site measurements relied on and the work to be carried out by others. Make removal, disposal, electrical work, surface repair, repainting, paving, drainage, delivery access, installation and final cleaning separate line items or clearly described responsibilities. State who approves extra work if an old anchor or hidden service is discovered, and how a change in the footprint will be recorded. If the quotation names Bloomcabin’s bioclimatic model, match that name and configuration to the attached drawing. Keep agreed changes with the quotation so the scope remains clear when work passes between contractors.
Before committing, verify approval and insurance questions for the particular property with a relevant local authority or suitably qualified professional. Do not assume that replacing an awning on the same terrace automatically follows the same approval route, or that a previous approval covers a new structure. If the terrace is rented, shared or managed, clarify who can authorise the work and keep any written agreement with the project records. Ask your insurer whether it needs to be notified. Requirements depend on the property and proposal, so this is a local check, not a rule that can be inferred from a generic pergola guide.
Frequently asked questions
Can the old awning holes be used for the pergola?
Not automatically. The new fixing detail has to suit the proposed design and the actual wall or ground beneath the finish. An old hole may be in the wrong place, damaged or intended for a different fixing arrangement. Ask the installer and, where needed, a qualified structural professional to approve any reuse. Do not refill and redrill by guesswork.
Should the awning be removed before the pergola is ordered?
Not necessarily. Photograph and measure the existing installation first, then agree with the installer whether removal is needed before the site can be checked properly. Removing it early may reveal damage, but can leave the wall exposed before repairs are arranged. Settle who handles removal, how the condition will be recorded and what temporary protection is needed.
Who should repair the wall or paving?
The project scope should say who is responsible. Ask whether the quotation covers redundant anchor removal, wall patching, paint or tile repairs, paving work, electrical work, waste disposal and final cleaning. If separate trades are involved, record when one hands the site to another and who assesses any defect found after the awning comes down.
Do I need approval to replace an awning with a pergola in Malta?
Do not assume that the same position or footprint means the same approval applies. Check the proposed work with the relevant local authority or a suitably qualified local professional. If the property is rented, managed or shared, clarify who can authorise the work and keep any written agreement. Ask your insurer whether it needs to be notified.
Can the new supports be fixed where the old paving is?
Only after the proposed fixing positions and the support beneath the paving have been checked. Tiles and grout are surface finishes; they do not establish the condition of the base or any foundation below. Share the pergola drawing with the installer and, if needed, a structural professional. Include paving and service checks in the site plan.
A successful conversion uses the old awning to understand the site, not as an installation template for the pergola. Record its fixings and services, confirm the new layout from the quoted drawing, and inspect what removal exposes. Agree the repairs, rainwater route, access arrangements and responsibilities before scheduling each stage. Keep concealed conditions and outstanding approval questions clearly marked until they have been checked. With those points documented, the project team can price the preparation work and hand over a clearly defined site, rather than leave key decisions until installation.
