
Retractable Pergola Screens: Planning the Cassette, Guides and Access
Pergola planning
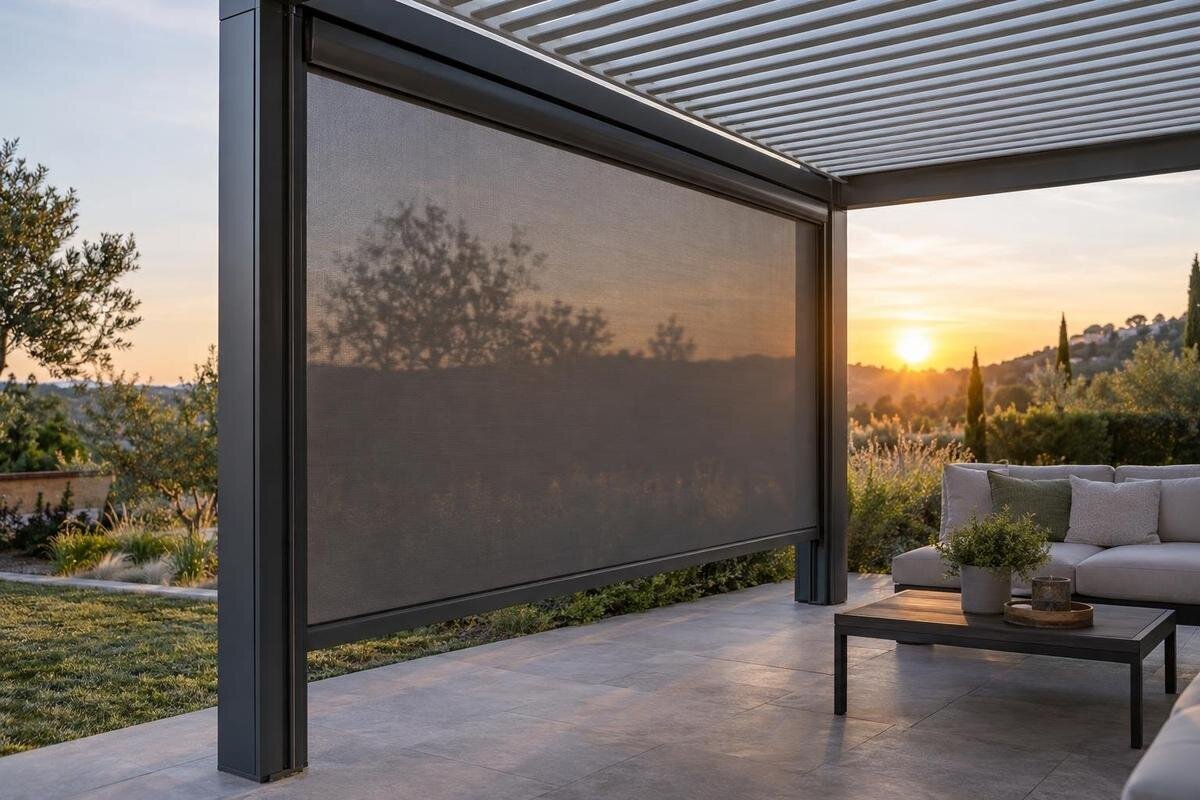
A retractable screen needs space when retracted, moving and lowered, not just across the area its fabric covers. When raised, the fabric may be out of the opening, but its cassette and side guides still occupy space; during movement, its path may conflict with doors, furniture or a walking route. The practical questions are where the retracted screen is housed, how its guides meet the frame, and how you can reach it for cleaning or servicing. Confirm the screen design for the exact pergola model rather than assuming a screen is part of the package.

What makes up a retractable pergola screen?
A retractable screen is an assembly, not simply a sheet that disappears. Depending on the chosen design, it may include a roll held in a cassette, screen material, side guides, a lower rail and a manual or motorised operating arrangement. Profiles and attachment details vary, so this is a list of items to ask about, not a description of a particular pergola or a promise that every component is supplied. Request a drawing of the proposed screen and opening. A product photograph may show the fabric without revealing cassette depth, brackets, guide projections or how the material is retained. Ask for both the fully retracted and lowered positions.
Before discussing a model, identify the opening to be screened and whether it is an entrance, a fixed bay or a passage people use. If more than one side is planned, number each bay and state which one needs a screen. Ask which parts come with the selected pergola, which are separate accessories and whether the screen is an approved configuration for that exact model. The Bloomcabin Pergola page names the regular pergola model; that fact alone does not show that a screen is included or that a particular system fits. Keep the distinction clear in the written specification.
Where the cassette sits when the screen is retracted
In a common roller arrangement, the cassette sits along the top of the opening; other systems may locate components differently, so check the actual design rather than planning from habit. The housing remains a physical feature when the screen is fully retracted. Ask whether it sits within the opening, below a beam or on a face of the frame, and record its full length, depth and projection. Draw it in an elevation from the terrace and, if relevant, from the adjoining room. Include end caps and brackets in its outline, not just the width of the fabric. A small change in mounting position can alter what is visible from each viewpoint.
Check the area around the cassette as well as the space it occupies. Ask which cover opens or comes off, and show the clearance needed to reach and remove it. Add nearby wall lights, door trim and shutters to the drawing, including any parts that open towards the housing. Keep this access visible on the plan even if a beam conceals the cassette from the terrace. Use measurements from the approved screen drawing, not estimates from a website photograph. For the Bloomcabin Bioclimatic Pergola, ask the screen supplier to show the proposed cassette position and access space in relation to the frame.
How the side guides meet the frame
A side guide might be a continuous track, a narrower profile or another arrangement designed for that screen. Do not assume how the screen material is held in place or how little space the guide takes. On the plan and elevation, show each guide in relation to the post, wall and clear opening. Note its full external width and depth, including any bracket that holds it away from the frame. The guides may reduce the usable passage or remain visible when the screen is retracted. If a door, chair or walking route passes close by, compare its position with the guide’s actual projection, using the dimensions for the chosen system.
Check what each guide meets at the top and bottom, and whether a beam junction, corner or wall return affects the connection. Ask which surface supports it and whether the proposed fixing is approved; do not assume that any face of a pergola or a nearby wall can take the component. This matters where a frame meets a building: the Bloomcabin Wall Pergola page identifies a wall-mounted model, but does not establish a particular screen fixing. Request a detail showing the guide, its bracket and the frame together before treating the opening dimensions as final.
Clearance for the screen’s full movement
Draw the whole path followed by the screen as it moves between retracted and lowered positions. A screen may appear to clear an object at each endpoint but meet it while moving, especially if a door handle, wall light, projecting shelf or hanging planter sits in its path. Mark door swings, window openings and shutters in the position in which they will actually be used. If the opening is also an entrance, check that the intended screen position does not conflict with the usual route in and out. Confirm the operating sequence from the system instructions rather than relying on an assumption about how the screen moves.
Include movable items in the plan as well as fixed features. Show the table and chairs in their usual arrangement, a chair pulled back and any tall planter or other object near the opening. A drawing of the posts alone will not reveal a conflict with everyday patio use. If the design has a lower rail, mark where it sits when the screen is lowered and check the nearby floor edge or step; do not assume the screen seals to the ground. Also allow access to the handle or control without having to shift fixed furniture. For a layout based on the regular pergola model, mark these everyday-use clearances alongside the frame dimensions, keeping the screen’s own movement dimensions on the same drawing.

Sightlines with the screen raised and lowered
The cassette and guides remain part of the view when the fabric is retracted. Check their effect from the places where people sit and from the doorway, not only from directly beneath the roof. Mark seated and standing viewpoints on a plan, then draw lines of sight through each opening towards the garden, courtyard or other view you want to preserve. An elevation can show whether the cassette aligns with a beam or crosses a preferred view of the sky. With the screen lowered, the guides and screen material may also frame or interrupt the view. This is a check of physical layout, not a promise about visibility through a particular fabric.
Fabric openness, colour, lighting on either side and the angle of the sun can all affect what is visible. Do not judge privacy or transparency from a small catalogue image alone. If samples are available, compare them at seated eye height and in the light conditions in which the screen is likely to be used. Add a simple sun-path note to the sketch to record when direct sun reaches the opening and whether the screen is expected to be retracted or lowered then. This makes the intended position part of the plan, rather than assuming that the screen will stay down all day.
Planning screens on more than one side
If you plan screens on two or more sides, treat every bay as its own assembly before reviewing the corners. Label each opening and draw its cassette and guide positions. Where two bays share a post, mark which face each component uses. Do not assume that separate units join into a continuous corner, share a guide or leave no gap; those details depend on the supported design. A corner can also leave less room for a door, walkway or furniture than the middle of an opening. Review the arrangement from inside and outside, and note which posts or junctions need a specific detail drawing.
Record how the screens are expected to be used as well as how they fit. Note which openings need to stay available as routes, and whether the controls for one screen could be hard to reach when another is lowered. Ask whether the actual units operate independently and whether their instructions specify a particular sequence. Do not infer this from a photograph of a multi-sided pergola. If you are considering the bioclimatic pergola model, identify each screened bay in the enquiry and request a drawing showing both the individual assemblies and their shared corners.
Access for cleaning and future servicing
Maintenance access is easier to plan before the cassette and guides are surrounded by other features. Depending on the system, a cover may need to be reached or removed, and guides may need attention along their length. Ask which parts are intended to be accessible for routine care and what space a service task needs. Mark that area on the layout. A fixed bench, storage cabinet, trellis, wall finish or light fitting added later could cover a fixing or make the housing awkward to reach. Treat the access area as part of the screen’s footprint, even though it is not part of the moving fabric.
Ask whether a technician needs to reach the cassette from below, from the side or at one end, and whether furniture or another feature would need to be moved. Do not assume that the housing can be serviced from floor level or that its cover can be removed without extra clearance. On a wall-mounted layout, check that the wall return and nearby openings do not block the service side. Record which tasks are routine cleaning and which should be handled by an installer. For a layout using the wall-mounted pergola model, show the service access beside the wall and frame details so it is considered together with the proposed screen position.
Routine cleaning without damaging the system
Outdoor components can collect dust, pollen, leaves or grit, although where it settles depends on the guide profile and the site. Check the care instructions for the screen material, cassette cover, side guides and lower rail separately; their finishes may require different methods. Keep the parts accessible enough to see whether debris is building up around the guides or cover. If the pergola is exposed to sea spray or nearby building work, ask whether that changes the recommended care for the specified materials. A routine suited to one fabric or finish should not be assumed suitable for another.
Do not assume that a household lubricant, solvent, hose or pressure washer is suitable for a fabric or guide. Follow the system’s instructions and use only the cleaning methods they permit. Avoid dismantling the cassette or forcing a stiff screen to move as a shortcut to cleaning. Make it possible to wipe accessible surfaces and clear loose debris without reaching over a fixed obstruction or moving heavy furniture. If the screen’s movement changes or a part looks damaged, consult the manual or installer about what to do rather than improvising a repair.

Confirming compatibility with the pergola model
Screen compatibility has to be checked against the exact pergola model and the chosen opening; it cannot be inferred from a general product category or the size of the frame alone. Ask whether the proposed screen design is supported, where the cassette and guides attach, and what opening dimensions or approved components apply. If the screen is sold separately, confirm compatibility with the pergola supplier or installer before any alteration to the frame. The Bloomcabin Bioclimatic Pergola product page identifies a pergola model only; it does not establish that a screen is included or compatible.
Have the complete arrangement stated in writing: the number of screens, the bays they cover, which parts are included or separate accessories, the operating method, material, dimensions and mounting details. Ask for the relevant care instructions and any operating limits for the selected system. If the pergola is already in place, provide its model details and note any changes made since installation rather than giving only an overall width. A clear specification makes it easier to distinguish the pergola from the screen system and to identify the exact configuration if it needs servicing later.
Use a plan and elevation to confirm the layout
A simple dimensioned drawing can bring the separate checks together. Show the pergola from above and add an elevation of the screened side. Measure from the relevant post faces and mark the cassette’s full outline, guide projections, screen travel and the lower rail position if the design has one. Add doors, handles, wall lights, shutters, steps, furniture and regular walking routes. Prepare a second view with the screen lowered so the remaining passage and any physical conflicts are clear. Mark the space needed to reach the cassette and guides, as well as the seated and standing viewpoints that matter.
Label uncertain dimensions instead of estimating from a photograph, and ask the supplier to confirm them on the screen drawing. For a layout based on Bloomcabin’s regular pergola, keep the model identification and proposed screen configuration together so the supplier can review the complete arrangement. Resolve where the housing sits, how the guides attach, what can move past the screen and how cleaning access is preserved. A drawing that records those details gives a clearer basis for confirming the proposed configuration than a list of opening widths on its own.
Frequently asked questions
Does a retractable screen disappear completely when it is raised?
Not necessarily. In many roller systems the fabric rolls into a cassette, which remains in place, and side guides may remain visible too. Check the drawing for the fully retracted position, including brackets and covers, rather than expecting the whole assembly to disappear.
Can I fit a generic screen to any pergola?
Do not assume so. Confirm that the specific screen design is supported by the exact pergola model and opening, and that its guides and cassette have approved attachment points. A screen sold separately is not automatically compatible.
How much room do the side guides need?
There is no universal allowance: guide profiles and brackets vary. Use the actual system drawing to check their width, projection and position against the clear opening, door swings and nearby furniture.
Can screens be fitted on two sides that meet at a corner?
That depends on the supported corner detail. Ask how each cassette and guide meets the shared post, whether the screens operate independently and what happens to the walking route. Do not assume the units join neatly or share a guide.
What access should I leave for cleaning and servicing?
Ask which parts need routine access and what space is required to reach or remove covers and inspect the guides. Follow the system’s care instructions, and confirm with the supplier or installer if a service task needs more access than routine cleaning.
Plan the screen in three states: stored, moving and in use. The first leaves the cassette and guides in view; the second can reveal clashes a static drawing misses; the third affects passage, outlook and access to the opening. A measured plan that records all three states, together with cleaning and service access, gives the supplier a precise basis to confirm the supported design for the chosen pergola model. The layout is complete when the screen can be used and reached for care without conflicting with how the terrace is used.
