
Pergola Shade in Low Evening Sun: Which Side Needs Protection?
Pergola planning guide
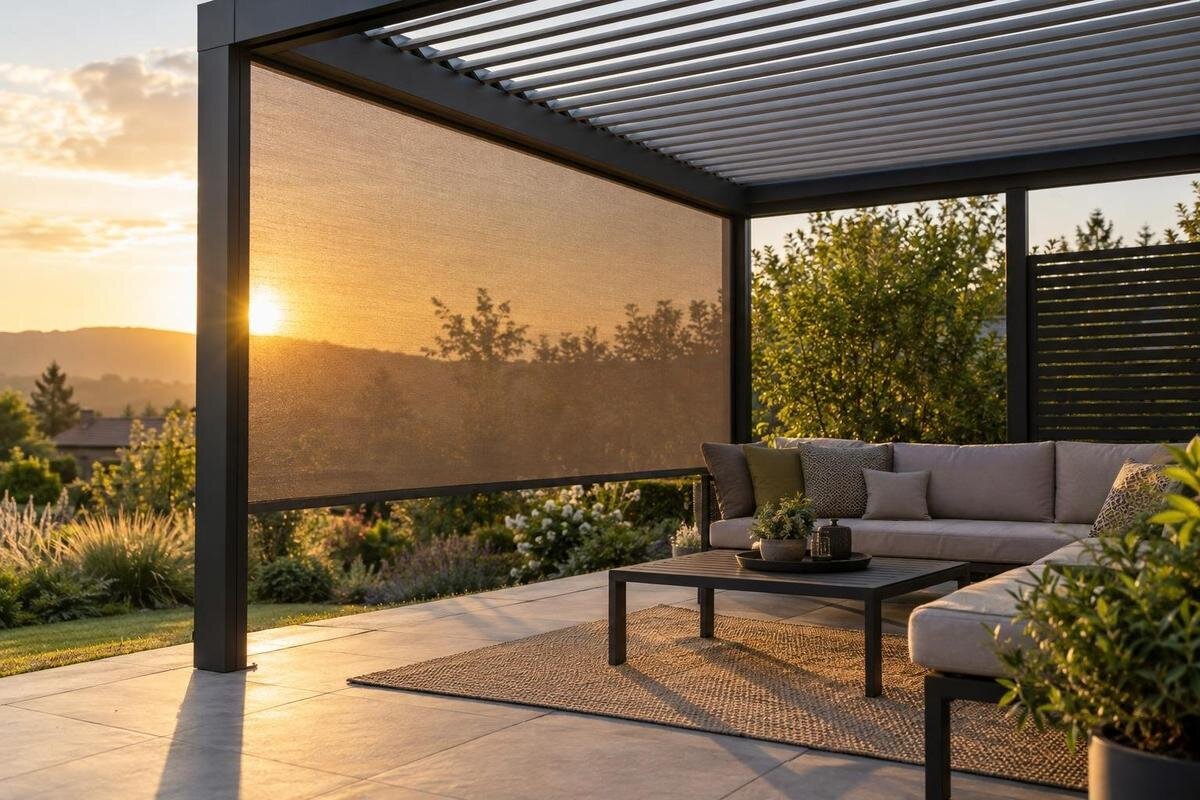
A pergola can provide shade overhead while the setting sun still reaches an open side, a face or the dinner table. The useful screen position is not automatically the side called west: it is the edge the low sun crosses before reaching the place where you sit. Choose one typical evening, mark that seat and track the direct light. A simple plan and a few observations can show whether one side, a corner or only a short section needs attention.

01
Which side needs protection from low evening sun?
Begin with the person using the pergola, not with a compass label. A side screen can intercept direct light only when it lies between the low sun and the place where glare is felt. The roof may shade the area from above, but sunlight can still enter at a low angle through an open side and reach a face, book or meal. A side that looks exposed from the garden may not matter to the chosen seat if a wall or another building already blocks the light. The floor can be in shade while a face is still exposed, so assess the light at the seat rather than judging by the patch of shade alone. If discomfort remains after direct sunlight has moved away, note that separately as possible reflected glare.
Mark the usual seat, table and direction of view. A chair facing the garden creates a different sightline from one turned towards the house, and the person across the table may be affected from another angle. Think of the screen as a boundary crossed by a ray from the sun to the seat, rather than as general cover for the whole terrace. When considering the Bloomcabin Pergola, use this seating plan to explain where protection is needed. If two seats matter equally, draw a sightline for each instead of assuming that one position represents everyone. Keep both seats on the same drawing so you can compare the edges their sightlines cross.
Choose the evening you are planning for
Choose one familiar use that makes the problem easy to recognise: a meal outdoors after work, reading in a particular chair, or sitting with guests at one end of the table. Name the usual seat and, if useful, the usual month and approximate part of the evening. “At sunset” is too vague for a useful shade plan, because the sun’s direction and height shift through the evening and across the year. Pick the time when glare usually makes you move, turn your chair or stop using the space; that is the exposure to solve first. Keep the furniture in its ordinary position so the observation matches real use, and note whether chairs or the table are normally moved for that occasion.
Treat this as one scenario rather than assuming all evenings are the same. If you use the terrace in several seasons, repeat the observation on dates that matter; do not assume a screen placed for one sunset will cover every later one. Use a clear or mostly clear day to judge the direct path, and note cloud cover because it changes brightness without changing the sun’s position. Never look directly at the sun to locate it: observe the light entering the pergola and shadows on paving, walls or furniture instead. Record the date and approximate time, then note the period when you actually want the screen to help.
02
Sketch the pergola, seats and nearby boundaries
Draw a plan view of the pergola footprint and surrounding terrace. Add a north arrow and label each edge A, B, C or D so “west side” cannot be confused with the wall or garden side. Mark posts, walls, doors and windows, furniture, walking routes, fences, nearby buildings and trees that cast shade. Use the actual site outline rather than a stylised product photograph; a proposed screen must meet the real boundary. If orientation is uncertain, use a compass or map as an initial clue, then check it on site, because a terrace can face diagonally rather than squarely towards a compass point. Mark any fixed obstruction that blocks the view from a seat.
Put each seat and the usual direction of view on the drawing; mark separately the person whose eyes get direct glare. If you are comparing configurations, write the exact shortlisted model beside its outline. For the Bloomcabin Bioclimatic Pergola, use the footprint and post positions confirmed for the configuration you are considering, rather than estimating them from a catalogue image. Keep the seating positions consistent between drawings so you can compare layouts without changing the problem you are trying to solve. Use the same edge labels throughout, and show the supplier or a qualified installer the actual opening, including the space at corners and around doorways.
Record where the light reaches the seating area
At the chosen time, sit or stand in the marked position and make observations at a few regular intervals before and after the worst glare. Record which edge the light enters through, where the bright patch lands, and whether it reaches your eyes, the tabletop, seat back or floor. Note when exposure begins and ends rather than recording only its strongest moment. If several chairs are used, check each, but keep the primary seat marked so changing position does not shift the answer unnoticed. A quick sketch for each observation can show the light’s path more clearly than a general note such as “sunny on the terrace”.
Use a simple log or photographs of shadows on paving, walls and furniture to compare observations; avoid pointing a camera or your gaze directly at the sun. Write down the date, approximate time, weather and seat for each note. A cast shadow falls away from its light source, which can help identify the incoming direction, but verify that against where direct light actually crosses the pergola edge. For a layout using the Bloomcabin Wall Pergola, include the house wall in each sketch. Record when its shadow reaches the seat and whether light still enters through an adjoining open side at that time.

03
Place the screen on the edge the light crosses
On the plan, draw a line from the sun’s direction through the affected eye position. The boundary that line crosses into the pergola is the first edge to assess for protection. This is more reliable than automatically choosing the side called west or screening the boundary opposite the sun. If light arrives diagonally, it may enter near a corner and pass along two sides as the sun moves. Mark the entry point at each observation time: the path can shift from one edge to its neighbour within the evening. Discuss a screen at the crossing edge, rather than choosing a side solely because it faces the open view.
Check for existing barriers before adding a screen: a neighbouring wall, house, balcony or other structure may already block part of the path at certain times. The useful location is where the light remains unobstructed, not simply the edge that is easiest to name or reach. When discussing the regular Bloomcabin Pergola, identify the boundary by its letter on your drawing and show the recorded entry points. Distinguish an edge that admits light throughout the meal from one exposed only briefly before you sit down. This keeps the proposed screen position tied to the period you want to use the space, rather than to the terrace’s general orientation.
Check the view at seated eye level
A plan locates the side but does not show whether a proposed screen interrupts the light at the needed height. Draw a simple side view from the seated eye towards the opening, marking the ground, seat, eye line, overhead frame and any wall or parapet that blocks the view. Low sun can enter below an overhead structure; a gap above a side screen can also leave part of the view exposed. The result depends on the site geometry, screen dimensions and time observed. This sketch is not a specification: it identifies the part of the opening that needs checking. If people across the table are also affected, check their sightline separately.
As a temporary visual test, ask another person to hold an opaque board at the candidate boundary while you sit in your normal position, in still and safe conditions. Move it by hand to see whether the glare path disappears and how much of the view is covered; do not attach a test panel to the pergola or use a broad board when wind makes it unsafe. This mock-up helps explain the position that needs protection, but does not establish product fit. When enquiring about the bioclimatic pergola model, compare the approved accessory’s dimensions and position with your side-view sketch, rather than treating the temporary panel as a specification.
04
Cover only the part of the side that needs shade
Shade may be needed only during the period when direct light sweeps across a seat. Mark the exposed section of the boundary at the beginning, middle and end of that period. If glare appears at one end of the table, a full-length enclosure may block more view and movement than your observations justify; if the exposure travels along the edge, show the affected length and corner. Note which people or objects need protection rather than treating the whole terrace as one target. The aim is not to make the entire space dark, but to interrupt the specific direct path you have recorded.
Check what happens after the sun moves behind a neighbouring roof or wall: a fixed screen can remain across the view after its shading role has ended. A wall-mounted arrangement may have a wall already forming one boundary, so note which open side remains relevant instead of assuming all sides need treatment. For an enquiry about the wall-mounted pergola model, include the side letter, affected length and period of exposure. State whether you need protection for one seat or the full table. This gives the supplier a clearer basis for discussing suitable coverage without treating every open side as part of the same shading requirement.
Keep doors, routes and views in mind
Shade must not make routine access awkward. On the plan, mark door and gate openings, the route from the house to the garden, chair pull-back space and the path used to carry food or clear the table. Note which of these crosses the proposed screen line. Also mark windows and doors that open towards the pergola, since the screen’s position or deployed state may affect how the terrace is viewed or used from indoors. A sketch with furniture and real routes is more useful than a bare rectangle labelled “screen here”.
Test the proposed line in the normal seating arrangement: would someone need to pass through it, reach a handle, move a chair or keep a particular view open? Consider daylight into the adjoining room if the screen sits beside a window, but assess it at the time and in the position you actually use rather than assuming a result from a product image. When discussing a layout for the Bloomcabin Pergola model, show the nearest door or window and the route you need to keep clear. Mark any conflict between that route and the proposed screen line, so access is considered alongside the seat’s need for shade.

05
Verify compatibility with the exact pergola model
Before ordering, confirm compatibility for the exact pergola model and the side where you want protection. Ask whether the proposed screen is an approved accessory, whether it is included in the quoted configuration or supplied separately, and how its specified width and height relate to the opening. Check whether posts, a wall, other accessories or a doorway affect its proposed position. Request current documentation for operating conditions and any limits that apply to that accessory. Do not infer wind performance, fixings or structural capacity from a screen’s appearance or a product photograph; those details need model-specific confirmation.
Give the supplier your sketch, seat position, time window and exact model name rather than asking only for a “west-side screen”. For example, the Bloomcabin Bioclimatic Pergola listing identifies one model, but the listing alone does not establish that a screen is included or that a particular accessory fits a chosen configuration. Ask the supplier to identify the approved component, the side it can serve and the documentation for installation and use. If a proposal involves a non-standard attachment or a change to the frame, seek advice from the manufacturer or a suitably qualified professional before proceeding.
Turn your observations into a clear buying brief
Turn your notes into a short brief with four facts: where the light comes from, which seat is affected, what time period matters, and which edge or corner the plan shows it crossing. Add whether the exposure is direct or reflected, what already blocks it, and any door, route or view that must remain clear. If the light shifts from one side to another, state when and whether both periods matter to your actual use. For example: “At the usual supper seat, direct light enters over edge B before the meal ends; the garden path must stay open.” That is more useful than “the west side is too sunny”.
Keep observations separate from what remains to be confirmed. The sketch can show that a side screen might interrupt a particular ray; only current product documentation can confirm accessory availability, fit and operating limits on the selected model. Compare proposed options against the same seat and evening window, noting changes in view and access as well as shade. If the terrace serves different months, repeat the check for dates that matter before treating one side as a year-round answer. A small change to the seat or table position may also alter the sightline, so compare that option before deciding on a screen.
Frequently asked questions
Which side of a pergola should I screen first?
Start with the boundary the direct ray crosses on its way from the sun to your usual seat at the time glare occurs. Check the direction on site before relying on a compass label such as west.
Will the pergola roof block low evening sun?
Not necessarily. The roof may shade the space from above while sunlight still enters through an open side. Check the light at the seat and at the time you use the terrace.
Do I need to screen two sides?
Only if your observations show that light enters through both sides during times that matter, or that more than one seat needs protection. A diagonal path near a corner is a reason to check the adjoining edge, not automatically to enclose it.
Will a side screen remove every kind of glare?
No. It may interrupt a direct path from the sun, but light reflected from paving, glass or another surface can reach you from a different direction. Note reflected glare separately and check its source.
Are pergola side screens included or compatible with every model?
Do not assume so. Ask whether the specific screen is an approved accessory for your exact model and configuration, whether it is included, and what documented operating conditions apply.
Low evening sun is a line-of-sight problem before it is a product choice. Once you have marked a particular seat, time window and crossing edge, it becomes clearer whether protection is needed on one side, around a corner or not at all. Keep that map with the model-specific accessory information so the final arrangement addresses the glare you experience without screening parts of the terrace that were never exposed.
