
Designing a Pergola Area within a Wildlife-Friendly Garden
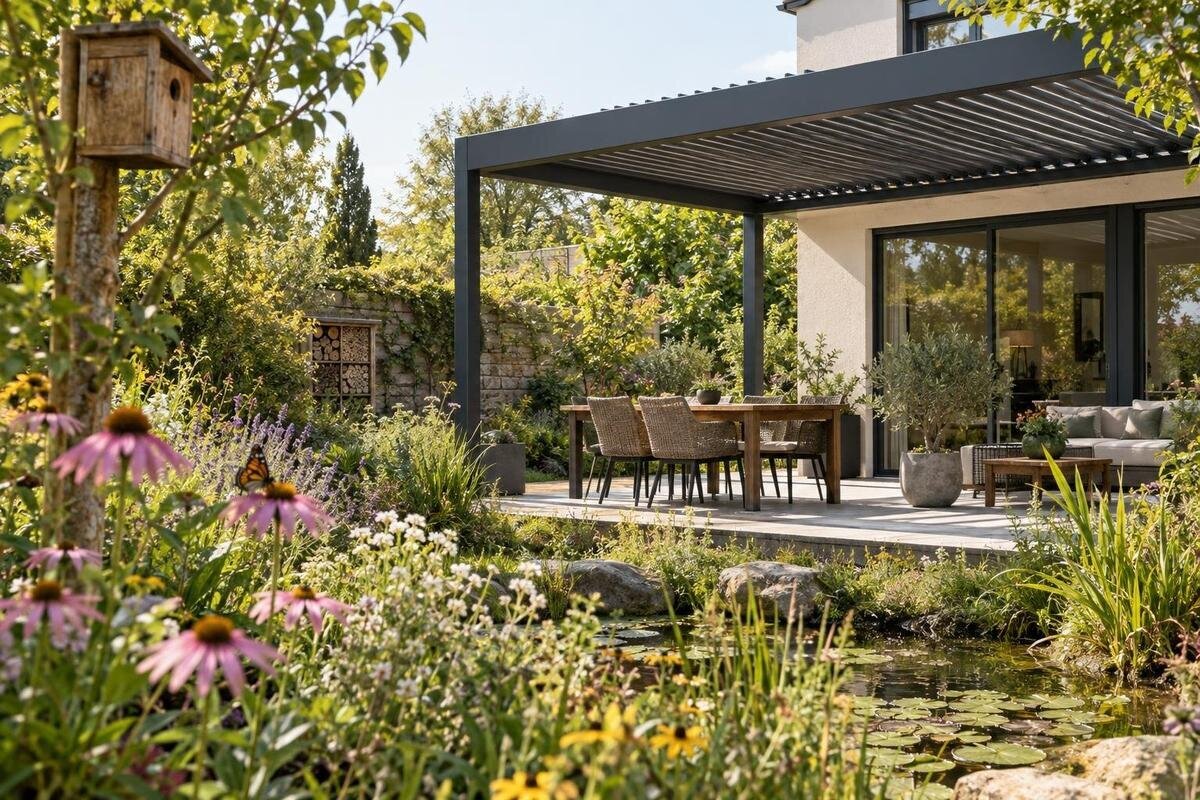
Garden planning guide
A pergola can give a garden a defined place to sit, but it should not take over planting space or make routine care awkward. In a wildlife-friendly garden, the design work is to coordinate movement, planting, daylight, outdoor lighting and maintenance before the layout is fixed. Begin with what is already there, then fit the proposed structure into a measured plan. That makes trade-offs visible without suggesting that a particular pergola or planting arrangement will attract particular wildlife.

01
Map the garden before placing the pergola
Draw the garden at a scale that captures the house, boundaries, existing trees and shrubs, established beds, gates, paths, storage, service points and doors. Record the pergola’s intended use—quiet seating, meals or a place to work—because each affects which routes people need and where chairs will move. Note areas you hope to keep planted or relatively undisturbed, and flag measurements still to be confirmed. Include the approach from the house as well as the proposed seating area. A measured plan is more useful than a pergola icon placed over a photograph, which can hide narrow passages, changes in level and the distance between a bed and a threshold.
Separate fixed features from decisions. Mark doors and gates that must open, existing paving you intend to keep, plants you hope to retain and anything that still needs a site check. Use a simple key to distinguish existing features from proposed additions, so a retained shrub is not mistaken for planting that can easily be moved. Note when routes are used and which beds can be reached from only one side. If an area is meant to remain less disturbed, show it clearly rather than treating it as spare space for chairs or storage. Record how that area can be maintained from the adjoining path. Keep observations separate from assumptions about species or habitat. This record gives a designer a realistic starting point and helps prevent the pergola from occupying the only workable connection between the house, garden and planted areas.
Set the pergola footprint around planting beds
Draw the whole pergola footprint, not just a shaded patch: include support positions shown on the chosen plan, the access route and space to sit, stand and move chairs. For a house-side layout, compare the Bloomcabin Wall Pergola listing with a dimensioned drawing for the exact configuration. Its listed area range is 9 to 24 m², but area alone does not show how the structure meets a wall, where supports fall or whether the remaining gap suits planting. Treat those as questions for the drawing, not assumptions. Do this before marking paving or selecting plants.
Draw planting beds as deliberate shapes rather than leftover strips between the pergola and a boundary. Their space should follow the mature size of the plants and allow someone to reach them for routine care. Narrow strips beside a wall or fence can be awkward to access, so test their position on the plan before committing. Compare a few placements, including a shifted orientation or a smaller footprint, and note what each does to the planted area and route. That makes it easier to see whether the pergola fits the garden as a whole, rather than only the intended seating spot.
02
Plan planting by mature height and spread
Show planting in height bands: existing canopy or taller growth, shrubs, lower plants and ground cover. These layers help coordinate the garden’s shape and access; they do not promise a particular wildlife outcome. For every proposed plant, confirm its mature height and spread, light and watering needs, and suitability for the site. Those details affect the space available beside the pergola and the amount of pruning the layout may require. Draw plants at their expected mature size, not the size of a nursery pot, so the seating area does not rely on repeated cutting to remain usable.
If seasonal flowering is part of your plan, ask for locally relevant plant choices and flowering periods, rather than assuming that one popular species will suit the site. Keep a planting schedule alongside the drawing, identifying each proposed plant, its expected flowering period and the care it will need. This lets you compare the planting through the year instead of choosing everything for its appearance in one season. Where a species is undecided, leave it marked as a choice to resolve rather than assigning it an assumed flowering period. Climbing plants and large containers need particular thought: confirm the plant’s mature size and care needs, and check whether the selected structure is intended for that use. When comparing a model such as the Bloomcabin Pergola, establish any planting restrictions before deciding where a climber could go. Keep the planting schedule consistent with those limits.
Keep access routes clear for people and maintenance
Draw continuous routes from the house to the pergola, from the entrance to the garden and to any area that needs regular access. Show door swings, steps, changes in level and places where people may need to pass one another. A route that crosses a bed simply because it is the shortest line can make everyday movement compete with garden care. Decide where a clear path is essential before adding secondary paths or decorative stepping stones. The aim is to keep planting areas distinct from the routes people use, not to pave every possible line across the garden.
Set route widths according to who will use them and what needs to pass through: this might include a wheelbarrow, garden tools or a mobility aid. If turning space matters, show it on the plan rather than expecting it to appear once furniture and planting are in place. Also check the space needed to pull out chairs without blocking the main path. This is a practical layout decision, not a single measurement that suits every garden. Where access is tight, ask a landscape professional to review the drawing before the pergola position and bed edges are fixed.

03
Check shade against planting and indoor daylight
A pergola can change how light reaches nearby beds and rooms, so do not judge its effect from a product photograph or a single observation. Note where the sun falls at different times and, where possible, at different points in the year. Mark beds whose planting needs particular light conditions, along with windows and indoor spaces where daylight matters. This helps separate the shade wanted over seating from shade that may affect another part of the garden or the house. If a planting choice is not yet settled, keep that uncertainty visible on the plan.
For a shortlisted Bloomcabin Bioclimatic Pergola, confirm the exact configuration and dimensions before assessing its shadow over a bed or window. Ask a landscape designer to consider the site orientation and the structure shown in the drawing; do not assume that a generic illustration shows where shade will fall on your plot. Record which seating areas are intended to be shaded and which planting areas should remain more open to light. Checking those needs together can reveal a better position or orientation before paving or planting makes a change harder.
Direct outdoor lighting where it is needed
Plan outdoor lighting around specific tasks, such as finding the entrance, using a step or sitting at the table. Mark each proposed light, the area it is meant to serve and the direction its beam should face. A shielded, downward-directed fitting may help keep light focused on a surface rather than washing across planted edges, boundaries or neighbouring windows. Avoid lighting every bed simply for visual effect. If limiting light spill is part of your wildlife aim, consider which areas genuinely need light and when; the right arrangement depends on the site and does not guarantee a particular wildlife response.
Discuss fittings, positioning and controls with a qualified installer; this guide is not an installation plan. Ask whether separate switching or timed operation is suitable for the intended use, and agree the proposed operating hours before deciding where lights go. Distinguish the light needed for access from lighting used while sitting outside: you may not want every fitting operating whenever someone passes through. Review the proposed light directions from the table, the house and the garden boundary, with planted edges marked on the same plan. This gives the installer a clear description of which areas you intend to illuminate and which you want to leave unlit. For the Bloomcabin Bioclimatic model, establish whether the proposed fittings are included, compatible additions or separate installations before incorporating them into the design.
04
Leave room for routine garden care
List the care the finished layout will involve: pruning, watering, clearing fallen leaves, cleaning surfaces and maintaining the pergola according to its instructions. Mark where a person can stand and reach each bed, and where tools or a hose can be brought through without blocking the seating area. A bed that narrows into a corner may look generous on a drawing but be difficult to manage if it can only be reached from behind furniture. Distinguish permanent access from space that can be made available by moving a chair. For occasional work, identify where movable furniture can temporarily stand without blocking a door or covering planting. Consider both everyday watering and less frequent tasks, so the maintenance plan does not depend on rearranging the entire seating area each time.
A wall-side installation may leave one edge less accessible, so test how that area will be reached before adding shrubs or climbers. For the wall-mounted Bloomcabin model, use the supplier’s current documentation to check any stated access or maintenance requirements for the exact configuration. Do not design a bed around an assumed clearance. If a planting strip would make access difficult, adjust its shape or ask a designer to review the relationship between structure, wall and plants. Allowing for this access from the outset avoids having to move established planting simply to reach an area that needs care.
Define the boundary between seating and planting
Decide where a hard surface is useful for seating, moving furniture or following a clear route, and where a planted bed can remain. Draw the edges precisely and include room to pull chairs out, walk around a table and clean the seating area. The entire pergola footprint does not automatically need paving. Keeping the surface and planting boundaries clear on the plan makes it easier to see whether beds are being reduced unnecessarily or whether a path is too narrow for its intended use.
Include movable items in the layout: pots, storage, chairs and tables all occupy space and may need to be shifted for watering or cleaning. Avoid lining a narrow access route with containers that make it harder to pass. Draw chairs in both their tucked-in and occupied positions, and show where storage doors or lids open. A clear route on an unfurnished plan may disappear once these everyday movements are included. Where pots define the edge of the seating area, decide which side they will be watered and tended from rather than using the planted bed as standing space. When testing the regular Bloomcabin Pergola, compare its exact dimensions with this furnished layout. Assess the usable gaps between supports, furniture and beds, rather than treating the catalogue area figure as the amount of space available for seating.

05
Coordinate rainwater, drainage and watering
For a roofed pergola design, ask how rainwater is handled on the exact configuration and where any discharge is directed. Do not assume that an image or model name confirms a gutter, outlet or collection feature. For a wall-side proposal, the Bloomcabin Wall Pergola can be included in the site plan while you verify the applicable product information and how it relates to existing drainage. Mark nearby paths, doors and planting when discussing runoff, so that water arrangements are considered alongside everyday access rather than after the surfaces have been laid.
Show how planted areas will be watered and where a hose or other equipment can be used without crossing the main route or interfering with seating. Trace the route from the water point to each bed, including beds on the far side of the pergola, rather than marking the tap alone. Consider where watering equipment will be kept between uses so that storage does not take over an access gap. Confirm the water needs of the selected plants with a local specialist, and avoid assuming that every bed will need the same routine. If the garden has a drainage issue or the planned surfaces change where water runs, ask a landscape professional to assess the site. Keep unresolved water arrangements marked on the drawing until they have been assessed.
Check the complete layout on a dimensioned plan
Before committing to the layout, bring its elements together on a dimensioned landscape drawing. Show the house and boundaries, existing vegetation, the selected pergola footprint, proposed planting at mature size, paths, seating, lighting intentions and the space needed for care. Include planting requirements and mark which details are confirmed and which still need a supplier, installer or landscape professional to verify. This makes the drawing useful for comparing options, not just illustrating a finished look. It also helps prevent a choice about one feature from quietly reducing access, planting space or daylight elsewhere.
Test the drawing against ordinary use: open the doors, move chairs, reach the beds, carry tools and consider how lighting will be used after dark. Review it once for a quiet evening with the furniture in use and again for a day spent tending the garden. The same layout needs to accommodate both without turning planted areas into shortcuts or temporary storage. Check water arrangements for a roofed design, too, and review any access limited by a wall or boundary. If several needs compete, a design consultation can help resolve them against the site measurements and planting requirements. Compare the regular Bloomcabin model with this complete layout, using its exact dimensions to identify where changes are still needed before the design is finalised.
Frequently asked questions
Where should a pergola sit in a wildlife-friendly garden?
Choose its position after mapping existing planting, entrances and the routes you need to keep clear. Then compare the footprint with available light, seating space and access for garden care. There is no single position that suits every plot.
What should I plant around a pergola?
Choose plants for the site and their mature height, spread, light and watering needs. Ask a local nursery or landscape professional for locally appropriate options. If flowering at different times is part of your plan, confirm suitable species and seasons rather than assuming one plant will meet every aim.
Will a pergola guarantee that wildlife visits the garden?
No. A pergola is a garden structure, not a guarantee of wildlife visits. Plant choice, site conditions and ongoing care all matter, so treat wildlife-friendly design as an aim to plan for, not a result promised by a particular model or layout.
How can I limit light spill around the pergola?
Plan which spots need light, direct fittings towards those areas and avoid lighting planted edges by default. Agree operating times and suitable fittings with a qualified installer. The effect of outdoor lighting varies with the site and species, so no layout guarantees a particular response.
Can I train climbing plants over any pergola?
Do not assume that a pergola is designed to carry planting. Confirm the selected structure’s documented intended uses and care requirements with the supplier, and check the climber’s mature size and maintenance needs with a local plant specialist.
Keep the plan legible: a place to sit, continuous routes, planting drawn at mature size, lighting with a defined purpose and enough room to care for each part. If a detail affecting planting, rainwater or access is unresolved, mark it as pending rather than filling the gap with a guess. Review the drawing as one garden, not as a pergola layout with planting added afterwards. That is the practical basis for bringing a pergola into a garden where wildlife aims already matter.
