








Bloomcabin Large Orangery
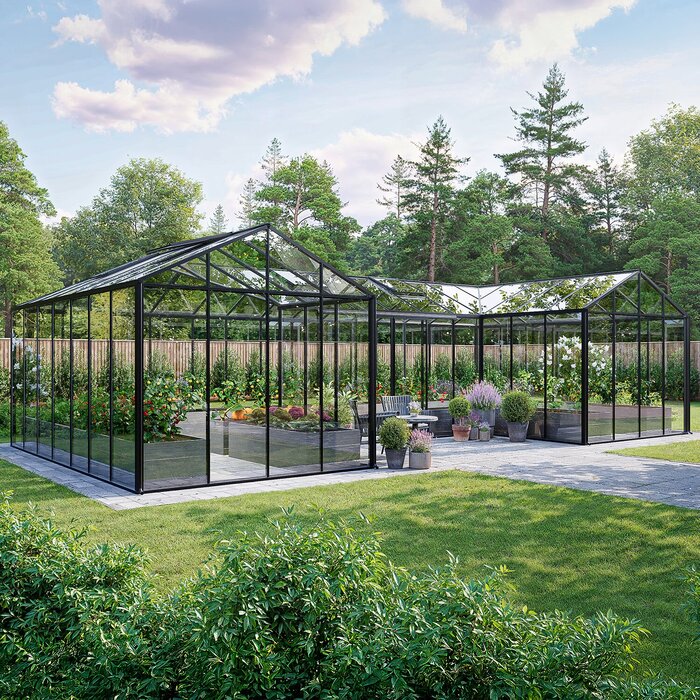
Large Orangery by Bloomcabin: approx. 47–70 m² for plants, dining and flexible garden use
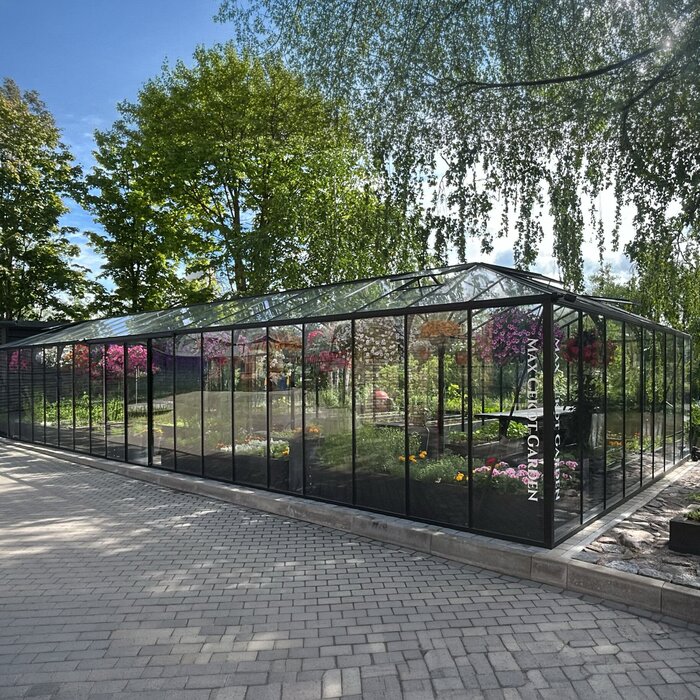
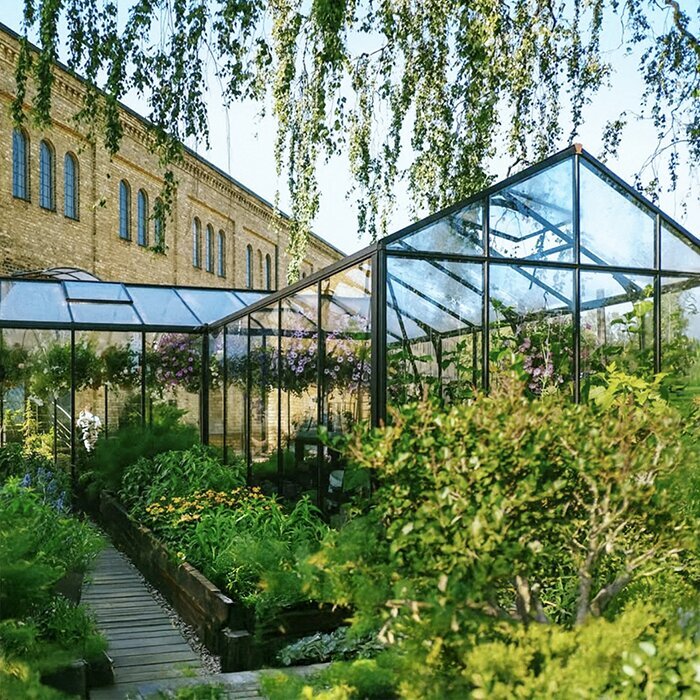
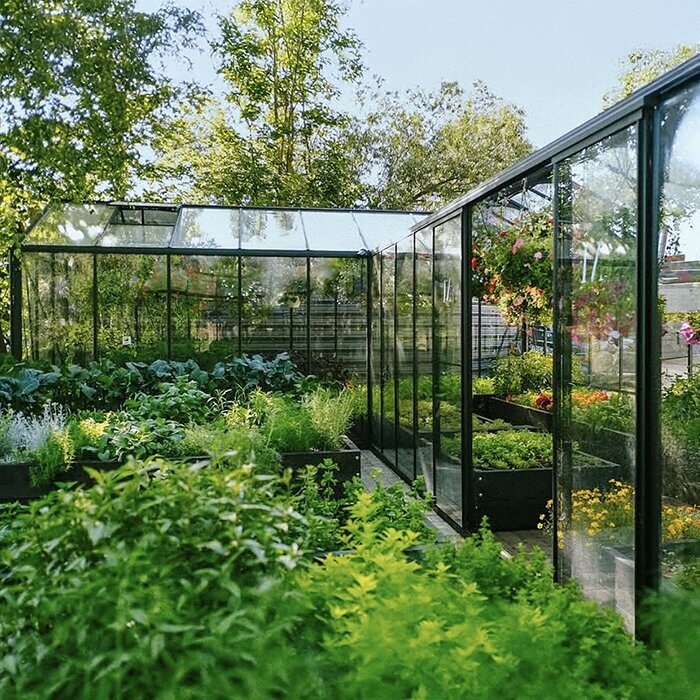
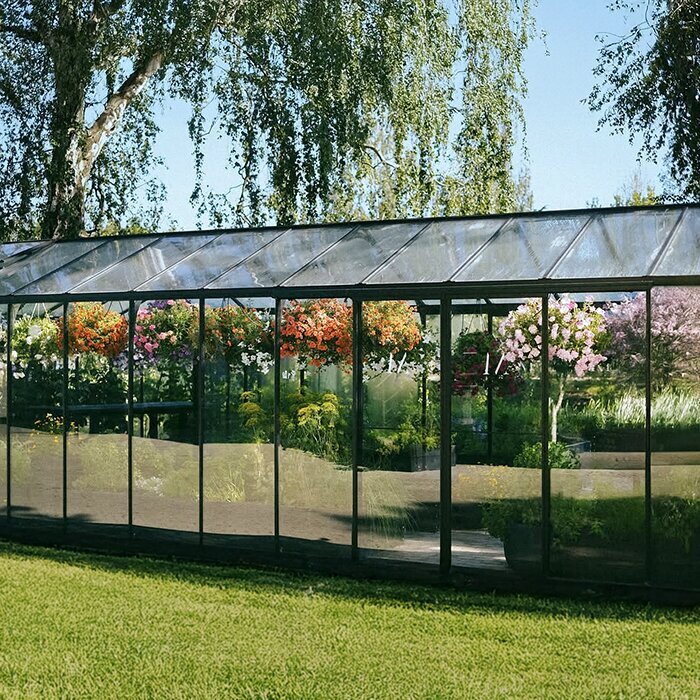
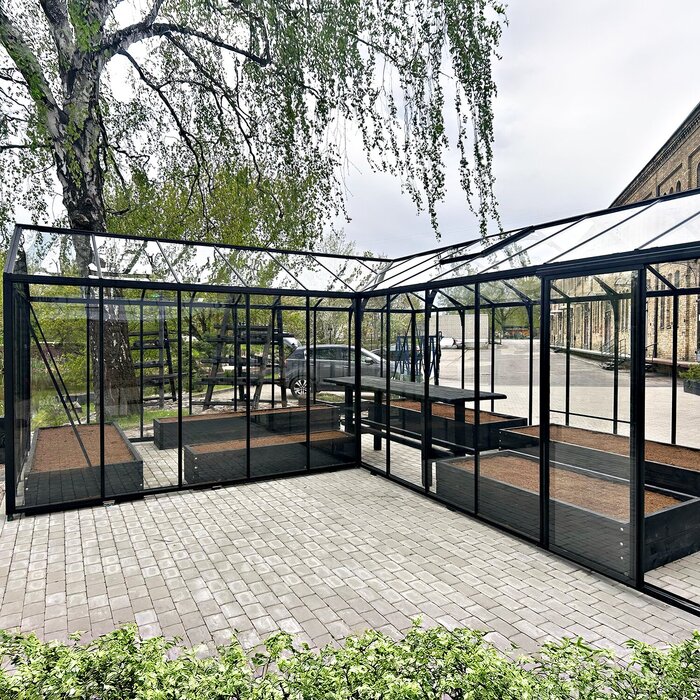
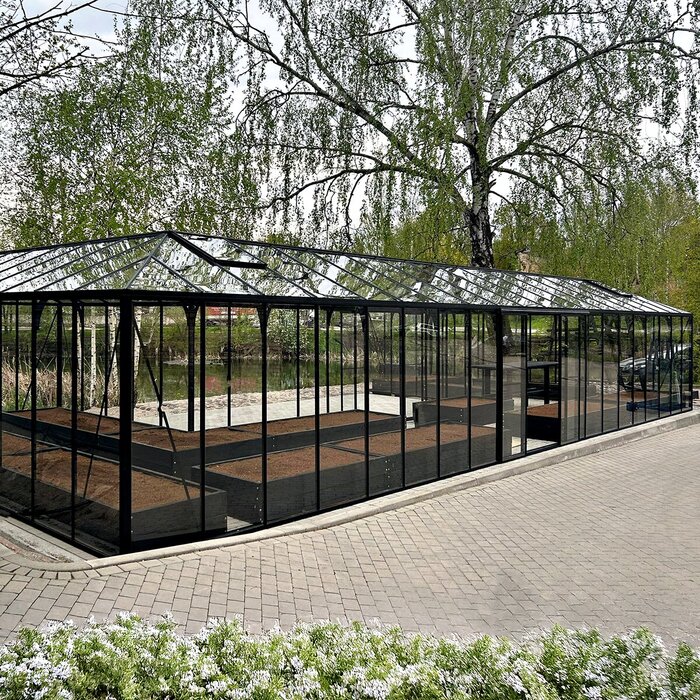
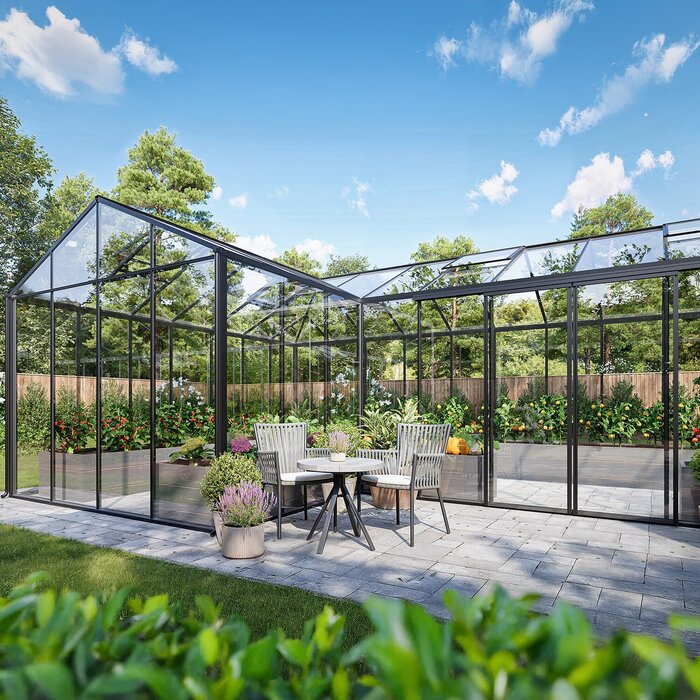
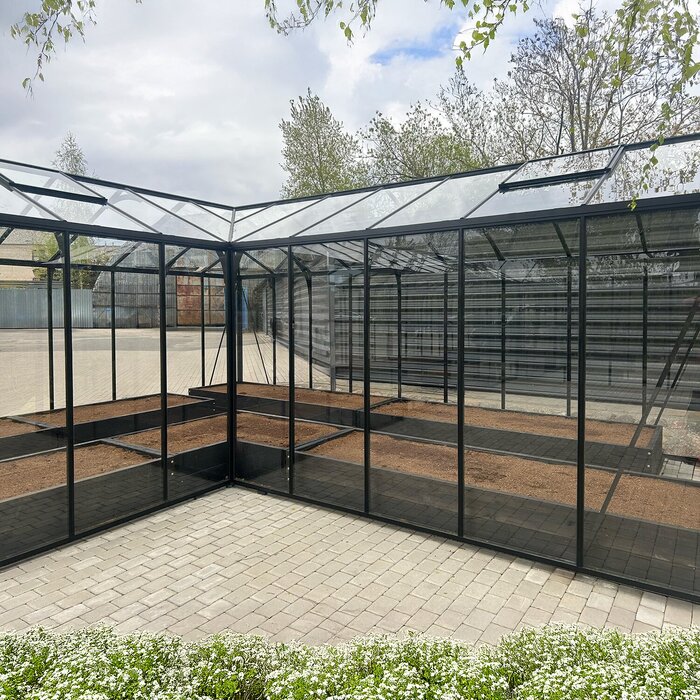
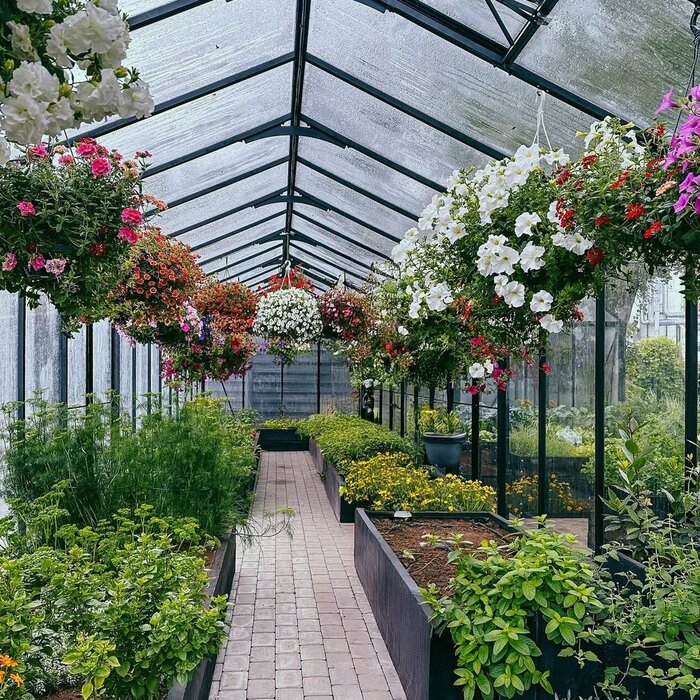
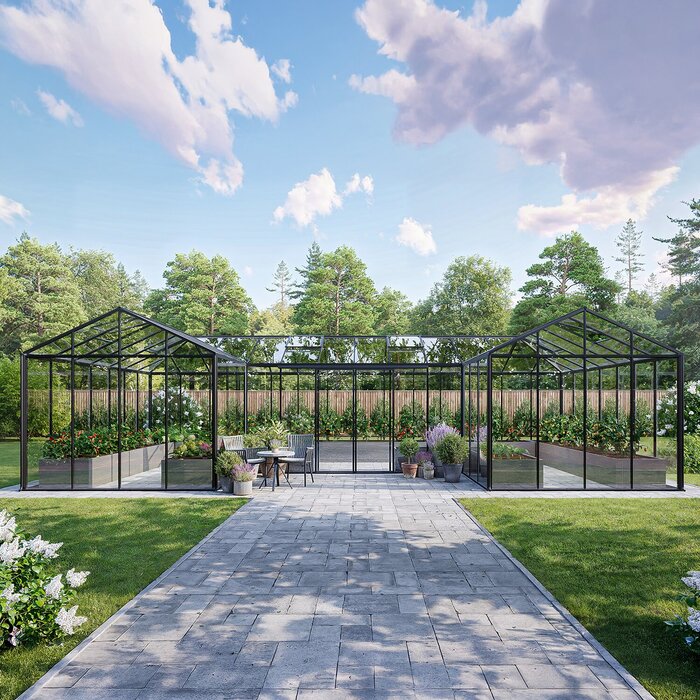
The Bloomcabin Large Orangery is designed for gardens where a greenhouse should protect plants while also serving as a genuine garden room. With around 47–70 m² there is ample space for wide paths, larger planting areas, container trees, worktables and a separate seating area.
At this scale, the interior can be planned far more freely than a traditional greenhouse with a central path. Permanent planting areas, a tidy workspace and somewhere to relax can be clearly separated. Available floor area is not the only consideration: plants need light and air, water and tools should be close to the worktable, and seating is best kept away from splashing water, soil and busy routes.
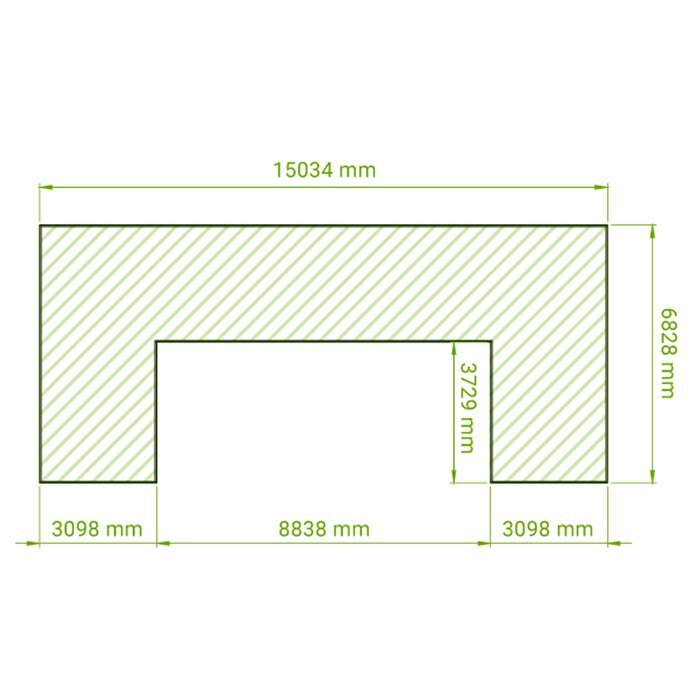
Before ordering, mark out the external footprint in the garden and check sunlight, shade and routes at different times of day. This shows early on whether there is sufficient working and cleaning space around the structure and whether access for delivery and assembly is practical. Details of dimensions and available versions are available from Bloomcabin Malta.
An exceptional size class
What changes when a greenhouse reaches around 47–70 m²?
Planting space and comfortable movement no longer need to compete. The greater challenge is to organise the open floor area deliberately, so it does not become cluttered with randomly positioned pots, equipment and furniture.
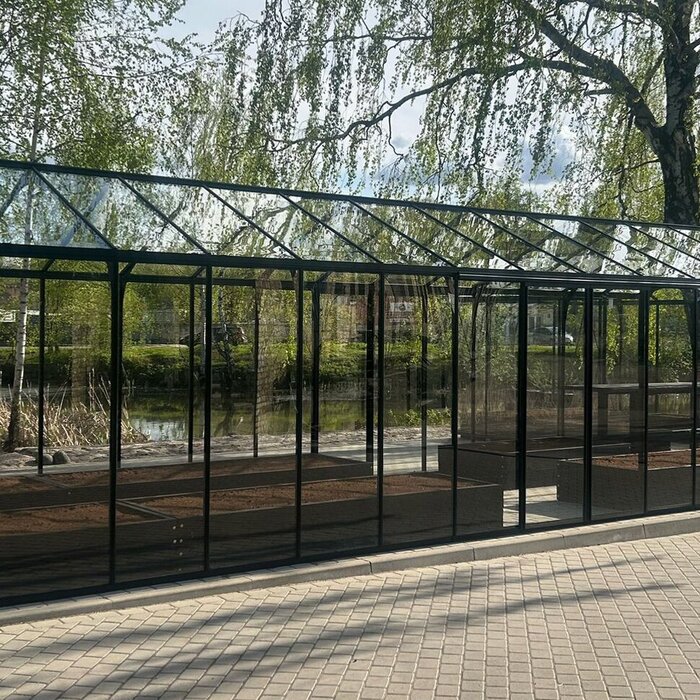
Wide paths, permanent beds and a proper seating area can all be included at once. Heavy bags, planters or a trolley need a direct route from the entrance to the work area, without tight turning points.
The remaining area can be used differently through the seasons: propagation tables in spring, warmth-loving plants later on, then extra seating or overwintering containers after harvest. Movable tables and furniture make this adaptable without repeatedly rebuilding permanent beds.
01
47–70 m²
Generous open interior
02
Plenty of growing space
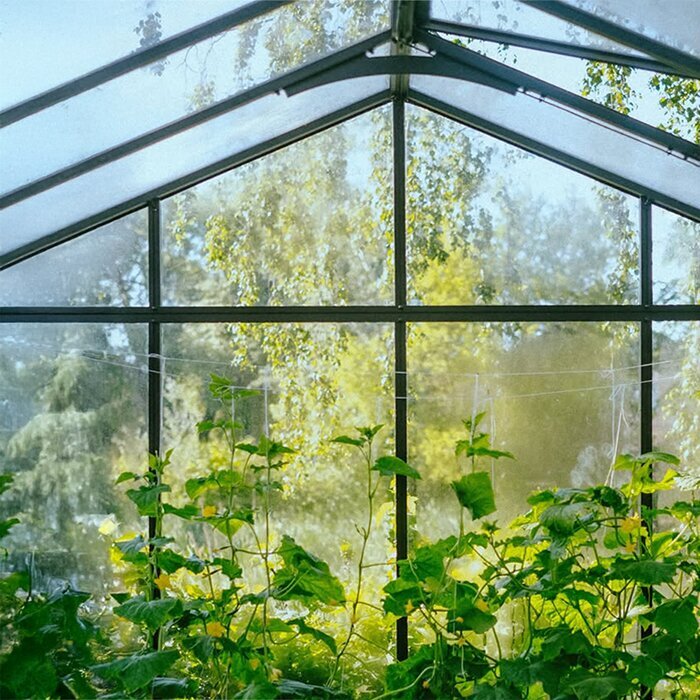
Beds, containers, propagation and climbing crops
03
Space to unwind
Dining table, lounge seating or studio beside growing areas
04
Individual features
Doors, ventilation, colour and an optional chimney opening
Two key functions
Ample room for plants and comfortable relaxation
The open floor plan supports clearly separated routines. Compost, empty pots and tools can be organised near the worktable, while crops needing regular care remain close at hand. Position the seating area so harvest baskets and watering equipment do not need to pass through it. The orangery can then stay orderly on busy gardening days and the seating space remains usable.
Versatile growing areas
For growing several crops, the area gives scope to group plants by growth habit, care needs and harvest time. Position tall climbers so they shade other plants as little as possible and do not obstruct roof vents or doors. Low beds and propagation areas are easier to inspect, water and harvest alongside regularly used working paths.
✓ long beds and crop rows
✓ tomatoes, cucumbers, peppers and climbers
✓ propagation and worktables
✓ citrus plants, container trees and larger collections
Garden living
A dedicated area can be arranged for dining, relaxing or working without losing the orangery’s greenhouse character. Choose a spot that is not crossed by irrigation hoses or routes carrying damp soil. Easy-care surfaces suited to greenhouse conditions make cleaning simpler. Furniture and textiles should withstand temperature changes, high humidity and strong sunlight, or be stored dry when required.
✓ large dining table
✓ lounge or breakfast area
✓ creative workspace or studio
✓ shared meals and small private gatherings
Materials and construction
High-strength aluminium profiles, 4 mm safety glass and an integrated base frame
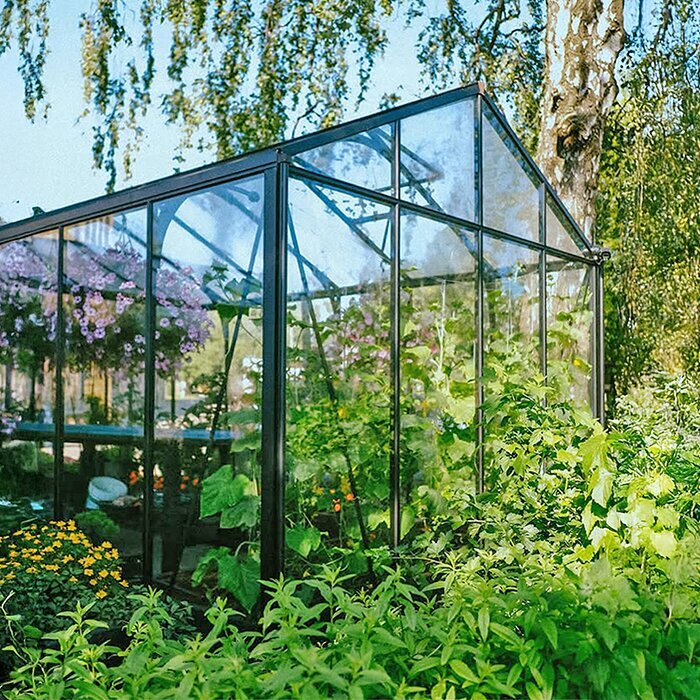
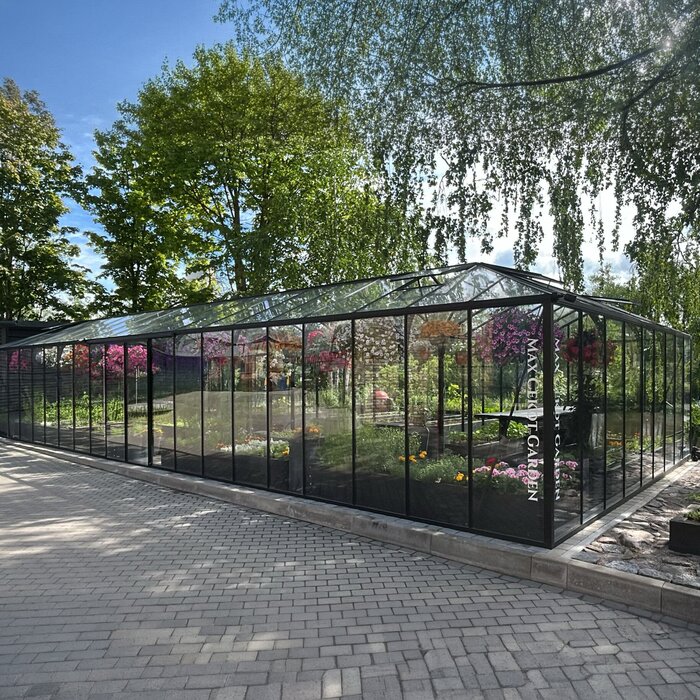
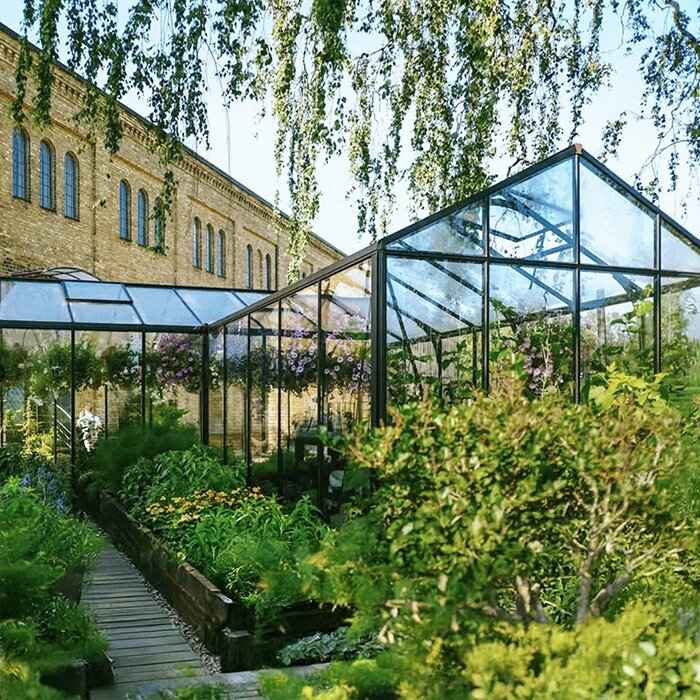
The orangery combines high-strength aluminium profiles with 4 mm toughened safety glass. Clear glazing lets planting remain visible from outside and creates an open connection with the garden. To ensure frames and panes fit together without stress, align all components exactly as described in the assembly instructions. Until installation, store glass securely, protected from impact and away from walking and working routes. Suitable protective equipment and enough helpers are required for transport and assembly.
Ridge height is around 2.67 m and door height about 1.85 m. This provides room for taller plants and climbing crops, although sufficient clearance from roof vents and glass must still be maintained. Single or double sliding doors may be available depending on wall width. The chosen option determines the main route and should suit the intended planting, work and seating layout.
The structure includes a base frame, integrated gutters and roof vents; an optional chimney opening is available. Allow for these elements during floor-plan and connection planning: vents need clear access and airflow, gutters need controlled rainwater drainage, and the base frame needs a properly prepared foundation. If heating is planned, include the optional chimney opening in separate professional planning.
Technical overview
Bloomcabin Large Orangery at a glance
Interior area
Approx. 47–70 m²
Generous interior for plants and relaxation
Height
Approx. 2.67 m ridge height; approx. 1.85 m door height
Room for tall crops; consider door height when moving in large plants and furniture
Frame
High-strength aluminium profiles
Designed for the large glazed structure
Glazing
4 mm toughened safety glass
Clear safety glazing for high light levels and unobstructed views
Doors
Single or double sliding doors
Choose a single or double option to suit the main route and large containers or furniture
Integrated equipment
Base frame, gutters, roof vents and optional chimney opening
Integrated ventilation and rainwater drainage; the optional chimney opening can form part of separately planned heating
Climate and location
Conditions are not identical throughout an orangery of this size. Sunlight, open doors, roof vents, dense planting and damp beds create warmer, cooler or more humid zones. Use these differences in the layout: place warmth-loving plants in sunnier areas, protect more sensitive crops where appropriate, and avoid positioning seating in the strongest draught. A clear thermometer and regular observation reveal how the climate actually behaves after use begins.
Summer ventilation
On long sunny days, the large glazed area heats up quickly. Effective air exchange requires warm air to rise freely towards the roof vents while cooler air enters through the doors. Arrange tall shelving and densely trained climbers so they do not obstruct this continuous air path. Avoid creating a dense canopy directly beneath the ridge.
Roof vents and sliding doors together create the natural ventilation system. Their operating paths must remain accessible even when plants have grown considerably in summer. Temperature is not the only issue when ventilating: after watering or among dense planting, air exchange helps remove excess moisture. At the same time, avoid unnecessarily cold draughts directly over young plants. Use openings according to weather, time of day and the plant collection.
Seasonal shading can limit leaf scorch and make the seating area more pleasant on very bright days. It should work where it is genuinely needed without permanently darkening the entire orangery. Mobile or temporary solutions can be adapted to sun position and individual crops. Ensure fixings do not damage glass or frames and that roof vents can still open freely.
Winter use
Anyone overwintering citrus or sensitive collector plants should first know each plant’s minimum temperature. This determines whether frost protection alone or a higher temperature level is needed. The large glazed surface can create substantial energy demand; group plants with similar warmth needs together instead of strongly heating the whole orangery without a defined need. Remove dead leaves and water standing in saucers regularly.
Any planned heating should protect the plants that need it, not only the seating area. Dense planting and tall furniture must not obstruct heat distribution or access to controls. Electrical wiring and equipment in the humid greenhouse environment should be designed and installed by suitably qualified REWS-authorised professionals with the appropriate scope.
Even with heating, the orangery remains a glazed greenhouse rather than a fully insulated living room. Temperatures can vary considerably between day and night and between ground level and the ridge. A short coffee break therefore calls for different expectations from frost-free wintering of valuable plants. Separating these aims helps plan heating periods and plant positions to suit real needs.
Flooring and wide paths
A large glazed room needs a durable, permanently level floor build-up that supports both gardening and relaxation. Before work begins, decide which areas will be open planting, hard surfaced or used with movable containers. Work zones should resist soil and watering; the seating area needs a level, load-bearing surface for table and chairs. Materials and construction must suit foundation planning and intended water drainage.
Wide main paths make it easier to move soil, pots, equipment and furniture. Fix their position before installing beds or connections. Consider not only route width, but also sliding-door opening zones, bends and manoeuvring areas. Sack trolleys and mobile plant tables need more turning room than a single person, especially when changing direction. A direct work route also keeps soil and watering away from the seating area.
The finished surface should be slip-resistant and easy to clean; water must not collect by furniture or the base frame. Create transitions between paved paths and open planting areas without trip edges. Tools, hoses and cables need fixed storage places or orderly routing. This keeps paths and sliding doors clear during intensive gardening.
Water, foundation and interior
For the Large Orangery, rainwater drainage, foundation and interior fit-out must be coordinated at the same height level. Finished floor height affects the door threshold, bed edges and falls for cleaning or watering water. Outside, position downpipes and drains so the foundation and access remain clear. Locations for water and electricity connections must be confirmed before hard surfaces are installed.
Rainwater and garden irrigation
The large roof collects substantial quantities of rainwater. A single container beside the greenhouse is therefore not enough. Plan the route from integrated gutters to storage, a controlled overflow and drainage for periods when storage is full. Water must neither undermine the foundation nor run across main paths. Removable or accessible connections make cleaning easier if leaves and deposits obstruct the inlet.
After commissioning, inspect the system during heavy rain to confirm that all joints are watertight, the overflow drains freely and no water remains around foundations or paths.
Collected rainwater can cover part of irrigation needs. The draw-off point should be easy to reach with a watering can or hose without blocking access. A suitable covered store keeps out coarse debris. Check water level, inlet and overflow regularly. Before rare cold spells, inspect and, where necessary, drain pipes, fittings and containers according to their design.
Foundation for a large footprint
Along long wall lines, small variations in height, angle or diagonal affect the whole structure. An inaccurate foundation can prevent frame parts fitting together without stress or stop sliding doors running smoothly. Complete and check the substructure before assembly begins. Correcting levels later during glazing is not a substitute for an accurate base.
Prepare the entire installation area so it is stable, level and suited to the selected dimensions. Match construction and anchoring to the structure, local ground conditions, drainage and site exposure. As these conditions vary by property, plan the foundation from the product documents and obtain professional assessment where needed. Route drainage pipes and service ducts so they do not weaken load-bearing or intended anchoring areas.
A continuous reference line and checks of side lengths, angles and diagonals help identify dimensional errors early. Measure not only after setting out, but again after the foundation is complete and before frame assembly starts. Check height at several points as well. Only when plan and level are correct should the kit be laid out on the assembly area in the intended sequence.
Plan furniture to scale
A large table needs enough room beyond its footprint for chairs to be pulled back and every place reached. A drawing should therefore show not only the tabletop but the real use area, including seated sides. If dining is close to plants, allow an additional care gap. Leaves can then be checked, containers turned and fallen soil removed without rearranging the whole area.
Lounge furniture should not block main paths, doors, roof vents or workspaces. Low furniture may look open but often needs more floor area than expected. Modular or easily moved pieces are useful when propagation space is needed in spring or room for containers in autumn. Cushions and textiles must suit changing conditions or be capable of dry storage outside the orangery.
Mark every area that must remain clear even when furniture changes on the scale drawing, including sliding-door zones and space in front of technical controls. These no-go areas prevent a layout that works on paper from later blocking important functions.
Delivery, plants and use
For a greenhouse of this size, prepare delivery and assembly separately. Components, glass and packaging need orderly protected storage while sufficient working space remains clear around the foundation. Decide the eventual positions of large plants before furnishing: a heavy container is much easier to bring in along an open, firm path than through an already arranged interior.
Delivery and preparing the assembly area
A large kit needs enough space for components to be unloaded safely, checked and sorted by assembly stage. Store glass elements securely and protect them from tipping, impacts and hard edges. Remove packaging only when the relevant parts are needed and can be identified clearly. Children, pets and uninvolved people must not enter the work area during unloading and assembly.
Check access roads, gates, bends, steps and the route from unloading point to foundation before delivery. Clear width is not the only factor; low branches, tight turns and delicate garden surfaces can also complicate transport. If direct access is unavailable, establish how long or heavy components can be carried safely onwards. Dry interim storage protects sorted parts until each assembly stage begins.
A tidy, clearly defined assembly area supports efficient work and reduces the chance of mix-ups or damage. Tools, fixings and profiles should not lie on walking routes. Assemble according to the supplied instructions and in the correct sequence; unauthorised alterations to profiles, glazing channels or anchoring may impair function. Use stable suitable equipment and safe weather conditions for work at height.
Citrus plants, container trees and plant collections
The room height and open area accommodate larger specimen plants and extensive container collections. Do not plan only for current plant height: crowns continue growing towards the glass and may later obstruct roof vents, neighbouring plants or care routes. Sufficient clearance makes pruning, pest inspection and cleaning panes easier. Statement plants can structure the room, but should not create a permanent bottleneck.
Heavy containers need a load-bearing level position and should be reachable via the direct main path. Once planted and watered, they are much harder to move. Saucers must be easy to inspect and empty so water does not remain standing and place strain on the surface. Leave enough space between large pots to care for and inspect plants from every side.
Smaller plants on suitable mobile stands can be moved between sunnier and more sheltered areas as seasons change. Castors must suit the floor and load and lock securely. Movable groups also simplify deep cleaning and create temporary free space. Group plants with similar watering needs to reduce water reaching paths and furniture during irrigation.
Relaxation and long-term planning
Comfortable long-term use also depends on sufficient organised storage. Frequently used pots, compost and tools should be kept near the work area without taking over floor space and paths. A fixed storage place outside the main-use area is useful for seasonal furniture or propagation equipment. The interior can then be rearranged without temporarily placing items in front of doors or glass.
Meals and small gatherings
For meals and small gatherings, provide an accessible surface for crockery and drinks so the worktable does not also become a serving station. Seating can face the planting, but should be kept away from watering points, open compost and areas with regular condensation. Lighting and electrical connections must be installed professionally in the damp environment.
Move sensitive plants, low propagation trays and watering equipment out of the immediate circulation area before a gathering. Additional chairs and decorations belong only on stable surfaces; do not lean or attach items to glass, frames or vents.
Remove spilled liquids and food remains promptly after use so work surfaces stay clean and paths do not become slippery.
Long-term interior planning
Permanent beds, water connections and large trees shape the layout for many years, so plan them first. Include future maintenance routes: glass, frame joints, gutters and vents must remain accessible. A bed running directly up to difficult-to-reach components can make care unnecessarily hard. Some reserve space at strategic points is more practical than maximum uninterrupted planting.
Mobile growing tables and furniture complement permanent elements. Worktables should be easy to reach and provide enough potting space so soil and plant debris do not travel through the seating area. Do not attach shelving to the structure without authorisation; freestanding solutions must be stable and must not project into glass. Before moving mobile elements, check that plants, containers and tools are secure.
Once a layout has proved successful in daily use, document positions and clear circulation areas on the plan. This makes seasonal changes easier because tables, shelves and seating can return to locations that work.
For different garden locations
Consider summer heat, winter temperatures, wind and water during planning
Consider not only direct sunlight but also reflections from pale façades and hard surfaces. These can add heat to individual areas. Conversely, buildings, walls and trees cast shadows of varying length according to time of day and season. Observation before fixing the final position helps plan realistically for strongly changing light zones.
In winter, the lower sun changes light distribution significantly. Evergreen plants and buildings can shade areas that appear bright in summer. Check winter access to the entrance and external maintenance areas before deciding on the location.
The structure is designed for wind speeds up to 30 m/s and a snow load of 210 kg/m². These manufacturer ratings are not Maltese planning approval. Ask a perit to confirm the applicable Planning Authority classification and arrange a site-specific structural assessment covering ground conditions, exposure, rainfall and foundation design. Avoid extra loading of the glass roof from nearby roofs, walls or trees.
Integrated project planning
1
Define the use
First decide which plants need the greatest permanent area and when the seating area will be used. This creates a clear use profile against which later decisions can be assessed.
2
Draw the routes
Draw connections between doors, beds, worktables and seating. Check whether transport, plant care and relaxation can happen at the same time without routes blocking one another.
3
Coordinate services
Coordinate water draw-off, rainwater overflow, electricity, lighting, drainage and possible heating before foundation and floor work. Installations in the greenhouse environment require professional execution.
4
Keep flexibility
Reserve accessible maintenance areas and avoid fixed furniture or permanently installed shelving there. Seasonal equipment should have a defined position or storage place so planting zones remain intact after every rearrangement.
Frequently asked questions
Common questions about the Bloomcabin Large Orangery
How do I find the right size for my plot?
Transfer the selected version with its actual external dimensions to a scale site plan. Include door positions, main paths, fixed installations and the external area needed for assembly and cleaning. Interior area alone is not enough for selection.
Can the seating area be used all year like a living room?
No. The orangery remains a glazed greenhouse with temperature fluctuations and elevated humidity. A dining or seating area is possible, but furniture and textiles must be suitable or stored dry when necessary.
How do I care for the aluminium frame?
Clean profiles, connections and door tracks regularly using water, a soft cloth and a mild non-abrasive cleaner. Remove deposits from tracks without scratching surfaces. Do not drill into the frame without authorisation, as this may affect finishes and structural components.
How do I clean the safety glazing?
Clean panes with water, a soft cloth or sponge and a non-abrasive cleaner suitable for glass. At the same time, inspect transitions to frames and sealing areas, removing dirt that has accumulated there.
How can I stop plants obstructing ventilation?
Allow sufficient clearance between mature plants, supports and openings. Roof vents and sliding doors must remain fully operable; check routes again when climbing plants have grown larger in summer.
What must be clarified before installing heating?
Plan the heater location, flue route, required clearances and professional installation in advance. The optional chimney opening is only a preparation and does not replace project-specific fire, flue, planning and professional installation advice.
How long does the guarantee apply?
This greenhouse has a 12-year manufacturer guarantee. The applicable guarantee terms and requirements for assembly, use and care remain decisive.
How should I plan access for large containers and furniture?
The door option and main path should suit the largest item moved regularly. Measure containers or furniture, including the manoeuvring space needed, and keep the route from entrance to intended position clear.
Bloomcabin Large Orangery
Plan a large garden greenhouse that continues to suit plants, plot and intended use
Before ordering, bring all decisions together in one shared project document. This should include the selected version, a dimensioned site plan, responsibilities for foundation and connections, plus a delivery and assembly sequence. A documented approval prevents plans from different stages being confused. Use the following list as a final ordering check.
Project documents for ordering
✓ Match product name, version, external dimensions and frame colour with quotation and site plan
✓ Mark sliding-door positions and areas that must remain permanently clear on the plan
✓ Record contacts and responsibilities for unloading, interim storage, foundation checks and assembly
✓ Document foundation-check results for side lengths, angles, diagonals and heights
✓ Confirm water, electricity, drainage and possible heating plans in the same plan version
✓ Keep assembly documents, delivery address, access details and planned storage area ready before scheduling
