
Planning Lighting Around an Outdoor Sauna for Evening Use
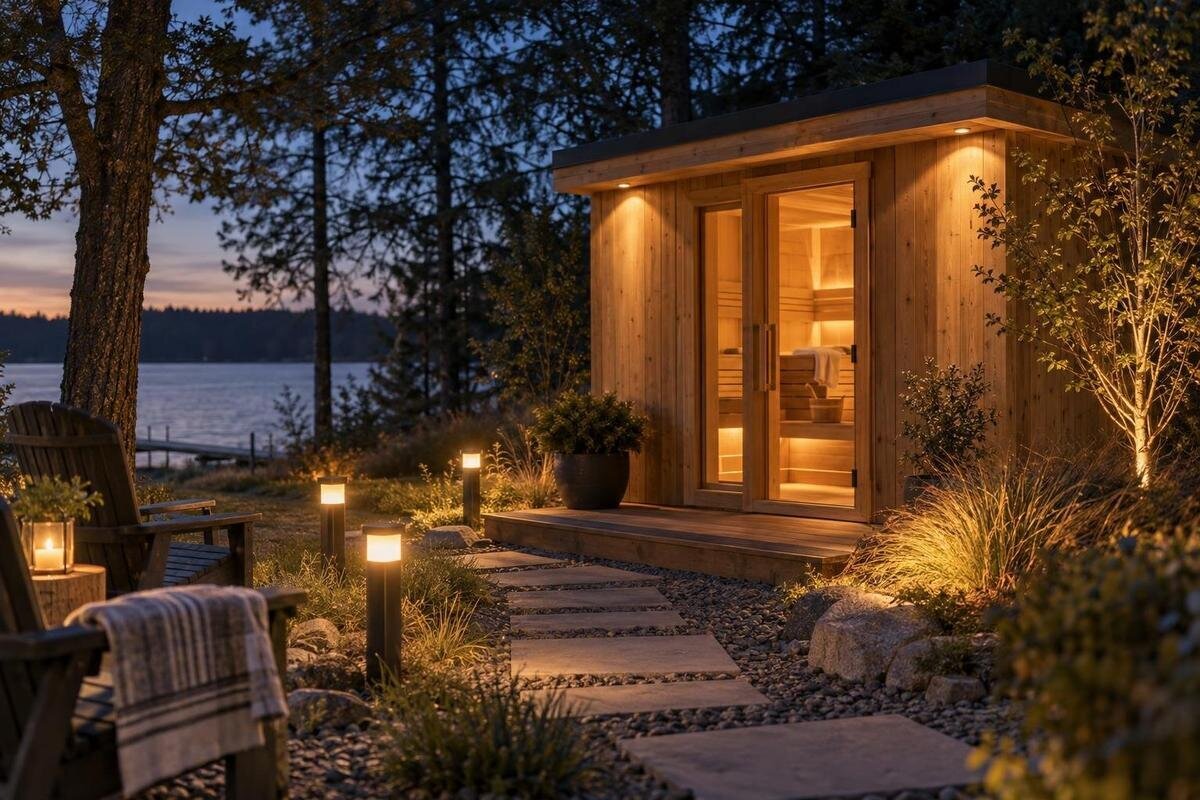
Outdoor sauna lighting
Outdoor sauna lighting works best when it makes the whole evening route legible, rather than treating the sauna as the only thing to illuminate. Plan separately for the walk from the house, the entrance and the place to sit afterwards. Those areas have different tasks: show changes in the ground, make the threshold easy to find and let people settle without a bright fitting in their eyes. A site plan, the sauna manufacturer’s current instructions and advice from a qualified lighting professional or electrician provide a basis for choosing and positioning suitable fittings.
Lighting plan checks 1
Divide the area into a route, an entrance and a place to rest
An evening lighting plan works better when it treats the route, the sauna entrance and the resting spot as connected but distinct areas. On the walk from the house, people need to read where the path goes and notice changes in the surface. At the entrance, they need to find the threshold and operate the door without being dazzled. At the rest area, they need enough light to move and settle without a bright source dominating the view. Lighting every zone in the same way can leave the route unclear or make the seating area feel exposed. Consider the change from a bright house to a darker garden, and the different view on the return journey.
Sketch the journey in both directions, from the house to the sauna and back again. Mark the point where people pause before entering, the route out to the rest area and any path home that remains in use afterwards. Show where these routes meet or branch, so the plan covers the whole journey rather than just the main approach. The aim is not to flood the whole garden; it is to make important transitions clear. Record existing porch and deck lights, along with when other garden lights or sensors operate, as overlapping beams and shadows can change what the path looks like.
Map every change along the approach path
Walk the intended route in daylight and trace it on a simple site plan. Note bends, narrow passages, steps, changes from paving to grass or gravel, drains, edging, gates and low branches. These details show where someone may lose the line of travel, rather than merely where a fitting could look attractive. Include the route from the parking area or side gate if that is how people arrive. A line of evenly spaced lights is not automatically the clearest arrangement: a bend, a step or a surface change may need more considered visibility than a straight, unobstructed stretch. Damp surfaces or fallen leaves may also change how the route reads.
Use the exact sauna position to plan the final approach. If you are considering the Sauna HCF-300 listing, its listed area is 6.89 m²; an area figure does not give the unit’s external dimensions, entry position or the space needed around it. Obtain the manufacturer’s current drawing and place the sauna accurately on the site plan before settling the last path light. Mark likely obstructions such as screening, stored items and planting, too. Keep fittings out of the walking line and note any beam that could shine into a person’s eyes as they approach.
Lighting plan checks 2
Light the entrance and threshold clearly
The entrance should be easy to locate from the path, but a strong light aimed straight at the door can make details harder to see. Plan for the approach, the point where a person stops and the threshold itself. If there is a step or change in level, make that transition visible from the direction people will actually arrive, rather than relying on light spilling from inside the sauna. Account for the handle and the space needed to open the door, using the manufacturer’s layout instead of assuming every model has the same entry arrangement. Check the view when someone is leaving as well as arriving.
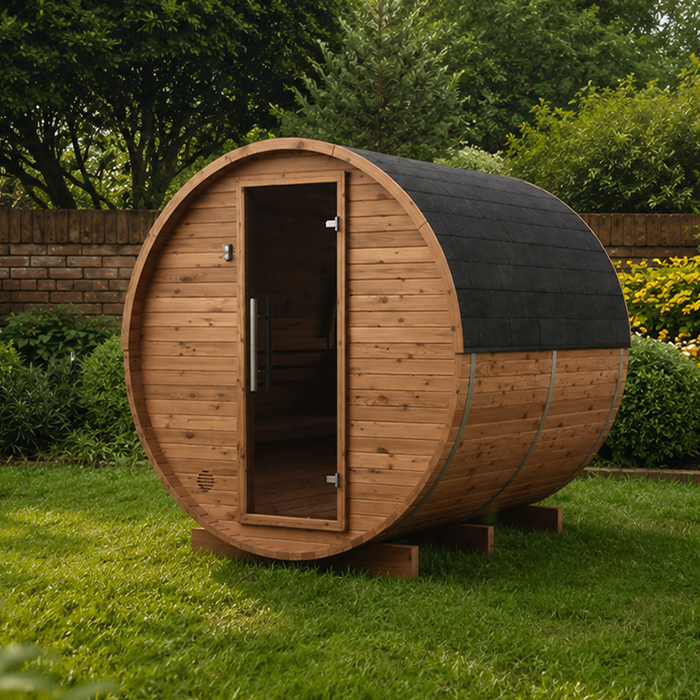
Confirm the exact door location and any opening clearance against the current manufacturer’s drawing before settling a light position. If the Thermowood Barrel Sauna LCF-300 is on your shortlist, use its own installation information rather than borrowing measurements from another sauna or judging the product photograph. A fitting should not obstruct the door or be used outside its specified conditions; a qualified electrician can advise on a suitable position and type once the layout is known. Consider what the entrance looks like with the door both open and shut.
Check glare from standing and seated viewpoints
Glare depends on where people look, not just on how a fitting appears from the deck. Check the view while walking towards the sauna, standing at the door and sitting in the rest area. An exposed bright source can be uncomfortable in direct view; glass, wet paving, a light-coloured wall or a water feature can also reflect light back towards the eye. If the chosen sauna design includes glazing, include views through it in the review, especially if a light could make the garden beyond harder to see.
Ask the lighting professional to assess shielding and aiming from those real viewpoints, not just from a plan drawing. When comparing options such as the Sauna S-140, use the current manufacturer’s drawing to mark the confirmed door and window positions on your lighting plan. This gives the sight-line review a clear reference rather than relying on a product photograph. Check the view from inside the house as well, particularly if a bright fitting would be visible from a bedroom or living room. Direct useful light onto the route or task while keeping the source itself out of direct view where practical.
Lighting plan checks 3
Give the rest area a different lighting level
A resting area has a different job from a path. People may want to see where a seat, towel or drink is, but a bright beam across the seating can undermine a calm evening setting. Plan a comfortable pool of light where people will sit and enough visibility around it to stand up and leave. The right balance depends on surface finishes, other garden lights and whether the space is open or sheltered, so describe the intended activities before choosing fittings. Avoid lighting only the seats while leaving the route back to the sauna or house hard to read.
Mark likely seat positions and consider the view from both sitting and standing height; a light behind a seated person may cause glare or leave part of the area in shadow, depending on its direction. If furniture or a table will move, allow for more than one position. The Sauna HC-150 listing gives an area of 2.97 m², but that figure alone does not describe the separate outdoor space needed for a seat or the path to it. Draw the rest area as its own part of the site plan.
Specify fittings for the actual outdoor exposure
Outdoor fittings need to suit the conditions at their actual location. A lamp under shelter may face a different mix of rain, wind and moisture from one in an open garden. Nearby irrigation, coastal air, direct sun or a splash-prone surface may matter at a particular property. These are reasons to describe the site accurately, not to choose a fitting by appearance or by a broad label alone. Note what shelters each proposed position and ask a qualified lighting professional or electrician to match the fitting’s published environmental suitability to the exposure and the manufacturer’s restrictions.
Include the sauna’s surroundings in that conversation. Heat, moisture and the manufacturer’s specified clearances can affect where exterior lighting is appropriate, but the relevant limits depend on the actual sauna and fitting. Do not assume an ordinary garden light is suitable simply because it is outside, or select a product from a photograph. If the Sauna HC-225 is your candidate, provide its exact model name and current manufacturer instructions so the professional can assess the installation context. Plan access for future cleaning or replacement, too, without hiding a fitting behind plants, fencing or furniture.
Lighting plan checks 4
Coordinate lighting with the sauna’s instructions
Treat lighting inside the sauna, if included, as a separate question from the path and outdoor rest area. Only the exact product’s written inclusions and current manufacturer information can establish what is supplied and how it may be used; an exterior lighting plan cannot confirm either. Check the configuration in writing before budgeting around any built-in light, control or accessory. Do not assume a light inside the sauna will illuminate the entrance or make the route home visible. Show all intended light sources on the plan so their roles are clear.
Before specifying a nearby fitting or control, have the installer review the sauna manufacturer’s current requirements alongside the electrical design. Ask who is supplying each component, which lights are separate from the sauna and how the proposed controls will interact; compatibility should be confirmed, not guessed. If you are considering the Sauna N-210 product page, identify that model clearly in the lighting brief and keep its corresponding manufacturer documentation with the plan. Record any unconfirmed inclusions or control arrangements as questions for the supplier or installer. Leave circuit selection, protection and installation details to a qualified professional.
Choose controls that work on the return trip
Think about controls from the person arriving home after dark, not only from someone already sitting outside. Being able to switch on path lighting before leaving the house may help with the outward walk; entrance and rest-area lighting may need a different setting. Depending on the layout, grouped or separately controlled zones can be useful, but switches, sensors, timers and dimmers are not automatically compatible with every fitting. Ask the electrician to specify an arrangement that suits the equipment and the way people will use the area.
Place controls where they are practical to reach at the start and end of a visit, without requiring someone to cross an unlit part of the garden to operate them. If a sensor is being considered, discuss its coverage and whether movement on the path or in the rest area will trigger it as intended. For the final plan, mark the position of the Sauna N-250 and the intended route, then agree which outdoor zones operate together. Do not assume sauna controls also operate exterior lights unless the manufacturer and installer confirm that arrangement.
Lighting plan checks 5
Review the layout after dark
Review the plan in full darkness as well as at dusk. Walk the whole route in both directions and pause at the entrance, then sit in the intended rest position. Notice whether steps and edges are easy to read, whether anyone has to look directly at a lamp, whether the sauna or planting blocks a light, and whether the route home still makes sense. A torch or other safe portable light can help you inspect a proposed route, but it cannot prove how a final fitting will perform.
Ask the lighting professional to check and aim the installed fittings from those viewpoints, including the view from the house and the usual approach. For a layout featuring the Sauna LC-260, carry out the review at its proposed site position rather than judging the lighting against a generic outline or catalogue image. Note any dark patches or glare that need attention. Revisit the design if a screen, fence or future planting changes the light path. The aim is to keep the route, entrance and resting place clear without troublesome glare, rather than making every corner bright.
The information a lighting professional needs
Provide the electrician or lighting designer with a marked site plan showing the house, route, surface changes, sauna position, entrance, rest area, existing lights and any trees, screens or reflective surfaces. Include the exact sauna model and its current manufacturer drawings or instructions, plus notes about the outdoor exposure at each proposed fitting. Indicate where people arrive, where they pause and where they sit. Annotated photographs taken from walking and seated viewpoints can clarify sight lines that a flat plan cannot show.
Use the brief to ask for a considered arrangement of fittings, aiming, environmental suitability and controls, with any sauna-related restrictions checked against manufacturer information. Confirm which items are included in the sauna and which are separate purchases or professional work, so the lighting plan does not rely on an unconfirmed extra. Keep maintenance access and everyday use in view. A good result need not illuminate every part of the garden: it should make the evening journey and the places to pause work together, with technical choices made for the exact site.
Frequently asked questions
How bright should the path to an outdoor sauna be?
There is no single useful level for every site. The route should make its direction and changes in level clear without creating glare, and it needs to be considered alongside existing porch or garden lighting. A lighting professional can assess the surface, layout and ambient light when specifying what is suitable for your property.
Should the sauna entrance have its own light?
Treat the entrance as a distinct lighting task, but that does not necessarily mean it needs a separate fitting or switch. The approach and threshold should be easy to see from the direction people arrive. Decide on a position and fitting after checking the exact sauna layout and the conditions at the entrance.
Can solar lights be used on the path?
They may suit some layouts, but check that they provide dependable light when you use the sauna in the evening. Shade, seasonal daylight, weather and control behaviour can all matter. Do not assume a decorative marker light makes steps or changes in the path clear; assess the whole route before relying on it.
Does an outdoor sauna include the outside lights?
Check the current written inclusions for the exact model and configuration. A product photo, or the presence of an interior light, does not confirm that path or rest-area fittings are supplied. Until you have confirmation, plan exterior lighting as a separate part of the garden layout.
What should I give the electrician?
Provide a site plan, the exact sauna model and its current manufacturer information, plus notes on the route, surface changes, entrance, rest area, existing lights and outdoor exposure. Mark where people arrive and sit. Ask which fittings and controls are included, which are separate, and what needs professional specification.
Think of the finished scheme as a short sequence of visual cues: a route you can follow, an entrance you can find and a place to rest that is not dominated by a lamp. A plan based on actual site conditions, the selected sauna’s current documentation and real viewing positions gives the electrician a sound basis for specifying the lighting. Confirm supplied lights separately, then review the installed result after dark from the approach, threshold, seat and return route. That is how the garden can remain legible without turning the whole evening area into a brightly lit display.
