
Wall-Mounted or Floor-Standing Sauna Heaters: Layout Planning
Sauna layout guide
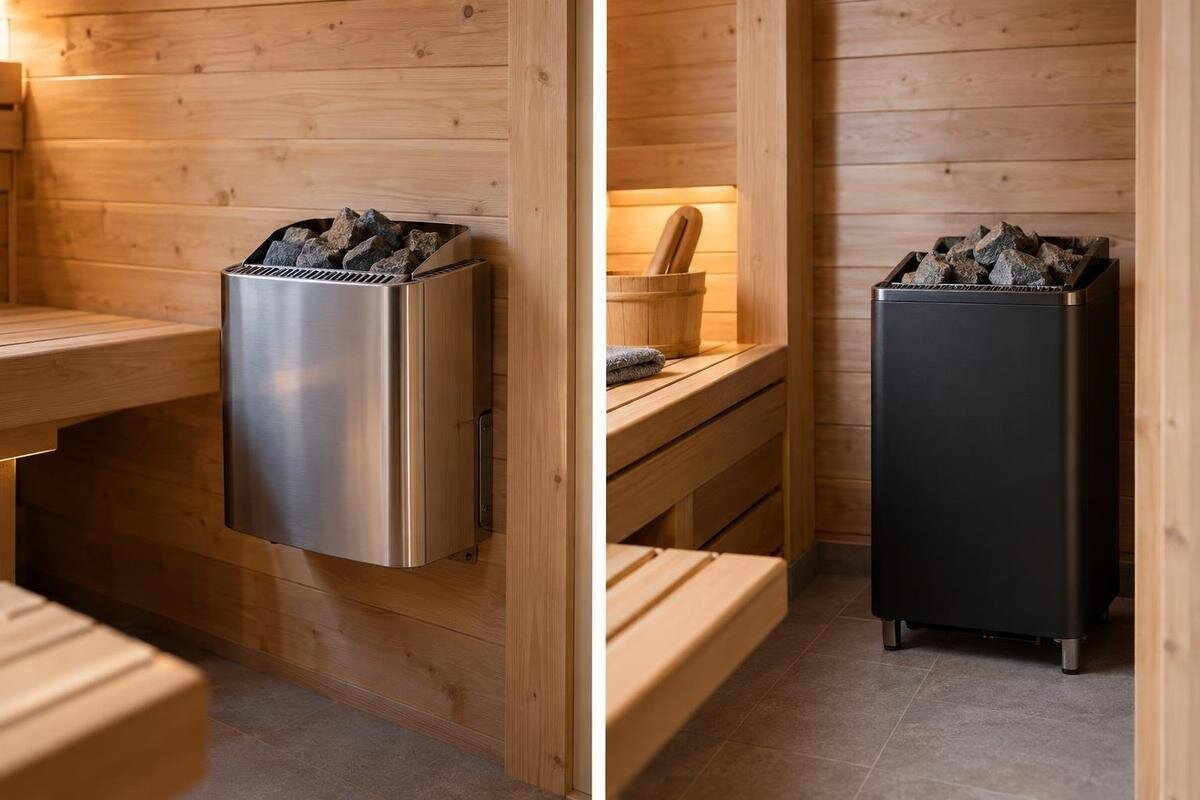
Choosing between a wall-mounted and a floor-standing sauna heater affects more than whether the appliance has a base on the floor. It changes where support is needed, how much floor remains available, and how the heater sits alongside benches, the entrance and the route through the room. Wall mounting may keep the heater's base footprint off the floor, but its required clearances can still reserve nearby space. A floor-standing unit takes a defined area at floor level as well as any clearances. The useful comparison is between approved layouts for the exact heater and cabin, not between mounting labels alone. This is a planning guide, not an installation procedure.
What the mounting format changes
The basic distinction is where the heater is supported. A wall-mounted unit attaches to a wall in the position and manner specified for that model; a floor-standing unit rests on the floor in its approved position. This changes the supporting surface and the location of the appliance body, but it does not tell you whether the heater suits the cabin, how large its body is or whether installation will be simpler. Dimensions and clearances differ between models. First confirm the permitted mounting format for each heater you are comparing; do not assume a unit can be converted or positioned anywhere simply because it appears to fit.
On the plan, draw three things separately: the heater body, the full clearance area required by its manufacturer, and the space left for benches and movement. Wall mounting may keep the heater's base footprint off the floor, but its clearance zone can still make nearby floor unavailable for a bench or other fitting. A floor-standing unit has an obvious base footprint, yet its planning area also includes any required clearances and specified accessories. Neither format is automatically the smaller choice. Compare the exact drawings at scale, and count as usable only the space left after every required zone has been marked.
Internal dimensions and catalogue area
A dimensioned interior plan is more useful than an outside footprint or a single catalogue area. Mark the inside walls, doorway and direction the door opens, bench edges, and fixed features that affect where a heater or passage can go. Use measurements for the precise cabin configuration under consideration, not a sketch of a generic sauna. When a listing gives an area, note whether it is defined as internal, external or another measure; if that is unclear, ask before relying on it in a layout. A single area number cannot show every usable dimension or the space left between a bench and a wall.
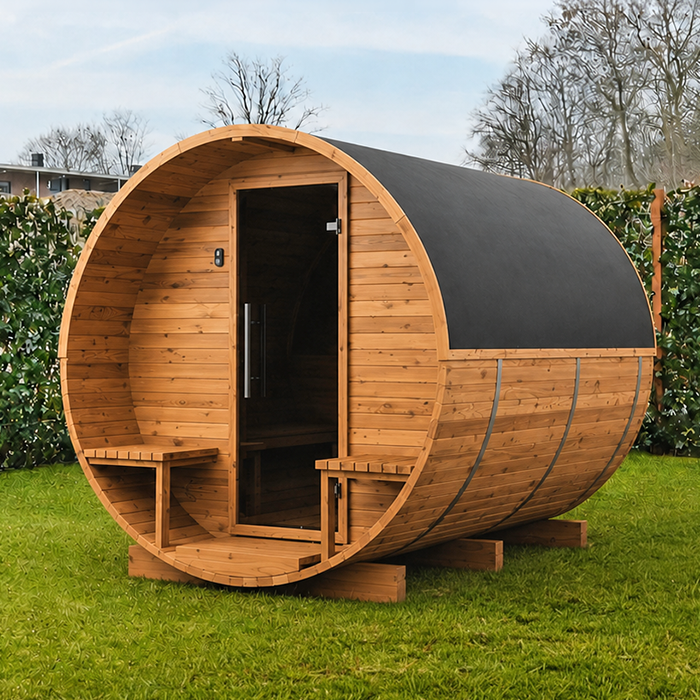
The listing for Thermowood Barrel Sauna LC-260 records 5.12 m². Treat that as catalogue information, not a scaled room plan or evidence that either heater format will fit. The figure alone does not show the clear width beside a bench, where an approved mounting point lies, or how the entrance route runs. Overlay each candidate only when the cabin dimensions and exact heater drawing are available. Two plans with a similar headline area can leave different routes once benches and clearances are marked, so compare the actual shape and interior measurements rather than treating square metres as a fit test.
Benches, entry and movement
Place the heater in relation to the benches, not as a last object on an otherwise finished plan. Mark the intended seat positions and bench edges, then draw the doorway, its opening movement and the route between the entrance and seating. Check whether the heater, any specified guard and the clearances interrupt that route or leave a bench too close to a restricted zone. This matters for both mounting formats: the wall-mounted body may be off the floor, but its required space still counts; the floor-standing unit occupies floor and can affect how people approach a bench.
When reviewing the Sauna HCF-300, listed at 6.89 m², use its interior plan to compare the seating arrangement with each proposed heater position. The listed area does not establish the width available beside a bench or at the entrance. Mark where each bench begins and ends, then check the route from the doorway to those seats using the exact heater clearances. If one format requires a bench to move, show that change explicitly rather than comparing it with an unchanged seating plan. Redraw the door swing too. This reveals whether the apparent space saving preserves the intended seating and access, or simply transfers the space problem to another part of the room.
Structural support for a wall-mounted heater
A wall-mounted heater shifts the support question from the floor to a particular wall. The fixing location and support arrangement have to suit the exact unit, not just look sturdy once the sauna lining is in place. Do not assume that a decorative surface or interior lining is itself a suitable fixing structure. The cabin's construction and the heater's mounting instructions both matter. Have the manufacturer or a qualified professional confirm the support arrangement where it is uncertain, before fixing benches or finalising the heater position. Otherwise, a location that appears to save floor space may not be available.
Use the exact drawing to check the permitted mounting position, orientation and distances from surrounding surfaces and benches. Include any bracket, guard or other item specified for that model, as it can change the space you need to leave clear. Avoid transferring a height or fixing detail from a similar heater. For the Thermowood Barrel Sauna LCF-300, listed at 6.89 m², identify the proposed fixing location on the cabin plan and keep the support question separate from the area figure. Ask whether that particular wall location is suitable for the selected heater and specified mounting arrangement. If its suitability remains uncertain, do not count it as an available mounting position when comparing layouts.
The floor area needed by a floor-standing heater
A floor-standing heater needs a reserved position for its base, plus the clearances in its own instructions. Mark the full body footprint and required space around it, not only the points that touch the floor. Then check the outline against the intended bench positions, entrance route and door movement. A visually narrow appliance can still claim an important strip of floor once its specified clearance is included. The mounting label alone does not show how much room it occupies: the exact dimensions, allowed position and clearance rules determine whether a floor-standing layout works.
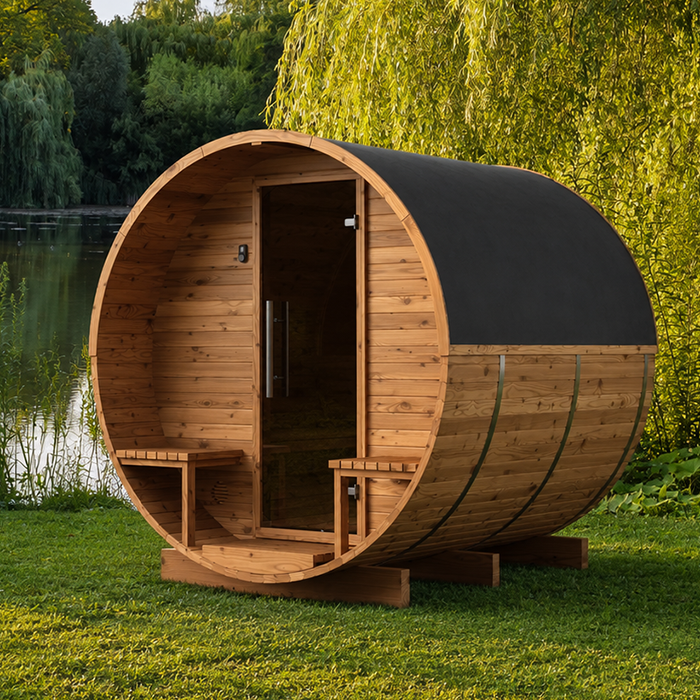
Check what the heater documentation requires from the supporting floor and its specified location; do not assume that any clear patch or surface is acceptable. A floor-standing format does not mean the unit can be shifted to another corner later without revisiting clearances and connections. When considering the Sauna S-140, listed at 1.93 m², show the proposed base position within the measured interior rather than treating the catalogue area as proof of fit. Keep its full clearance envelope visible alongside the bench edges and doorway. If the position changes during planning, update the whole outline and check the supporting surface again, rather than moving only the symbol for the heater.
Clearances for the exact model
Clearances are model-specific distances between a heater and the surrounding parts of the room; they are not spare area to borrow for a bench, guard or storage. Read the manufacturer's manual or technical drawing for the exact model and mounting configuration, including its measurement reference points. Drawings may show separate distances in different directions, so do not reduce them to one general radius or reuse a value for another size or installation type. If an allowed position depends on a particular orientation or fitting, use the documentation for that version rather than a generic product image.
Mark each required zone clearly and distinguish it from the heater casing itself. Include any guard or accessory that the manufacturer specifies, and check that its full outline does not cross bench or door space. When assessing the Sauna HC-150, listed at 2.97 m², record the clearance dimensions beside the proposed heater position on the cabin plan. Keep the catalogue area as a separate room detail, not a substitute for those measurements. If a dimension is unclear, ask which reference points it uses and whether it applies to the chosen mounting configuration. Resolve any apparent mismatch between the manual and cabin drawing before treating the outlined space as available for the heater.
Access around the heater
Once the clearances and route to the benches are drawn, review access to any controls located inside the room. Mark where someone would stand to reach them and check that the heater body, guard or bench corner does not obstruct that position. Consider access when entering or leaving a seat as well as when standing in the doorway. Small gaps between fittings should not be counted together as though they form one usable passage. This review has a different purpose from checking the manufacturer's minimum distances: it shows whether the remaining space lets people use the planned seating and reach the controls without awkward obstructions.
Check any maintenance access specified for the particular heater. A wall-mounted unit is not automatically easier to service just because its base is off the floor, and a floor-standing heater should not be presumed movable for cleaning or servicing. For the Sauna HC-225, listed at 4.4 m², add the selected heater's access requirements to the interior plan separately from its base and clearance zones. The catalogue area cannot define that access. Identify which spaces must remain open rather than being filled by a bench or another fitting. If the manual leaves this unclear, ask a qualified installer to clarify the access needed before finalising the surrounding layout.
Heater and cabin compatibility
Space is useful only if the heater is suitable for the exact cabin configuration. Check the manufacturer's requirements for the sauna room and its permitted mounting format, rather than choosing a heater solely because its outline fits. A wall-mounted and a floor-standing version may have different installation arrangements; never assume that a bracket, base or conversion kit works across models. Confirm any limits on the proposed position and orientation in the documentation for the exact heater. This check should come before treating either mounting style as a workable layout.
Compare the precise cabin version and heater model, including any control equipment, connection requirements, guard or mounting parts identified in the documentation. For the Sauna N-210, the listed 4.43 m² is a cabin detail, not confirmation of a compatible heater package. Keep a separate record of the heater and associated parts proposed for the order, and verify which are included and which are separately required. Match their model names and configurations to the heater instructions and cabin plan. If these records describe different versions, clarify the difference before committing to the layout. This avoids comparing a complete mounting arrangement with an option whose required parts have not yet been identified.
A fair side-by-side layout comparison
Compare both formats on the same scaled drawing so neither gets the advantage of looser assumptions. Keep the cabin boundaries, benches, doorway and fixed features unchanged. For each approved heater option, overlay the correct body dimensions and clearance envelope; show the wall fixing location on the wall-mounted plan and the base position on the floor-standing plan. Add any guard or accessory required for that model, then check the route to the benches and the access that needs to remain available. Use positions permitted by the manufacturer, rather than placing each heater wherever the drawing looks open.
Summarise each option in the same terms: floor outside the clearance zone, an uninterrupted route, the intended bench arrangement, confirmed support and any required access. For a cabin such as the Sauna N-250, listed at 5.27 m², base this comparison on internal measurements and the selected heater drawings rather than the catalogue area. Note any changes needed to make either option work, such as moving a bench or choosing another permitted heater position. Do not rank the formats by the floor directly under the heater alone; that can miss a restricted side zone or an unsuitable supporting wall. An option that works only by overlooking a requirement is not a viable space-saving layout.
Checks before purchase and installation
Before ordering or installation, have the exact heater manual and technical drawing, the cabin plan for the actual configuration, and information about the mounting hardware or accessories. Confirm the permitted format and orientation, applicable clearances, support needs and any room limits stated by the manufacturer. A drawing for a similar-looking model is not enough. Where wall or floor support is uncertain, ask the manufacturer or have a suitably qualified professional review the proposed location. Electrical connection planning should also be handled by an appropriate qualified person; this guide is not an installation procedure.
Resolve questions that could force a late layout change: Does the exact heater permit the proposed position? Which parts of the room must remain clear? Is the chosen supporting surface suitable? Does the cabin match the heater's stated requirements, and are necessary brackets, guards or controls included or separately required? Can the door, benches and route still be used as drawn? Record the answers against the selected model, not just the mounting format. That leaves a concrete comparison between a wall-supported and a floor-supported layout, rather than a guess based on a product photo or headline area.
Frequently asked questions
Does a wall-mounted sauna heater always give you more usable floor space?
No. It may remove the heater's base from the floor, but its required clearance zone can still reserve nearby space. Use the exact model's drawing to see what remains available for benches, fittings and movement.
Is a floor-standing heater easier to install?
Not by default. It needs an approved floor position and suitable support, while a wall-mounted model needs an approved fixing surface. Both have model-specific clearances and compatibility requirements. Ask a qualified professional about uncertain support or installation details.
How much clearance should I leave around a sauna heater?
Use the manual or technical drawing for the exact heater and mounting configuration. Requirements can differ between models and positions, so do not rely on a generic distance or measurements for another heater. Include any specified guard in the plan.
Can the same heater be used wall-mounted or floor-standing?
Only if the manufacturer permits both arrangements for that exact model and specifies the required hardware and conditions. Do not assume that a separate bracket, base or conversion kit is suitable.
Can the sauna's listed area tell me which heater format to choose?
No. An area figure does not show the full interior dimensions, bench positions, clearances, support or heater compatibility. Use the cabin plan and the heater's documentation together to compare the proposed layouts.
Choose the position that works on a measured plan after the permitted clearances and mounting support are confirmed. Wall mounting may leave the base area clear, but only the floor outside required zones counts as available; a floor-standing unit needs its whole approved footprint to fit without disrupting benches or movement. The useful comparison is between the exact heater and the exact cabin configuration. The mounting label alone cannot tell you which layout will work.
