










Classic greenhouse on a masonry base
Classic greenhouse on a masonry base – traditional greenhouse architecture with brick, natural stone, concrete or rendered masonry
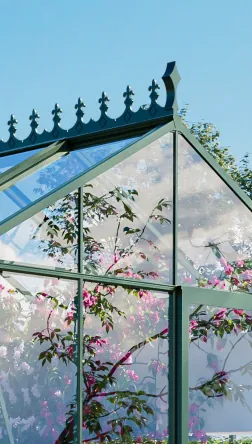
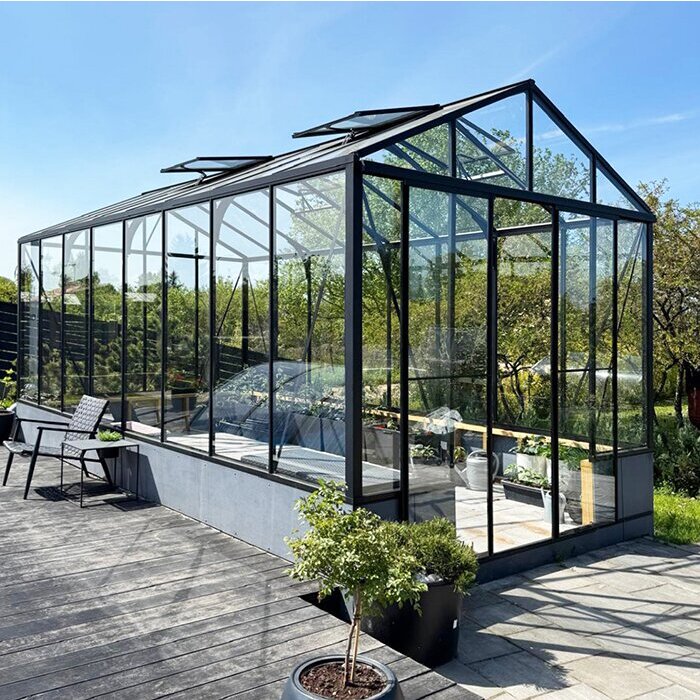
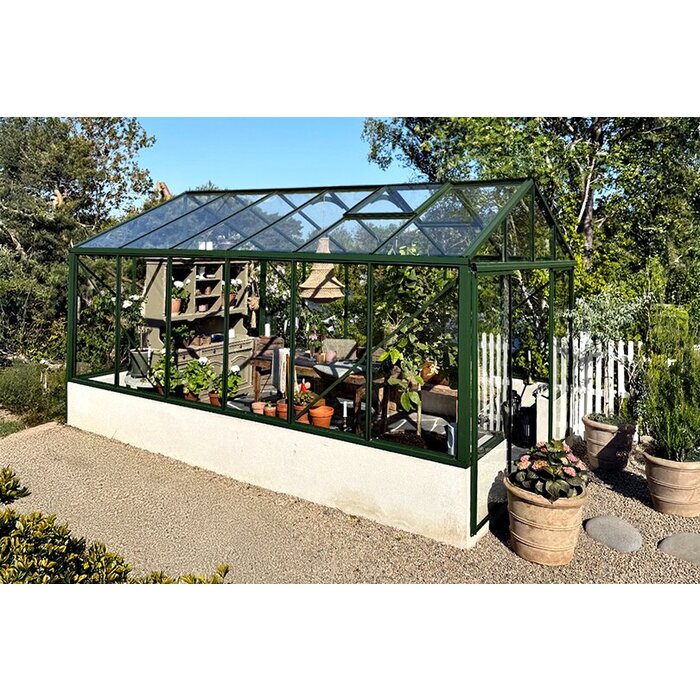
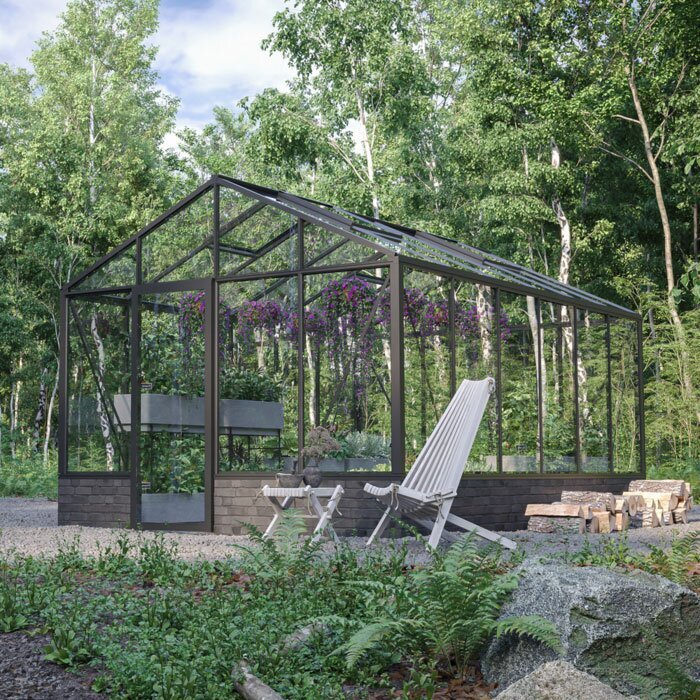
Our Bloomcabin Classic greenhouse on a masonry base combines the traditional freestanding gable-roof form with an individually designed masonry base built on site. Brick, natural stone, concrete or rendered masonry form a solid base instead of the lower glazing panels. This lets the greenhouse complement patios, paths and the home while retaining its distinct character.
Available configurations range from compact models to generous designs . Choose from different widths and lengths. The masonry base is built to suit the chosen configuration . Glazing options include polycarbonate, 4 mm toughened safety glass and selected specialist glazing. As dimensions, base height, door connection and frame must work together, finalise the greenhouse configuration first. Only then can the foundation and wall be reliably built to the confirmed measurements.
This model is not a lean-to greenhouse. As a freestanding structure, it needs neither a house façade nor another existing wall as a load-bearing component. The frame and gable roof stand on their own masonry base. Consider this when selecting the site, planning the foundation, arranging installation access and drainage. View the Bloomcabin Classic greenhouse on a masonry base.
Classic greenhouse architecture
The masonry base changes the lower section, not the classic greenhouse form
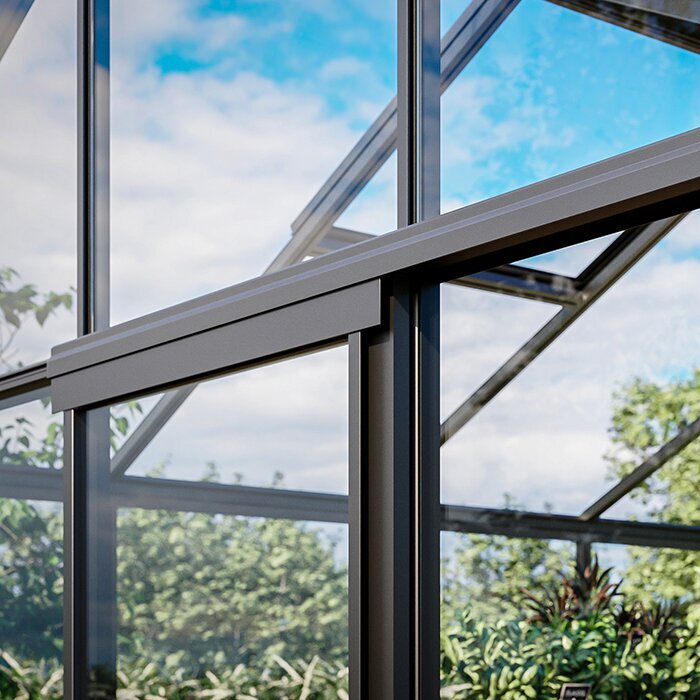
The aluminium frame sits directly on the prepared wall top. A consistent base height, accurate corners and a neatly formed door connection are essential to the clean Classic silhouette. With the lower glass panels removed, the base material becomes much more prominent than in a fully glazed version.
The enclosed base makes the greenhouse feel more like a permanent part of the garden. Corner detailing and the transition at the door are particularly influential, as masonry and aluminium meet directly there. Clean lines and a few carefully matched materials usually look calmer than a mix of many colours and finishes.
Because the frame and glazing begin above the wall, use along the sides changes. Workbenches, low shelving, planters or beds can be arranged there without soil and tools reaching the lower glazing. Windows must still move freely, and sufficient clearance from the panes is needed for cleaning and care.
Benefits of a masonry base
How a masonry base affects light, work routines and edge zones
This version suits buyers who want to integrate the base as a visible design feature in the garden. A solid enclosure replaces transparent glazing panels at the lower level. How well it suits the intended use depends chiefly on the selected height and the arrangement of plants and equipment.
Individual design
Choose material, joint pattern and finish to suit garden, paths and buildings
Practical edge zone
Arrange workbenches, low shelves and planters to suit the base height
Enclosed base zone
Soil, tools and splash water stay away from the lower edge of glazing
Plan the interior together
Plan base height, planting areas and working routes together from the outset
Configure first, then build the masonry base
Overall dimensions, base height and door opening must be confirmed before construction
The wall and load-bearing foundation are built on site. Before this work begins, the model, length, width, base height and door arrangement must be chosen and confirmed. Preliminary outside dimensions or a rough sketch are insufficient, as even small deviations can complicate frame support, fixing or the connection around the door.
The finished wall top must be consistently stable, level, square and dimensionally accurate. Check length, width and both diagonals together. Fixed reference lines and documented check measurements help identify deviations early during masonry work, particularly on longer versions. Correct level differences professionally before fitting the frame.
The door position affects future paths and the usable internal layout. During configuration, decide which side will be used to bring wheelbarrows, planters and working materials into the greenhouse. Building height connections are then set using the confirmed door and base design.
Classic construction
Aluminium frame and glazing for a precisely prepared masonry base
Area: approx. 3.8–28.1 m².
Masonry base: approx. 10–50 cm, depending on configuration.
Main widths: 2.35 m and 3.10 m.
Glazing: Polycarbonate, 4 mm toughened safety glass and selected specialist glazing.
Ventilation: Manually opening roof windows; automatic window openers are available for suitable configurations.
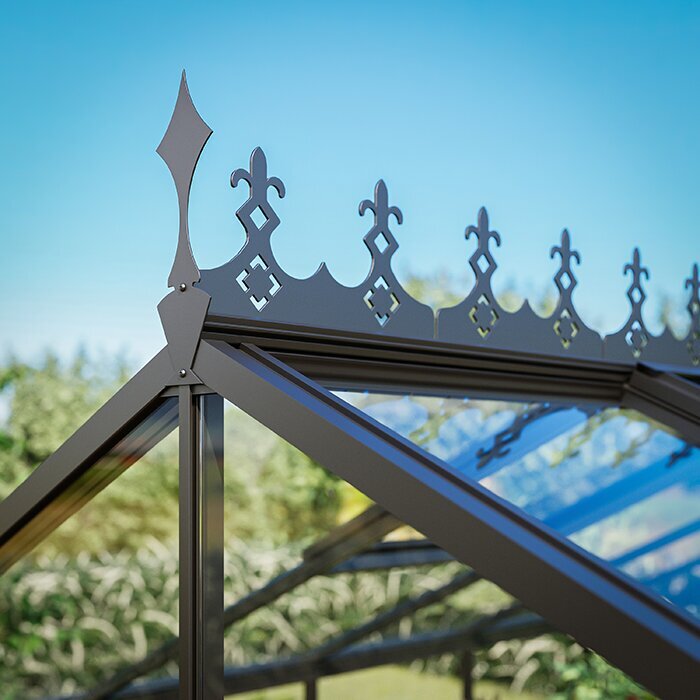
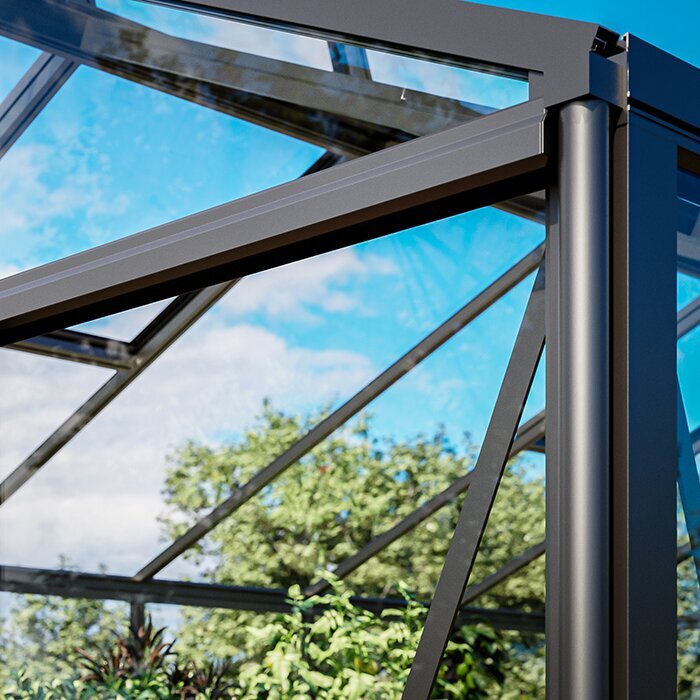
Frame: Powder-coated aluminium profiles.
Drainage: Integrated gutters.
Doors: With sliding doors, depending on the selected configuration.
Warranty: Under the warranty terms, the aluminium greenhouse structure carries a 12-year warranty. The greenhouse is designed for a wind speed of 30 m/s and a snow load of 210 kg/m². Correct installation and a suitable load-bearing masonry base are required. Conditions at the specific site, together with care and inspection guidance, must also be observed.
Design
Match base material and frame colour to the garden and building
Brick in a related colour family can connect with the house façade without copying it exactly. With natural stone, the combination of base colour and texture is often decisive. Exposed concrete or rendered surfaces are more restrained and can bring the aluminium frame forward. Choose base material for its suitability to the planned build as well as its appearance.
Joint width, joint colour, bond and the finish of the wall top significantly affect the overall result. A carefully planned top edge is both a design line and a technical bearing surface. Cappings or projecting finishes must not obstruct installation of the greenhouse frame. Check details at corners and the door opening against the final construction before building the wall.
The selected RAL colour of the powder-coated aluminium profiles can harmonise subtly with the base material or create a deliberate contrast. Compare material samples outdoors in daylight before deciding. Include adjacent paving and vegetation too, as they influence the finished greenhouse more strongly than a single colour chart.
Proportions
Choose base height to suit plants, outlook and interior fittings
A low base creates more visual connection between the interior and garden. It suits low-growing plants needing as much side light as possible, or a particularly transparent effect. However, there is less solid wall area beneath benches and planting areas for splash protection or a backdrop. Allow for this when fitting out the space.
A higher base emphasises the solid foundation and screens the lower interior more strongly. This can be useful where work surfaces or planters are planned along the sides. Wall height must not be set independently of available configurations. It must suit the door, frame and glazing.
Three questions help with the decision: Which plants will stand along the sides, at what height will work be done regularly, and how open should the greenhouse view remain? Resolving these points before ordering allows the base and fittings to be planned together, avoiding awkward working heights or unnecessarily shaded planting areas later.
Interior fittings
Arrange shelves and workbenches sensibly along the masonry base
Freestanding shelves and workbenches should stand securely and be sized so they press neither against glazing nor profiles. Fixings in masonry must suit its construction and must not transfer unwanted loads to the greenhouse structure.
Frequently used tools, pots and growing media are better kept on an accessible work surface than on the floor. Store heavy supplies low down and securely. Leave a clear passage for watering cans, harvest baskets and planters, so everyday tasks remain possible without blocking doors or brushing delicate plants.
Leave enough clearance between fittings and glazing for cleaning, air movement and visual inspection. Do not place tall shelves or plant supports beneath roof windows where they restrict opening. Automatic window openers also need free movement. A scale drawing of the interior helps distribute work surfaces, planting areas and walkways before buying equipment.
Planting
Place tall plants and movable pots outside ventilation and walking routes
Tomatoes and other tall-growing plants need not only enough height, but a position where they will not overgrow roof windows, doors and main paths. Position plant supports to suit the roof shape and planned ventilation openings. Allowing clearances early makes later pinching out, tying in, harvesting and removing dead plant material easier.
Pots allow flexible use of the edge zone because they can be moved when light changes or for cleaning. Saucers or suitable standing areas prevent watering runoff from remaining in one place. Position large containers so their weight is safely supported and they cannot tip against the wall, profiles or glazing.
A clear layout avoids conflicts: low plants in bright edge areas, tall growth outside window lines and movable containers where they do not narrow the passage. During the growing season, regularly check whether shoots are growing into fittings or window openers. Training plants in time is easier and gentler than severe later pruning.
Load-bearing base
Prepare a foundation and ground that will remain load-bearing
The foundation beneath the masonry base must suit the existing ground, local frost conditions and selected greenhouse size. Its precise construction cannot be determined solely from the visible base shape. Where soil conditions are uncertain, the site slopes, or ground has been filled, obtain competent advice on the required foundation before earthworks and material orders begin.
A neatly pointed or rendered wall can only serve reliably as a base when the substructure carries the load permanently. Settlement or deformation would transfer into the aluminium structure and glazing. Load-bearing capacity, levelness and drainage are therefore more important than purely cosmetic corrections to an unsuitable base. The masonry base is a structural part of the build, not merely an enclosure.
Before concreting or laying masonry, also clarify where rainwater and cleaning water can drain and whether conduits or service lines are needed. Later penetrations are time-consuming and can damage waterproofing or finishes. However, service routes must not impair the foundation’s load-bearing role or planned greenhouse fixing areas.
Access
Plan the door opening, threshold and path height together
The door opening must fit the selected sliding door and base height exactly. As well as width, the height relationship between wall top, threshold, internal floor and external path is important. Deviations can obstruct free door travel or create an unexpected step. All trades should therefore work from the same confirmed dimensions.
A straight, sufficiently wide access route helps with a wheelbarrow, planters or harvest crates. Even small edges can be inconvenient with a loaded wheelbarrow. Do not build up the internal finish later so high that it intrudes into the door’s movement area or above a planned drainage level. Water must not collect in front of the entrance outside either.
Before forming the door opening, mark the centre line and binding height references clearly. The clear opening after all finishes are complete is decisive, as render, paving and cappings alter the finished measurement. A documented check before sign-off helps avoid later corrections to the base.
Drainage
Direct rainwater safely away from the base and foundation
The integrated gutters collect water from the roof surfaces and allow orderly drainage. Arrange drainage routes and outlet points so water neither runs across the visible wall nor remains at the foundation. Effective drainage is particularly important at the entrance, so the path and threshold do not become wet after rain.
Ground around the greenhouse should lead surface water away from the structure. Gutter water must be directed so it cannot run back to the base due to an unfavourable fall. Include adjoining paths and beds; simply extending an outlet is not enough where the gradient is unsuitable.
Collected rainwater can be used later for watering if the tank and connection are suitably positioned. A rain barrel must stand securely and must not obstruct maintenance access, doors or gutter access. A controlled overflow is also important, so a full container does not discharge beside the wall and foundation during heavy rain.
Climate
Adjust ventilation to plants, outdoor temperature and sunshine
Warm air rises into the gable roof and can escape through open roof windows. To maintain air exchange, climbing plants, stored items or taut supports must not block the windows. The door may also be opened if needed. Avoid leaving sensitive plants exposed to strong draughts for extended periods.
On sunny days, temperature inside a closed greenhouse can rise quickly. Start ventilation before plants show obvious heat stress. Weather, growth stage, watering and planting density all affect need. A densely planted greenhouse responds differently from one that is mostly empty at the start of the season, so fixed opening times are rarely useful.
Automatic window openers can respond to temperature changes in suitable configurations and support regular ventilation. They do not replace checks of plants, doors and mechanisms. After a long absence, strong winds or unusual weather shifts, check that all windows move freely and can close fully.
Material choice
Choose glazing for light effect, appearance and intended use
Toughened safety glass offers a clear view and underlines the traditional architecture of the Classic greenhouse. Plants, shelves and masonry remain clearly visible from outside. Position hard objects, tools and tall shelving so they cannot strike the panes. Follow product-specific guidance when cleaning and installing the elements.
Polycarbonate differs from clear glass in light distribution, weight and thermal properties. Reduced transparency can suit an interior that should be less visually prominent. The better option depends on planned plants, desired design and personal working style. Consider the site and ventilation when choosing as well.
Selected specialist glazing broadens the available configurations. Before deciding, check which panels and versions are available for the specific model. A coherent result comes from choosing glazing, frame colour and base material together. Changing later is considerably more difficult than making a careful decision before the wall is built.
Interior
Make the internal floor easy to maintain and align it with door height
Stone paving, gravel and other durable surfaces can visually connect with the masonry base. Secure footing, good cleaning options and sensible water drainage are vital for daily use. Loose materials must not enter the sliding-door track. Lay fixed surfaces so no trip edges arise at work areas or transitions.
Where potting or growing media are handled often, an easily swept surface simplifies care. Planting beds have different requirements from fully surfaced walkways. A practical layout can combine fixed paths with open planting areas provided the foundation and base are not affected. Keep joints and edge connections accessible for inspection.
Set the final floor level before forming the door opening. Include every layer from the load-bearing ground to the finished surface. Adding a thicker finish later can affect the threshold and door movement. Planned mats or movable floor grids must not sit so high at the entrance that they obstruct the sliding door.
Connections
Plan power, lighting and cable routes early
If power points or lighting are planned, protected cable routes can be prepared much more discreetly before the foundation, wall and floor are complete. Their number and position should suit work surfaces and clear routes. Ask a licensed electrician to assess, plan and complete any electrical installation in the greenhouse’s damp environment.
Conduits can simplify later additions if their position, end points and sealing are clarified in advance. Do not run cables loosely across the floor or beside moving doors and windows. Visible cables are not only visually distracting but can hinder work. A simple installation sketch helps locate connections after construction is complete.
If the greenhouse is to be heated, consider its location, electricity supply, distance from plants and operation early. Heating does not replace adequate ventilation or appropriate plant planning. Use it as intended; temporary devices or unsuitable extension leads are not a sensible long-term solution for unattended operation.
Building forms
Freestanding Classic greenhouse or lean-to greenhouse?
The Lean-To model is designed as a lean-to greenhouse against an existing building wall, which strongly determines its location and use. The façade connection, one-sided access and available wall area are part of this concept. This form suits a greenhouse deliberately connected to a building where the construction conditions are present.
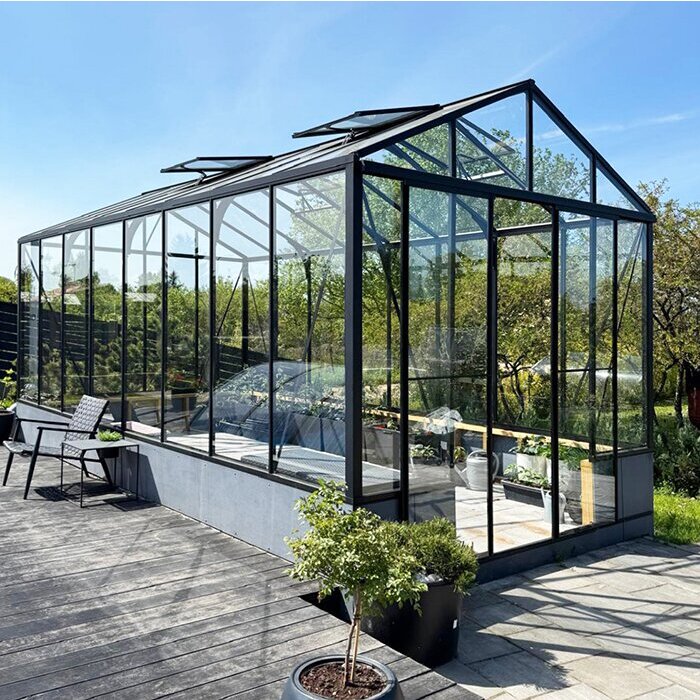
By contrast, the Classic greenhouse on a masonry base has its own gable roof and a completely freestanding structure. It needs no house wall, but does need an independent load-bearing base and enough room on every side. This allows more flexibility in choosing its garden site, provided light, access, clearances and local conditions are considered.
Available space, the desired relationship to the house, light conditions and access routes are decisive when choosing. For the Classic greenhouse, also allow enough room on all sides for installation, glass cleaning and gutter care. With the Lean-To, the building and façade connection have greater influence on planning.
Care and access
Maintain access for cleaning, checks and minor maintenance
Gutters, doors, roof windows, glazing and visible wall surfaces must remain accessible over time. Sufficient clear space around the greenhouse makes it easier to clean panes, remove leaves and inspect connections visually. Ladders and cleaning equipment also need a secure standing area without affecting beds or neighbouring land.
Dense hedges and vigorous climbing plants directly beside the frame make access difficult. Branches can rub on glazing and coating, leaves can fill gutters, and thick growth can conceal changes to components. Maintain surrounding plants so adequate distance from the structure remains.
A maintenance strip need not be fully paved, but it should be firm underfoot and free from permanent obstacles. Place rain barrels, compost bins or large pots where they do not hide components. Including access in the site plan from the beginning avoids improvised solutions and allows checks without dismantling garden equipment.
Seasonal care
Check the structure and drainage before and after winter
Before winter, check roof windows, automatic openers, sliding doors, gutters and outlets work correctly. Remove or securely fasten loose items and unused plant supports. Plant debris in hard-to-reach corners retains moisture and complicates inspection; a tidy interior makes changes to the frame, glazing and wall easier to spot.
After frost, snowfall or strong storms, inspect the greenhouse from outside and inside. Check glazing, fixings, door travel, windows and visible connections to the base. Do not move snow so it creates uneven additional loads or blocks access. Have damaged or stiff-moving parts properly repaired before further use.
At the start of the growing season, clean gutters, check moving parts and wash the glazing with suitable products. Joints, render or visible stone surfaces can also be inspected for changes. Addressing small defects early helps prevent water ingress or stiff components. Care instructions for frames, glazing and accessories take priority.
Long-term planning
Plan the masonry base so future garden changes remain possible
The masonry base remains fixed to its site and foundation even when planting, paths or garden furniture change later. Its height and proportions determine over time whether the greenhouse feels light or substantial. A restrained design with clean finishes is generally easier to adapt to later garden changes.
When choosing materials, also consider later care. Joints, render and exposed stone surfaces should be inspectable and repairable if needed. Accurate workmanship and an appropriate wall top matter more for greenhouse installation than elaborate decorative details that hinder access to connections or fixings.
Leave enough room around the base for future planting and maintenance. New beds, containers or paths must not later narrow doors, gutter outlets or cleaning access. Planning these areas from the outset allows the garden to develop without concealing important greenhouse components.
Project sequence
Coordinate measuring, masonry work and greenhouse installation clearly
Before work starts, establish who will provide confirmed measurements, who will check them on site and when the base will be released for installation. The owner, masonry contractor and installation team must work from the same planning version. Notify everyone of changes to door position, base height or overall dimensions before they are built.
After masonry work is complete, recheck and document length, width, diagonals, heights and the door opening. Bearing surfaces, cappings and adjoining finishes must also be complete and compatible with the confirmed greenhouse configuration. Installation should begin only after identified deviations have been resolved.
Before construction begins, check requirements applying at the site. Building-consent exemptions and resource-consent or district-plan requirements are separate, and actual use, foundations, services, boundary fire separation and stormwater may matter. Ask the relevant council about the individual greenhouse project. Also clarify underground services, boundaries and access for material delivery and installation before foundation work.
Frequently asked questions
Common questions about the Classic greenhouse on a masonry base
Is this greenhouse attached to a house wall?
No. The Classic greenhouse on a masonry base is freestanding, with its own gable roof and load-bearing base. A house wall serves neither as a rear wall nor as structural support.
When can construction of the masonry base begin?
Only after the model, size, door arrangement and base design have been finalised and the associated measurements confirmed. Do not build the foundation and wall using preliminary details.
Who builds the foundation and masonry base?
That depends on the individual building project. The foundation and masonry base are completed on site using confirmed greenhouse dimensions. Where soil, foundation, drainage or masonry construction needs professional assessment, engage a suitably qualified contractor.
Are brick, natural stone, concrete and rendered masonry suitable?
Yes, these materials can generally be considered for the design. The key requirements are a construction suitable for the material and a load-bearing, level, square and dimensionally accurate wall top for greenhouse installation.
Can the wall top have a capping?
Only if the capping is coordinated with the confirmed construction and obstructs neither the level frame bearing surface nor planned fixings. Projections at corners and the door opening must be clarified before building the wall.
Can the internal floor be built up higher later?
Only if the threshold and movement area of the sliding door remain clear. Set the final floor height before forming the door opening and allow for every intended finish layer.
Can water from the gutters be collected?
Yes. A suitable container can be used later for watering, provided it stands securely and blocks neither the door, maintenance route nor gutter access. Its overflow must direct water safely away from the base and foundation.
How does this model differ from the Lean-To model?
The Lean-To model uses an existing building wall and is built as a lean-to greenhouse. The Classic greenhouse on a masonry base stands freely on its own foundation and masonry structure and is not tied to a façade.
Bloomcabin Classic
Freestanding Classic architecture with an individually designed masonry base
For handover to the installation team, keep drawings, check measurements and details of finished surfaces together. This makes it clear on site which bearing surfaces, heights and service penetrations are intended.
Documents and checks for construction
✓ Provide the confirmed model drawing with overall dimensions and door position
✓ Document the masonry base material, construction and finished height
✓ Mark height references for threshold, internal floor and external path clearly
✓ Record locations for gutter outlets and required service penetrations
✓ Log length, width, diagonals and levelness before installation
✓ Ensure clear access for material delivery and the installation team