










Clean-lined garden architecture in thermally modified timber and glass
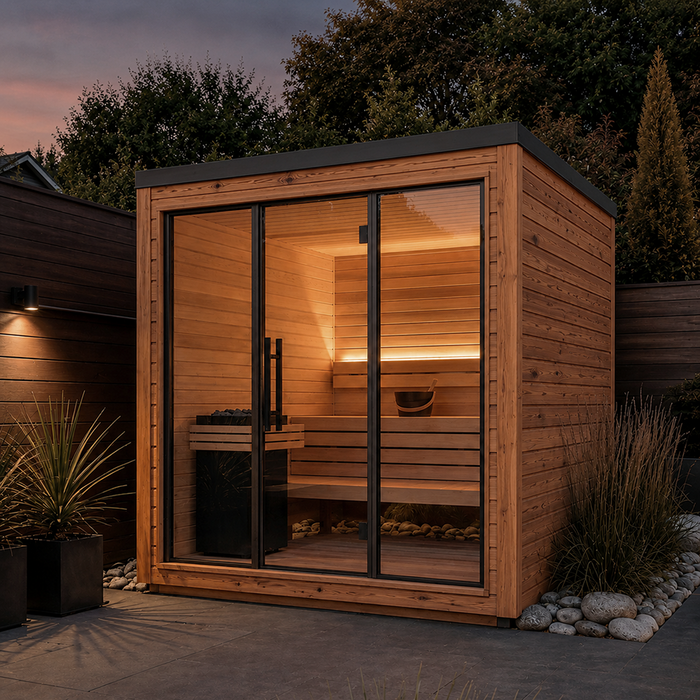
Elma L outdoor sauna – large glass front and three bench options
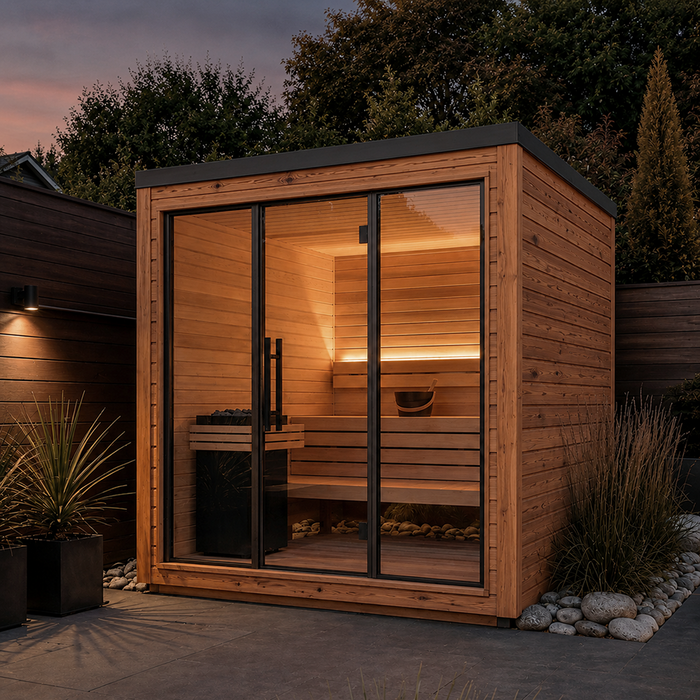
The Bloomcabin Elma L combines a generous glass front with a bright thermo-aspen interior and room for up to four people. With external dimensions of approximately 222 cm wide, 218 cm deep and 242 cm high, it sits between a compact sauna for one or two people and a larger sauna house. It suits households that sauna together regularly or couples wanting more freedom of movement. Three bench options offer different seating directions and ways to recline.
This guide helps you coordinate size, equipment, location and technical preparation. Discover further designs and sizes in the Bloomcabin sauna range.
Everyday use
Generous interior with practical external dimensions
Before ordering, mark out the external dimensions to scale at the intended location. Check the door side, the viewing direction of the glass front and connections to existing paths. This quickly shows whether the structure suits the available area and planned garden use.
The broad glass front shapes the interior and visibly brings the garden into the sauna experience. A view towards a planted garden area, sheltered courtyard or quietly designed terrace can greatly enhance the room. Also consider lighting: reflections and interior and exterior lighting change the view in the evening. Decide on the orientation before preparing the foundation, access route and power supply.
For choosing the size, typical rather than maximum occupancy matters most. Consider how often the sauna will be used by two people, family or guests, and assess each bench option for that usual situation. This avoids choosing around rare full occupancy or making the interior too tight for everyday use.
Key points at a glance
What distinguishes the Elma L
The Elma L’s key features cover capacity, external dimensions, bench layout and construction materials.
Up to four people
Always assess the stated capacity together with the chosen bench shape, as seating direction and preferred posture influence personal comfort.
Approx. 222 × 218 × 242 cm
These dimensions provide a spacious interior. Allow additional space outside the structure for access, installation and maintenance.
3 bench options
A straight bench, corner bench or ergonomic version each prioritises seating direction and comfort differently.
60 mm CLT construction and 8 mm clear glass
The substantial timber construction is complemented by a generous transparent front.
Materials & construction
Thermo-aspen inside, thermo-spruce outside and clear glass at the front
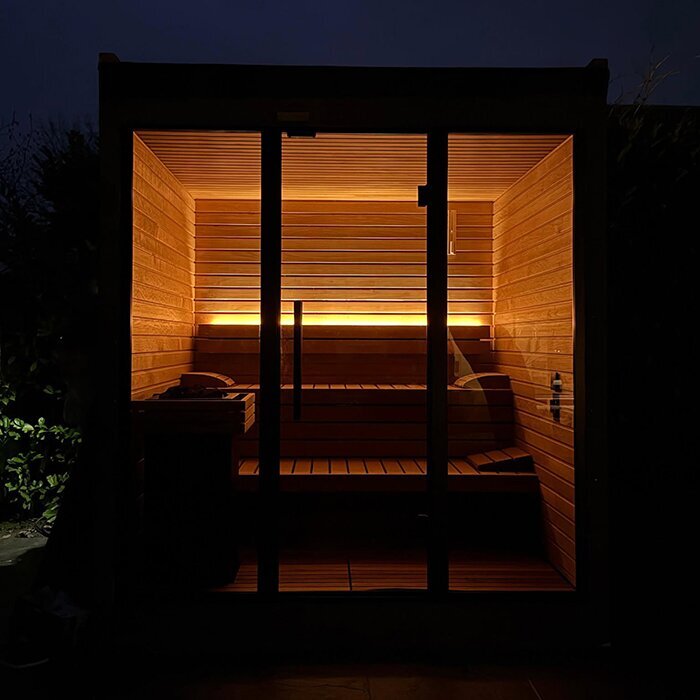
The thermo-aspen interior lining gives the Elma L a light, calm atmosphere. LED strips positioned behind the backrest provide indirect light without interrupting the uncluttered interior design. During the day, the glass front makes the room feel open and generous. In the evening, indirect lighting highlights the timber surfaces and aids orientation without becoming the room’s dominant light source.
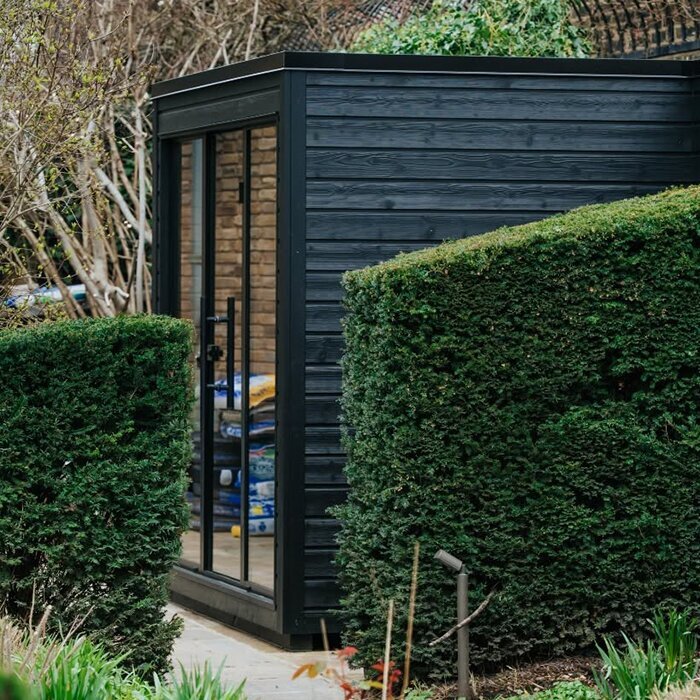
Externally, the Elma L is clad in thermo-spruce. Available surface finishes let you coordinate the sauna with the house façade, terrace and garden design. Natural-looking timber finishes blend discreetly into their surroundings, while darker options can create stronger contrast. Judge your choice against the whole visible exterior area and the light conditions at the installation site. Paving, timber decking, walls and neighbouring materials also affect the overall result.
The rectangular structure uses 60 mm CLT construction. Doors and windows are made from 8 mm clear glass; black anodised profiles visually frame the transparent surfaces.
Before installation and commissioning
Confirm foundation, weight and electrical connection before assembly
The Elma L weighs approximately 1,265 kg without the heater. The base must support this weight evenly and permanently. A surface that appears level is not necessarily sufficiently load-bearing, especially existing decks, filled ground and raised platforms. If unsure, have the supporting structure, sub-base and load transfer assessed for suitability. The foundation must also allow level, dimensionally accurate assembly so the structure is not distorted by settlement later.
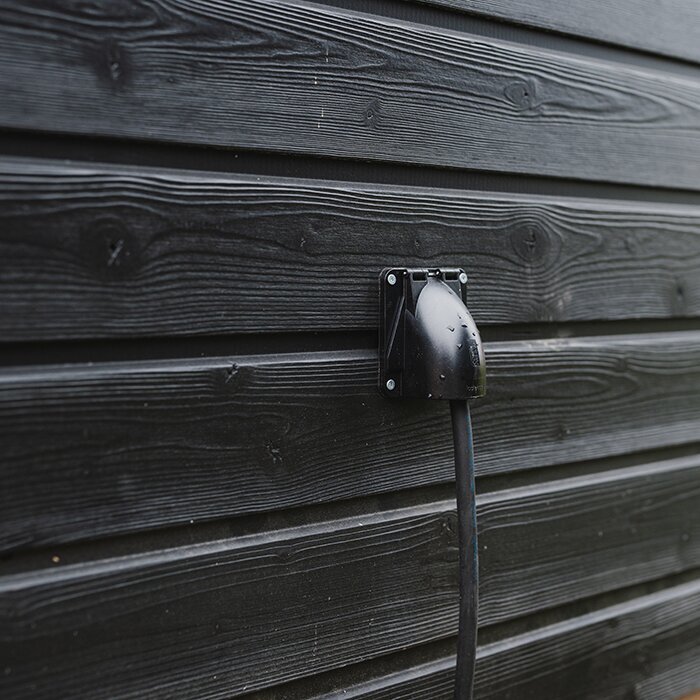
The technical data specify a three-phase supply of 400 V and 50 Hz. Before foundation work, clarify the cable route and handover point at the intended connection area. This avoids later cable runs across walkways or visible outdoor surfaces. Have a licensed electrical professional assess the installation, protection, equipment suitability, connection, testing and certification. The manufacturer’s documentation, the selected equipment and the technical and local requirements at the site govern the work.
Include the sauna surroundings in your site planning. Leave enough space outside the door for arriving, placing towels or robes, and cooling down. If you may later add an outdoor shower, plunge pool, lounging area or pergola, include service routes, drainage and paths in the first site plan. This enables later additions without blocking sauna access or maintenance areas.
Check early whether your project needs building consent or resource consent, and which boundary, electrical and fire-safety requirements apply. Rules vary with the site and design, so ask your local council about the sauna, foundations and services. Further planning advice is available in guidance for planning your Bloomcabin sauna.
Typical use
Which situations suit the Elma L?
Usual occupancy, preferred seating posture and the integration of the Elma L into the outdoor area are key to suitable use.
Families
For families, the bench design should suit the usual seating arrangement and allow easy sitting down and getting up.
Couples wanting more room
When mainly used by two people, bench choice can focus more on preferred posture than on achieving the highest possible number of seats.
Modern outdoor areas
The rectangular form, broad glass front and visible timber surfaces work especially well with clearly structured terraces and modern outdoor spaces.
Holiday properties
For a holiday property, easy-to-understand use guidance, clearly managed cleaning routines and reliable sauna supervision are especially important.
Model comparison
Elma L or Elma S – compare your real space needs
The Elma S is especially suitable when one or two people usually sauna and the smallest possible footprint is essential. It suits locations where additional space would restrict pathways or other garden areas.
By comparison, the Elma L is the better choice when the more compact Elma S does not provide enough room for usual occupancy or the desired seating arrangement. The foundation, access and property layout must, however, sensibly accommodate the larger version.
Both models belong to the same product family in design terms. Your decision should therefore be guided chiefly by usual user numbers, available footprint and preferred bench layout. Mark out both model footprints at the site as a trial. This reveals which option leaves sufficient space for paths, neighbouring garden features and installation.
Well planned year-round
Plan access, cooling-down space and use in every season
Treat the route between house and sauna as part of everyday use. It should be direct, well lit and safe to walk in wet weather. Avoid unnecessary steps, loose surfacing and narrow points. A dedicated cooling-down area is useful if it does not obstruct the doorway. In winter, keep the route easy to clear of leaves, dirt and ice; in summer, ensure furniture and planting do not narrow access.
After using the sauna, remove textiles and visible dirt, and allow the interior to ventilate and dry fully. Check that the door and glass surfaces close freely and look for anything unusual on timber, seals or fixings. A brief inspection after each use helps identify changes early.
For ventilation, drying and maintenance, follow the instructions for your selected version . Keep them readily available for regular care.
Choosing the right bench layout
Straight bench, corner bench or ergonomic version?
The straight bench reinforces the clean, orderly look of the interior. Everyone faces the same main direction and the free floor area remains easy to oversee. This option works particularly well when only a few people usually sit side by side or when linear design is the priority. Before ordering, check the illustration of the chosen version so the bench position and layout meet your expectations.
With a corner bench, seating is distributed along two sides of the room. Users face one another more directly, which can be pleasant during shared sauna sessions. The corner shape also affects how easily people take a seat, stand up and pass others. Alongside user numbers, consider whether children, adults of different heights or people with different seating habits will regularly use the sauna together.
The ergonomic version is designed for a more supported, relaxed posture. It is an option where comfortable reclining matters more than a neutral, flat seating surface. Which shape feels comfortable depends on body height, preferred posture and sauna-session duration. Compare the product presentation and scope of supply for the specific version rather than deciding from its name alone.
Choose the bench version before completing your order. If users have different preferences, prioritise the most frequent use case and the posture of those who use the sauna regularly.
Use by several people
Organising shared sauna sessions practically
When several people use the Elma L, keep the area directly outside the door clear of shoes, textiles and other items. Set up a fixed storage spot beside it that does not restrict entry and exit. Garden furniture, planters and sauna accessories should also stay out of the door swing and walking area. A clearly arranged access zone is more practical day to day than a densely decorated space.
During shared use, keep personal items on the storage area outside the movement zone and ensure everyone can reach the exit. Arrange seating so people wishing to leave earlier can do so without unnecessary repositioning. The relevant bench geometry and use instructions provide the framework for this.
Where possible, divide the outdoor area into zones for arriving, cooling down and resting. This keeps splashing water and stored items away from the direct access route. If a shower or pool is nearby, direct water so the doorway and foundation do not remain permanently wet.
Orientation and privacy
Coordinate views and privacy screening with the glass front
The transparent front makes careful assessment of sightlines worthwhile. Stand at the proposed location and consider both directions: what view will sauna users have, and from which paths, windows or neighbouring areas can the interior be seen? Repeat the check at approximate seated height. A location that feels private while standing may permit unexpected views from a lower perspective.
Planting and suitable privacy screens can reduce side views, but must not obstruct access or care of external surfaces. Consider plants’ eventual size and winter leaf loss. Also inspect the location after dark, as a lit interior can be more visible from outside. Exterior lighting should make the route visible without causing distracting reflections in the glass front.
Coordinate views, screening and the access side before preparing the foundation. Mark the building corners and the glass-front line on the property. This gives a much more realistic impression of the eventual orientation before work starts.
Maintain long-term access
Keep sufficient room for installation, inspection and maintenance
External dimensions describe only the structure, not the entire area needed. During installation, components must be transported to the site and handled there. After assembly, exterior surfaces, connections and the transition to the base should remain accessible. Do not position the sauna so tightly between fences, walls, buildings or permanent planting that side access is barely possible.
Adequate maintenance access makes it easier to inspect exterior timber, glass, sealing areas, fixings and water drainage. These areas should not disappear permanently behind decoration, dense planting or stored objects. Allow for the future space needs of nearby plants and avoid spots where leaves and moisture can accumulate directly against the structure.
Keep the access route permanently as a walkway and service path, not as storage for bins, bicycles, garden equipment or seasonal furniture.
Prepare delivery and installation
Check the delivery route and assembly area before ordering
Walk the complete route from the property entrance to the intended location. Note garden gates, bends, steps, slopes, low passages, overhanging branches and sensitive ground surfaces. Even a wide driveway will not help if the final section passes through a narrow side path or across lawn that cannot bear loads. Keep photographs and relevant measurements ready for discussion with the delivery or installation partner.
By the agreed installation date, the foundation and electrical planning must be prepared accordingly. Remove stored materials, garden furniture and vegetation from the work zone. The area around the location must also suit assembly; soft ground or unsuitable temporary coverings can hinder the work. Clarify in advance who will check the finished foundation level before assembly.
Record in writing who will arrange delivery onto the property, assemble the sauna and undertake the electrical connection. It should also be clear which preliminary work you must complete in good time. Ask whether packaging or transport aids will be stored temporarily on the property. A clear sequence prevents delays between foundation work, assembly and electrical connection.
Confirm the version before ordering
Record your selected version and scope of supply clearly
Before submitting the order, compare the chosen bench layout and surface finish with your site plan. Use unambiguous descriptions and retain the order confirmation. Where several people or contractors are involved, everyone should work from the same current plan. This prevents old sketches or superseded preferences being used by mistake.
Check separately which components and services are included with the ordered version and what is not included or must be planned separately. This is especially important when coordinating the sauna, heater, electrical connection and planned outdoor additions. Do not rely only on product images for building preparation; use the documentation for the configuration actually selected.
Keep order documents, the site sketch, foundation details, electrical plan and contact details for involved professionals together. This means everyone can refer to the same information when questions arise. Installation, operating and care instructions should remain easily accessible after assembly too.
Outdoor drainage
Lead rainwater and splash water away from the structure
The base must drain water so that persistent standing water does not form below or directly beside the sauna. Consider normal rainfall as well as water that may flow towards the site from neighbouring surfaces, roof areas or higher ground. Even when the foundation surface is dry, moisture can collect in an adjacent hollow. Drainage must therefore suit the soil, slope and property conditions.
Test drainage paths practically after completion. Water should not run towards the entrance, across the main path or into areas where it may freeze at low temperatures. Remove leaves, soil and plant debris before they impede open drains. An outdoor shower needs its own water management, as it produces more frequent and concentrated water than rainfall.
Do not later build up soil, gravel or decoration directly against the underside of the sauna. After garden work, check that the intended ground level and ventilation around the base remain intact. Have the cause of settlement, washout or standing water identified before the base or structure is affected.
Regular inspection
Organise regular care by component
Divide regular inspections into interior, glass surfaces, exterior shell, access route and base. Inside, focus on cleanliness and visible changes to the timber. For glass, check soiling and adjacent sealing elements. Outside, look for deposits, mechanical damage and areas that remain wet unusually long. Also inspect the walkway, base and water runoff. Dated notes help you identify changes over time.
Use only cleaning and care products explicitly suitable for the relevant material. Unsuitable coatings or cleaners must not contact timber, glass or sealing elements. Work on electrical components is not routine cleaning and must be left to the responsible professionals. Intervals and procedures follow the installation, operating and care instructions for the selected version.
Frequently asked questions
FAQ – Bloomcabin Elma L
When is the Elma L more suitable than a compact sauna?
The Elma L is suitable when several people sauna together regularly, or when two users want more room and a wider choice of bench layouts. The site must also offer enough space for the structure, access, installation and maintenance.
What area should I allow in addition to the external dimensions?
In addition to the structure’s approximate 222 cm width and 218 cm depth, allow for the doorway, walkway and accessible installation and maintenance areas. Also include the approximate 242 cm height if roofs, branches or other structures are nearby.
Can the Elma L be installed on an existing deck?
That depends on the deck’s supporting structure and sub-base. The sauna weighs approximately 1,265 kg without the heater. Its outward appearance alone cannot show whether the existing area can carry this load evenly and permanently. If uncertain, have its load capacity professionally assessed.
Which bench option suits which use?
The straight bench suits a linear seating arrangement, the corner bench a more face-to-face group, and the ergonomic version a supported, relaxed posture. Decide before ordering according to usual user numbers, seating posture and the desired social setting.
How should thermo-aspen and clear glass be cleaned?
The interior lining is thermo-aspen in STP 15 × 90 mm format, while the transparent surfaces are clear glass. Remove loose dirt gently from the timber and clean glass with suitable non-abrasive materials. Use only products identified in the care instructions as suitable for each material and adjacent seals.
How should privacy screening for the glass front be planned?
Check views from paths, windows and neighbouring areas at approximate seated height and with the interior illuminated. Planting or screening should limit side views without compromising access, outlook or maintenance areas.
Who may carry out the electrical connection?
For the specified three-phase 400 V and 50 Hz supply, have a licensed electrical professional assess the installation, protection, equipment suitability, connection, testing and certification in line with the manufacturer’s instructions and local requirements.
What should be completed before the installation date?
The foundation and electrical planning must be ready, the delivery route checked and the work area at the site cleared. Also agree who is responsible for delivery, assembly, foundation inspection and electrical connection, and which work must be completed by the customer in advance.
Bloomcabin Elma L
Does the Elma L suit your property and sauna use?
For final planning of the Bloomcabin Elma L record the bench option and surface finish clearly. Then coordinate the footprint, load-bearing base, delivery route and electrical supply with the involved professionals.
If a smaller footprint, another design or a different room concept suits your property better, compare further outdoor saunas and barrel saunas from Bloomcabin.
Checklist before ordering
✓ Mark the structure, doorway and assembly areas on the site plan
✓ Define usual user numbers and the suitable bench option
✓ Confirm base load capacity, level and drainage
✓ Plan the three-phase power supply with a licensed electrical professional
✓ Compare the selected version, scope of supply and separate services
✓ Clarify local requirements before work begins
✓ Permanently ensure delivery access, maintenance access and water drainage
View Elma L in detail