
How to protect the base of a wooden summer house from ground moisture
Summer house planning and care
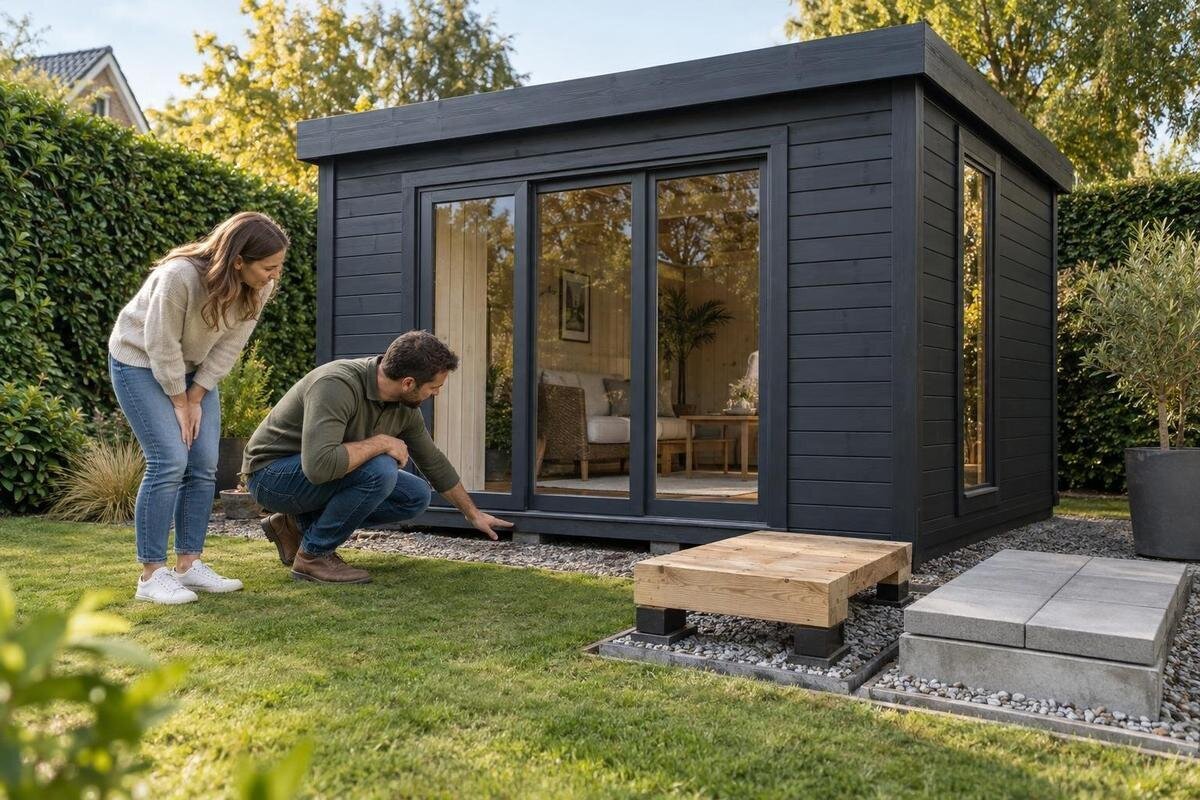
Ground moisture can be easy to overlook when choosing a wooden summer house: the site may look dry while the underside of the base remains close to damp soil or a moisture-holding support. Lasting protection depends on several details working together, including a suitable base, a moisture break at the timber junction, room for drying and an appropriate finish. This guide focuses on the lower structure and the buying questions that help you confirm how it is meant to be installed.

01
How ground moisture reaches the base
The first place to examine is the junction where the lowest timber member meets the base. Depending on the design, this may be described as a sill, base frame or floor support, so use the product drawing rather than assume every summer house has the same arrangement. Timber in direct contact with persistently damp soil can absorb moisture. Moisture may also travel through some porous supports and reach the timber if there is no effective separation at the contact point. The visible wall boards are only part of the assembly: a damp underside or covered joint can be slower to dry and harder to spot.
Ground moisture is not limited to visible puddles. Soil can remain damp below a dry-looking surface, while wet weather, irrigation, shade or later landscaping can change conditions around the base. Repeated or prolonged wetting can leave timber slow to dry and may contribute to staining, coating failure or deterioration over time; a mark by itself does not identify the cause. Pay particular attention to corners and edges, where rain splash, accumulated debris and changes in surface level can create a more persistently damp local area than the rest of the site. When comparing options, request the installation drawing for the Verdana 1 garden house and confirm its base junction from that documentation. A listing name or photograph alone cannot establish how the lower timber is protected.
Check the ground at the intended footprint
Assess the exact footprint you plan to use, rather than a drier or more convenient part of the garden. Note whether the proposed support will sit on soil, paving or an existing slab, and whether the ground stays damp after rain or watering. Look for low patches, persistent puddles, damp marks, algae or a nearby tap that regularly wets the area. Also consider whether water naturally runs towards the footprint from an adjacent lawn, path or bank, even if it does not settle there for long. These observations help you understand the conditions at the base; they are not a substitute for planning the structure’s support. If possible, check the spot in more than one kind of weather, as a single dry-day inspection may give a misleading impression.
Record the finished surface level you expect after any paving, edging or planting is in place. A base that begins clear of the ground can end up partly buried when soil or mulch is added later, bridging the intended separation and making the lower wall harder to inspect. Mark the footprint and nearby beds or paths before ordering, so the location remains accessible. If you are considering the Verdana 2 garden house listing, ask for its site-preparation and support requirements and compare them with the ground you actually have, rather than relying on details from another model.
02
Choose a suitable, stable support
Choose the support arrangement from the building’s installation requirements and the conditions on site. The base needs to provide the support the structure is designed for and remain stable and appropriately level. It should also present a consistent bearing surface, rather than leaving an isolated corner or section of the frame carrying more than its intended share. An improvised row of loose pieces may settle unevenly or leave parts of the frame poorly supported. The right design depends on both the building and the ground, so avoid guessing from a photograph, choosing only by the lowest initial effort or copying another summer house’s footing. If the ground is soft, uneven or otherwise uncertain, ask the supplier or a suitably qualified installer to assess the proposed support before you order or prepare it.
Do not assume that a hard surface automatically keeps timber dry. Concrete and masonry can retain or transmit moisture, and a timber member placed directly against a damp support may still be exposed at the contact line. Consider support and separation together: the base carries the building, while the specified interface limits moisture transfer where the materials meet. Before choosing a listing such as the Durano wooden garden house, request the applicable base instructions and check whether your planned support meets them. The model name alone cannot establish a foundation detail.
Confirm where the moisture barrier belongs
A damp-proof course or another suitable moisture barrier can interrupt moisture moving from a support into timber, but it needs to be part of the intended construction detail. Ask where the separation is designed to sit: between which support and which timber member, and whether it is supplied or must be sourced separately. Establish whether the detail must continue beneath the whole relevant contact area or is used in a particular specified location. The layer must work with the specified materials and fixings and provide the intended break at the contact area. Do not infer the right product or layout from a generic photograph; these details belong in the installation guidance for the particular building.
An arbitrary sheet wrapped around the base is not a reliable substitute for a planned interface. It may leave gaps at support points, trap water against timber, cover areas that need to dry or interfere with how the base is fixed. If the documentation is unclear, ask the manufacturer or installer to explain the junction before assembly rather than adding material afterwards. For the Veltor 1 garden house listing, look for or request a product-specific base drawing and confirm where the moisture break belongs. Do not presume that one membrane arrangement suits every model.

03
Preserve the space needed for drying
Separating the frame from damp ground reduces one route for moisture, but timber still needs the chance to dry. Follow any requirement for ventilation below the floor and around the base, and do not block designed openings with stored items, loose insulation, boards or dense planting. Avoid adding a skirt or enclosure just to hide the support: unless the design accounts for it, this can reduce air movement and conceal early signs of damp. The aim is not to leave the structure exposed to every splash, but to preserve its intended drying paths rather than sealing the underside by guesswork.
Check what the actual design says before assuming there is an open underfloor space, a vent or a removable panel; arrangements can differ, and the supplier’s instructions are the source for product-specific details. Seasonal use matters too: a gap that appears clear in summer can become obstructed by windblown leaves, garden equipment or accumulated material later in the year. Keep the perimeter accessible enough to inspect the lowest timber and the support junction. If you are considering the Orello 1 garden house, ask for the base and ventilation details in its assembly information, then consider whether future storage, edging or cladding could obstruct them.
Keep soil and planting from bridging the base
Even a well-separated frame can be wetted repeatedly if soil, mulch or paving is built too high against its lower edge. Maintain the finished-ground relationship specified for the house and avoid allowing beds or stored materials to cover the base. This is worth checking after gardening work as well as at installation, because fresh compost, bark or topsoil can gradually obscure the original edge. Clear away soil build-up, fallen leaves and other debris that holds moisture against the timber, taking care not to damage a membrane, coating or trim. Do not copy a clearance from another building: the required space depends on the design and needs to be confirmed in its instructions.
Think about what happens close to the lower wall, not only how the foundation is made. Repeated sprinkler or hose spray, splash from a hard surface and a roof drip can wet the same boards again and again. Adjust routine watering and avoid positioning edging or containers so they direct water at the frame. This local protection does not replace the building’s wider water-management arrangements. For the Modano 1 garden house listing, ask which finished-ground level and clearance its instructions require before settling paving or planting around it.
04
Maintain a suitable finish on exposed timber
Find out what treatment or finish the timber has when supplied. Do not assume that an unfinished-looking surface needs a particular coating, or that any treatment already applied removes the need for later care. Follow the product instructions for exterior protection, including any guidance for exposed end grain or cut surfaces during assembly. A suitable coating can help protect exposed timber from weathering, but it does not isolate the base from damp soil or correct a wet support. Applying more product is not necessarily better if it is incompatible with the existing treatment or put on damp timber.
Choose a finish intended for the relevant exterior timber and follow its maker’s directions for preparation, application and renewal. Before recoating, identify the existing finish and address the cause of persistent wetting; coating over dirty, damp or deteriorating timber can conceal rather than solve the problem. Inspect lower edges and exposed cuts particularly carefully, as they may need attention sooner than broad, sheltered wall surfaces. Keep a note of the products used and the care advice, especially if someone else will maintain the summer house later. If considering the Veltor 2 garden house, ask what timber-care guidance applies to that product instead of assuming a particular preservative or repainting schedule.
Make base protection part of the buying comparison
Ask about the base before you commit to a purchase. Request the installation guide and confirm the required surface or support type, whether a floor or base frame is included, where a moisture break belongs, how the lower structure relates to the finished ground and what ventilation must remain open. It is also useful to establish when in the installation sequence any separating layer or protective treatment is required, so site preparation and assembly are coordinated. Establish which items are supplied and which are your responsibility, and whether you are expected to prepare the base or appoint an installer. These points shape the site plan and preparation, even when they are not obvious in product photographs.
Compare answers for the exact models you are considering rather than transferring details from a similar-looking house. Ask for written clarification if the instructions leave the base junction, timber treatment or finished ground level unclear. Keep the guidance with your order documents so the person preparing the site can refer to it. The Veltor 3 garden house listing can be a starting point for a product-specific enquiry, but check the current documentation for that exact model before planning its support.

05
Keep the base accessible for inspection
Once the summer house is assembled, keep enough access around the base to inspect it without moving a permanent screen or damaging planting. Look along the junction between the support and the lowest timber, especially at corners and sections hidden from the usual approach. Check whether soil or paving has risen, whether leaves or stored items are holding moisture against the wall, and whether a designed opening has become blocked. Looking after prolonged rain or after a change to nearby landscaping can reveal a recurring source of wetting that is not apparent in dry conditions. A brief note or a few reference photographs can help you notice changes in ground level, coating condition or recurring wet patches rather than relying on memory.
Revisit the base after changes that could affect it, such as adding a path, edging or a new bed. Do not pry away fixed boards or step onto unsupported parts to inspect a concealed space; use intended access points and follow the maker’s care advice. If you cannot see an important junction safely, ask the installer how it should be checked. An accessible perimeter makes routine inspection easier and helps you spot changes before they disappear beneath new landscaping or a later enclosure.
Investigate damp signs before choosing a repair
Treat a dark patch, peeling finish, persistent damp smell, soft spot or distortion as a reason to investigate, not as proof of one particular fault. Note where it appears, whether it follows rain or watering, and whether the ground, planting or a covering has recently changed. Compare what you see with the base drawing and check for direct contact, a bridged moisture break, restricted drying or repeated splash. These clues can help identify how moisture reaches the timber. Painting over the first visible mark may leave the underlying cause untouched.
If the timber remains wet, feels soft, has deteriorated or the source is unclear, seek advice from the supplier or a qualified building professional before carrying out a repair. The appropriate response depends on how the base is constructed and how extensive the problem is; avoid sealing affected timber or altering a support without understanding the detail. Address the moisture path first, then follow suitable guidance for drying, repair and any replacement finish. Where the affected area is structural or difficult to access, a professional assessment is preferable to guessing from the surface.
Frequently asked questions
Will raising a summer house above the ground prevent damp?
A raised base can help keep timber from direct contact with soil, but it does not automatically stop moisture travelling through a support or reaching the frame by splash. Follow the building’s base details, including any specified moisture break and ventilation.
Does every summer house need a damp-proof membrane?
Not necessarily. The right detail depends on the building and its support. Check where the manufacturer specifies a damp-proof course or other moisture barrier, and do not add a sheet in an unplanned position or assume one arrangement suits every base.
Can exterior paint protect the base from ground moisture?
A suitable exterior finish can help protect exposed timber, but it cannot separate the frame from damp soil or a moisture-holding support. Deal with the source of wetting first, then follow the product’s guidance on compatible finishes and maintenance.
How much clearance should there be between the ground and the timber?
There is no single clearance that applies to every design. Use the height and finished-ground requirements in the installation guidance, and allow for later changes such as paving, soil or mulch being added around the building.
What are early signs that the base may be getting damp?
Recurring damp patches, peeling finish, darkened timber or a soft area are reasons to investigate. None identifies the cause on its own. Check for ground contact, blocked drying paths and repeated wetting, and seek professional advice if the timber is deteriorating.
Protecting the bottom of a wooden summer house is mainly about controlling contact with damp ground and allowing the timber to dry. Confirm the support and moisture-break details before installation, keep later landscaping from bridging the base, and maintain access for inspection. A suitable finish has a role, but it cannot correct a wet support or a blocked drying path. When you compare buildings, the clearest choice is one whose installation and care guidance explains how the base should meet the ground.
