
Planning Guttering and Rainwater Collection for a Summer House
Summer house planning
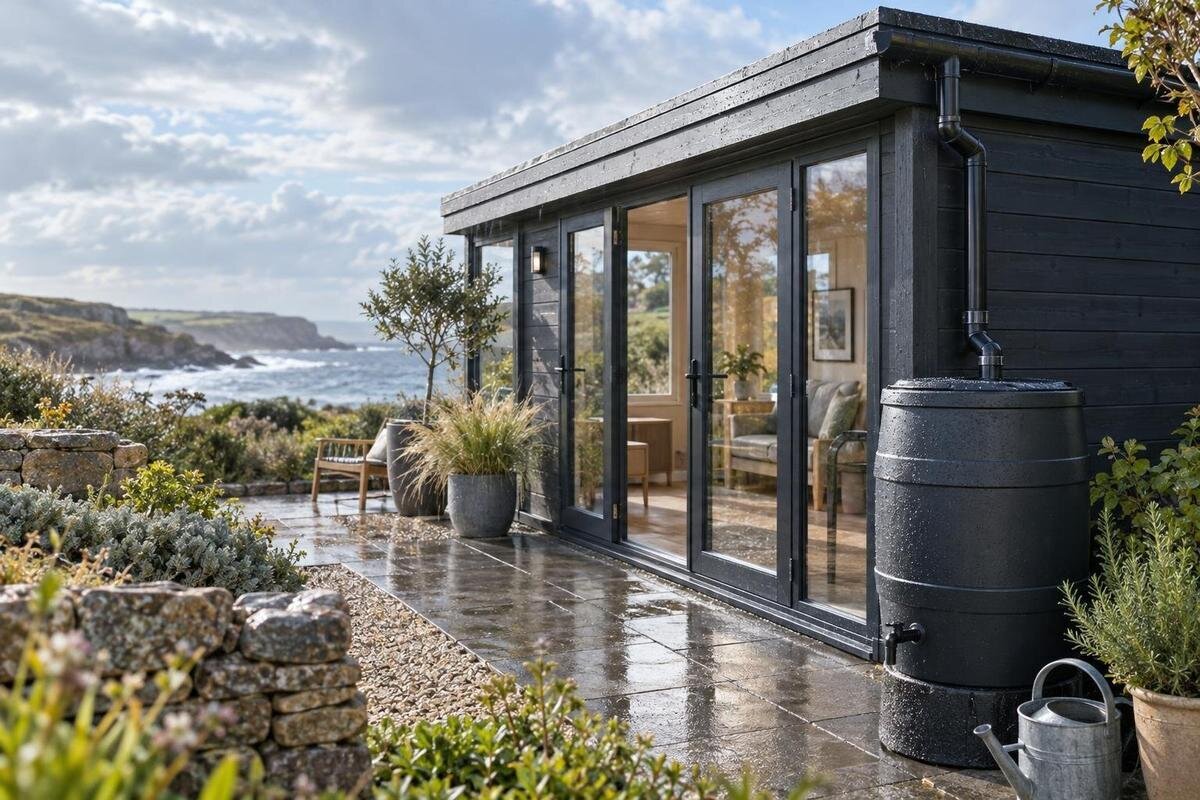
Planning rainwater collection for a summer house begins at the roof edge, not at the water butt. The roof determines where runoff leaves; the gutter and downpipe shape its route; and a storage container needs an overflow that remains safe when it is full. Treat these as one system before ordering a building or accessories. That way, you can check the mounting point, space for pipework and final destination together, rather than discovering that a convenient tank location conflicts with the only practical downpipe route.

Before you order 1
Map roof runoff before choosing guttering
Begin with a simple site sketch. Mark the summer house footprint, each roof edge that sheds water, corners, doors, windows, steps, paths and obvious changes in ground level. Different roof planes can send water in different directions or concentrate it at a corner, so do not assume every side needs a gutter. Use the building information or a safe view from ground level to understand the actual layout; do not climb onto the roof just to trace runoff. If possible, watch where rain falls during a shower and note splashback, pooling or existing drains nearby.
For the Verdana 1 garden house, check the supplied roof dimensions, eaves details and any relevant installation drawing before choosing gutter lengths or outlet positions. A model name or lifestyle photograph does not establish those measurements. If the information leaves a gap, ask the seller or manufacturer rather than estimating from an image. Add likely drip lines to your sketch and mark where water could reach the ground safely. The roof-edge projection can affect gutter placement, so check it alongside the run length and the route to your intended collection point.
Confirm the roof-edge fixing
Find out what fixing surface the gutter system requires. Some systems use brackets attached to a fascia; others can be fixed to suitable rafter ends, but neither arrangement should be assumed for a particular summer house. Eaves, fascia and roof overhang are different details, and a decorative edge may not be a suitable fixing point. Check the house instructions and gutter manufacturer’s guidance for the permitted position, fixings and spacing. Look for support along the intended run, including around corners; some fixing points may be difficult to identify once the roof is assembled. If support is unclear, ask an installer to assess it before ordering.
Treat the Verdana 2 garden house as a model to investigate, not as proof that a standard gutter kit fits. The gutter needs to sit where runoff can enter without interfering with the roof covering or edge trim. Do not plan to drill through a roof covering, cut an edge component or adapt a fixing without approval from the relevant manufacturer or a competent installer. Check the gutter instructions for bracket intervals, joint type and corner pieces: these affect where supports go and which parts you need. Confirm the exact model a suggested kit is intended for; resolving a mismatch before ordering is easier than improvising on site.
Before you order 2
Set out gutter runs, outlets and joints
Once the fixing method is known, plot each gutter run and decide where its outlet should sit. Gutters, corners, stop ends, unions and outlets need to belong to a compatible system; parts that look alike are not necessarily interchangeable. A run usually needs a fall towards an outlet, but the correct fall, bracket intervals and joint arrangement must come from the gutter maker’s instructions, not guesswork. When considering the Durano garden house, use confirmed roof edges and dimensions to draw each run, then mark the outlet and downpipe beside it. Record how the runs meet at corners so the parts list includes more than straight lengths.
Check the system’s capacity against the roof area feeding each run and the rainfall conditions specified by its supplier. More than one roof plane may feed a single gutter, so visible gutter length alone is not enough to select an outlet. Ask a gutter supplier or competent installer to confirm the suitable profile and outlet arrangement for the actual roof, particularly if runoff is concentrated at one point. Note which roof areas feed each tank; seasonal rainfall varies, so storage can fill at different rates. Do not reduce the outlet arrangement simply to suit a container’s inlet.
Route downpipes around garden use
Choose the downpipe route at the same time as the gutter outlet, rather than after the gutter is in place. Check it against doors and windows, steps, seating areas, bins and the route used to carry items in and out. A pipe across a narrow entrance or beside a frequently used path can obstruct access or be knocked. Include bends and intended fixing points in the sketch, and leave practical access for checking the pipe without having to move stored items. With the Veltor 1 garden house in mind, use confirmed layout information to locate doors and openings; do not infer them from a model name.
At ground level, decide where the pipe ends: in a water butt, a suitable drainage route or another planned collection point. Keep joints, filters and inlet connections accessible for clearing debris, and avoid a loose end that spills across a doorway or path. Do not discharge directly beside the summer house base, where repeated overflow can keep the ground wet or cause pooling. Check the site’s slope and distance from the building: a pipe that looks convenient at the wall may still send water back towards it at ground level. Keep the lower end visible so that a blockage or spill is easier to spot.
Before you order 3
Plan the discharge and overflow
Decide what happens when rain reaches the end of the downpipe before choosing a tank. A water butt is one option for garden watering, but it needs an overflow route for periods when it is full. Where storage is not wanted, a suitable surface-drainage or ground-infiltration arrangement may be possible; neither suits every plot. Soil, gradients, buried services, nearby structures and existing drainage affect the choice. If the site is sloping, confined or prone to standing water, ask a drainage professional to assess the route rather than relying on a guessed soakaway position. Consider how the water will behave after it leaves the pipe, not just where the outlet ends.
Plan the overflow alongside the main discharge. It needs to reach a place that can accept surplus water when the butt is full or its inlet is blocked; otherwise, the collection system may spill beside the building. Consider the Orello 1 garden house alongside the proposed tank and overflow location, without assuming that drainage parts or a storage container come with the building. Avoid routing water across a neighbour’s space, a public path or a regularly used part of the garden. If you intend to use an existing drain, confirm its suitability and any applicable requirements before arranging a connection. The route should also remain safe if the tank is moved or disconnected for cleaning.
Size storage for garden demand
Choose storage capacity by balancing likely water supply with garden demand. Roof catchment area and local rainfall affect how quickly a butt fills; how much you can use depends on watering habits, the plants you grow and whether you can draw water during drier spells. A small container may fill and overflow frequently, while a large one can take up space and remain underused if the garden needs little water. There is no universal capacity for a summer house. Estimate what you are likely to use, consider periods when the garden is not in use, and compare that demand with the container’s stated volume.
When considering the Modano 1 garden house, mark the proposed butt location on the garden plan before ordering. Leave room to reach the tap, lid, inlet filter and overflow, and choose a level base that supports the full container as its maker requires. A full water butt is heavy, so do not put it on an improvised stand or assume an uneven patch of ground is adequate; ask a suitably qualified professional if support is uncertain. Plan how the container can be emptied and cleaned, and whether the overflow remains connected if it is moved. Keep stored water covered and treat it as non-potable water for garden use.
Before you order 4
Allow for cleaning and routine checks
Maintenance should influence the layout. Nearby trees can drop leaves, twigs and seed cases into gutters, while roof debris can collect at outlets. If considering a leaf guard or mesh, confirm that it fits the chosen system and allows water to reach the outlet; a screen that is difficult to remove can make cleaning harder. Guards may reduce some debris entering the channel, but they do not remove the need to inspect it. For the Veltor 2 garden house, as for any choice, check whether the final roof-and-gutter arrangement leaves practical access to outlets and downpipe connections. Tree debris can vary through the year, so consider the site at leaf fall as well as in summer.
Plan a routine for checking guttering after leaf fall and heavy rain, following the house and gutter instructions. From ground level, look for visible sagging, separated joints, overflowing corners or water escaping away from an outlet; do not climb onto the roof or reach beyond safe access to clear a blockage. If work at height is needed, use someone equipped and competent to do it. Check that the downpipe remains connected and that the water butt’s inlet and overflow are clear. After a storm, look for debris or loose sections without attempting a repair from a ladder. A route that is easy to inspect is easier to keep working.
Compare compatible gutter systems
Compare gutter systems by their documented material, profile, finish and conditions of use, not by appearance alone. Plastic and metal systems, for example, can have different installation and maintenance instructions; a colour match or shared nominal size does not establish that parts will join. Check which fixings and joining method the manufacturer specifies, and whether the summer-house maker approves attachment to the chosen roof edge. If product information does not explain compatibility or exposure limits, request clarification before ordering. For the Veltor 3 garden house, use information for the exact model rather than assuming it shares every detail with another model or that an outdoor-sounding description confirms suitability.
Consider whether matching elbows, clips, connectors and replacement lengths are available from the same system. Mixing brands or profiles can leave gaps or make future repairs awkward, so confirm compatibility instead of relying on a visual match. A finish that suits the summer house may matter aesthetically, but choose it after fit, drainage and maintenance requirements. Keep the supplier’s fitting guidance with the parts so an installer or future owner can identify the correct components. Note the system and profile in your plan, and confirm whether seals, brackets or other accessories are specifically required before ordering the complete set.

Before you order 5
Measure parts and review the order
Turn the site sketch into a measured parts list. Record each gutter run, corner, outlet position, downpipe length, bend and fixing point; then list the stop ends, unions, clips, filters, butt inlet and overflow parts required by the chosen system. Gutter lengths follow the roof edge rather than the building’s floor footprint, so a floor-plan width is not a substitute for confirmed eaves measurements. Work from a product drawing or safe measurements from the ground. If a length or fixing point cannot be checked safely, ask an installer to confirm it. Label which run each component belongs to, so quantities are easier to review.
Before ordering a summer house or accessories, review the current product description and final order summary to see exactly what is included. A photograph may show a set-up with separate additions; do not assume that gutters, downpipes, a tank, a fixing kit or tools come with the building unless the written contents say so. Confirm the exact model, component compatibility, quantities and any separate requirements, then read the current payment, delivery and returns terms. If guttering is offered as an add-on, ask whether its instructions cover the roof edge on your chosen model and what information is needed to confirm the match. Keep any written answer with your order.
Arrange fitting and inspect the route
Coordinate gutter fitting with the build and garden works. A pipe route can be harder to change after paving, planting or storage narrows access, so mark it before those decisions are fixed. Follow both manufacturers’ instructions, including any limits on fixing to the structure. If the proposal involves changing roof-edge components, locating hidden support or resolving a drainage issue, have the relevant installer assess it instead of improvising. The correct bracket arrangement and drainage capacity depend on the particular building, gutter system and site. Raise questions before assembly if support points may be hidden later.
After fitting, check the route during rainfall from a safe position. Water should enter the gutter and travel towards its outlet; look for spills at joints, corners and end caps, and confirm that the downpipe reaches the intended point. Check that the storage overflow works as planned and does not leave water beside the base, across an entrance or on a path. If the gutter overflows or leaks, investigate the outlet, blockage, alignment and system capacity rather than simply adding a bigger butt. Follow the maker’s method for any controlled water check, and have work at height or changes to the route handled by someone competent.
Frequently asked questions
Can guttering be fitted to any summer house?
Not automatically. The roof edge needs a suitable fixing method, and the gutter must sit where it can collect runoff without interfering with the roof covering. Check the house instructions and gutter system’s compatibility details. If the fixing points are unclear or fitting would require changes to the structure, ask the manufacturer or a competent installer.
Are gutters included with a summer house?
Do not assume they are. Package contents can vary, so check the current product description and order summary, and ask the seller if anything is unclear. Look specifically for gutters, brackets, downpipes, a water butt and any fixing kit. A photograph may show accessories that are not part of the listed contents.
Where should a downpipe discharge?
Choose a suitable destination before fitting the pipe: for example, a water butt with a planned overflow or an appropriate drainage route. Keep the outlet away from the building’s base, entrances and paths, and make sure it can be inspected. Consider what will happen when storage is full or the pipe is blocked.
What size water butt should I choose?
Compare the container’s stated capacity with your likely water use, the roof area feeding it and local rainfall. Consider how often you can draw water and where the overflow will go. There is no universal size for a summer house; choose one that fits the site and your garden’s realistic watering needs.
Can I drink rainwater collected from a summer house roof?
Do not assume that it is safe to drink. Guttering and a garden water butt do not establish drinking-water quality, so treat collected rainwater as non-potable and use it for garden purposes. If you need drinking water, use a dedicated supply designed for that purpose rather than relying on roof collection.
Good summer house guttering is part of a complete water route: roof edge, compatible gutter, accessible downpipe, suitable discharge and, if wanted, storage with an overflow. Marking those points on a garden plan helps you judge whether rainwater collection is practical and identify what information is missing before you order. A clear route can direct runoff away from entrances and the building’s base while making routine checks easier.
