
How to Prepare Summer House Timber Before Painting
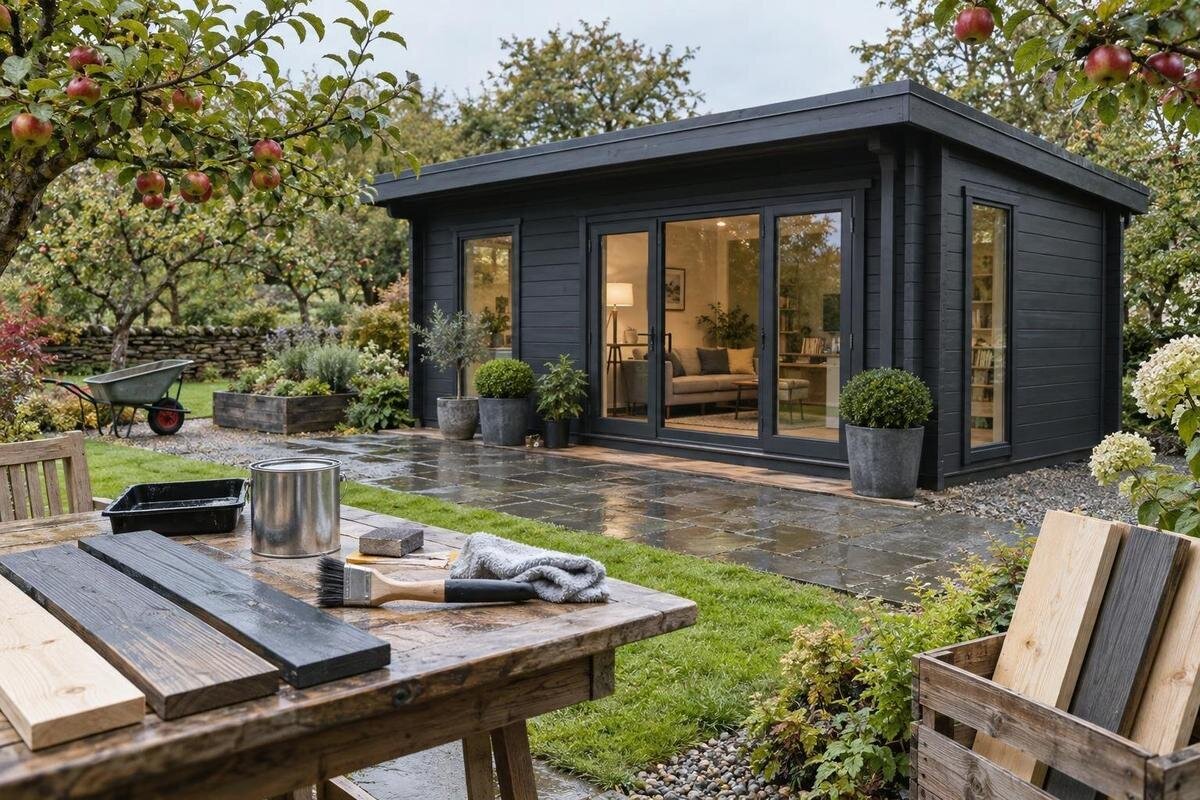
Summer house timber preparation
Before painting a summer house, establish what is already on the timber, remove dirt and failed coating, let the wood dry and smooth only the areas that need it. Good preparation also brings damage to light before a fresh coat can conceal it. The right method depends on the existing surface and the coating you plan to use, so begin with inspection rather than a one-size-fits-all sanding routine.

Questions to ask before ordering 1
Inspect the existing finish before choosing a method
Walk around the summer house in good daylight and inspect every face, including sheltered corners and the lower edges. Record whether the timber is bare, painted, stained or covered by another finish; the surface may differ from one elevation to another. Look for peeling, lifted edges, powdering, blisters, dirt and glossy patches that may affect adhesion. A gentle rub with a clean, dry cloth can reveal loose powder, but it will not identify an old coating or prove that it is bonded. Check around joints and openings as well as broad boards. Note whether damage is local or repeated across a wall; that pattern helps you define separate preparation areas. Mark sound areas and failed areas separately: one loose patch does not automatically mean every wall needs stripping.
For a house you already own, use this record to assign a method to each area rather than treating the whole exterior as one surface. If you are comparing models before purchase, treat a product page as a model reference, not a timber specification: use the Verdana 1 listing when asking the seller whether the timber’s surface will be bare or pre-finished and what preparation the supplied coating requires. Ask for guidance before choosing paint or abrasives, and keep the answer with your order details. Once delivered, compare the actual surface with what was stated; photograph any difference and pause until it is clarified.
Check timber dryness and weather conditions
Paint adhesion depends not only on visible cleanliness but also on whether the timber is dry enough for the chosen coating. Recent rain, washing, condensation in sheltered areas and moisture held near joints can leave the surface looking dry before the wood is ready. Pay particular attention to lower edges, end grain and places that dry slowly, but do not diagnose moisture from colour alone. A meter can help only when you know how to take and interpret readings against the coating maker’s stated limit; one reading on one board cannot represent the whole building. If the timber feels damp or the instructions set a moisture threshold, delay rather than guessing.
Check the paint label for its application conditions, including any stated temperature or moisture limits, and plan preparation so the surface can stay clean and dry until painting. Avoid starting just before rain or heavy dew if the timber could be affected before you are ready to coat it. There is no universal number of hours to wait after rain or washing: board thickness, airflow, exposure and recent weather all make a difference. When reviewing options such as the Verdana 2 listing, ask what information is available about the timber’s condition on delivery and which coating instructions will apply. Use those criteria, not a guessed timetable.
Questions to ask before ordering 2
Repair damaged timber before painting
Inspect board ends, joints, lower edges and areas around openings for splits, loose pieces, softness, crumbling or distortion. Look for staining that may point to repeated wetting, but do not assume that a dark mark alone proves the wood is damaged. Consider where water could be getting in or being held, and whether a leak, splash or blocked gap needs attention first. Paint can cover evidence without solving its cause. Make a note of each concern and check whether it is confined to the surface or affects a board, joint or fitting that needs repair.
Do not expect filler or a fresh coating to restore soft or badly split timber. Use a repair method intended for the problem and compatible with the planned coating; replace damaged pieces where needed. If a joint is affected, a board feels weak, or you are uncertain about the extent of the damage, ask a competent carpenter or builder to assess it before painting. For a prospective order such as the Durano listing, check the seller’s process for reporting damage on delivery and clarify which repairs should be completed before finishing. Keep a record before paint hides the area.
Clean dirt and residue without soaking the wood
Start by brushing away loose dust, cobwebs and dry dirt with a soft brush. If more cleaning is needed, use a cleaner suitable for timber and the coating you plan to apply, following its label for dilution, application and rinsing. Work gently rather than scrubbing with an abrasive pad that could mark the surface. Use only as much water as needed: soaking boards or directing water into joints can add moisture that then has to dry out before painting. Avoid treating a pressure washer as a shortcut, since forceful water can roughen fibres or enter gaps.
Check corners, ledges and joints for soap or cleaner residue after washing; residue left behind can interfere with the next coating. Rinse only as the cleaner’s directions require, then allow the timber to dry fully before sanding or priming. If you find grease, adhesive or another persistent deposit, do not reach for a random solvent that might affect the existing finish; identify the residue and use a compatible method. Before choosing a building such as the Veltor 1 listing, ask what care or preparation information is available for its delivered surface, rather than assuming that every finish can be cleaned in the same way.

Questions to ask before ordering 3
Remove loose or failing coatings
Once the surface is clean and dry, deal with coating that is peeling, flaking or no longer attached. Use a scraper carefully to lift material that has already failed, taking care not to gouge the timber or enlarge a sound edge. Where a firm coating meets a bare or scraped patch, smooth the transition as the paint instructions recommend so the edge does not remain raised. Do not strip an intact finish simply because a neighbouring area has failed; the right extent of removal depends on adhesion and compatibility with the new system.
If you cannot identify an old coating, establish an appropriate removal method before sanding it, as abrasion creates dust and chips. Use suitable dust control and protective equipment for the task, and collect debris rather than spreading it over cleaned timber. When comparing products, ask what surface condition is expected for the model shown on the Orello listing and whether any existing or supplied coating affects repainting. The listing identifies the model, but it is not a substitute for confirmation of the finish or its preparation requirements.
Sand rough areas without overworking the timber
Sand only where it solves a problem: rough fibres, raised grain, sharp transitions at scraped edges or patches that the paint maker says need keying. Work with the grain and keep a sanding block flat on broad boards to avoid hollows. Take extra care near corners, profiles and joints, where it is easy to round an edge or alter the fit of a moving part. Do not sand damp timber, and do not try to remove every colour variation if the surface is otherwise sound. Excessive sanding can leave more dust and bare wood to prepare without improving the result.
Choose an abrasive and sanding method that suit the surface and the coating instructions; there is no single grit that is right for every old finish and bare patch. Keep dust under control, especially when using a powered tool, and stop to check the surface in good light rather than sanding by feel alone. A model page cannot establish whether its timber should be sanded or how much preparation it needs, so ask about the supplied surface when considering the Modano listing. Follow any guidance you receive and avoid treating a sound surface more aggressively than necessary.
Questions to ask before ordering 4
Clear sanding dust and prepare bare patches
After scraping and sanding, remove dust from the entire area, not just the broad faces of the boards. Use a suitable vacuum attachment or soft brush, paying attention to joints, ledges, grooves and corners where fine particles collect. A clean cloth can pick up remaining dust, but avoid leaving fibres or residue behind. If you use a damp cloth, check that the paint system allows it and let the timber dry again before continuing. Dust left under primer or paint can spoil the surface and make it harder to judge whether the preparation is complete.
Look for bare timber exposed by scraping or sanding and check what the chosen system requires for those areas. Some coatings call for a particular primer or for treatment of exposed edges; others set different preparation steps for bare wood and sound existing paint. Follow the label for sequence and drying conditions rather than applying the same product everywhere by habit. Before ordering a model such as the Veltor 2 listing, ask the seller where to find guidance on compatible primers and preparation for exposed timber. Do not assume that the model name or product image answers that question.
Mask glazing, fittings and surfaces that must stay clear
Before painting, identify any glazing, handles, hinges, seals and moving parts that should not receive paint. Check around openings for gaps or channels that need to remain clear, and avoid covering labels or surfaces where two parts meet. Use masking materials that are suitable for the surface and remove them as their instructions advise; leaving tape on too long can make it harder to remove cleanly. Only take fittings off if the instructions allow it and you are confident they can be refitted correctly. Where a component’s purpose is unclear, check before coating it.
If you are shortlisting the Veltor 3 listing, ask whether the seller can point you to assembly or finishing guidance that identifies areas to mask or keep clear. Do not rely on a product photograph alone: it may not show every joint or explain how parts move. Once the building is in front of you, check the actual arrangement and mark the boundaries before opening paint. This small pause helps prevent accidental coating of seals, glass or moving surfaces and avoids having to scrape paint back off a finished area.

Questions to ask before ordering 5
Match the primer and paint to the prepared surface
Choose the coating system before the final preparation, so you can follow its requirements for bare timber, previously painted areas and any primer or undercoat. Read the label for the intended surface, exterior use, preparation method and application conditions. Do not assume that a product suitable for bare wood will also adhere to every old finish, or that one primer is needed over the whole building. If different areas have different surfaces, note which instructions apply to each one and keep the products and sequence clear.
Where instructions are unclear or appear to conflict, ask the coating maker or supplier before proceeding. A small test area in an inconspicuous place can help reveal an unexpected reaction or appearance, but it does not replace stated compatibility guidance. Allow the test to dry for the period specified before assessing it. Record the product names and preparation steps you have chosen, especially if bare patches and sound old coating need different treatment. That record also helps you repeat the same method on the remaining faces without relying on memory.
Make a final readiness check before painting
Before opening the tin, walk around the summer house once more. Check that dirt, cleaner residue, loose coating and sanding dust are gone; repairs are complete; and each surface is dry enough for the chosen system. Look along boards in good light for missed flakes, rough edges or bare areas that still need their specified preparation. Confirm that masking is in place and that no area has become wet or dusty since you cleaned it. If something has changed, address it rather than painting over the new problem.
Keep the prepared surface protected from dirt and moisture while you organise the work, without sealing damp timber in a way that prevents it drying. If rain, dust or handling affects an area before painting, reassess it and repeat the relevant cleaning or drying step. For a house not yet ordered, make the delivered surface and its preparation guidance part of your comparison; for one already in the garden, use your inspection notes to work through each face. A clear record turns the preparation into a manageable sequence rather than a last-minute guess.
Frequently asked questions
Can I paint over an existing coat?
Only if the existing coating is sound and compatible with the new system. Clean it and prepare it as the paint maker directs, removing loose material first. A fresh coat will not stabilise peeling paint. If you cannot identify the old finish, check compatibility before painting a larger area.
How do I know whether the timber is dry enough?
Do not rely on touch or the appearance of the surface alone, particularly after rain or washing. Follow the coating maker’s stated moisture and weather limits. If a moisture meter is needed, use it as directed and compare readings with the stated limit; one reading may not represent every wall.
Do I need to sand every board?
Usually, preparation should be limited to what the surface needs. Sand rough bare areas and feather the edges of failed coating as directed, but do not remove sound paint simply to make the whole building look identical. Check whether the chosen system calls for a light key on intact paint.
Is a pressure washer a good way to clean a summer house?
Do not make it the default preparation method. High-pressure water can roughen timber and drive moisture into joints. Start with a dry brush, then use a suitable cleaner and gentle application method according to its label and the paint maker’s instructions.
What should I do if the timber is soft or badly split?
Pause before painting. A coating will not repair damaged wood or resolve the source of moisture. Find and address the cause, then arrange a suitable repair or replacement. If the damage affects a joint or you are unsure how serious it is, ask a competent carpenter or builder to assess it.
Good preparation is not about sanding every board until it looks identical. It means identifying what is on each surface, removing only material that has failed, allowing the timber to dry and resolving damage before applying a compatible coating. If you are buying, clear information about the delivered surface and its preparation belongs in your product comparison. If you already own the summer house, the same checks give you a practical plan for each face before the fresh coat goes on.
