
Planning Summer House Floor Insulation Before Assembly
SUMMER HOUSE PLANNING
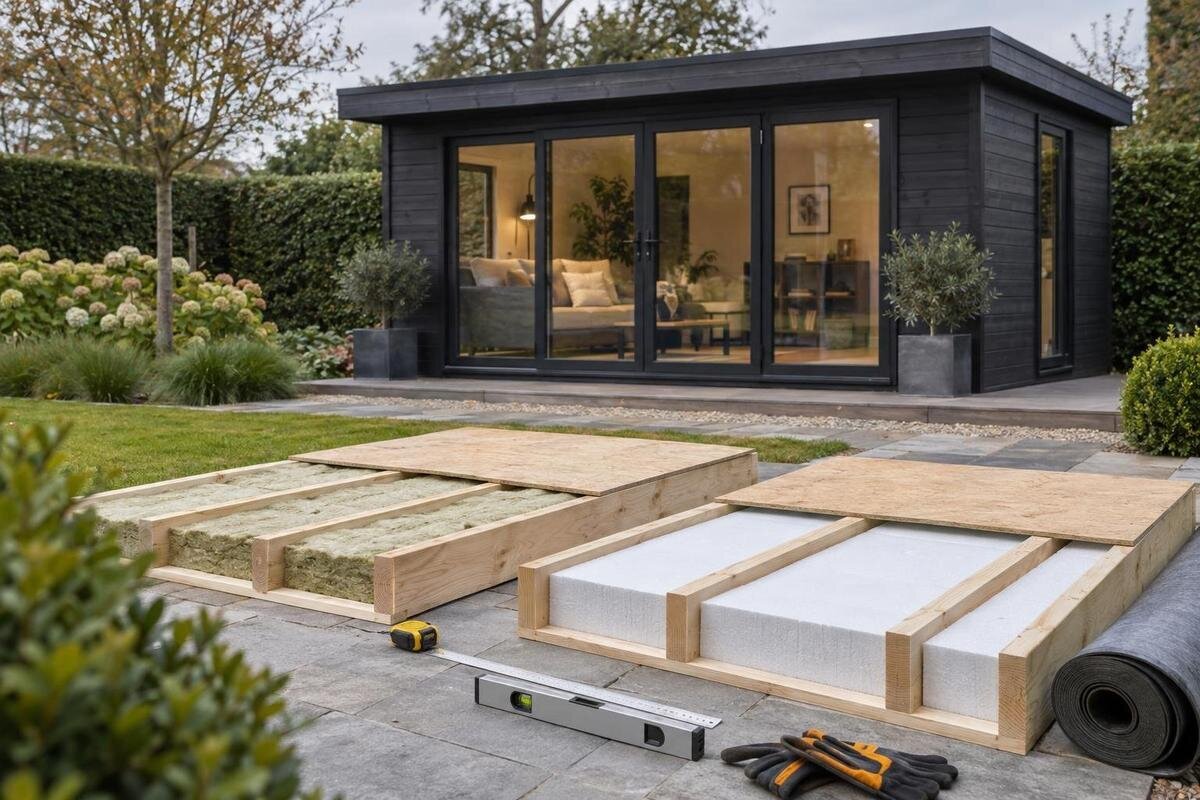
Planning summer house floor insulation before assembly gives you a chance to coordinate the base, floor structure and finished level before any layers are hidden. The key measurement is not just the insulation thickness: it is the full floor build-up, from the underside detail to the surface you will walk on. Confirm what the chosen summer house includes, how much depth is available and how the added height affects the entrance and room. These checks help you order compatible materials and follow the right assembly sequence.

Before you order 1
Match floor insulation to the intended use
Decide first what the room needs to do. Occasional use for potting, storage or a summer reading spot creates different requirements from regular use during colder months. Note when the building will be used, how long people are likely to spend inside and whether you expect a consistently comfortable workspace. These are planning questions, not reasons to choose a particular insulation product: they define the comfort you are aiming for and whether a deeper floor build-up makes sense within the available space. A clear objective, such as reducing the cold feel underfoot, is more useful than an undefined wish to make the whole building warm.
Floor insulation can reduce heat transfer through the floor, but it does not determine the comfort or suitability of the whole summer house on its own. Walls, roof, windows and doors, ventilation, draughts and the way the room is used also matter. If substantial items will be stored there, check separately that the proposed floor is suitable; insulation thickness says nothing about its load capacity. If the Verdana 1 summer house is on your shortlist, check the model-specific floor information against your intended use. If details are missing, ask for them rather than inferring an insulation arrangement from the name or images. Seek advice on the complete building design if you need a particular indoor environment.
Confirm the base and finished floor level
Before specifying insulation, establish how the base and floor are meant to work together. Follow the assembly guidance for the exact summer house, including any stated base-preparation and support requirements; a generic detail for another building is not a substitute. If the base is out of level or does not support the structure as specified, fitting the building and aligning its doors may become difficult. Insulation cannot correct an unsuitable base. Where the ground, proposed base or support design is unclear, ask a suitable builder or qualified professional to assess it before ordering materials.
Record the height from the top of the base to the planned finished floor, not just to the top of the floorboards. Include the layers specified for your design, such as a protective layer, insulation, floor deck and final covering, and note their individual thicknesses. Their total can raise the floor relative to the threshold and reduce clear internal height. Using one agreed reference level also helps the base installer and assembler work from the same figure. When considering the Verdana 2 model, use instructions for the exact version rather than borrowing dimensions from a different design; ask for the permitted finished level if it is not stated.
Before you order 2
Check what the floor package includes
Read the contents of the exact order before deciding what to insulate. A product listing can describe a building while a floor, extra materials or other options may be separate; what is included depends on the selected version and order. Check the contents list and assembly documents for floorboards, bearers or joists, fixings, membranes and any final finish. Mark each item as included, optional or separately sourced. If the wording is unclear, ask the retailer to confirm the contents for the precise version you intend to buy, preferably in writing, so you do not design around a component that is not arriving.
Then inspect the floor drawing, if one is supplied, for the support layout, available cavity and any panels or openings beneath the boards. These details affect what kind of insulation can fit and whether it can be installed without obstructing another layer. Separate options can also alter dimensions or assembly steps, so do not treat a general category image as a section drawing. For the Durano garden house, confirm from the exact order contents and documents whether a floor is included before buying insulation. If the floor is separate, coordinate its details with the building instructions.
Measure the depth available for insulation
Measure usable insulation depth from the floor design, not from the overall height between the ground and the boards. That larger measurement may include the base, support members and components that insulation cannot occupy. Use the drawing to identify the clear cavity, spacing between supports and any specified airspace or protective layer. Note whether the available depth is continuous or interrupted by the floor structure. If the documents give only overall dimensions, ask for the clear depth or have the installer check it before selecting a material; a photograph is not a reliable guide to a concealed cavity.
Once the space is known, compare it with the insulation manufacturer's stated installed thickness and fitting guidance. Material forced into a smaller cavity or compressed to make it fit may not perform as intended, while cutting or altering floor supports can compromise the designed assembly. Do not choose a thickness simply by filling the available depth; allow for all the specified layers and clearances. For the Veltor 1 summer house, request the clear cavity dimensions for the precise version and check them against the proposed material. Resolve any mismatch before assembly, while the floor detail can still be reviewed.

Before you order 3
Map the complete floor build-up
Make a simple cross-section of the intended floor, starting underneath and ending at the room surface. Label the base or support arrangement, any required underfloor protection, floor structure, insulation, any moisture- or vapour-control layer, deck and final covering. Add each layer's thickness and note its position. Show how the layers meet at the edges as well as in the middle of the floor, including the junction with the wall and threshold. This makes the total build-up visible and gives the installer or supplier a specific arrangement to review, rather than a vague request for floor insulation.
Do not copy a layer order from an unrelated building or assume that a membrane belongs on one particular side in every design. Materials and positions depend on the floor construction and the manufacturer's instructions; an incompatible layer can interfere with how the assembly manages moisture. If the documents leave a gap, ask for a model-specific floor cross-section and an explanation of each layer, including whether it covers the finish you plan to use. For the Orello garden house, request clarification before choosing insulation instead of relying on a generic sketch or photograph.
Plan for moisture beneath the floor
Treat moisture as a separate part of the design. Insulation does not stop water entering from a wet base, rain splash, a leak or ground moisture, and it does not identify the cause of dampness. Consider the actual site: whether rainwater collects near the building, whether the ground is often wet and how exposed the underside will be. If the base, floor or supplied boards are damp, or the floor detail is unclear, resolve the concern before enclosing the cavity. Hiding a damp problem behind a new layer can make later inspection harder.
Check whether the chosen floor design specifies an underfloor panel, ventilation gap, open route for air or a particular moisture-control layer, and keep any required openings clear. Do not seal the perimeter or fill a space simply because it feels draughty: changing the designed airflow may affect drying. Ask the supplier or a qualified builder how the underside should be protected in your setting, particularly if the base is close to wet ground. For the Modano garden house, use guidance for the exact model rather than inferring the underside detail from an image, and keep any clarification with the assembly documents.
Before you order 4
Check the threshold and door clearance
Calculate the finished floor height before assembly. Add the thicknesses of the layers you actually plan to use, including the final surface, and compare the result with the entrance threshold and the available clearance around the door. Floor and door details vary by model, so use the relevant drawing rather than assuming every sill is the same. A floor that finishes too high may interfere with opening or leave too little clearance; a lower floor can create a pronounced step from outside. Decide how the transition should work before boards or trim are fixed.
Check the movement path of the door and any track or lower trim shown in the documents; leave space for a mat if you intend to use one. Consider how the floor finish meets the wall and threshold, because a different surface thickness can change the final edge detail. Do not modify a door or supporting member to recover clearance without the manufacturer's approval or advice from a qualified professional. If the Veltor 2 model is under consideration, compare its documented entrance dimensions with the complete insulation-and-finish build-up, not just the bare board level.
Allow for finished room height and fittings
An insulated floor changes the relationship between the floor surface and the rest of the room. Each added layer reduces clear internal height, which can matter if the ceiling is low, and raises the level of shelves, worktops, seating or storage measured from the floor. Use finished internal dimensions wherever available rather than assuming an external building measurement gives usable room height. Include the floor covering, underlay and edge trim in your proposed total, not only the insulation. If you already own furniture or storage units, note their feet, plinths and fixing points before finalising the surface.
Sketch furniture and storage in position, then check clearances for door opening, access, wall-mounted items and the way the floor edges will be finished. A cabinet may need its base adjusted; a partition or skirting may meet the floor differently once the build-up is higher. Do not cut structural boards around an obstruction unless the instructions allow it or a qualified professional confirms the detail. For the Veltor 3 summer house, base your layout on verified internal dimensions and recalculate clear height after adding the planned layers. Request the figures if they are not provided.

Before you order 5
Fit the insulation into the assembly sequence
The right installation sequence depends on the selected floor system, so do not assume the insulation always goes in before the floorboards or after the walls. Use the model's assembly instructions to identify which parts become inaccessible as the building progresses and when the cavity should be checked. Put the specified insulation and associated layers on the materials list before that stage. Planning ahead gives you time to confirm size and fit, and avoids leaving a hidden space unfinished because a component was ordered too late.
If someone else is assembling the building, share the layer drawing, dimensions and target finished floor height before work begins. Agree who will confirm the fit before the floor is closed, and keep the current instructions and written clarifications with the materials so everyone uses the same version. Check delivered items against your order while there is still time to resolve a missing or incorrect component. Do not improvise a substitute layer or alter a support member to save time; if the specified sequence appears incompatible with your plan, pause and seek advice.
Confirm the details before ordering
Bring the critical information together before placing the order: the exact summer house model and version, what the floor package includes, base requirements, clear insulation depth, proposed layer order and finished floor level. Note where each figure came from and mark anything still unconfirmed. Keep the building and insulation documents side by side; if they describe different versions or use different reference points, resolve that discrepancy rather than combining the most convenient numbers. Base the purchase decision on the complete compatible assembly, not on insulation thickness alone.
Ask focused questions about any gaps: Which floor parts are included? What cavity and doorway clearance are available? Which protective or moisture-control layers are specified, and when should they be fitted? Is the proposed finish included in the permitted floor height? Get answers tied to the exact model and keep them with the assembly documents. If you are buying insulation separately, confirm that its fitting guidance agrees with the building requirements. Where advice conflicts or the base and structure need assessment, ask a qualified professional to review the detail before materials are ordered.
Frequently asked questions
Does every summer house need floor insulation?
No. Whether it is worthwhile depends on how you will use the building, the floor design and whether the extra layers can fit. For occasional seasonal use it may not be a priority. If you want to use the room regularly in colder weather, consider the floor alongside the walls, roof, windows, doors and ventilation.
How do I choose the insulation thickness?
First find the clear depth available in the floor structure for the exact model. Then compare it with the insulation manufacturer's fitting guidance and account for every other specified layer. There is no universal thickness that suits every summer house. Ask the supplier or a qualified professional if the documents do not give enough information.
Does a summer-house floor package always include insulation?
No assumption is safe: package contents depend on the exact product and order. Check the contents list for the floor, insulation and any other layers, and distinguish included items from optional extras or materials you must buy separately. Ask for clarification before ordering if the listing or instructions are not clear.
Do I need to check the doorway if I insulate the floor?
Yes. Insulation, decking and the finished surface all contribute to the final floor height. Compare that total with the threshold and the clearance under or around the door, using the drawings for the chosen model. Include the finish and any mat you plan to use when considering the transition.
Will an insulated floor make a summer house suitable for year-round use?
Not by itself. Floor insulation addresses only one part of the building, while walls, roof, glazing, doors, draughts and ventilation also affect comfort. If you need a particular indoor environment, have the complete design assessed by a suitable building professional rather than relying on the floor layers alone.
Plan the floor as one complete assembly: the base, supporting structure, insulation, any specified control layers and the finish all affect the final level. Once those details are confirmed for the chosen summer house, you can order materials to fit the design rather than making the design accommodate a guess. Planning before assembly is the opportunity to reconcile floor depth, threshold clearance and construction sequence while the details are still open to review.
