
Using a summer house in winter: a preparation checklist
WINTER USE
Using a summer house in winter can be useful, but the name does not tell you how a particular building will cope with cold, wind or prolonged damp. Before ordering, match its documented purpose and installation requirements to the way you intend to use it. If it is already in the garden, inspect it before the first cold spell and revisit the checks after wet or stormy weather. This winter preparation checklist separates purchase questions from routine upkeep. It also helps you spot the limits of a visual inspection and know when to ask the supplier, installer or another qualified professional rather than guessing.

01
Define the kind of winter use you expect
Start by describing the winter use in ordinary terms: a brief visit to collect garden equipment, a short place to sit, or repeated longer stays place different demands on the building. Note how often you expect to use it, whether it must be comfortable as soon as you arrive, and what will remain inside between visits. A summer house used for storage and occasional shelter has different priorities from one expected to provide a comfortable place to spend hours. Write down the longest visit you expect as well as the typical one; a plan for brief check-ins may not suit an afternoon indoors. Seasonal upkeep can help you spot problems early, but it cannot replace performance that the product was not designed or documented to provide.
Write those requirements down before comparing models and separate essentials from preferences. Do you need a clear path to the door in poor weather, somewhere to bring wet items, or an interior that stays comfortable for a long visit? The answers affect the site, the product information you need and whether the plan is realistic. A timber finish, glazed front or attractive interior photograph does not establish insulation, weather resistance or suitability for extended use. Compare the evidence against your intended pattern of use; for example, the Verdana 1 summer house should be assessed from its model-specific information, not from its name or appearance.
Read the product details before ordering
Check the exact product listing and request the relevant manufacturer instructions before you buy. Look for the stated intended use, material and construction details, roof covering, wall and floor information, glazing, door and window arrangements, ventilation, base requirements and maintenance schedule. Not every item will be described on a summary page, so do not fill gaps by guessing from photographs, marketing adjectives or a model name. If a point matters to winter use and is unclear, ask the seller or manufacturer to clarify it for that exact model. Keep the model reference on any written answer; guidance for a similarly named product may not apply when you arrange installation or future upkeep.
Confirm what is included and what is separate; never assume that a base, installation, weatherproofing treatment, insulation or other work comes with the building unless the product details and order make that clear. Ask what site and assembly conditions are required, and whether proposed alterations change the manufacturer’s instructions. Apply those questions to the Verdana 2 summer house just as you would to any alternative. Being sold as a summer house does not, by itself, promise comfortable use in cold weather. Compare documented suitability, work required and ongoing care before weighing the overall cost.
02
Check the site, base and drainage
Walk the proposed spot after rain, or look for signs of where water collects through wet months. Note puddles, run-off from roofs, blocked drains, saturated ground and nearby paving that may direct water towards the building. Consider whether water drains away from the intended footprint or is likely to collect at low points. Make sure the walls and openings remain accessible for inspection; a very narrow gap can make routine care awkward even if the structure fits on a plan. A site that looks dry in summer may behave differently after repeated rain, so base the choice on actual drainage and access, not a sunny-day impression.
Match the base and installation to the instructions for the exact structure and the conditions on your plot. Do not assume that a visually level patch, paving or an existing platform meets those requirements, and do not improvise structural calculations to make it fit. If levels, drainage or support are unclear, ask the supplier or a qualified installer to assess them before ordering or building. That assessment may change the position, preparation or scope of work, so it is better to resolve the question before purchase. For the Durano summer house, find out what base requirements apply rather than choosing a surface by appearance.
Inspect the roof and exterior
Before colder, wetter weather sets in, inspect the outside from a safe position at ground level. Look for damaged or displaced roof covering, gaps at junctions, components that appear loose, or signs of water tracking down a wall. Check corners, lower wall edges and the point where the building meets its base, where splashback or standing moisture may be visible. If gutters or downpipes are fitted, look for visible blockages from the ground. After strong winds or heavy rain, repeat the visual check and note anything that has changed; do not climb onto the roof or disturb parts you cannot reach safely.
Inside, compare any marks or damp patches with what you see outdoors and record their location and whether they change. Peeling, blistering or visibly worn exterior coating may need attention, but the right maintenance depends on the material and the product’s care instructions. Do not coat over dampness or apply an unapproved sealant simply to hide a leak; establish the source first. Check the guidance for the Veltor 1 summer house or the model you own, and seek advice from the supplier or an appropriate tradesperson if damage is persistent, extensive or hard to access. A quick cosmetic repair is not a substitute for finding out why water is entering.

03
Check doors and windows before cold weather
Open and close each door and window gently during an inspection. Notice whether a latch catches, a frame appears damaged, glazing seems loose, or a seal supplied with the building has shifted. Clear leaves and grit from accessible tracks and thresholds in the way the care instructions recommend; do not force a stiff fitting or fill a gap with foam, tape or sealant before checking what the maker allows. Easy operation matters if you need to use an opening when the weather is cold, and the exit should not be blocked by stored items. If a fitting has changed since your last check, note it rather than repeatedly forcing it.
When buying, verify the exact door and window arrangement and what is supplied, then consider how nearby fences, plants, stored furniture or seasonal debris could obstruct opening or access. Do not infer the type of glazing, seals or ventilation from a photograph. For the Orello summer house, as with any listing, use the stated details and assembly information to check that the openings suit the planned position and winter routine. If a door starts binding or a window no longer closes properly, ask the installer or supplier to assess the cause instead of forcing it. This matters before leaving the building unattended, when a partly closed opening could admit rain.
Look for damp and follow ventilation guidance
After rain and during cold spells, inspect indoors for water marks, condensation on surfaces, a musty smell or belongings that feel wet. Check the corners and floor around stored items rather than looking only at the centre of the room. Record where and when the signs appear: condensation, a leak and moisture entering near the base need different responses. Move possessions away from an affected area while you investigate, but do not cover the surface or assume that opening a window will correct the underlying cause. If damp or visible deterioration persists, ask the supplier or a suitable professional to identify it before redecorating or storing more belongings there.
Follow the product’s instructions for ventilation and take account of the conditions outside. If you air the building, choose a safe opportunity and secure it again before leaving; an open window or door left unattended can let in rain or compromise security. Avoid bringing wet coats, muddy tools or garden materials straight into a closed room, and dry movable furnishings elsewhere if they are not intended to remain damp. When checking the Modano 1 summer house, look for model-specific ventilation and care information rather than assuming that appearance reveals how moisture should be managed. Keep vents clear only as the manufacturer directs.
04
Assess the documented provision for warmth
Winter preparation is mainly about reducing avoidable moisture exposure, checking the building’s condition and making planned visits manageable; it does not add insulation or prove that the structure is designed for warmth. A summer house can be dry and in good repair yet still feel cold. If regular comfort matters, check what the documentation says about insulation, floor construction, air movement and intended use, and ask which limitations remain. Do not use wall thickness, glazing or a photograph as a shortcut for judging thermal performance. Before buying, ask the seller to identify the model-specific specifications or manufacturer’s guidance relevant to the use you have in mind.
If you plan to add heating or fixed electrical equipment, establish first whether the building and proposed arrangement are appropriate. Have any electrical work assessed and carried out by a qualified electrician; do not improvise an installation or treat portable equipment as proof that a building is suitable for prolonged winter use. For the Veltor 2 summer house, or another candidate, request relevant information before deciding that it will meet a need for lengthy stays. Heating choices and electrical work require their own assessment; this checklist covers preparation and upkeep, not how to install or operate equipment.
Plan winter access and protect stored belongings
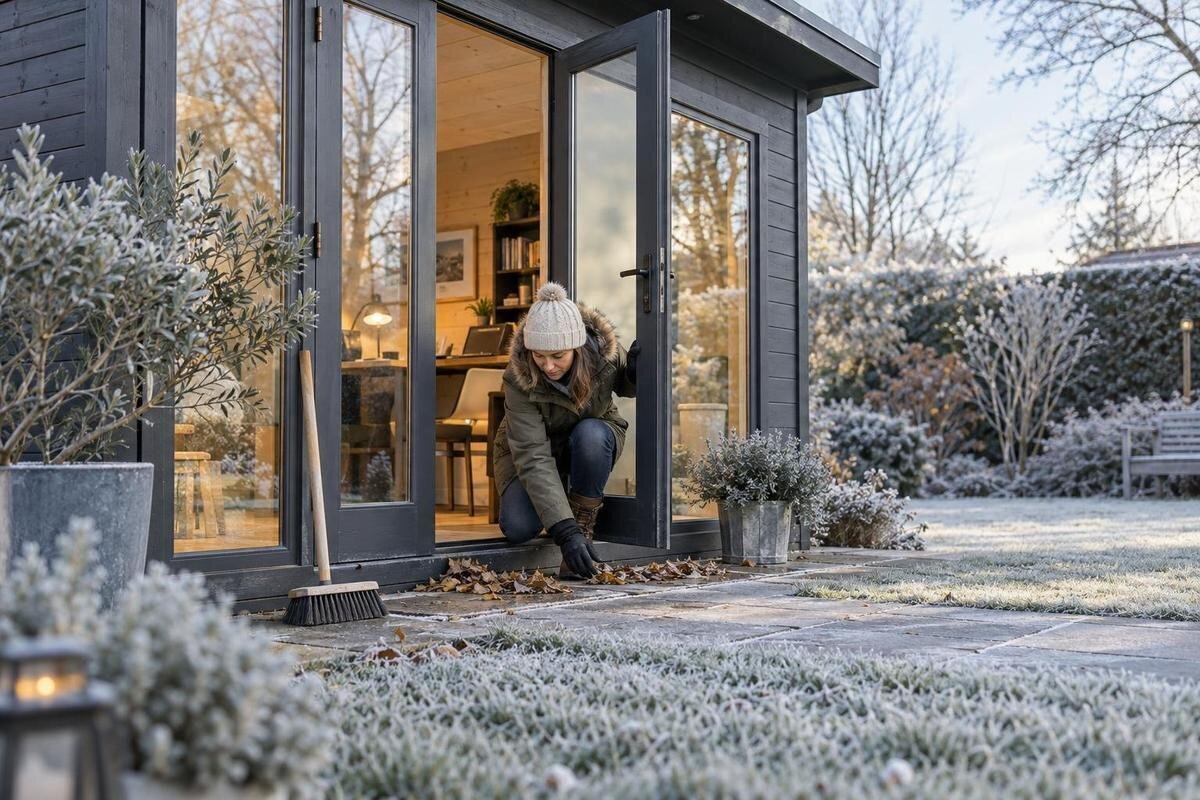
Check the route from the main house to the summer house, including steps, paving and gates, before you expect to use it in poor weather. Clear fallen leaves and small obstructions, address obvious slip hazards safely, and make sure the door area can be reached without shifting stored items. After a storm, look from the ground for fallen branches or debris; do not enter beneath a damaged tree or approach a building if you suspect it may be unstable. Think about how you will carry things in and out when surfaces are wet or icy, and make routine access part of the winter plan rather than an afterthought.
Decide what should remain indoors and what is better removed between visits. Keep paper, fabrics, cushions and equipment that could be damaged by damp in a dry place unless the product guidance confirms that the conditions are suitable; avoid stacking belongings against walls where they hide leaks or make checks difficult. If delivery or assembly is planned for winter, confirm access, unloading space, ground conditions and the installer’s weather requirements before agreeing the arrangements. Apply the same checks when considering the Veltor 3 summer house: base the plan on the supplier’s instructions and the actual site, not an assumption that a vehicle or assembly team can reach the spot.

05
Build a seasonal inspection routine
Before the first prolonged spell of wet weather, make a baseline inspection of the roof, walls, openings, base and nearby drainage. Record existing marks or defects, clear leaves from accessible ground-level areas and confirm that locks and doors operate. Repeat a brief visual check from the ground after heavy rain or strong winds, and after snowfall if it has accumulated; continue occasional checks while the building is closed. A dated note or photograph makes it easier to distinguish a new change from an old stain and gives a supplier or tradesperson clearer information if you need advice. Do not enter just to complete a checklist if the building or surrounding area appears unsafe.
Use the manufacturer’s maintenance schedule for cleaning, coatings, moving parts and any drainage components; generic advice for one material may be unsuitable for another. Treatments can have product-specific application conditions, so follow the instructions and product label rather than applying them simply because winter is approaching. If a task involves working at height, repairing structural damage or locating the source of a leak, do not turn routine upkeep into a risky repair project. Get an assessment from an appropriate professional where you cannot safely identify or resolve the problem. Keep records of work and observations with the product documents.
Know when to pause use and arrange an assessment
Pause use and arrange an assessment if you find an active leak, damage after a storm, movement at the base, or a door or window that cannot be secured. These signs can have different causes, and a visual inspection cannot establish that a damaged structure is safe. Keep people away from an affected area and ask the supplier, installer or a relevant professional for advice. If there is a concern about snow accumulation or storm damage, do not climb onto the roof or attempt an improvised repair. Resume use only when the issue has been addressed and the building can be entered and left safely.
Before placing an order, bring the key questions together: is the exact model documented for the planned use, are its base and site requirements understood, what maintenance is expected, and what additional work or professional assessment may be needed? Check that the model reference, specification, items included, installation arrangements and access plan are clear in the order documents. If the required level of warmth or weather protection is not established, choose a product or solution with information that supports that need instead of planning to make up the difference after delivery. This final pause keeps the winter plan grounded in evidence rather than expectation.
Frequently asked questions
Can I use any summer house in winter?
There is no blanket answer. Suitability depends on the exact design, installation, site exposure and how long you intend to stay. Check the model’s stated use and limitations with the seller or manufacturer; a dry, upright building is not automatically comfortable for extended visits.
What should I inspect before winter?
Check the roof and exterior from ground level, accessible drainage and openings, then look indoors for water marks or damp after rain. Test doors gently and keep the route clear. Repeat the visual check after severe weather, and ask a professional about damage, persistent leaks or anything you cannot inspect safely.
Does winter preparation make a summer house warm?
No. Clearing drainage, checking the building’s condition or addressing a leak does not establish insulation or heating provision. If dependable warmth matters, verify the exact model’s documentation and seek qualified advice about any planned fixed electrical work.
Should I leave a window open to prevent damp?
Follow the manufacturer’s ventilation guidance and take account of wind-driven rain and security. Do not leave a door or window unsecured while the building is unattended. Remove wet belongings and investigate persistent moisture rather than relying on an open window alone.
Can I repaint or treat a summer house just before winter?
Use only a product and method permitted for the material, following its preparation instructions and application conditions. Do not coat over dampness or use a treatment to conceal a leak. If deterioration is extensive or its cause is unclear, seek advice first.
Winter use calls for an ongoing plan, because conditions and the building’s state can change during the season. Choose a summer house on documented suitability, give its site and base equal attention, then use brief inspections to spot changes in the roof, openings, drainage or interior. If the evidence or condition does not support the use you want, scaling back visits or seeking a professional assessment is a sensible outcome of the checklist. A careful plan keeps expectations realistic and makes seasonal upkeep more manageable.
