
Designing a Comfortable Route Between Your House and Sauna in Winter
Winter sauna access
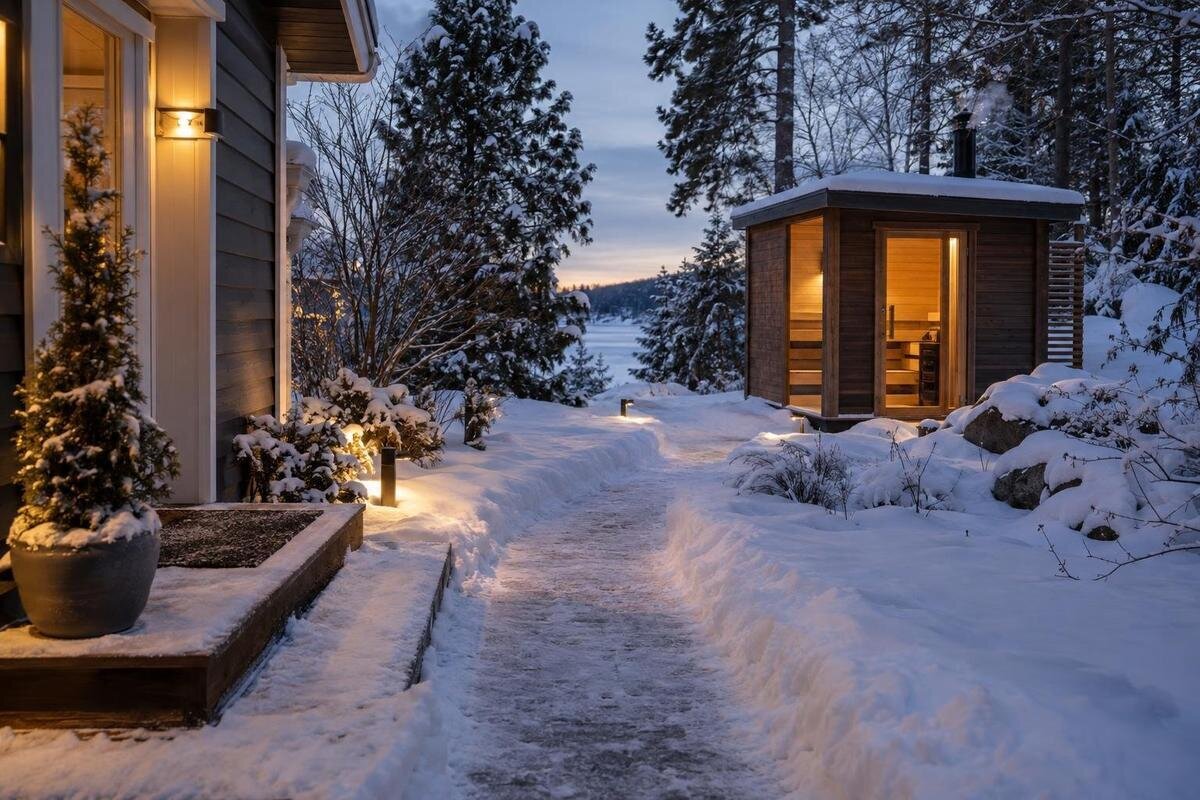
A winter sauna visit is only as comfortable as the journey to and from it. A short path can still become awkward if rain collects at the door, ice forms in shade, wet footwear has nowhere to go or snow has no practical place to be cleared. Plan the route as a working outdoor space: connect the house door to the sauna entrance, choose a surface for the conditions and decide how you will keep it passable through the season. The best design depends on the actual plot, entrance and maintenance routine.
01
Map the route from the door you actually use
Start at the door you will normally use and trace the full trip to the sauna entrance. The shortest line on a plan may cross a gate, steps, a drain cover or the place where bins are kept, so note existing paving, lawn, changes of level, downpipes and garden equipment before deciding. Think about both directions: you may carry a towel or robe out and bring wet footwear or used towels back. The route can feel different after rain, at dusk or when furniture is out. If a gate must be opened while carrying something, include its latch and opening arc. A direct line is often easier to keep clear, but the useful route reaches both doors without a sharp turn, an unexpected step or a regular obstruction.
Put the exact model reference, such as Sauna HCF-225, on the plan and use its current manufacturer’s drawing or manual to confirm the entrance position and any installation clearances. Do not set the path from a product photograph or assume another model has the same layout. Mark the actual doorway only once the unit’s position is settled, then share the same plan with the people preparing the ground and installing the sauna. If the documented configuration, access requirements or base details are unclear, ask the manufacturer or installer before excavating or committing to a permanent surface. Recheck the route if the model or its position changes.
Leave a clear landing at each doorway
Both ends of the route need a place to stop, not just a line that reaches a door. At the house, check how the exit opens and whether someone can step outside without meeting a path edge, gate, plant pot or stored footwear. At the sauna, allow a stable landing where someone can pause, turn, remove or put on shoes and let another person pass if space permits. Keep the landing clear of the door’s movement and avoid ending the path at the edge of a step or raised deck. Use the manufacturer’s guidance for any sauna threshold, step or platform rather than improvising its height or covering a drainage detail.
Mark each door’s movement on the plan before settling the path width. For a candidate such as Sauna S-140, check its own installation information instead of copying clearances from a different unit. At the house end, test the route with the door open, a gate unlatched and anything that usually sits near the entrance. At the sauna, consider where someone can stand while opening the door without stepping into mud, a puddle or a narrow pinch point. If a change of level is unavoidable, have the builder design the landing and transition as part of the same job.
02
Choose a surface for wet, cold conditions
Look for an exterior surface that is predictable when wet and practical for your routine, rather than relying on a finish name or showroom sample. Ask the supplier whether it is intended for an exposed footpath and how its texture and cleaning advice apply in frost-prone conditions. A textured slab may feel different from a smooth one, but dirt, leaf litter, wear and water still affect the result. Loose gravel can shift underfoot and make snow difficult to clear cleanly; decking can suit a level transition, but its condition and finish need attention. None of those labels guarantees grip in every weather. If possible, inspect a sample when wet and ask how the material should be maintained.
Decide the route and door landing before ordering surfacing, so the finish can run continuously rather than stopping at an awkward strip. Once the position for a model such as Sauna HC-150 is confirmed, show the plan to the surface supplier and ask about edges, joints, cleaning and de-icing compatibility. A surface that is easy to sweep may still need careful detailing where it meets lawn, decking or a threshold; a small lip can catch a shoe or shovel and hold water. If you are comparing samples, assess them in the conditions in which they will be used, and check that the recommended snow-clearing method is practical for the finish.
Plan where rainwater will drain
Rain management matters alongside snow: a wet path can freeze overnight, and water that repeatedly stands at an entrance makes access unpleasant. Look for low spots, roof runoff, downpipes and the places where a paved route meets softer ground. A permeable-looking top layer does not guarantee drainage if the ground below cannot take the water. Aim to keep runoff from crossing the walking line or collecting at either doorway, and consider where roof water will go before adding a canopy. Do not redirect it towards the sauna base or the house without checking the installation guidance and site conditions.
Mark downpipes, existing drains and obvious low points on the route sketch. Before paving around a selected model, including Sauna HC-225, check the manufacturer’s instructions for the base and its surroundings. Then ask a qualified landscaper or drainage professional to resolve uncertain levels, falls or discharge using the actual ground and drainage conditions. Keep drain covers accessible for inspection; do not bury a drain or create an edge that traps water. Where a change to drainage could affect a building, boundary or neighbouring surface, obtain site-specific advice before the work begins.
03
Decide whether the route needs a roof
A roof over the whole route is not always necessary. A short covered landing at one or both doors may help with direct rain or falling leaves, while an open path can be simpler to clear and inspect. A canopy will not keep out wind-driven rain, and its roof can send water onto the walking line unless runoff is planned. It can also introduce shade, posts or a new pinch point. Compare the exposed route with a sheltered option on a plan, including where people will enter and where water will discharge. Consider whether the cover solves a practical problem without creating another maintenance task.
If you want a separate cover near a sauna such as Sauna N-210, confirm the required clearances and any restrictions on attachment from the current manufacturer’s instructions. Do not assume a generic garden shelter is suitable for this location or that an adjacent roof is included with the sauna. A qualified installer can specify a structure for its intended exposure and coordinate its supports and runoff with the path. Check that any posts or gutters will not narrow the walking line or obstruct a gate. In some gardens, improving the door landing and drainage may be more useful than roofing every metre; decide from the actual site rather than a catalogue image.
Manage wet footwear and the indoor transition
Decide where wet footwear, outer layers and towels will go at each end. If shoes are removed outdoors, a dry, stable place for them should not block the path or cover a drain. If they are carried inside, plan an indoor spot that will not leave a wet trail across the house. A washable mat can help manage drips, but it belongs somewhere it will not curl, slide or obstruct a doorway. At the sauna end, keep the external landing clear enough to open the door and set down a bag without using the path as storage. These small arrangements affect how usable the route feels on a rainy evening.
Use the entrance layout for your chosen model, such as Sauna N-250, to plan where footwear and towels can be left without obstructing access. Keep clean, dry items apart from wet shoes, and choose a storage spot you can reach without stepping off the firm landing. Anything left outside needs protection from the weather; a sheltered doorway alone may not keep it dry. At the house, check that a tray or mat does not prevent the door from opening fully. Consider how you will empty, clean and dry these items after use, rather than leaving damp footwear and mats permanently at the entrance.
04
Leave room for snow clearing
Allow space to remove snow without piling it across a doorway, against a gate or over a drain. A path that is just wide enough to walk along may leave nowhere to put a shovel or cleared snow, so mark the storage area as well as the walking line. Avoid relying on a narrow turn where snow can accumulate, and make steps or changes in level easy to locate before winter. Decide where the shovel will be kept so it is available from the house side and does not have to be fetched across the uncleared route. If snow is forecast, clearing little and often may be easier than tackling a compacted layer later.
Choose any grit or de-icing treatment only after checking it against the surface maker’s instructions and the materials around the entrance; products suitable for one finish may not suit another. For a planned installation beside Sauna LC-260, decide where snow will be moved and how the route will be treated before choosing the final surface. Do not assume salt, grit, sand or a proprietary product is universally appropriate, and follow the directions on anything you use. Plan where loose grit can be swept up afterwards, especially near thresholds and drains. Make sure the path’s edges and steps will still be easy to see.
Maintain the surface and drains
Winter use is affected by fallen leaves and mud as well as ice. Keep drains, joints and edges free of debris, and check after heavy weather for a loose board, shifted slab, washed-out aggregate or an edge that has become uneven. Moss or algae can make a wet surface harder to use, but the right cleaning method depends on the material; avoid aggressive treatment unless the supplier recommends it. A simple seasonal check before colder weather, followed by attention after storms or freeze-thaw periods, can catch small problems early. This is care for the path and its drainage, not a substitute for following the sauna’s own maintenance instructions.
Keep a simple record of the surface material, the supplier’s care instructions and any compatible cleaner or treatment. On the site plan for your selected sauna, such as Sauna HCF-300, mark access points that must remain clear for inspection and upkeep. Store brushes and clearing tools where they are easy to reach without narrowing the path, and arrange repairs when you first notice movement or damage. If a repair changes the height or drainage at the entrance, review the whole transition instead of fixing one spot in a way that leaves a new lip or allows water to pool. Check the repaired area after rain to see whether the original problem has been resolved.
05
Consider who will use the route
Think about everyone who may make the trip, including guests who do not know the garden layout and anyone carrying towels or other items. Repeated steps, a tight turn or an uneven join can make a short route harder to manage in wet footwear. Where step-free access is important, discuss the layout, levels and surface with a qualified designer or landscaper before committing to a route; the space and ground conditions will shape what is practical. If another person may need to walk beside the user, include that in the test rather than assuming single file is always convenient. Keep stored items, hoses and furniture out of the route.
Visibility also matters on darker winter afternoons. Make path edges, steps and changes in level easy to pick out, and do not let a planting border, pot or garden tool obscure the approach. Check the route from both ends, including with the house door open; a clear line from one direction can be hidden on the return. If additional outdoor lighting is needed, have its fittings and installation specified for the location by a qualified professional rather than improvising electrical work. Identify any dim or obscured points early so later additions do not put a post or fitting in the walking line.
Draw and test the route before building
Before work starts, put the house, sauna, entrance points, doors, steps, path edges, drains, downpipes, proposed shelter and snow-storage area on one sketch. Use current installation information to place the exact sauna configuration and show any manufacturer-specified clearances; have a professional set out levels or drainage rather than estimating them from a photograph. Mark changes of surface and where the path meets a threshold, deck or lawn. A shared drawing helps the landscaper and sauna installer coordinate what each is responsible for, and makes it easier to spot a conflict between a roof post, drain cover, gate swing and the route.
Test the proposed line on site with temporary markers or string on a safe, dry day. Walk it from the house and back in the footwear and outer layer you expect to use, and check turns, landing space and where a shovel or wet shoes will go. Observe runoff during rain from a safe position rather than testing the path when it is icy. Ask contractors how they will deal with drainage, edges, transitions and surface care, and confirm which materials and structures are included before work begins. A simple route can be comfortable if those details work together; extra paving or a full canopy cannot compensate for a poor endpoint or water that has nowhere to go.
Frequently asked questions
How wide should the path to an outdoor sauna be?
There is no single width that suits every garden. Allow for the people who will use it, the sauna door’s movement and the clearing tool you plan to use. Include a landing at each end rather than measuring only the straight run. Mark the route on site, and ask a qualified professional about levels or step-free access if these are difficult.
Which surface works best for a winter sauna path?
There is no surface that stays equally suitable in every garden and weather condition. Compare how firm it feels when wet, whether it is practical to clear, and what cleaning or de-icing the supplier recommends. Loose gravel, paving and decking each have different upkeep and underfoot considerations, so assess the material for your site rather than relying on its name.
Do I need to cover the route?
Not necessarily. A short covered landing may help at a doorway, while a roof over the whole path introduces supports and runoff to plan. Cover will not keep out wind-driven rain, so consider the exposed route, available space and maintenance involved. Confirm clearances and any restrictions on attachment with the sauna manufacturer before adding a nearby structure.
Can I use salt or de-icer on the path?
Do not assume a particular treatment is suitable for every surface. Check the paving or decking supplier’s instructions before using salt, grit or a proprietary de-icer, and follow the product directions. Also decide where loose grit will collect and how you will clear it from thresholds and drains after the icy conditions pass.
How close can I position the sauna to the house or path?
Use the current manufacturer’s installation information for the exact model and configuration to confirm its position and any required clearances. Do not estimate from a photograph or copy another model’s layout. If the route, drainage or ground levels make the siting unclear, ask the manufacturer, installer or a qualified landscaping professional before permanent work begins.
Good winter access comes from coordinating the small decisions: the path meets the actual entrance, the landing stays clear, runoff has somewhere to go and the surface can be maintained with the time and tools available. A direct, uncovered route may suit one plot; another may benefit from shelter or a step-free layout. Settle these details from the site and the sauna’s own instructions before permanent work begins, and the journey between house and sauna is more likely to remain comfortable in the weather you actually get.
