
A Practical Pergola Layout for Accessible Dining
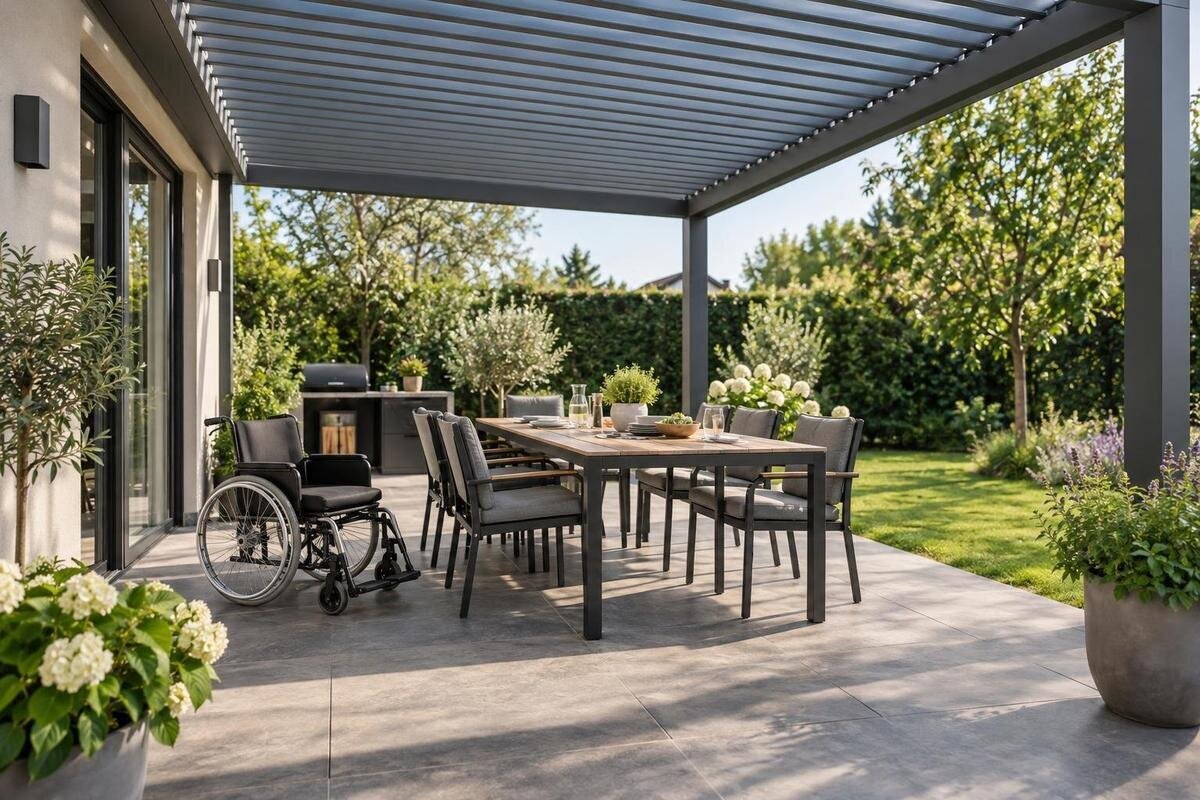
Pergola layout guide
A pergola dining area works better for a range of guests when the route in, the space around the table and the seating arrangement are planned together. The useful test is not whether a table fits beneath the roof, but whether people can arrive, turn, sit, serve a meal and move away without shifting furniture each time. This guide treats step-free access, wheelchair approach and turning as practical comfort goals. It does not set minimum dimensions or certify compliance; measure the real site and furniture, then check requirements that apply to your site with a suitably qualified professional where formal compliance matters.

Map the route to the dining table
Walk the journey a guest will actually make, from the house door or garden gate to a place at the table and back out again. Mark the route on a site sketch before placing furniture. Include turns between the house and pergola, the swing of any door or gate, and the point where someone leaves the main path to join the dining area. A direct approach from the most-used entrance may be easier than a route behind seated diners or around a planter. If guests arrive from more than one direction, mark each path and decide which should remain clear during a meal. This route map can reveal awkward crossings before the table position feels fixed.
Follow the route in both directions, noting where someone approaching the table would meet a person leaving it. Look beyond the pergola entrance: the connection from the house or gate matters just as much as the final approach to a seat. Record any point where the route becomes less direct or requires someone to double back. If guests use different arrival points, check whether those paths join beside the table or away from the seating. The aim is a continuous, predictable approach that remains easy to follow during a meal. Mark thresholds, changes of level and surface problems on the sketch so they can be considered alongside the furniture layout.
Measure clear floor space beneath the pergola
Measure the ground area available, not just the space where a roof might sit. Record distances from walls, boundaries and fixed features; include door swings, downpipes, permanent benches and any supports shown on a plan. Draw the table and chairs at their real sizes, including chairs pulled out for someone to sit down or stand up. The Bloomcabin Wall-Mounted Pergola listing states a range from 9 to 24 m²; treat this as a product-area reference, not a clear-floor plan or a guarantee that your furniture will fit. Request exact dimensions for the configuration you are considering.
Write down separate measurements for the outside footprint, the clear space between supports and the narrowest width beside the table. They answer different questions. A roof can cover the right area while a support occupies an approach or turning point; a table can fit while its pulled-out chairs interrupt travel. Use dimensions for the selected product configuration, not an online image or general model name, and ask for dimensioned information if it is not supplied. Mark the sketch as a concept until the site, furniture and product measurements have been checked together. If the route bends around a post, show the bend and the room needed to make it rather than estimating from the roof outline.
Keep the entrance clear when the table is in use
Decide where people will enter the dining area and keep that opening usable when chairs are occupied. An approach should not require someone to weave between a wall and the table or wait for a chair to be moved before reaching an open place. Check the entrance with diners seated, rather than judging it with every chair tucked neatly beneath the table. For the Bloomcabin Pergola, request dimensions and the support layout for the option under consideration, then compare them with the entrance on your sketch. Pay particular attention to any support beside the opening and the chair nearest it.
Check doors and gates in both their open and closed positions. A door that swings into the only route can leave someone waiting, while a gate that opens across the approach can narrow it just when access is needed. Keep loose furniture, a serving trolley and movable pots outside the space needed for opening them. Consider where someone can wait while a door or gate is opened without blocking the dining entrance. Check the threshold at the house as well: a level garden route does not make the whole journey step-free if there is a lip at the doorway. Where a threshold interrupts access, get site-specific advice on a suitable transition.
Plan wheelchair access at the table
Position the table to suit how guests approach it, rather than automatically placing it in the centre of the pergola. A wheelchair user may prefer to approach from the side, line up with an end or turn before reaching the table; the best arrangement depends on the person, the wheelchair and the table base. Sketch those movements with the actual equipment in mind. When considering the Bloomcabin Bioclimatic Pergola, compare its exact dimensions and support positions with the preferred table position. This lets you assess the space around the dining place as well as the route leading to it.
Allow for the whole sequence: approaching the table, positioning the wheelchair, transferring into a dining chair if that is the guest's preference, or remaining seated in the wheelchair, then moving away afterwards. A pedestal or central base may leave different legroom from a table with four legs, but neither description is enough on its own; check the actual base and clear space beneath the table. Keep chairs, bins and planters away from the approach, and check that table legs or supports do not obstruct knees or footrests. If several guests use mobility aids, make sure one person's place does not block another's approach or leave them without a clear way out.

Choose seating that can adapt to the group
Choose seating that allows the arrangement to adapt to the group. Plan a place for a wheelchair alongside the dining chairs, rather than relying on last-minute furniture changes to make room. If guests prefer armrests, a firmer seat or another chair style, note those choices before deciding how many places the area can hold. Also decide where a spare chair will go when it is not needed, so it does not end up in the entrance or behind another diner. Compare the seating arrangement with the wall-mounted pergola option once its actual dimensions and support positions are available.
Look at the table and chair dimensions together rather than treating the advertised seat count as the number of practical places. Pull each chair into its normal dining position, then note whether the route behind it remains clear. An open space at the short end is useful only if the table base, edge and approach suit the guest using it. Consider the remaining diners too: accommodating one place should not leave a neighbouring chair trapped against a support. A smaller table with an uncluttered approach may serve the group better than extra seats packed around every side. Ask the people who will dine there which arrangement feels comfortable.
Allow room for serving and moving around
Plan what happens when food, drinks and dishes move between the house and the table. A route used by someone carrying a tray may overlap with a wheelchair approach; if both share a narrow point, the person serving should not have to step backwards around a seated guest. Draw the serving route separately, then look for crossing points beside chairs, at doorways and near the table. A short route is not necessarily the clearest if it cuts across the only turning space. When assessing the Bloomcabin Pergola model for dining, compare these working routes with the support positions and table arrangement on your measured plan.
Consider where everyday items will sit during a meal. A tray, cooler, extra chair, bin or bag can quickly occupy space that seemed generous when the pergola was empty. Choose a place for these things beyond the clear route rather than relying on stacking them beside the entrance. If a guest has someone helping them at the table, allow that person to stand nearby without blocking another place setting or the way out. Leave an alternative route if a temporary item has to move, so every journey does not depend on shifting the table.
Include wheelchair turning space in the plan
Mark turning space separately from the route on the drawing. A person may need to turn before joining the table, reposition after a chair is pulled out or change direction to leave. Whether this is possible depends on the wheelchair or mobility aid, the user's movements and the positions of supports, furniture and other people. Avoid relying on a universal circle or an empty patch measured before the chairs arrive. Use the device dimensions where the user is comfortable sharing them, and discuss the movements they need to make. Compare configuration details from the Bioclimatic Pergola page with this part of the furniture plan.
Look at the turning area with the table ready for a meal and with people seated, because chairs may occupy different positions. If a wheelchair has to reverse out, trace the return route and check that it does not end against a wall, support or closed gate. Include the space used by someone standing to pull out a chair, rather than assuming only the furniture will occupy the area. Check whether a person passing behind the diners would also cross the turning space. Where several movements share one spot, consider changing the table position so that someone leaving their place does not depend on everyone else moving first.
Check levels and surface changes along the route
Consider surface and level changes as part of the layout rather than leaving them until after the table is chosen. Note where the patio meets the lawn and where paving joints, loose material, grates or drainage channels cross the route. A change that looks small can be awkward for some wheels or walking aids, so assess the path with the people who will use it instead of judging it from a distance. Keep drainage in mind when considering a level route; do not block a drain or assume a new surface can simply be laid over the old one. For changes involving paving, falls or thresholds, seek site-specific advice from a qualified professional.
Decide how the route will stay clear over time. Loose mats, hoses, extension leads, leaf build-up and movable pots can appear after the pergola is installed, narrowing a path that worked on opening day. Build a storage place into the plan for cushions and spare chairs, and agree where serving items will go between meals. If a step-free path is essential, include the whole journey from the chosen arrival point to the table, not only the floor beneath the pergola. A site drawing can show level changes, but an on-site review is needed to judge how the finished route works in everyday use.

Lighting and accessories beside the dining area
Comfort details should not take space from circulation. A freestanding light, umbrella base, side table, planter or screen can change the width of a route or the space beside a dining chair. Mark planned accessories before finalising the table position, and decide which will stay in place and which will be put away. Shade and glare can also influence where guests choose to sit; note when the sun reaches the table and whether the preferred place still allows an unobstructed approach. If you plan to dine after dark, check that the route and table can be seen clearly without putting a lamp or cable in the path.
If you are considering add-ons, ask how they affect the chosen arrangement and what the product listing actually includes. Use the Bloomcabin Pergola page to identify the model you are considering, then confirm whether the proposed lights, screens or other accessories are included and compatible with that configuration. Show their positions on the plan rather than adding them after the dining layout is settled. Check whether they occupy space beside a chair, project into an approach or need a separate base on the ground. If fixed lighting is planned, have its wiring and installation addressed by an appropriately qualified professional.
Test the layout at full scale
Before choosing a model, use masking tape, chalk or removable markers to outline the supports, table, chairs, entrance and route at full size. Mark chair positions twice: pushed in and pulled out. Then move through the route with the wheelchair or mobility aid that will be used, if the person is comfortable doing so, and try the usual meal tasks. A drawing can hide awkward turns that become obvious on the ground. For the option shown in the Wall-Mounted Pergola listing, use confirmed configuration dimensions rather than scaling an online image. Label the sketch or mock-up as a concept so its purpose as a practical layout trial is clear.
Invite the people who will use the dining area to check the trial at different stages: arriving, approaching an open place, sitting, reaching the table and leaving while others remain seated. Ask what gets in the way and whether an alternative route is needed. Include whoever will set and clear the table, because serving movements can expose a pinch point that an empty-space test misses. Revise the arrangement if access depends on lifting a chair or moving a planter before each meal. A repeatable test in the actual space is more useful than a polished plan that no one has tried.
Frequently asked questions
How wide should the route to the table be?
There is no single figure that can be recommended without knowing the mobility aid, turns, furniture and site. Measure the narrowest points on the planned route and check them with the people who will use it. If you need to meet formal accessibility requirements, ask a suitably qualified professional to assess the plan against the requirements that apply to your site.
Does a step-free entrance make a pergola accessible?
Not by itself. The route also needs to work at thresholds and changes of level, and the table must be reachable without blocked approaches or turns. Chairs, posts and serving items can change how the space works once people are dining. Step-free access is a useful planning goal, not proof that a design complies with accessibility requirements.
How can I check that a wheelchair user can reach the table?
Plan around the person's preferred approach and the actual wheelchair, table and base. Check the space needed to position the chair, the room beneath the table for knees and footrests, and the route back out. A full-size trial with the person who will use the space is more informative than judging an empty plan or relying on the table's advertised seating capacity.
Does the pergola's listed area show how much room there is for dining?
No. A listed area does not show the clear space left for a table, pulled-out chairs, wheelchair approach or turning. Compare the site measurements with the exact product dimensions and support positions for the configuration under consideration. Then add the actual furniture and routes to the same plan.
Can I test the layout before choosing a model?
Yes. Use removable markers to outline the supports, table, chairs and route at full size, then try the usual movements with the people who will use the area. Include serving and leaving the table while others are seated. Request exact product dimensions before relying on the trial, and treat the sketch as a concept rather than evidence of formal compliance.
A useful pergola dining layout connects the route in, the space at the table and the way out. It still works when chairs are occupied, food is being served and everyday items are in place. Bring the site, furniture and product dimensions together, then try the arrangement with the people who will use it. Their experience of approaching, sitting and leaving can reveal what a roof outline or advertised seating capacity cannot. The aim is a dining area where guests can join the meal and move away without the group having to rearrange the furniture each time.
