
Attaching a Pergola to an Externally Insulated Wall
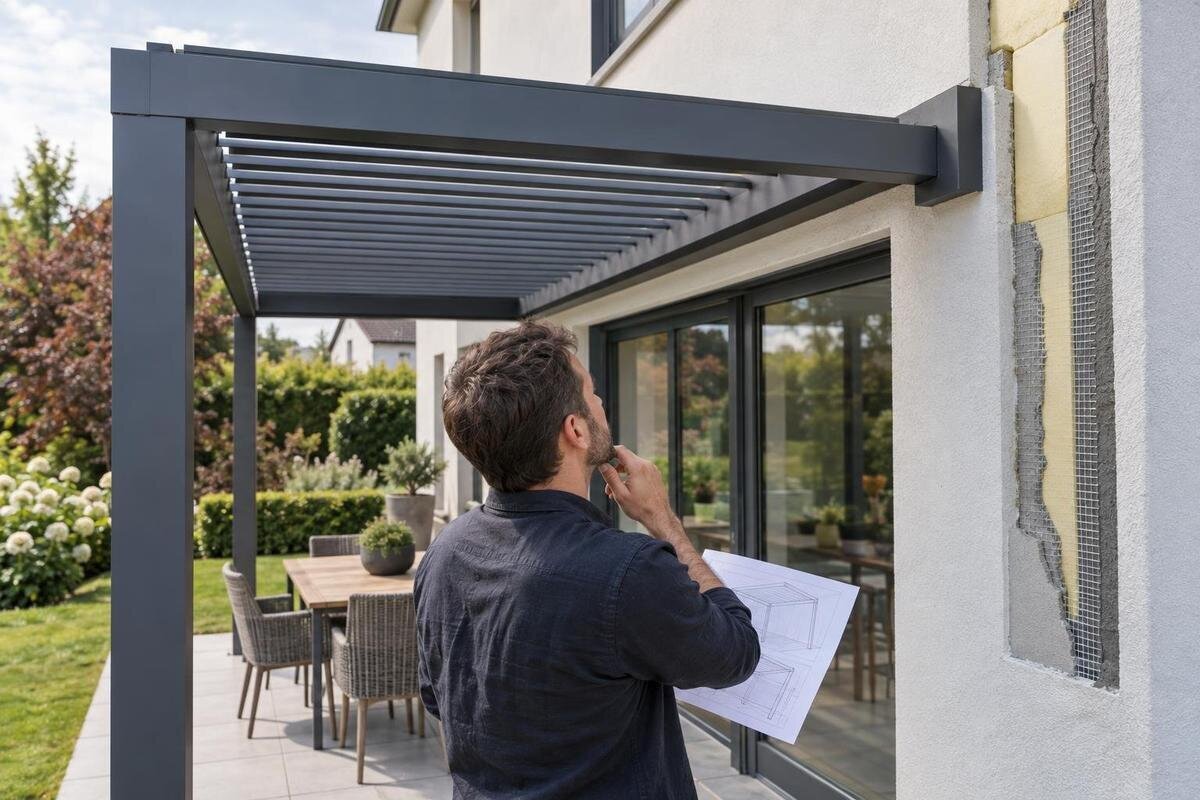
Pergola installation guide
Attaching a pergola to an externally insulated wall calls for more than a longer fastener. The finish and insulation sit between the bracket and the building’s structural backing, so the connection has to transfer the pergola’s forces through a specific wall build-up without compromising the façade. First identify what lies behind the insulation; then obtain a structural assessment and an approved anchoring detail for the exact pergola and site. The documents should also address the stand-off connection and weatherproofing around any penetrations. Without verified substrate information, a neat-looking fixing point is not evidence of a suitable connection.

Why external insulation changes the connection
An externally insulated façade is a layered wall, not a solid block at the surface. The visible render, cladding or other finish may cover insulation boards, a cavity, support rails or sheathing, with masonry, concrete or framed construction farther in. The arrangement can vary between buildings and may have changed during renovations. Do not assume that render, insulation or cladding can carry a pergola load. Unless a professionally designed façade attachment system explicitly gives a layer that role, it is not the structural backing. A bracket bearing directly on insulation can cause compression or movement; a fixing that grips only the finish has no verified load path into the building.
A building-mounted pergola applies more than its own downward weight. Its projection from the wall creates leverage at the connection, while wind may produce upward and sideways forces. The design actions depend on the model, layout and site, so both the attachment and the wall behind it need assessment. If you are considering the Bloomcabin Wall-Mounted Pergola, establish the intended position and arrangement before asking for a connection design. Describe where it will meet the building and which parts of the wall are covered by external insulation. This gives the assessment a defined starting point rather than leaving the designer to work from a product photograph. The important question is how the connection will transfer that model’s forces through the insulation to verified structural backing, with the wall finish protected around the attachment.
Identify the wall behind the finish
Gather evidence before anyone specifies a fixing. Useful starting points include construction drawings, records of later alterations and documents from the original façade or insulation contractor. Establish the insulation type and thickness, the finish system and the construction behind it. The supporting wall could be masonry, concrete, a framed assembly or another arrangement; cavities, rails, sheathing or reinforcement may also affect how a connection can be designed. Do not assume that a description such as “brick wall” proves the make-up at the exact pergola location, particularly if the building has been altered or repaired.
A qualified person should assess whether the available records match the wall on site. Cracks, bulging, damp marks, patched areas or previous penetrations are reasons to investigate further, although a clean-looking finish does not prove structural capacity. Depending on the evidence, a specialist may recommend suitable survey methods or a controlled opening. Leave that choice to the person responsible for the assessment rather than making exploratory holes yourself. Record findings at the proposed fixing area: evidence from another elevation or a different part of the building may not describe the substrate where the pergola will be attached.
Trace the loads into the structural wall
The design needs to account for the whole load path: from the pergola’s wall-side member, through the connection that bridges the insulation, into the anchors and supporting construction, and onwards through the building. Each part depends on the others. An anchor chosen for a particular material does not, by itself, demonstrate that the full assembly is suitable; nor can a robust bracket make up for weak or unknown backing. The structural assessment should relate to the actual pergola arrangement and the wall condition, not a generic fixing schedule or a detail copied from another home.
The assessment also has to reflect the selected model and its configuration, including its projection from the wall and the position of its supports. Wind can create sideways and upward actions as well as downward loading, and nearby openings or wall edges may affect where a connection can be placed. When reviewing the Bloomcabin Pergola model information, identify the exact arrangement you want assessed. A marked-up plan or elevation can help distinguish the intended wall connection from the other supports and show its position relative to doors and windows. Label a proposed layout as a proposal, rather than presenting it as an approved fixing arrangement. If the layout changes during design discussions, make that change clear so the assessment and product enquiry still refer to the same configuration. Similar-looking pergolas should not be assumed to share a connection detail.
Design the stand-off through the insulation
Because the structural wall is set back behind the façade, the connection needs a designed way to bridge that distance. A suitable stand-off arrangement or other engineered attachment must transfer the required forces to the verified backing without relying on the insulation as a support. Its design depends on the wall material, the insulation build-up, the pergola geometry and the site assessment. A generic spacer or an extra-long fixing is not automatically an equivalent solution, and there is no single detail that can be assumed to suit every insulated wall.
The connection can also affect heat flow through the façade. Depending on its materials and geometry, it may create a thermal bridge, so the designer should assess whether thermal separation or another detail is needed. The proposed assembly must suit the actual insulation thickness and finish system, rather than simply fit through them. For Bloomcabin’s wall-mounted option, ask for a drawing that shows the relationship between the bracket, the stand-off arrangement and the supporting wall. It should be clear which parts transfer the load and how the intervening façade layers are accommodated. This is a question about the complete assembly, not just the length of a fastener. Where the structural and façade details are prepared separately, have the responsible professionals resolve any differences before installation, so the installer is not left to reconcile incompatible details on site.

Protect the façade from water ingress
A connection through an insulated façade can interrupt the finish and other layers that help manage moisture. The design must address how the proposed penetrations are sealed and how the wall’s existing water-shedding details continue to work. Depending on the system, there may be a cavity, a water-resistive layer or other components that need to remain effective. The correct approach is specific to the façade; a detail suitable for one finish or insulation system cannot simply be assumed to suit another.
Agree the weatherproofing detail with the professional responsible for the façade system, alongside the structural connection design. Consider compatibility with the finish, movement at the connection and future inspection or maintenance. A bead of sealant alone should not be assumed to restore the performance of a system after it has been penetrated. If you are considering the Bloomcabin Bioclimatic Pergola, include the proposed wall junction in the enquiry as well as the model name. Ask which parts of that junction will remain accessible once the pergola is installed and who will complete any making good around the brackets. The agreed scope should distinguish the connection work from repairs to the surrounding finish, so neither task is left unassigned. Check any applicable manufacturer requirements and keep the weatherproofing detail with the structural drawing for the same location.
Ask for project-specific drawings and evidence
Before committing to a wall-mounted layout, request a structural assessment, substrate evidence and approved anchoring drawings for the actual installation. The drawings should identify the pergola model and arrangement, the wall construction assumed, the connection through the insulation and the relevant design limits. They should also show how the façade detail fits around the connection. Ask who is responsible for the structural design and who has reviewed the proposed interface with the insulation system. “Approved” is more useful when the person responsible and the scope of approval are clear.
Check that the evidence relates to the proposed location and matches what is found on site; drawings for a different substrate or a previous project may not apply. If a detail relies on an assumed wall material, ask how that assumption was verified. Use the wall-mounted pergola listing to identify the product in the enquiry, then keep the assessment and approved drawing with that product information. Record the drawing reference and revision so everyone can distinguish the current design from earlier proposals. Where the assessment contains conditions or limits, make sure those remain available to the installer rather than sending only an isolated drawing. A useful project file connects each decision to its basis: the selected model, the evidence for the wall and the detail accepted for that location. It need not contain unrelated paperwork from other installations.
Check the proposed fixing locations on site
A site assessment should compare the approved drawing with the real wall and the intended pergola position. Confirm the finish and construction at the relevant area, and identify features that may affect the design, such as openings, wall edges, movement joints, existing repairs, services or drainage details. The aim is to make sure the proposed locations agree with the evidence and the drawing before work begins, not to find a convenient spot and adapt the connection afterwards.
Check that the planned arrangement also leaves the access and clearances needed around doors, windows, gutters and areas that require maintenance. Consider these features with the pergola in its intended position, rather than checking the wall in isolation. Note any conflict on the site plan so the designer can distinguish an access problem from a structural one. If the surveyed wall differs from the design assumptions, or the proposed position conflicts with a façade feature, refer the discrepancy back to the designer. Do not move a fixing or change a connector on site without approval. Include the exact model in the site notes; the regular pergola product page can help identify it. Keep observations about the existing building separate from proposed changes, particularly where the position is still being discussed, so an unapproved alternative is not mistaken for the agreed layout.
Coordinate the installer and façade work
Agree who will verify the substrate, carry out the connection work and reinstate or protect the façade. These responsibilities can involve different professionals, so coordination matters: the structural designer needs reliable information about the wall, while the person responsible for the façade needs to confirm how its layers will be protected. The installer should have the approved drawing and the relevant product instructions before work starts. An installer should not be expected to create an unreviewed structural solution on site simply because the wall is difficult to access.
Agree a procedure for unexpected site conditions before installation begins. It should identify who receives the installer’s findings, who can authorise a revised detail and how that decision reaches everyone doing the work. Do not improvise by substituting a longer fixing, changing a bracket position or adding an unapproved component if the wall differs from the drawing. Where an inspection is needed before any part is covered, arrange it in advance and retain a record of the completed connection and façade work. For an enquiry about the bioclimatic pergola model, request instructions for that exact product and keep them alongside the project-specific details. At handover, distinguish the original proposal from any agreed revisions and record which arrangement was installed. That gives future maintenance work a usable account of the connection, rather than a collection of drawings with no indication of which one applies.

When a wall-mounted connection is not suitable
A wall-mounted design may need to be reconsidered if the supporting construction cannot be verified, the wall is damaged, the proposed connection cannot be designed for the insulation build-up or the façade cannot be adequately protected. Do not let a lack of information become a reason to rely on the outer finish. Further investigation, a different location or a revised pergola layout may be more appropriate, but each change needs to be assessed against the actual model and site rather than treated as a simple workaround.
A genuinely independent support arrangement could be considered if the selected product’s drawings allow it and the posts and their foundations are assessed for the site. “Freestanding” does not mean that an existing paved surface is automatically suitable, or that a wall tie can be added without changing the design. If you are exploring alternatives through Bloomcabin’s pergola range information, ask which support layouts are documented for the exact model. Compare the implications for post positions, access beside the building and the separate foundation assessment, rather than assuming that removing the wall connection settles every installation question. Keep any support independent unless a designer has specified a wall connection. If the proposed alternative still includes a tie or bracket to the building, identify it explicitly: the insulated-wall connection remains part of the assessment and cannot be omitted merely because the layout is described as freestanding.
Settle the design questions before ordering
Before finalising a purchase, make sure the enquiry names the exact pergola and includes evidence for the wall at the intended fixing locations. Ask what structural substrate was verified, who assessed the load path, which approved anchoring drawing applies and how the insulation and finish will be protected. Confirm that the model, wall build-up and proposed layout all match the documents. If the answers rely on a general statement such as “it will take a longer bolt”, the connection has not been established for your project.
Also agree who will inspect the work, how any unexpected site condition will be handled and what records you will receive. Plan access for installation and future façade maintenance, and check any property, complex or local approval requirements that apply to your project with the responsible professional. These checks keep the structural design, installation and wall-system details aligned. If the documents do not agree with the wall on site, pause the work and have the design reviewed before a fixing is made.
Frequently asked questions
Can I use longer bolts through the insulation?
Not on the basis of length alone. A longer fixing does not prove that it reaches suitable structural backing or that the insulation will not be compressed. The connection needs to be designed for the verified wall build-up, the pergola model and the forces at that site.
Can the render or insulation carry the pergola?
Do not treat either as a structural fixing base unless a designed façade attachment system specifically confirms that role. In a typical build-up, the load must be transferred to suitable structural backing behind the insulation, using a connection designed for that wall.
Who should assess the wall and connection?
A structural engineer or other suitably qualified building professional should assess the load path and substrate evidence. A façade or insulation-system specialist can advise on protecting the wall build-up. The installer should follow the agreed drawings and have clear instructions for what to do if site conditions differ.
Does the insulation have to be opened up?
Not necessarily. Reliable construction records or other suitable survey evidence may be enough, but the responsible professional should decide what proves the substrate at the proposed fixing locations. If further investigation is required, it should be planned rather than done as exploratory drilling.
What if the wall construction cannot be verified?
Pause the wall-mounted proposal until the construction can be assessed. The design may need further investigation, a different location or a genuinely independent support layout. Any alternative still needs model-specific drawings and its own structural assessment; do not assume an existing surface or footing is suitable.
The key is to treat the wall, connection and façade detail as one coordinated design. A verified substrate, approved anchoring drawings and a weatherproofing detail for the actual wall give the installer a sound basis for the work. If any of those assumptions fail on site, revise the design before proceeding rather than trying to bridge the gap with longer hardware.
