
Balancing a Pergola and a Wildlife-Friendly Garden
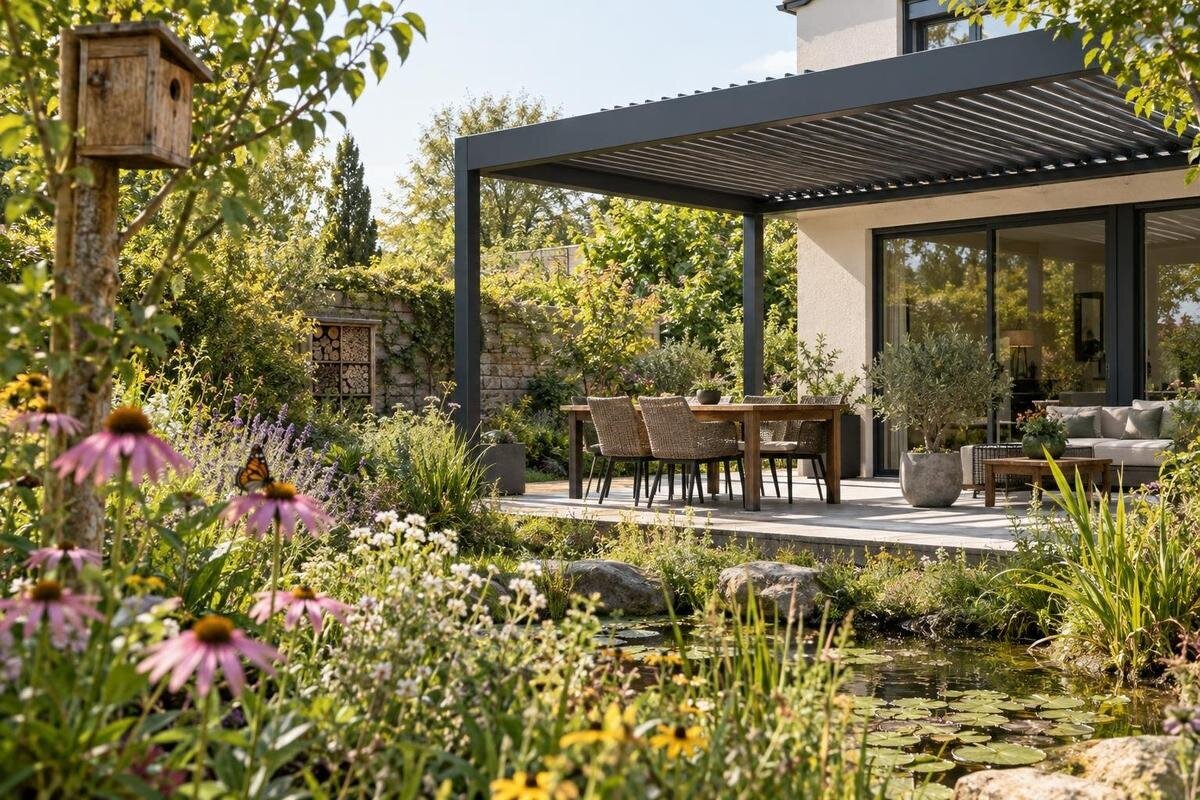
Pergola and garden planning
A pergola affects more than the place beneath it: its footprint can alter a path, a bed, a view from the house and the route used for routine garden care. In a wildlife-friendly garden, planting, lighting and maintenance need to be planned together, rather than added after the structure is fixed. That does not mean a particular pergola or number of planting layers guarantees wildlife visits. Local conditions and species requirements matter. The practical job is to protect useful existing features, document planting needs, keep access clear and direct light with care. A measured plan makes those relationships easier to discuss before work begins.

01
Audit the garden as it is
Begin with a base plan of the garden as it works today, rather than the empty space you imagine after construction. Mark the house, doors and windows, boundaries, paved areas, established trees, existing beds, taps and any known drains or services. Measure the garden and note changes in level; photographs help, but do not replace dimensions. Add the routes between the house, gate, storage, bins and seating. Note the views from the main rooms and areas of sun and shade relevant to the plants you are considering. This shows whether the pergola occupies spare space or sits across a route or view people already use.
Observe the garden at different times and, if practical, in more than one season. Record where people sit, when outdoor lights are used, which beds need frequent care and where wildlife is already seen. Treat these as observations, not predictions: adding a new bed does not by itself prove that a particular bird or insect will arrive. If the project has a species-specific aim, ask a locally knowledgeable ecologist or horticulturist what evidence and planting requirements apply. Note when routine maintenance takes place as well, so the new layout does not block the way it is done.
Choose a pergola position from a measured plan
Place the pergola in relation to the house and the rest of the garden, not as a patio rectangle in isolation. Mark a likely footprint and check the outlook from windows, door movement, the route to beds and the space needed to reach planting. A wall-mounted arrangement and a freestanding arrangement create different questions. An attachment needs assessment of the actual wall and nearby services; posts within the garden affect circulation and planting. Mark eaves, downpipes, outdoor taps and exterior doors for the designer to assess. A qualified designer or installer should confirm site and structural requirements; a sketch cannot establish that a particular wall or foundation is suitable.
The catalogue lists the Bloomcabin Wall-Mounted Pergola in sizes from 9 to 24 m². Treat this as a stated product size range, not a verdict on fit: put the exact configuration under consideration on a dimensioned plan and compare it with the space left for planting and access. The range alone does not establish wall suitability, clearances or an ecological benefit. If several positions seem possible, draw each before deciding; a small move can preserve a path or bed without changing the garden’s main use. Show furniture too, since its approach space can reveal a pinch point outside the footprint.
02
Allow for mature plant size
Plan planting by mature height and spread, not just by what a new plant looks like in a pot. On the drawing, distinguish low edge planting, taller shrubs or grasses, and any larger existing plants; these are useful spatial layers, not a formula for wildlife value. Check each candidate’s local suitability, light, soil and water needs with a knowledgeable local source. Then leave room for its mature form and for the person who will water, prune or replace it. A bed that looks generous on installation day can become difficult to reach if mature size is never considered.
The Bloomcabin Pergola listing gives a size range from 9 to 24 m². Use the exact selected footprint, rather than the range as a proxy, when placing beds around it. Draw the planting boundary separately from the structure, then mark mature plant outlines and the clear space needed for routine care. Avoid putting the tallest layer where it blocks a route or useful sightline simply because the spot looks empty on a plan. Consider the garden when plants are new as well as when they reach their documented size, and keep a simple plant schedule beside the drawing.
Keep planting clear of installation and service zones
Separate the planting plan from the space needed to install and maintain the structure. Ask for the selected pergola’s dimensioned drawing, including post positions and any specified service or access zones, before fixing bed edges. Mark known underground services, irrigation lines and inspection points; do not cover a feature that must remain reachable. Trees and established shrubs may have roots beyond their visible canopy, so do not assume that a post or excavation is harmless because it is outside the trunk’s immediate area. Ask which areas need temporary access during the work. Have a qualified professional assess services, ground conditions and structural work; this guide cannot specify foundations or excavation.
For a scheme that includes the Bloomcabin Bioclimatic Pergola, obtain the drawing for the chosen configuration rather than using the model name to infer post positions or planting clearances. Have the installer confirm those positions before a landscape professional finalises nearby beds. Distinguish permanent access areas from space needed only during installation, so both are accounted for without confusing their purpose. Leave inspection and cleaning points accessible, and wait until installation work is complete before planting nearby. This helps avoid creating a permanent bed where an installer or gardener would have to walk through it.

03
Lay out paths for everyday use and garden care
Map paths from the doors to the gate, seating, garden beds and practical destinations such as a tap or tool store. A route should still work when people are sitting under the pergola and when garden tasks are under way. Measure the clear width needed for the people and equipment that use the garden; test passing places, turning points and door swings rather than relying on a photograph. Include mobility aids, prams or a wheelbarrow if they are part of daily use. The right route depends on the household and garden, so specify it on the drawing. It should not depend on moving chairs every time someone needs to pass.
If the wall-mounted Bloomcabin model is being considered, plot a route from the relevant door before placing furniture or new planting. Assess circulation on your site rather than relying on the product listing to show how the space will work. Keep the path and its edges clear, and avoid making maintenance access depend on walking through a bed. At junctions, show where people turn and where a gate opens. Include the space needed to carry tools or remove prunings. A mapped route can connect the house, seating and garden without dividing planting into awkward leftover strips.
Control where outdoor lighting falls
Plan outdoor lighting for specific tasks and locations instead of spreading light across the whole garden. Mark the door, main path and seating position that need illumination, then show the intended direction of each fitting and any shielding. Aim light down and towards the area in use; check from inside the house and at the boundary that the beam does not fall where it is unwanted. Timers or other controls can help manage when a light is on, but do not replace decisions about direction. Test proposed angles from the seating position as well as beneath the fitting. Have a qualified professional specify and install electrical work.
When considering the Bloomcabin Pergola listing, draw proposed lighting separately from the structure and confirm any permitted mounting method for the exact configuration with the relevant professionals. On the lighting plan, distinguish the areas that need illumination from beds and boundaries where light is unwanted. This gives the direction, shielding and controls a clear purpose rather than treating lighting as decoration alone. A low-spill layout controls where light falls and can help avoid glare or light reaching neighbouring windows. It does not, on its own, establish a particular effect on wildlife; seek locally informed advice if that is a specific project goal.
04
Check climbers and attachments before adding them
Treat climbers and attachments as a separate design decision, not an automatic way to soften a pergola. A climbing plant, trellis, wire, hanging planter or irrigation line may add weight or create maintenance needs, so use them only when the manufacturer or a qualified installer confirms that the exact product and fixing arrangement are suitable. Do not assume a structure can carry an added feature. If suitability is not documented, keep planting in nearby beds or in independent containers that can be moved and cared for without attaching them to the frame. Set planting far enough back to keep paths clear as it grows.
If you are considering Bloomcabin’s bioclimatic model, confirm whether a climber can be attached to the selected configuration before choosing a plant for that purpose. Compare its mature spread and pruning needs with the access available, including the room needed to reach it without stepping through adjacent beds. Keep connections and inspection areas visible and accessible as the plant grows. Make sure the proposed pruning can be managed by the person who will actually care for the garden. Where planting serves a particular wildlife goal, record the locally relevant reason for the choice alongside its care requirements, rather than treating greenery alone as sufficient.
Plan water access and seasonal maintenance
Include water access and seasonal care in the layout while the beds are still being planned. Mark the tap, hose route, any planned irrigation and the places where tools or garden waste need to pass. Keep hoses out of the main route where possible, and decide who will clear leaves, prune plants, weed beds and check lighting. Planting requirements are not interchangeable: document each selected plant’s water and pruning needs with locally suitable advice, rather than creating a watering schedule from a general wildlife-garden label. Note where tools can be stored so care does not require moving furniture or stepping through a bed.
When reviewing the wall-mounted pergola listing, consider maintenance at the junction between the house, seating area and planting. The model name and size range do not explain how water moves around your particular site. Ask the relevant professional to address the exact product and site details, and show drainage or irrigation routes on the plan. Check that beds and nearby surfaces can be reached without trampling plants or repeatedly clearing the seating area. A seasonal checklist should identify each task, the access it needs and who will do it, making the proposed layout easier to assess against the garden’s actual care routine.

05
Bring the design together in a dimensioned drawing
Before committing, bring the layout into one dimensioned landscape drawing rather than a collection of separate sketches. It should show the selected pergola’s exact footprint and post positions, paths and door swings, existing plants to retain, proposed beds with mature sizes, water access, known services, lighting direction and maintenance routes. Add written planting requirements such as expected height and spread, light and water needs, and pruning considerations, checked with a locally knowledgeable professional. Date the drawing and mark revisions so the designer, installer and gardener can identify the current version. A drawing cannot guarantee an ecological result, but it makes design intent and practical conflicts visible.
For the regular pergola model, bring the exact configuration and its dimensioned information to the design discussion so everyone works from the same proposal. Ask the landscape designer and installer to resolve any mismatch between post positions, planting and access before work starts, and carry those decisions through to the current drawing. If you want a specific wildlife-related outcome, state it as a goal and ask for the reasons behind the proposed plants and management. Keep that explanation alongside the practical planting requirements. Where a detail remains unclear, record the open question rather than allowing different people to work from different assumptions.
Test the proposed layout from key viewpoints
Test the proposed composition from the places that matter: the main room looking out, the garden entrance and the seating area. A temporary outline on the ground can reveal whether the structure narrows a route or takes over a bed more clearly than a screen image. Check the view again with mature plant outlines, not only empty borders, and make sure a person can reach each bed without crossing through furniture. Consider the view from the boundary too, particularly when reviewing where lighting will fall. If the layout feels crowded, adjust the footprint or planting edge before adding more features.
Use this final review to decide whether each element has enough room to do its job: the pergola provides a place to sit, paths connect the areas people use, and beds accommodate the chosen plants and their care. Check that the view from indoors still works when chairs are occupied and plants have reached their expected size. Review decorative lighting against the locations that actually need it, rather than adding fittings to fill gaps in the design. If a conflict appears, revise the relevant footprint, route or planting edge on the drawing so the practical layout and the intended garden character remain aligned.
Frequently asked questions
Does a wildlife-friendly garden need a particular type of pergola?
No. Choose a pergola form and footprint for the site, circulation and confirmed structural requirements; plan the planting separately for local conditions. A product name or visual style does not establish ecological value or guarantee wildlife visits.
How can I keep outdoor lighting low-spill?
Mark the paths, seating and entrances that need light, then plan the fittings’ direction and shielding around those areas. Check that light does not fall where it is unwanted, including neighbouring windows. Low spill controls where light falls; it does not prove a particular wildlife benefit. Have a qualified professional handle electrical design and installation.
Can I grow climbers on the pergola?
Only after the manufacturer or a qualified installer confirms that the exact product and fixing arrangement are suitable. Climbers, wires and planters can affect maintenance and may add weight. If suitability is not documented, keep plants in separate beds or containers and leave the structure accessible.
What plants should I put around a pergola?
There is no universal list. Check each plant’s local suitability, mature size, light, soil, water and pruning requirements with a knowledgeable local adviser. If you have a particular wildlife goal, ask an ecologist or horticulturist to explain which plants suit that aim and why. A planting choice alone cannot guarantee visits from a named species.
What should a garden plan show before installation?
Show the selected footprint and post positions, paths and door swings, existing services, planting at mature size, water access, light direction and space for seasonal care. Add documented planting requirements and ask qualified professionals to resolve structural, electrical and site-specific questions. A current, dimensioned plan helps identify conflicts before work begins.
A pergola and a wildlife-friendly garden work together when seating, planting and routine care all have space in the same plan. Preserve useful routes and existing features, allow for mature growth and direct lighting towards the areas where it is needed. Resolve structural, electrical and site-specific questions with qualified professionals, and base planting choices on local advice. The aim is a garden whose layout supports both everyday use and a clear planting purpose, without assuming that a pergola style or a densely planted border guarantees a particular wildlife result.
