
Build a greenhouse yourself or have it installed?
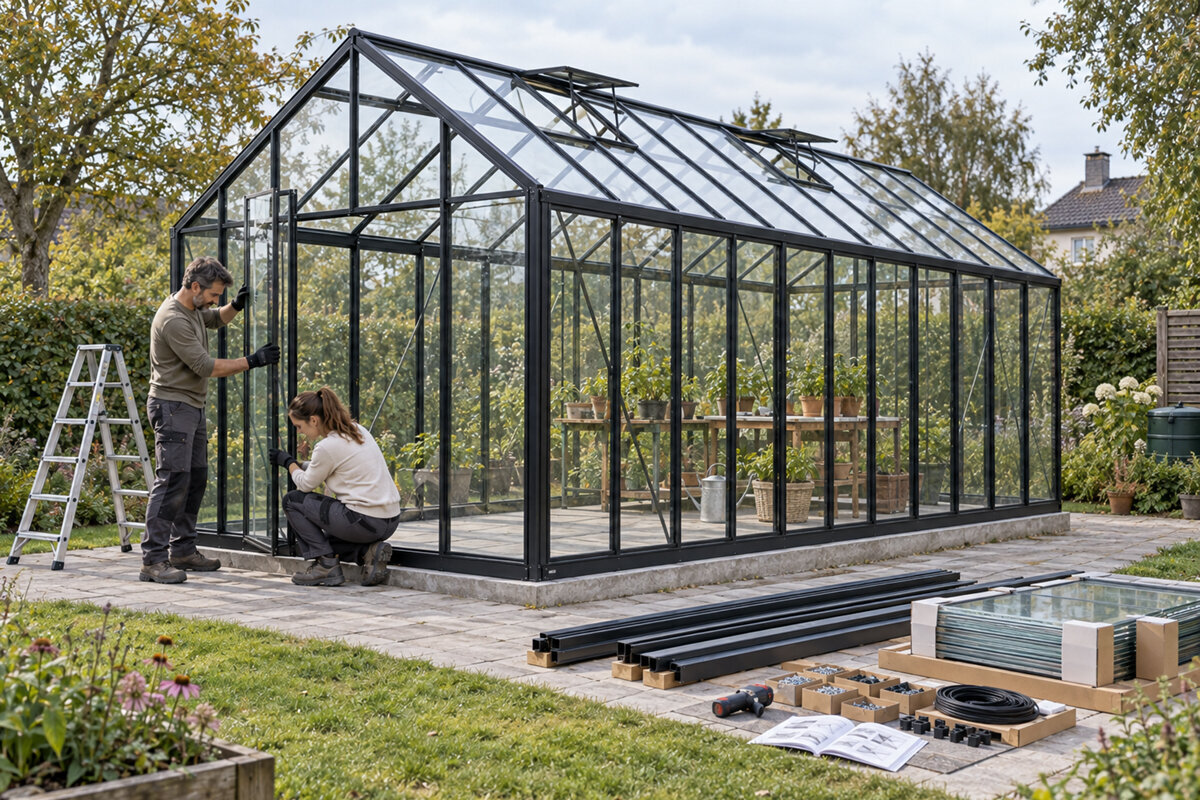
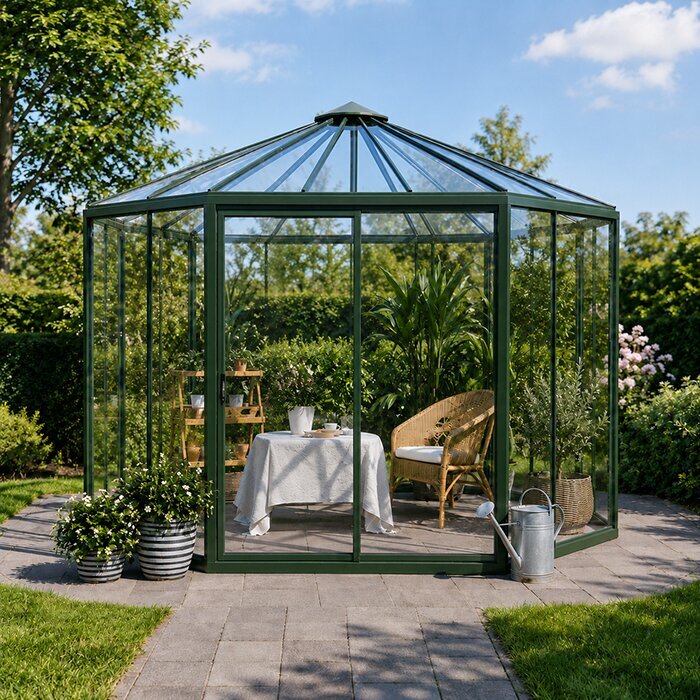
Whether DIY assembly or professional installation suits you best depends on more than greenhouse size. Site conditions, the base, available help, practical skills and the need for a predictable process all matter. This comparison considers both options in practical terms.
A greenhouse may initially seem like a manageable garden project. Yet several steps need careful coordination between opening the packages and making the first planting. The foundation, alignment, frame, glazing, doors and seals all need attention. Reviewing these points early makes the installation choice far more reliable.
Self-assembly can be highly satisfying if you enjoy precise work, can allow enough time and can arrange support. Professional installation, by contrast, can reduce pressure where conditions are complex or the project needs completing without long interruptions. Neither route is inherently superior; the right one suits your property and resources.
Treat installation as part of the overall greenhouse plan, rather than an afterthought. Before buying, check garden access, ground conditions, your preferred installation date, transport arrangements and temporary storage options. Clarify local requirements and insurance questions with the relevant parties in good time.
Decision basis · 01
Assess the project honestly
The key question is not whether you can use a screwdriver. It is whether you can manage the complete process. This includes reading assembly instructions, checking components, aligning accurately and identifying deviations. DIY work needs enough time for focused, unhurried tasks. Interruptions caused by weather, work commitments or absent helpers can substantially affect progress.
A freestanding greenhouse on an open site is usually easier to organise than a project with difficult access, a tight garden or many connection points. Take stock: who can help carry? Where can delicate parts be stored safely? What tools are available? Honest answers prevent apparently economical DIY work becoming difficult through improvisation.
Include the actual workspace around the greenhouse in your site assessment. The footprint alone is not enough: clear routes are needed to sort, pass and move profiles and panes safely. Check whether garden furniture, beds or fence sections will restrict access during assembly.
Also check that wall surfaces will remain accessible for cleaning, maintenance and possible repairs over time. Well-planned access prevents later work becoming unnecessarily difficult because of planting or permanently installed features.
- Assess not only your experience, but also available time, helpers, tool quality and a dry, orderly work area.
- Allow time for re-measuring, sorting and corrections; these tasks are not minor extras with a kit.
As a clear starting point, compare the different Classic greenhouses in standard versions by footprint shape and assembly principle.
Site and connection · 02
Prepare a lean-to greenhouse carefully
A greenhouse placed against a wall adds interfaces to the usual assembly work. The wall surface, foundation height and connection area must work together precisely. Early checks are especially worthwhile with uneven façades or existing downpipes. Correcting matters later at the frame is not a substitute for proper preparation and can make installation needlessly difficult.
Intended use also affects the decision. Where paths, doors, water connections or planting are close by, assembly needs a considered sequence. DIY installers should check every dimension against the actual site and keep the wall area clear. If building details are uncertain, professional assessment before starting is preferable to corrections during installation.
With a lean-to greenhouse, the wall connection should not be treated as a minor detail. Check that the wall will remain accessible and that existing services, windows or roof drainage will not affect the planned position. This clarification supports a logical sequence for every stage of work.
Before concreting or fixing anything, check drainage around the installation area. Standing water, yielding ground or unclear transitions to paths can seriously complicate preparation and future use.
- Check the wall line, clear door areas, rainwater routes and the actual height of the prepared base before ordering.
- Record dimensions and obstacles with sketches; this helps both DIY assembly and a later installation discussion.
For projects against a house wall, full-size standard lean-to greenhouses offer an appropriate category for site-based selection.
Foundation as the key · 03
The base determines the build
A level, load-bearing foundation with accurate dimensions is essential for controlled assembly. It determines whether frame profiles align, doors work properly and glazing can be fitted without stress. DIY projects often underestimate this work because it happens before visible assembly begins. Check product-specific requirements carefully before approving the area for installation.
Depending on the property, earthworks, drainage or creating a suitable installation surface may need specialist knowledge. If you arrange installation, clarify whether foundation preparation is included or must be completed beforehand. The same applies to DIY work: a temporary base rarely saves effort when parts later need aligning, correcting or loosening again.
Record the results of your foundation inspection before assembly begins. A simple sketch showing external dimensions, height points and planned fixing locations helps identify deviations early. It also creates a shared basis where helpers or an installation provider are involved in preparation.
- Measure diagonals, levels and edges repeatedly; a surface that looks level is not necessarily accurate enough.
- Confirm product-specific fixing requirements before starting and keep access clear for materials and equipment.
When planning a foundation, the dimensions of Classic standard greenhouses provide a practical basis for your site sketch.
Workflow · 04
Divide assembly into sensible stages
Orderly DIY assembly starts by matching the delivery against the parts list and instructions. Sort profiles and connectors under cover rather than spreading them straight onto the lawn. The usual sequence is base frame, supporting structure, roof sections, glazing and moving elements. Begin the next stage only once the previous level is checked. This keeps mistakes traceable and easier to correct early.
Professional installation teams also follow a clear sequence, but bring practiced methods and established routines. This can be valuable when aligning the structure and fitting delicate components safely. Before appointing anyone, ask what preparation is expected, how access problems are handled and what inspection or handover is planned. A detailed scope creates clarity for everyone.
Before starting, decide which components must be secured or protected after each working day. Weather or missing helpers can interrupt a partly completed build. Keeping profiles, fasteners and glazing organised makes it easier to resume and reduces the risk of mixing parts up.
Bring out delicate components only just before fitting them, checking again for damage as you do so. Organised temporary storage reduces searching and makes it easier to follow the assembly sequence consistently.
- Keep assembly documents close throughout the build and mark completed steps clearly.
- Tighten connections fully only after alignment and squareness have been checked for that construction level.
If the wall side forms part of your workflow, consider large standard lean-to greenhouses with particular attention to access and connections.
Safety and materials · 05
Plan helpers, tools and protection realistically
Greenhouse assembly creates situations that can be difficult to handle safely alone. Long profiles, roof sections and glass panes need adequate room, controlled movements and often a second person. Plan suitable work gloves, stable access equipment and a tidy work area. Strong wind, wet conditions or poor visibility increase risk and should not be ignored because of scheduling pressure.
Protecting the components matters alongside protecting people. Do not rest parts on hard edges or twist frames by lifting them unevenly. Check the instructions for recommended tools and fixing steps. If safe equipment or dependable helpers are unavailable, choosing an installation service is a sensible decision, not a lack of initiative.
Discuss not only carrying tasks with helpers, but also clear signals and places to set parts down. A coordinated approach prevents rushed movements, especially with large or delicate components. Keep children and pets well away from the work area during critical assembly stages.
- Arrange at least one reliable second person with clearly agreed tasks for lifting and glazing work.
- Pause work in unsuitable weather and secure fitted parts according to the assembly guidance.
For material and space planning, you can include Classic greenhouses as a standard model early in organising your garden.
Understanding cost factors · 06
Compare more than installation work
No reliable total can be given without specific quotations, but the cost structure can be reviewed. For DIY assembly, consider foundation materials, tools, possible hire equipment, transport aids and the value of your time alongside the kit. Professional installation may involve scope, travel, access, preliminary work and additional services. Compare transparent descriptions of work rather than broad labels.
For an installation quote, ask exactly which work is included and what your property must provide. A lower-looking figure may be incomplete if the foundation, excavation or difficult access are handled separately. The same transparency helps with DIY: list every expected stage and identify where outside help may be useful.
For a fair comparison, use one project list for both routes. Note the prepared base, access, storage, required help and possible follow-up work. This moves the comparison beyond individual line items and shows which tasks still remain with you.
A short responsibility overview is especially helpful: who prepares the site, who organises materials and who checks handover? Clear responsibilities avoid misunderstandings whether you assemble it yourself or appoint support.
- Compare quotations by scope, prerequisites, possible additional work and how on-site deviations will be handled.
- Give DIY work a realistic allowance for helpers, equipment and corrections, rather than counting materials alone.
For projects close to a wall, assess full-size standard lean-to greenhouses together with all required preparation work.
Requirements and cover · 07
Check local requirements early
Whether and under which conditions a greenhouse may be installed can depend on location, size, use and municipal rules. Do not rely on general statements online or experiences from another municipality. Ask the relevant local authority early if your project raises questions. Also consider boundary distances, property lines and any rules that apply within your residential development.
Reviewing existing insurance documents can also be worthwhile, particularly if suitable cover during or after installation matters to you. The treatment of damage, assembly mistakes or accessories depends on the individual policy. Ask your insurer what applies to your property and intended use, and document preparation and assembly carefully.
Keep assembly documents, photographs of the prepared area and agreements somewhere easy to find. This documentation supports communication with everyone involved and helps you trace individual stages later. It does not replace individual advice, but provides an orderly basis for outstanding questions.
- Before ordering, clarify potential requirements with your municipality or building-control authority, especially near boundaries or at sensitive sites.
- Check insurance terms individually and keep photographs, documents and foundation and assembly details organised.
For a clear project description to involved parties, Classic greenhouses in the standard range make an easy-to-understand starting point for planning.
Choosing well · 08
Decide around risk and everyday life
Choose DIY assembly when you can not only start the process but complete it reliably. That includes preparation, careful work, the ability to make adjustments and enough capacity for unexpected interruptions. The benefit is controlling your own project, but it only emerges when the task fits your experience and the real situation in your garden.
Choose professional installation when you want to reduce complexity and delegate practical execution. Still read product documents and written agreements carefully, because responsibility for the site and prepared base remains important. Check the applicable written terms and the exact scope of any warranty or guarantee services. This makes the choice a robust project plan rather than a spontaneous convenience decision.
Your decision may also reflect personal workload. If you enjoy careful hands-on work, you can deliberately plan the build as a project. Where time is uncertain or organisation adds pressure, delegating practical assembly may be the more suitable everyday choice.
- Base the choice on your actual preparation and risks, rather than a general expectation that you must do everything yourself.
- Record responsibilities in writing once external help is involved, so preparation, assembly and handover remain clear.
If a wall-based solution supports your use, compare large standard lean-to greenhouses with the real conditions at your home.
Comparison
DIY assembly and professional installation compared
Both routes can result in a successful greenhouse. This overview helps you place the key differences in the context of your property. It does not replace assembly instructions or the assessment of a specific quotation, but it highlights the questions that should be answered before deciding.
| Criterion | DIY assembly | Professional installation |
|---|---|---|
| Time management | You manage dates, helpers and work stages yourself. | The process follows the agreed date and prepared conditions. |
| Practical requirements | Alignment, fixing and glazing require care and safe working. | Practical execution is handled for you; site preparation remains crucial. |
| Foundation checks | You check dimensions, levelness and fixing requirements before assembly starts. | Clarify in advance whether and how the prepared base will be checked. |
| Cost assessment | Include tools, assistance, time and potential corrective work. | Compare scope, access and excluded preliminary work carefully. |
| Flexibility | You set breaks and the sequence around your own calendar. | The appointment structures the project but requires timely readiness on site. |
DIY assembly suits you if
you can follow instructions confidently, measure carefully, coordinate helpers and allow enough time for weather-independent tasks.
Arrange installation if
access, the foundation, a sloping site or timing create special demands and you prefer experienced hands for practical work.
Clarify before committing
Check foundation requirements, access, storage, local requirements and an installation quote’s scope before deciding.
Plan your installation choice in five steps
A brief written pre-check quickly reveals differences between DIY assembly and professional installation. Work through these points before finally selecting the model, accessories or installation route.
01
Survey the site
Measure the available space and check access, paths, slopes and obstacles. For lean-to versions, also photograph the situation from several viewpoints.
02
Define the foundation
Read the product-specific requirements and plan the base separately from the visible structure. Check dimensions, levels and the intended fixing method.
03
List resources
List tools, protective equipment, storage space and reliable helpers. Add realistic time windows, including allowances for weather and checking steps.
04
Compare the installation scope
When using external help, ask about included work, necessary preparation and handover points. Compare quotations using the same written project basis.
05
Check approvals
Clarify outstanding local requirements, neighbour issues and insurance with the appropriate contacts. Only then should the build be scheduled definitively.
Pre-assembly checklist
Use this list as a final project check. It helps identify avoidable interruptions whether you assemble the greenhouse yourself or arrange an installation service.
01. Assembly instructions, parts list and product dimensions are available in the current version for the chosen model.
02. The site has been measured, is freely accessible and checked with doors, paths and future use in mind.
03. The foundation meets product-specific requirements and has been checked for levelness, dimensions and fixing options.
04. Components can be stored dry, protected and sorted without blocking paths or garden areas.
05. Suitable tools, protective equipment and stable access aids are ready before the first assembly step.
06. Reliable helpers are available to carry long items and fit glazing.
07. Weather and working time allow calm, safe work without unnecessary pressure or risky improvisation.
08. Local questions, insurance matters and, for professional installation, the exact scope have been clarified individually.
Frequently asked questions about greenhouse installation
Can I build a greenhouse myself without prior experience?
This depends less on one level of experience than on overall preparation. If you can follow instructions precisely, measure carefully, have appropriate tools and can organise help, DIY assembly is possible. If you are uncertain about the foundation, glazing or safety, professional support is often the better route.
What is most often underestimated with DIY assembly?
The preliminary work is often underestimated: an accurately prepared foundation, enough storage space, sorting parts and coordinating helpers. Checks between build stages also take time. Focusing only on tightening screws leads to an overly tight plan and increases the risk of avoidable corrections.
Must professional installation include the foundation?
Not automatically. An installation service can have different scopes and should be described clearly in writing. Ask specifically about preparing the area, checking the foundation, fixing, disposal and handover. This shows early which work you must organise yourself or appoint separately.
When is a lean-to greenhouse especially demanding?
It becomes demanding when the wall, foundation and connection area are not prepared precisely. Unevenness, downpipes, narrow paths or differing heights can affect progress. Check the real site carefully and have unresolved building questions assessed by suitable professionals before assembly starts.
Should I clarify approval or insurance questions before buying?
Yes, this is sensible whenever the site or intended use raises questions. Requirements can vary locally, so obtain binding information from the relevant authority. Insurance terms are also individual. Ask your insurer what information is needed for your project rather than relying on general assumptions.
How can I compare installation quotations effectively?
Compare more than the total figure; focus above all on the work described. Important points include property conditions, included stages, how access problems are handled and possible additional work. Give every enquiry the same dimensions and information, so differences in scope become much clearer.
Explore greenhouses
Choose your installation route with confidence
Building a greenhouse yourself can be a rewarding garden project when the foundation, work environment and personal resources are well prepared. Professional installation can make organisation more secure, especially for challenging sites or limited time. What matters is a realistic assessment of the complete task.
Before ordering, allow time for dimensions, the base and responsibilities. Compare models that suit your site and record open questions in writing. With clear preparation, you choose not only the right installation route but also create a solid basis for future use.
Find a greenhouse shape that suits your garden, site and intended installation route.
