
Pergola Moisture: How to Tell Rain From Condensation
Pergola weather guide
A wet patch beneath a pergola may come from rain getting through, condensation forming on a cool surface, or both. Timing, weather and droplet patterns offer useful clues, but a single wet morning rarely proves the source. Record what happens before changing the roof or treating every drip as a fault.

01
Why a wet surface does not identify the source
Water beneath a pergola is a symptom, not a diagnosis. Rain may pass through an opening, reach an edge or joint, or be blown beneath the roof during a shower. Condensation forms when water vapour in the air turns to liquid on a surface cool enough for it; no rain needs to fall at that moment. Either source can leave a drop on the same beam or seat, and condensation can gather until it drips. A puddle or one wet spot therefore says little about where the moisture began. The sequence of weather, temperature change and first wetting is more useful.
Begin by finding the first surface that looks wet, not just where a drop lands. A drop can travel along a beam or roof component before falling, so the spot on the floor may be some distance from its origin. Note whether moisture is on the roof underside, an edge, a support, a nearby wall, furniture or only the ground. Record the roof position and whether sides or screens are fitted. Pergola designs do not all share one drainage route or one weather limit, so these details give your observations a useful context.
Compare the timing with the rainfall
Rain-related entry is more likely when the first wetting follows a shower closely, becomes stronger as rain intensifies, or appears on the side exposed to wind-driven rain. Look for a repeatable path from a roof edge, opening, joint or component, but remember that the drip may land some distance from its origin. Note when rain starts and stops, whether the wind changes, and when the first droplet appears. Moisture during a genuinely dry spell shifts attention towards condensation or another source. A forecast alone is not enough; compare it with what actually happened at the pergola.
Timing is still a clue, not a verdict. Water can remain on a surface or within a drainage path after rain and drip later, while a roof may stay damp after the shower without new water entering the space. Record whether the wet patch grows, stays steady or fades, and whether it returns at the same point on another rainy day. Keep the time of the shower separate from the time you first noticed moisture: discovering a wet beam after rain does not tell you when it became wet. When discussing a Bloomcabin Wall-Mounted Pergola with a supplier, explain that sequence rather than simply reporting an after-rain drip. This gives the supplier a clearer starting point for interpreting the pattern against the installed roof's weather limits.
02
Use droplet patterns as clues, not proof
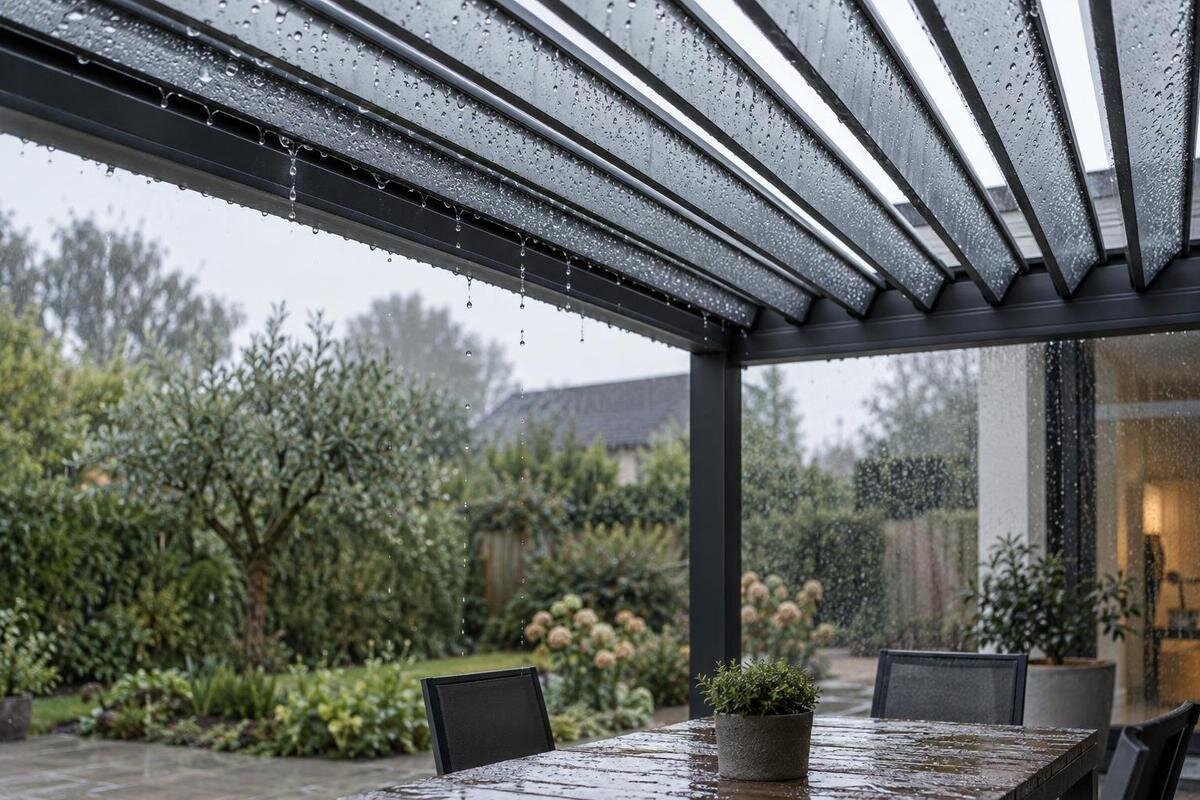
Condensation often appears as fine beads across a cooler underside or as a light film on several nearby surfaces. If droplets merge, they can become large enough to fall, so a drip is not automatically evidence of rain. Rain entry may leave a more concentrated trail, a wet line from an opening, or a patch that recurs after showers. These patterns are useful but not definitive: water can follow a beam before dripping, and wind-driven rain may affect more than one area. Compare the spread of moisture with its timing rather than diagnosing from droplet size alone.
Sketch the roof from below and mark the first visible bead or wet line, not just the floor drop. Take one wider photo to show the area and one close-up of the route, then revisit the same points after a dry night and during ordinary rainfall. If similar fine beads appear on several cool surfaces, note that; if a single line follows the same joint during rain, record that instead. Use the same viewing points where possible so changes are easier to compare. The pattern supports a theory only when it agrees with the weather record and the roof's actual layout.
Check for conditions that favour condensation
Condensation depends on the relationship between moisture in the air and surface temperature. Air contains water vapour, and when a roof surface cools below the air's dew point, some of that vapour can turn to liquid on the surface. A clear, calm night can leave exposed surfaces cool by morning; moisture may become noticeable as the air warms while the roof remains cool. It can happen at other times too, so dawn is a clue rather than a requirement. Humidity, airflow and the way the space is enclosed all affect what you see. You do not need to calculate a dew point to keep a useful record.
Look for a repeated relationship, not a fixed time of day. A dry night followed by widespread underside droplets and no rain points towards condensation; a patch that starts during rain and follows one route points towards water entry. The difference can be subtle if it rained earlier or the structure stayed cool. Note whether the frame, roof underside and nearby surfaces are all affected, and whether the moisture fades as conditions change. Keep observations of widespread beading separate from those of a concentrated wet line, even when both occur on the same morning. If you are considering a Bloomcabin Pergola, use these distinctions when asking about moisture beneath the proposed roof and enclosure. Describe the conditions at your site rather than asking whether the model will ever drip.

03
Match the pattern to the roof and enclosure
Check the roof's actual construction before applying advice about a different type. A pergola may have open slats, adjustable sections, a fixed covering or another arrangement, and each can expose the covered area to weather differently. If there are louvres, note their position when moisture first appears, but do not move them as an improvised test. An open or partly open arrangement may allow rain to reach the space, depending on its design and the conditions. Compare what happened with the intended use and weather limits for that configuration rather than assuming the space is sealed.
Wind direction can help explain why moisture is concentrated on one side: rain may be driven beneath a covering or through an opening. A screen, wall or other enclosure may alter both airflow and the route water takes, so record which parts are present. When reviewing a Bloomcabin Bioclimatic Pergola, confirm the roof and enclosure configuration in the relevant product information. Compare the damp area with the direction of the rain, but treat that match as evidence to investigate rather than a final diagnosis. Describe the affected side in relation to a fixed feature, such as the adjoining wall or garden, so that later photographs and notes refer to the same place. A record that says only ‘wet on the left’ becomes ambiguous when photographs are taken from different positions.
Record observations consistently
Use a basic log that separates observations from interpretations. Record the date, rain start and stop times, approximate intensity, wind direction if known, roof position, fitted sides or screens, and the first place moisture appeared. Add photographs with timestamps if your phone allows it. Write ‘droplets along the exposed edge during rain’ rather than ‘the roof leaks at the edge’ until the source is established. Give each affected area a consistent description and keep the wider photograph with its close-up, rather than collecting isolated pictures of drops. If you did not see when wetting began, write ‘already wet when checked’ instead of estimating a start time. This preserves the distinction between what you witnessed and what you inferred when comparing a dry-weather morning with a rainy day.
Compare similar conditions where you can: a dry period, ordinary rainfall and, if relevant, the same roof position. Do not wait for severe weather or create a storm test. Observe from a safe, dry position at ground level; do not climb onto the roof or reach across a wet area. If the manufacturer provides an observation method for the model, follow that rather than improvising. Record occasions when the usual wet point stays dry as well as those when moisture appears. That comparison helps you avoid building an explanation around wet days alone. Keep the exact product identifier at the top of the log; for a wall-mounted pergola from Bloomcabin, include the installed configuration alongside the model name so the observations remain tied to the structure you are investigating.
04
Rule out water from nearby surfaces and equipment
Before attributing every wet mark to the roof, consider other routes into the same space. Rain can run down an adjacent wall or arrive from a nearby roof edge; a gutter or downpipe may also release water close to the pergola. Irrigation, a hose or recent cleaning can wet surfaces at particular times. These sources may be intermittent and can look like a roof problem if the first visible drop is beneath the structure. Note where water first appears and follow a visible trail only if it is safe. Do not dismantle a neighbouring drain or alter an installation to test a theory.
Keep this check specific. Note whether the wall above or beside the pergola is already wet, whether moisture appears only when an irrigation cycle runs, and whether the timing matches the roof's exposure to rain. A wet floor alone does not identify the source of moisture overhead. Separate photographs of an adjacent wall or nearby outlet from close-ups of the roof underside, while retaining a wider view that shows their positions relative to one another. If you are comparing the regular pergola in the Bloomcabin range with your intended layout, include those surrounding features in your enquiry. The useful question is where water could reach the covered space in that layout, rather than whether a product title explains every damp mark.
Compare visible water paths with the drainage design
If the design includes gutters, channels, outlets or concealed drainage, observe from ground level during ordinary rain. Note any visible water running over an edge, a stain that follows a joint, or water emerging somewhere unexpected. These are observations, not permission to clear, pry open or dismantle a component. A drainage issue may affect where rainwater appears, while condensation can form away from the drainage route. Pergolas do not all use the same parts, so do not assume that an unfamiliar channel is faulty or that a diagram for a different roof configuration applies.
Use the model-specific drainage diagram, if one is supplied, to understand the intended route and compare it with what you can see. For the Bloomcabin bioclimatic model, ask for drainage details that match the installed version and configuration. On your sketch, distinguish the intended route shown in the information from the visible route you observed; do not fill in a concealed section by guesswork. If you cannot see where water goes after it enters a channel, record that limit to the observation. Do not block an outlet, pour water onto the roof or flush a route to reproduce a leak unless the product instructions expressly allow that method. If checking the route requires access above the roof or removal of a component, leave it to the installer or a suitably qualified service person.

05
Ask for weather information for the exact configuration
When choosing a pergola or checking one before purchase, ask for written information for the exact model and configuration, not a blanket assurance that pergolas are waterproof. Look for stated weather limits, the roof's operating conditions, the drainage route and any restrictions that apply when sides or screens are added. Ask what the information says about wind-driven rain at edges and openings, as well as the intended enclosure combination. A product photograph can show appearance, but it cannot establish how a particular model performs in your weather or where it directs water.
Keep the answers with the product name so that later troubleshooting can be model-specific. When considering the wall-mounted pergola option, relate the supporting information to the exact layout and exposure at your site. Describe which sides would be open or enclosed and where the covered area meets the building, rather than relying on a general question about waterproofing. Ask the supplier to distinguish information about rain entering the space from information about condensation forming on the underside; these address different sources of moisture. If details are missing, ask before committing rather than assuming there is a universal storm or watertightness rating. Compare the stated limits and drainage arrangement with how you intend to use the covered space, including where you plan to place seating.
Decide whether the pattern needs a closer inspection
A one-off damp morning with fine droplets across a cool underside, no recent rain and no recurring route may fit condensation; record it and see whether similar conditions bring it back. A wet line that starts during rain, follows a specific joint or edge, or returns in the same place deserves a closer look at the relevant roof details. Repetition matters. Compare rainy days with dry days and note whether the roof stays damp, because one event can involve cooling, residual water and wind-driven rain at the same time.
Seek an assessment promptly if water is reaching electrical fittings, making a walking surface unsafe or visibly affecting finishes. Do not touch wet electrical equipment or attempt an improvised repair. Share photos, dates, rainfall timing, roof position and the model identifier with the installer or supplier. When asking about a regular Bloomcabin pergola, describe the recurring pattern first, then identify anything that differed between wet and dry occasions. Include the clearest examples rather than sending a collection of unlabelled close-ups, and distinguish an observed water trail from a suspected concealed route. The assessment should use the instructions and weather information for the actual installation. A useful outcome is an explanation of the observed pattern, with any remaining uncertainty made clear, rather than a premature label of either leakage or condensation.
Frequently asked questions
Can condensation form beneath a pergola when it has not rained?
Yes. Moist air can condense on a roof or frame surface that has cooled enough, even if the weather is dry. Fine droplets after a cool night, with no recent rain and no clear route from an opening or edge, make condensation worth considering. They are clues rather than proof, so record the timing and where the first moisture appears.
Does a drip that starts after rain prove that the roof is leaking?
No. Rainwater may continue to drip from a surface or drainage route after a shower, and condensation may also form as temperatures change. Check whether the wet patch began during the rain, whether it follows a repeatable path, and whether it appears again in dry conditions. The roof design and its drainage information help explain what you observe.
Do droplets beneath louvres mean rain is getting through?
Not by themselves. Droplets may be condensation or may relate to rain, depending on the weather, the louvre position and the specific roof design. Note the position when moisture first appears and whether it follows rainfall. Use the operating guidance for that model; do not change the roof position as an improvised leak test.
Can condensation and rain entry happen at the same time?
Yes. Rain may reach one area while moisture condenses on a cooler surface elsewhere. A wet roof after a shower can make the pattern harder to read, so record each place where moisture first appears separately and note what the weather was doing. Do not assume that finding one source rules out the other.
What should I tell an installer about recurring moisture?
Share the dates and times, whether it was raining, the wind direction if known, the roof position and any fitted sides or screens. Include photos of the first wet point and any trail, plus the exact model name. State what you observed rather than labelling it a leak before the source is clear.
Rain and condensation can leave similar drops, but their timing, spread and route tell different stories when recorded together. Compare dry-weather mornings with ordinary rain, note the roof position and consider nearby sources of water. Then check a recurring pattern against information for the exact model and configuration. This helps avoid labelling ordinary condensation a leak while ensuring that a repeatable, rain-timed entry point is not dismissed as dew.
