
Replacing an Old Awning with a Pergola: Site Changes
Pergola conversion guide
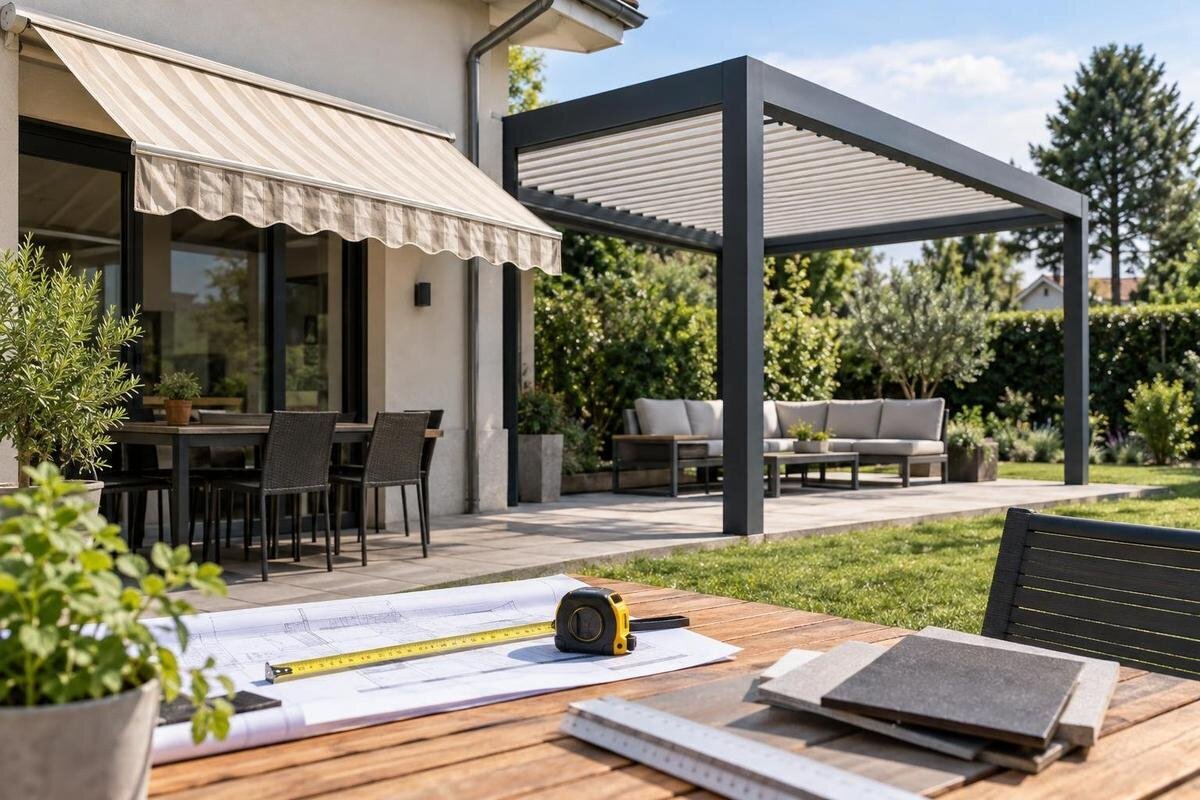
Replacing an old awning with a pergola is a site-conversion project, not simply a swap of shade products. Removing brackets can expose holes, damaged finishes or wall conditions that were hidden, while the new layout may introduce supports where the awning had none. Before ordering, establish what must be removed, what needs repair and where the new structure is intended to sit. A measured record lets the supplier, installer and repair trades work from the same brief instead of making separate assumptions about fixings, paving or water run-off.

Existing dimensions and usable patio space
Begin with a measured plan of the existing shaded area, not with the awning’s nominal width or a visual estimate. Mark the wall line, outer edge and corners, then show nearby doors, windows, steps, gutters, drains, boundaries and fixed items. Note how far the awning projected and the height of its underside, but separately measure the floor area you want to use beneath the pergola. Include changes in level between the house and patio. These measurements describe the site; they do not establish the final pergola dimensions, clearance or fixing points. Write dimensions in the same units, state each reference point, and mark any estimate as uncertain.
Take wide photographs from the house and garden, followed by close views of each bracket, wall surface and obstruction. Label them to match a simple sketch, and date the record so later revisions are clear. For a first catalogue reference, Bloomcabin Bioclimatic Pergola is listed for areas from 9 to 24 m²; that range can frame a product enquiry, but it does not show whether a particular footprint, boundary or support layout fits your site. Ask for a drawing based on your measurements rather than assuming the old shade line is the correct pergola edge. If a dimension is inaccessible, record that limitation rather than filling the gap with a rounded guess.
Wall condition and new attachment points
Before the old awning comes down, record what can be seen around every bracket: cracks, flaking render, damp staining, loose masonry, corrosion marks, patched areas and any movement or distortion. These are observations, not a diagnosis. Keep photographs and note whether a bracket covers a joint, cladding edge, window reveal or gutter connection. If removal will expose the surface, agree who will inspect it and who can decide whether it needs repair before new work proceeds. A clean-looking section of wall behind a bracket should not be taken as proof that it is ready for a different fixing arrangement. Compare current photos with maintenance records or house plans if available; they may point to earlier repairs, but cannot confirm present condition.
Do not treat an old awning’s fixing pattern as a template for a pergola. A different structure can have a different layout and requires its own project-specific attachment review. If you are considering a wall-mounted format, Bloomcabin Wall-Mounted Pergola identifies a catalogue option, not the capacity or condition of your wall. Ask the supplier or installer what information they require and whether a qualified building professional should assess the proposed attachment. Put agreed attachment positions on the drawing and defer drilling until the responsible parties have confirmed the plan.
Agree how redundant brackets and holes will be handled
Make removal and making good separate, explicit items in the work scope. Agree who will take down the awning, remove brackets and redundant anchors, dispose of material, protect nearby glazing and paving, and check behind the hardware once it is off. The safe removal method depends on what is fixed into the wall and what may sit behind it, so do not ask an unqualified person to cut, drill or pull fittings out blindly. Also clarify whether a contractor will stop if the exposed wall shows damage or unexpected wiring, and how that change will be priced and approved. If the awning includes a motor, light or associated cable, identify it before removal and agree who is qualified to disconnect or make that equipment safe. A verbal instruction to remove the awning can otherwise leave key tasks between trades.
Define the repair finish in plain terms: sealing penetrations against weather, patching render or masonry, replacing affected tiles, repainting a defined area, or leaving a surface for a separate decorator. These tasks are not automatically part of the pergola supply or installation, so identify the person responsible and whether matching the existing colour or texture is included. Do not assume a patch will blend invisibly; agree the finish standard and what will happen if the substrate is damaged beyond the visible hole. Specify whether repairs cover just the fixing points or also adjacent cracks, stains or chipped finish; otherwise each trade may allow for a different area. If repairs are done before new supports are set out, the installer needs to know what must remain accessible and how the finished surface will be protected.
New support positions on the patio
An awning attached to a wall may have left the floor clear, whereas the pergola layout you choose may require supports at positions not used before. Use the supplier’s drawing to mark the proposed footprint and each support point on the actual patio, rather than placing posts by eye. Check the markers against door swings, steps, paths, furniture, garden edges, bins and any access route needed for maintenance. Walk the area as it is used: a support can be on the plan yet obstruct a chair, gate or route to the garden. If the intended arrangement is not final, show alternatives on separate drawings so old and new positions are not confused. Temporary markers let household members test the route and furniture layout before permanent ground work is committed.
Ask the supplier to dimension the outside edges and support locations from fixed references such as a wall corner, door jamb or property boundary. Include any projection beyond the paved area and confirm which measurements are final, not indicative. The Bloomcabin Pergola catalogue page lists a product from 9 to 24 m²; a stated area does not explain where its supports would fall on your patio. Ask for offsets from fixed points as well as overall width and depth, since two layouts with the same area can place supports differently. Use the project drawing to decide whether paving, circulation space and intended furniture layout can coexist, and have the responsible installer confirm that the shown configuration is the one being quoted.

Paving, ground conditions and buried services
Do not assume that paving which carries foot traffic can automatically take a pergola support or anchor. The visible finish could be tiles, pavers, a slab, a deck or a mix of surfaces, and the condition below it may not be apparent. Photograph joints, cracks, patched areas, drains and changes in paving, and give that information to the installer. A competent professional must confirm the support arrangement and any ground work for the actual product and site, including the base and anchor requirements. Agree whether existing paving will be kept, lifted, cut or reinstated, and who pays for replacement material if removal damages it. A raised planter, surface channel or deck edge can also limit where work can be carried out.
Record level changes at the house threshold, patio edge and proposed support areas. These details help the supplier and installer check whether the final layout, door clearance and surface repairs can be coordinated without guessing. Before anyone cuts or excavates, identify buried services and drains from reliable site information and have a suitably qualified person confirm anything uncertain. Existing building plans may be incomplete, so flag unknown routes rather than marking an area as clear from memory. If you are considering the Bioclimatic Pergola, request its project-specific support layout before deciding whether the present surface can remain.
Rainwater routes after awning removal
The old awning may have directed rain to a particular drip line or collection point; a pergola can change where water falls or is channelled. Do not assume the old arrangement will still manage run-off. Ask the supplier to show the intended water route for the exact configuration, including collection points and any outlet shown in the project drawing. On site, note gutters, downpipes, wall junctions, surface channels, drains, door thresholds and places where water already pools. Mark the direction of existing flow on the site sketch. If the proposal depends on altering an existing downpipe or drainage point, include that work in the scope and identify the trade responsible for it.
Check the discharge destination as well as the point where water leaves the structure. A route that crosses a main walkway, drains towards a doorway or conflicts with a neighbouring boundary can create a practical problem even when the frame itself fits. Ask the relevant trade to confirm that the proposed route connects to the site’s drainage arrangement and that repairs around the old fixing points will not be left exposed to weather. Record any changes to gutters or surface drainage on the same coordinated drawing, and name the person responsible for testing and checking those parts at handover.
Keep openings, services and everyday routes clear
List fixed services near the old awning and proposed pergola: exterior lights and wiring, plug points, taps, air-conditioning units, irrigation, drains, pipes and access panels. Photograph each item and mark its position and height on the plan, including anything partly hidden by the awning. Do not assume that a surface cable or pipe can simply be shifted to clear a support; ask the appropriate qualified trade to locate and advise on services before work is agreed. The installer also needs to know where access for future maintenance must remain, rather than discovering a blocked panel or outlet after the structure is in place.
Check how the new footprint interacts with doors and windows throughout their normal use. Include the full swing of hinged doors, the route through sliding doors, opening windows, shutters, steps and the space needed to clean glazing or reach gutters. If you are considering the wall-mounted pergola from Bloomcabin, have the installer show its proposed position in relation to these openings, services and routes. Mark any space that must stay free, such as a path used for carrying furniture, before the drawing is approved.
Coordinate removal, repairs, delivery and installation
Write a sequence with the people responsible for each stage: awning removal, inspection, wall and paving repairs, any drainage or service work, site preparation, pergola installation and final making good. The order may depend on the site and on who is doing the work, so agree the handover points rather than assuming one contractor will coordinate everyone. In particular, decide when repairs must be complete, when the installer needs access to fixing areas and who protects finished paving. If a problem is found after dismantling, record how work will pause, who assesses it and how a change is approved before the programme continues.
Plan the physical route from the delivery point to the work area. Measure gates, passages, stair turns and low clearances; identify parked vehicles, garden structures or fragile finishes that may restrict carrying components. Ask the supplier for the actual package and handling information for the selected product instead of inferring it from a gallery image or overall footprint. If you have selected the Bloomcabin Pergola model, use that product reference when confirming access dimensions and unloading arrangements for your property. Agree where materials and removed awning parts can be kept, who clears debris, and how people will reach the house during the work.

Specify the conversion in the quote
Send the same site record to everyone pricing the work: a dimensioned sketch, dated photos, proposed footprint, support positions if agreed, surface type, access constraints and known services. Ask that the quote separates new pergola supply and installation from awning removal, disposal, repair, ground work, drainage changes and service adjustments. For each item, request a clear inclusion or exclusion rather than a broad phrase such as site preparation. Note assumptions about wall condition, paving and access so any later variation has a traceable reason. If a trade is not part of the quotation, name who must arrange it and when it has to be finished.
Attach the drawing version and record the exact model and configuration discussed. For example, the Bloomcabin Bioclimatic Pergola page can identify a catalogue product, but it should sit alongside—not replace—a site-specific drawing and written scope. Confirm which dimensions, support locations, repairs and water route are included; state who checks the wall or ground, and how changes are authorised if the exposed site differs from photographs. Compare quotes only after those boundaries are clear: a lower figure may cover less work if removal or reinstatement is excluded. Keep the agreed plan with the quote and ask for revised documents whenever the layout changes.
Property requirements and project handover
Before ordering, check what approvals, permissions or insurer notifications may apply to your particular property and proposed work. Requirements can depend on the site, ownership arrangements and local rules, so confirm them with the municipality, body corporate, estate management or insurer where relevant, and ask a suitably qualified local professional if the position is unclear. Do not assume that an old awning’s presence settles the question for a different structure. If a wall-attached layout is proposed, include the drawing and Bloomcabin Wall-Mounted Pergola page when asking what documentation is needed; a product name alone cannot answer a property-specific review.
At completion, walk through the site against the agreed drawing. Check that redundant brackets and exposed holes have been dealt with as scoped, finishes are recorded as complete or outstanding, openings and routes remain usable, and water can follow the documented route. Take dated photographs and keep the final drawing, product record, variation approvals and contact details for each responsible trade together. Write down any incomplete work, who will complete it and the agreed follow-up date. A clear handover matters because awning removal, repairs and pergola installation may be carried out by different people; it leaves a record of what was actually changed.
Frequently asked questions
Can I reuse the old awning brackets for the pergola?
Do not assume so. The fixing layout, wall condition and new structure are separate questions. Have the proposed attachments assessed for the exact pergola and site, and record agreed positions on the project drawing.
Will the pergola fit in the same footprint as the awning?
Not necessarily. Compare the new outside dimensions and support locations with doors, paths, boundaries and usable patio space. The area shaded by the old awning does not show where the new structure and its supports will fit.
Should the old holes be repaired before installation?
Agree who will make good the holes and when. The repair method and finish depend on the wall surface and condition; the scope should state whether patching, sealing and repainting are included.
What should I photograph before removal?
Take wide views and close-ups of brackets, wall condition, nearby services, openings, gutters, downpipes and paving. Add dimensions and label the photos so they can be matched to a site sketch.
Do I need to check permissions for the replacement?
Check the requirements for your specific property with the relevant local authority, property manager or body corporate, and insurer where applicable. Do this before ordering; the previous awning does not establish that every replacement arrangement is acceptable.
A well-planned conversion brings awning removal, surface repairs, support positions, drainage and access into one agreed scope. Treat each old fixing as something to assess, not a ready-made mounting point for the pergola. With the layout and responsibilities settled, the project is easier to quote and coordinate, and the handover can cover both the new structure and the condition of the surrounding patio.
