
Planning Electric Infrared Heating Under a Pergola
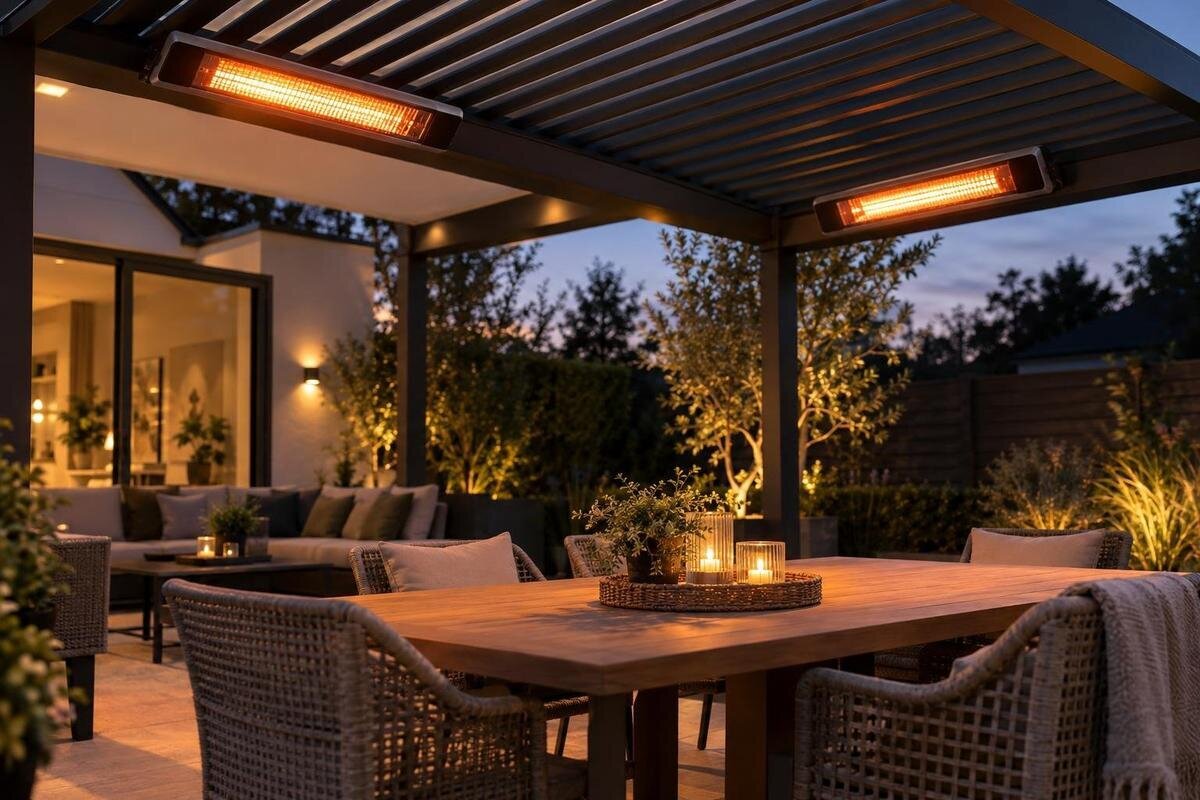
Pergola heating
An infrared heater may add radiant warmth to a pergola seating area, but choosing a heater is only part of the planning. The heater and pergola must each allow the proposed installation: clearances, fixing points, roof movement, weather exposure and electrical arrangements all matter. Treat the heater manual, pergola documentation and a qualified electrician's assessment as parts of the same plan, not separate afterthoughts.

Use the exact heater and pergola manuals
An infrared heater selected for a patio is not automatically suitable beneath every pergola. The heater's manual should specify the permitted installation setting, mounting orientation and clearances; the pergola documentation should identify approved fixing points and any restrictions on accessories. Match both documents to the exact models and configuration, not just to a product category or a similar-looking installation. Roof style, side screens, brackets or later alterations may change what the instructions cover. Read diagrams, notes and exceptions together: a fixing position that looks plausible is not necessarily approved.
Before ordering, record the heater's make and model, mounting version, pergola model, roof configuration, accessories and proposed position. Find the sections on installation, safety distances and outdoor use, as well as the pergola maker's mounting instructions. The Bloomcabin Wall-Mounted Pergola listing identifies a product model; it does not, on its own, confirm that a particular heater or fixing is approved. If either manual is silent or the instructions conflict, request a written answer from the relevant manufacturers and share it with the installer. Photos can help explain a question, but cannot replace model-specific approval.
Read every clearance in the heater manual
Clearance values are not a generic pergola standard; they belong to a particular heater and its approved mounting orientation. Check every distance the manual specifies, including those to the roof or ceiling, walls, floor, furniture, fabric and occupants, where applicable. Follow the diagram's measurement points rather than choosing a convenient reference: a distance may be measured from the heater casing, radiant face or bracket. Review overhead, side and front clearances as a set. Meeting one prominent distance does not cancel another restriction, and a minimum clearance does not permit you to ignore any larger distance the manual calls for.
Mark possible heater locations on a simple plan, with roof edges, beams, walls, screens, blinds, lights, furniture and normal seating positions. If you are considering the Bloomcabin Pergola, use the proposed configuration for this drawing and take clearance values from the exact heater manual. Check distances at the intended operating position, not just when the pergola is empty. If the diagram is unclear about a surface or measurement point, ask the heater maker to clarify it in writing. If no position meets every stated limit, reconsider the location, equipment or pergola configuration with the manufacturers; do not rely on an improvised heat shield.
Confirm approved fixing points on the pergola
The bracket supplied with a heater, or pictured in its manual, does not automatically make every pergola beam a suitable fixing. Confirm that the heater maker permits the proposed orientation and attachment, and that the pergola maker approves the exact fixing point and method. A member that looks sturdy, easy to reach or close to the seating area is not evidence of approval. Do not attach to a moving roof part, decorative trim, gutter, screen or other element unless the documentation explicitly allows it. Avoid drilling, clamping or adapting the frame on the assumption that a small fitting cannot affect it.
Ask which document names the permitted point, what fixing method it covers and whether approval applies to the exact pergola version and accessories. When considering the wall-mounted pergola model, identify whether the proposed heater support is the building wall or part of the pergola, so the supplier can address the actual attachment. Keep the heater bracket requirements separate from approval of the supporting structure: one manual cannot speak for the other maker. If the proposed support needs a structural assessment, have an appropriately qualified professional review it; do not estimate its capacity from appearance or an online rule of thumb. Pause if no one can confirm the proposed attachment.
Assess heating coverage for the seating area
Infrared heating is radiant: it directs energy towards people and surfaces in its path rather than relying only on warming all the air around a seating area. In an open-sided pergola, comfort can differ between seats because wind, distance, orientation and obstructions matter. Mark where people sit and stand, including less frequently used places, and note tall chair backs, umbrellas, beams or screens that may interrupt the heater's line of sight. A position over the centre of the floor does not guarantee even warmth across the whole area, and a clear view of the heater does not prove that the location meets its clearances.
Use positioning or coverage guidance from the exact heater manufacturer, if it is provided, and compare it with the real seating plan rather than the pergola's floor area alone. When planning a seating area beneath the Bloomcabin Bioclimatic Pergola, mark the seats you want to heat and compare them with the heater's stated coverage guidance. Do not infer the area served from the heater's appearance or a general product category. If one unit cannot meet all required distances while serving those seats, ask about a different position or heater. For more than one unit, assess each heater's clearances and ask the electrician to include the combined electrical demand in the design.

Check every position of a moving roof
An adjustable roof adds positions that need to be considered. If the pergola has moving louvres, a retractable canopy or another mechanism, check the heater and pergola instructions across the full permitted movement, not only in the position shown in a brochure. A heater that appears clear with the roof open may be too close to a surface or component when it moves, or may become more exposed to weather. Confirm any limits on using the heater with the roof open, closed or part-way. Do not assume a position is permitted simply because the mechanism can reach it.
Include the mechanism's movement, access for servicing and any controls or sensors in the plan. If you are considering the bioclimatic pergola model, establish the exact roof mechanism and its movement from the technical documents for your chosen configuration. Record which roof positions you intend to use with the heater on, rather than leaving this question until installation. Ask the pergola maker and heater maker to confirm in writing whether the proposed heater location permits those positions. If movement brings a component into a clearance zone, do not try to resolve the conflict by limiting travel or adding a stop unless the manufacturer approves the change.
Match the heater's outdoor rating to the site
A pergola roof does not automatically make a heater suitable for outdoor use. Check the heater manual and product label for a stated rating or conditions that cover the actual installation environment. A covered position can still be exposed to wind-driven rain, moisture, dust or spray; the level of shelter may also change when the roof moves. Use the rating definitions in the manual, not an assumption based on the word outdoor or on a space looking protected. Do not interpret an IP marking, if one is listed, without checking the manufacturer's explanation of what it permits.
Describe the site accurately when you ask for confirmation: how open the sides are, which way weather reaches the heater, whether roof settings change the shelter, and whether nearby water or cleaning spray could reach it. When reviewing the regular pergola listing, distinguish the configuration you intend to order from the conditions at your property. Ask the heater supplier whether the heater's stated conditions of use cover that location, and ask the pergola maker whether the proposed configuration affects exposure. If either answer is conditional, record the condition and check that it can be followed during normal use, including when the roof or side screens are adjusted.
Get the electrical plan reviewed by an electrician
Electrical planning belongs with a qualified electrician who has the heater's exact data and the pergola layout. The electrician can assess whether the available supply and circuit suit the proposed equipment, what protective and isolating arrangements are required, and how the connection should meet the heater manual and applicable local requirements. Include other equipment planned for the pergola, not just the heater viewed in isolation. Do not choose cable sizes, protective devices, plugs or connection methods from a generic online guide, and do not assume that a nearby socket is suitable. The project plan should identify who is responsible for design and installation.
Confirm how the heater is controlled before purchasing accessories. A wall switch, timer, thermostat, remote, smart control or existing pergola controller is not automatically compatible; use only arrangements supported by the heater maker and reviewed by the electrician. If the structure has a motor or lighting controls, list those too so the electrician can assess how each system is supplied and operated. When reviewing the Bloomcabin wall-mounted pergola listing, note which electrical equipment you intend to order and which items need separate confirmation. Ask for the exact electrical documentation so the electrician can review the proposed equipment together, rather than inferring provision or compatibility from a product photograph.
Plan cabling and service access before installation
Agree the cable route before fixing the heater, because a suitable heater position is not useful if wiring must cross a moving part or pass through an unapproved area. Show the proposed path on the layout, including the heater, roof mechanism, frame, walls, controls and any other planned fixtures. The electrician and pergola supplier can check it against the instructions and site conditions. Keep the route clear of moving components, hot surfaces, sharp edges and places where a cable could be trapped or exposed to run-off, as required by the equipment documentation. Do not drill the pergola or alter its drainage or finish to create a route without written approval.
Plan service access as well: the heater, mounting hardware, connection point and controls may need inspection or attention later, so avoid concealing them where the maintenance instructions cannot be followed. When assessing a Bloomcabin pergola model, use its installation information to establish where changes are permitted and discuss the proposed cable route with the supplier. Identify any part of the route that would become concealed, and ask the installer to record the final route and concealed work. If the approved heater position, cable path and maintenance access cannot coexist, resolve the design before work starts rather than leaving access as an installation-day decision.

Keep clearances practical during everyday use
Check that required clearances remain practical once the pergola is furnished and in use. Chairs are moved, blankets are brought outside, children may play and side screens or blinds can be added later; everyday changes must not put people or combustible items inside the heater's stated limits. Build the plan around how the area will actually be used, not only a drawing with furniture in fixed positions. Do not hang clothes, lights or decorations from the heater or bracket unless the manual explicitly permits it. Keep later additions outside the relevant limits and have them reviewed if they affect clearance or exposure.
Read the user instructions for switching the heater on and off, cleaning it and arranging inspection or servicing. Do not invent an operating routine or assume maintenance is unnecessary because the unit is under a roof. Make the approved controls accessible without reaching across the heater or moving a screen in a way that changes its operating conditions. At handover, ask the installer to show the approved heater position, permitted roof settings, control method and care requirements, and keep the exact manuals where the household can find them. If equipment or mounting is damaged or changed, have the relevant professional review it before relying on the original approval.
Resolve unanswered questions before you buy
Before you commit to a heater, get direct answers to a short set of model-specific questions. Is this exact unit approved for the exposure at the proposed location? What are its clearance values and measurement points? Does the pergola manufacturer approve the exact mounting point and fixing method? Can the intended roof positions be used while the heater is on? What electrical supply and control arrangement must the electrician review? Request drawings or written replies where needed, and make sure both manufacturers are answering for the same models and accessories. A vague answer that it should be fine does not settle a clearance or attachment question.
Compare the replies before buying: the heater instructions, pergola approval and electrician's plan should describe the same location, roof position, cable route and control arrangement. If one document rules out a proposal, changing the installer's method does not create manufacturer approval. Rework the layout, select equipment whose instructions suit the setting, or leave out the heater until the conflict is resolved. Keep manuals, confirmation emails, agreed drawings and handover notes together; if the pergola, heater or roof arrangement changes later, revisit the plan rather than assuming the earlier approval still applies.
Frequently asked questions
Can any infrared heater be mounted under a pergola?
No. The heater's manual must allow the proposed setting, orientation and mounting method, and the pergola manufacturer must approve the exact fixing point. You also need to meet the heater's clearances and confirm that its outdoor rating suits the location. Being described as infrared or outdoor does not, by itself, establish compatibility with a particular pergola.
Does a covered pergola automatically count as a sheltered place for a heater?
No. Wind-driven rain, moisture, dust and changes in roof position can affect exposure, even when a heater is beneath a roof. Check the heater's stated conditions against the actual site and the way the pergola will be used. Ask the manufacturer if the rating or wording is unclear.
How far should an infrared heater be from the roof and seating?
There is no universal distance that applies to every heater. Use the values and measurement points in the manual for the exact model and approved orientation. Check all listed clearances together, and ask the manufacturer to clarify any diagram or surface that is not explained.
Can I attach a heater to an adjustable louvre?
Only if the pergola manufacturer expressly approves that fixing point and method, and the heater instructions permit the arrangement. Moving parts also need to remain clear through their intended travel. Do not assume that a louvre is suitable because it is easy to reach or appears sturdy.
Who should check the electrical supply for a pergola heater?
Ask a qualified electrician to review the heater's exact electrical information, the available supply and the other equipment planned for the pergola. The electrician can assess the connection, protection and controls against the manuals and applicable local requirements. Do not assume an existing socket or controller is suitable.
Planning electric infrared heating beneath a pergola means matching the heater to the structure and the way the space will be used. A sound plan brings together the exact heater instructions, an approved fixing point and method, clearances that remain valid through intended roof positions, the site's weather exposure and an electrician's assessment. If those elements cannot be reconciled, change the location or equipment before purchase rather than improvising during installation.
