
Post-Storm Pergola Inspection: Ground-Level Checks
PERGOLA CARE
After a storm, a pergola can look intact while a connection, roof component or drainage route has changed. Wait until conditions and the ground are safe, then inspect from ground level only. Record visible changes without climbing, operating or moving anything, and have movement, breakage or electrical concerns assessed by an appropriate professional.

Wait until conditions are safe
Do not inspect while gusts continue, lightning is nearby, rain limits visibility, or floodwater and slippery ground make the route unsafe. A storm can leave branches, roof pieces, electrical cables or other debris unstable; a pergola that still appears upright may have a loose overhead part. Wait until conditions have settled and you can view it from stable ground. If you see a downed line, exposed wiring, a hanging section or a visibly leaning frame, do not walk closer for a better look. Keep other people and pets well clear. A calm interval is not enough if access remains washed out, flooded or blocked. If visibility is poor or it is dark, postpone instead of approaching with a phone light.
Choose a viewpoint that keeps you outside the area beneath the roof and away from a frame that appears to have shifted. Do not enter if you need to cross fallen branches, broken glass or unstable paving to reach it. A familiar path may no longer be firm if water has washed out an edge. Avoid ladders, roof access and reaching up to remove a branch, panel or loose trim; do not pull, shake or push a post to see whether it is firm. If a hazard puts people or services at immediate risk, keep away and contact the appropriate emergency or utility service. For other concerns, arrange a professional assessment before anyone uses the affected space.
Plan a safe viewing route and record observations
Before walking around the property, note the date and time, the storm conditions you observed and when you first noticed any change. Describe what is visible rather than making a diagnosis: 'a gap beside the wall looks wider than in last month's photo' is more helpful than 'the pergola is unsafe'. Use a quick sketch to name each side consistently—house side, garden side, left and right from one stated viewpoint. This prevents later photographs and messages from describing the same post by different names. If you know the make and model, copy it from your paperwork or a label already readable from a safe position; Bloomcabin Bioclimatic Pergola is one catalogue model name, not proof of a match. If a part is hidden, record that it was not visible and why rather than leaving an unclear gap in your notes.
Choose a viewing route before stepping out and stay outside the likely drop zone. Take one wide photograph showing the whole pergola and its setting from each side you can reach safely; leave a side out if the route is blocked or would take you beneath damaged material. Compare these views with installation or routine-care photographs taken before the storm, using the same viewpoint when possible. Earlier images can show whether a shadow, roof position or uneven paving was already present. Do not move objects to recreate an old view or cross debris to get a better angle. Note any side you could not view, so it is not mistaken for an area where no damage was found.
Look for changes in alignment or position
From a safe distance, look along the posts and beams for a new lean, bend, twist, sag or uneven line. Notice whether a post appears to have shifted relative to an older photograph, whether a beam sits differently at a visible joint, or whether a gap beside the building has changed. Check whether a roof section looks displaced or a corner appears lower than before. These are visual observations, not a way to decide whether a pergola can carry load: camera angle, shadows and uneven paving can distort the view. Record the location and the comparison that raised concern, and photograph the same sightline if it is safe to do so. Do not use a level, measuring pole or contact test near a suspect frame.
Give particular attention to a newly opened joint, a visible split, a bent or separated connection, a missing fastener, or movement reported by someone who saw it during the storm. Record a cracking sound as a reported event even if no clear mark is visible now; do not recreate it by moving the structure. Include the exact model wording from your order record, such as Bloomcabin Pergola, rather than identifying the installation by appearance. Any new movement, deformation or separation calls for restricted access and professional assessment, not a trial run beneath the roof.
Check supports and wall connections from outside
Look from outside the area for signs that the ground around the supports has changed: washed-out soil, a new depression, erosion, shifted paving, debris piled against a post, or a base that appears exposed or displaced. Where a footing, plate or fastener can already be seen from ground level, photograph its visible condition without probing soil, lifting covers or leaning close to a damaged post. Look for fresh cracks in paving beside a support or a change in the visible ground line, and note where they are. Do not fill a void, lever a base back into place or tighten an anchor. A photo can help an assessor locate an issue, but a crack or gap viewed from a distance does not establish its severity.
For a pergola attached to a building, look for a new gap, cracked masonry, displaced trim or water staining around the visible connection; for a freestanding unit, note changes at each visible support. The two arrangements are not interchangeable, so do not assume a wall or paving issue is separate from the pergola. If your documents identify a Bloomcabin Wall-Mounted Pergola, include that model name when reporting the wall connection. State whether the change appeared after the storm, with a wider photo showing its location. A connection may be concealed, so note if it cannot be seen. Do not remove cladding or try to inspect concealed anchors yourself.

Inspect the roof and fitted components from the ground
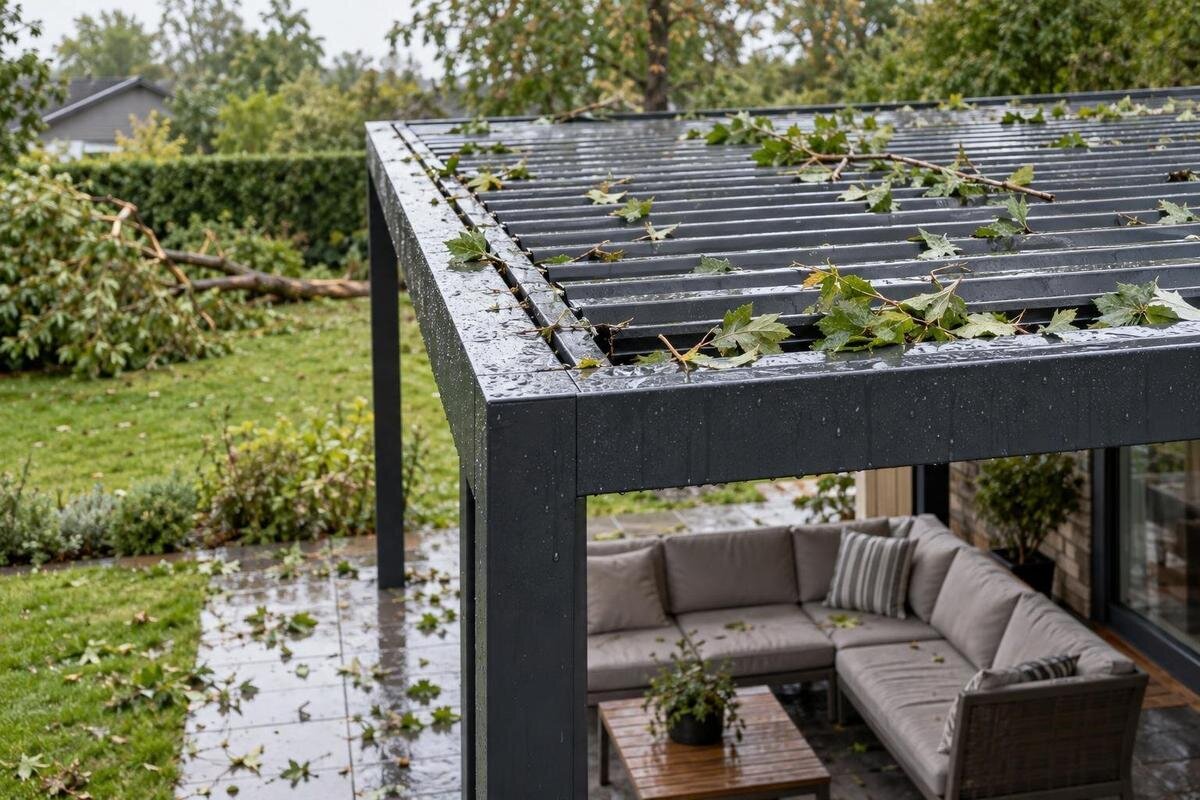
From the ground, scan the roof in sections and note anything visibly missing, displaced, buckled, cracked or hanging. The actual components depend on the pergola; check only items fitted to yours, such as fixed roof members or panels, moving roof elements, screens, glazing or trim. Look for an object resting on the roof or a branch caught against it, but do not reach up, climb, lift a panel or pull debris free. A loose part can move without warning, and a clear view from below does not confirm the condition of the top surface. Photograph it from a safe angle only if you can do so without passing underneath. Note loose pieces already on the ground without picking them up.
Record which component appears to be affected and whether it hangs over a walkway or seating area. Do not operate adjustable parts to test movement, switch a motor on to see whether it responds, or press controls after water has reached them. Note a product label only if it is already readable from your normal, safe position. For a repair enquiry, use the name in your records; the Bioclimatic Pergola catalogue page can help identify the model being discussed, but it is not a parts reference. Compare with earlier photographs if available, but do not assume a part is missing just because it is out of view. Leave removal, repair and decisions about use to the appropriate professional.
Look for water and drainage changes
After heavy rain, look for standing water around posts, an outlet that appears obstructed, water spilling from an unexpected edge, or fresh runoff cutting a channel in soil or paving. If your pergola has drainage channels or outlets, observe them only from ground level; their location and route depend on the model, so do not assume every unit drains in the same way. Note where water appeared and whether its source is obvious—roof, nearby gutter or surrounding ground. Record whether rain was still falling when you saw it, since one wet patch does not identify the cause. Avoid stepping into pooled water where the surface or depth is unclear.
Do not climb to clear a gutter, poke into a drain, remove an outlet cover or run a hose to test the route. Debris at ground level can be photographed without disturbing it; if it blocks an opening or has collected by a support, mention that in your assessment request. Compare the scene with earlier photographs and record whether water followed a new route or spread across the area during intense rain. Note secondary signs such as mud on a post, washed-out soil, staining on a wall or damage to paving. A qualified installer or drainage professional can advise about concealed routes; a ground-level check records what is apparent, not what lies inside a channel. Include earlier images if they show how water usually appears around the area.
Check the surrounding area and attached services
Storm damage may affect the pergola's surroundings as well as its frame. From the perimeter, note fallen branches, a limb resting on the roof, displaced fencing, damaged guttering, loose outdoor furniture, or an obstruction on a path. Photograph how an object sits in relation to the structure before anyone removes it, provided the view is safe. Do not climb to remove a branch or pull a large object from the roof; its weight and the condition beneath it may be unclear. Also look for cracks or displaced paving that continue beyond the pergola footprint, since the affected area may need assessment as a whole rather than as one isolated component. Keep clear of a damaged tree limb or debris near a power line.
If lights, heaters, screens or motorised equipment are fitted, note visible damage, water exposure, missing covers, exposed cables or components that have come loose. Do not touch a cable, open a housing, operate a switch or test an accessory; keep clear and use an appropriate qualified electrician or service technician for electrical concerns. Copy the names of the pergola and accessories from paperwork rather than guessing from appearance. Keep accessory details separate from the pergola model: the Wall-Mounted Pergola product page does not identify the wiring or accessories installed at your home. Describe electrical concerns separately from visible frame movement so the right specialist can consider each issue.
Take photographs that show context and detail
Take a context photograph first: show the whole pergola and its position relative to the house, paving, garden and nearby objects. Follow with a medium-distance image of each visible issue, then a closer view only if you can take it without stepping into an unstable area or standing underneath. Include a fixed reference, such as a post or paving joint, rather than placing a ruler or another person beside the damaged part. Keep the camera level where practical and take more than one safe angle; a close-up alone can hide whether a mark is local or part of a wider shift. Never take a risk for detail.
Use a caption or simple sketch to identify the side and component: 'house side, right post, viewed from garden' is more useful than 'corner'. Keep the original files and note the date, time and viewing direction; if you annotate a copy, retain the unaltered image too. Do not digitally remove debris, exaggerate a mark or present a reconstruction as a photograph of the scene. Store the photos with installation documents and earlier pictures so an assessor can compare like with like. A relevant product link, such as the wall-mounted model listing, can accompany your model details, but keep it separate from photographs documenting the condition of your installation.

Prepare a clear professional assessment request
An enquiry is more useful when it separates what you saw from what you suspect. Give the date and approximate time, the weather or impact you observed, the location of each change, whether anything was already damaged and whether the area has been kept out of use. Include context and detail photographs, your sketch, the exact pergola model name and purchase or installation records you already have. If you heard a bang or saw a component move, report it as an observation rather than assigning a cause. Mention any earlier repair you know about. Do not remove a label, dismantle a panel or look behind a cover to find a serial number.
Ask the assessor what information they need, whether the affected space should remain closed, and which specialist should handle separate structural, drainage or electrical concerns. Keep repair and replacement questions distinct. If you are considering a model such as Bloomcabin’s Bioclimatic Pergola, compatibility and site suitability still need to be considered against your installation details. For repairs, do not order a visually similar fastener, panel or accessory from a photograph. Use the product documentation and professional confirmation to establish the correct part. Ask for the findings, any use restrictions and part details in a form you can keep, then file them with the original images.
Keep the area closed until damage is assessed
Keep the area out of use where a component is loose, the frame appears to have moved, a support or wall connection is damaged, or a professional has advised against access. Do not rely on a quick visual check to clear a pergola after a serious impact or suspected movement; a ground-level walk-round cannot reveal every concealed condition or establish structural safety. If no damage is apparent, record that too, but do not treat it as proof that there was no impact or that a concern is resolved. Follow the assessor's directions about access and operation, and tell everyone using the area which part must be avoided. Where restrictions apply to only part of the site, make the boundary clear rather than relying on appearance.
Once the cause and extent are understood, a professional can advise whether a matched component, repair, approved upgrade or replacement enquiry is appropriate. Before choosing another model, such as the one shown in the Bloomcabin Pergola catalogue entry, confirm dimensions, mounting arrangement, connections and compatibility against your installation records and site. Ask what parts of the structure were assessed and what remains uncertain. Keep the final report and parts information with your maintenance records. The ground-level inspection is complete when visible evidence is recorded and unresolved damage or hazards have been referred to the right professional—not when a part has simply been pushed back into place.
Frequently asked questions
How long should I wait before inspecting a pergola after a storm?
There is no fixed waiting period that makes an inspection safe. Wait until the storm has passed, gusts and lightning are no longer a concern, and the ground and route are stable. If visibility is poor, water is still rising or debris is moving, stay away and postpone.
Should I open the roof or operate a screen to check it?
No. Do not operate moving parts or controls to test whether they still work, especially if something looks displaced or has been exposed to water. Make a visual check from the ground instead. If you suspect damage, leave operation and any safety decision to an appropriate professional.
What if I cannot see any damage from the ground?
Record that no damage is visible from your safe viewpoint, but do not treat that as proof that concealed connections are sound. If you noticed unusual movement, heard an impact or remain concerned, include those observations in an assessment request rather than testing the pergola yourself.
What photos should I send with an assessment request?
Take a wide view showing the pergola and its surroundings, then medium-distance photos of each visible concern. Add a closer view only when you can take it safely from the ground. Label the side and component, keep the original files and include earlier photos if available.
Can I clear a drainage outlet or remove debris before taking photos?
Do not climb, reach up, poke into an outlet or pull debris from a roof or uncertain frame. Photograph what is visible from a safe position without disturbing it. If an outlet or component appears blocked or damaged, report its location and ask an appropriate professional how it should be handled.
Finish with a clear record of visible changes, areas you could not inspect safely and any access restrictions. That gives an assessor a practical account without relying on guesses or an improvised repair. Where the frame has moved, a component is loose or wiring is affected, the next decision belongs to the appropriate qualified professional.
