
Growing Potatoes in a Greenhouse
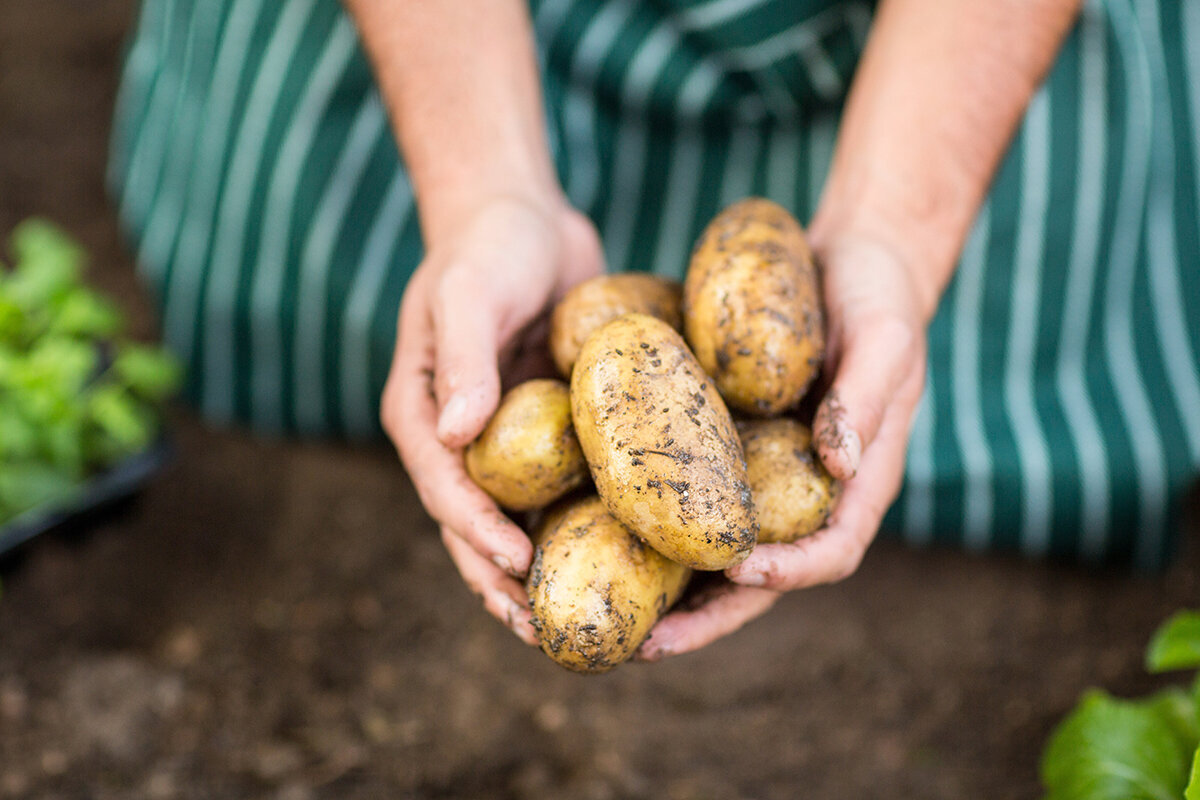
The hidden yield account · Greenhouse crop No. 09
Growing Potatoes in a Greenhouse
With potatoes, the visible foliage alone does not determine the harvest. The real balance is made in cool, light-protected soil, where covered stems form stolons and new tubers develop at their tips.
A greenhouse gives you particularly close control over this underground crop. Growing medium, watering rhythm, air movement, hygiene and the soil reserve for earthing up are in your hands. It does not turn potatoes into a tropical year-round crop. Instead, it supports a deliberate early-season start with chitted tubers, soil that warms sooner, protected shoots and a harvest before tomatoes or cucumbers need the space.
Folio 09 · South Africa · From seed tuber to storagePlate A · Where the harvest develops
Chapter I · Reading the underground plant
The potato tuber is a storage organ on a side shoot, not a root vegetable.
Potatoes are normally grown from seed tubers rather than true seed. Shoots emerge from their eyes and grow into stems. Fine side shoots, called stolons, form on the underground sections of these stems. New tubers are stored at their ends. This explains the main growing tasks: plant into loose soil, protect the stem base, add soil during growth and keep every tuber reliably away from light.
Earthing up is not decorative soil work. It keeps the tuber-forming zone dark, protects shallow potatoes and improves the growing area around the stems in suitable loose soil. The linked German agriculture guidance likewise explains that tubers form on underground side shoots and that ridging protects them from light. Do not fill grow bags or tall pots to the rim on day one. Reserve clean, loose medium for topping up later.
Balance correction — myth and reality.
Myth: the higher the soil ridge, the larger the harvest automatically becomes. In reality, adequate soil volume must work with healthy foliage, even moisture and oxygen around the roots. A deep, waterlogged container is not a productive store; it is a rot risk.
Myth: the higher the soil ridge, the larger the harvest automatically becomes. In reality, adequate soil volume must work with healthy foliage, even moisture and oxygen around the roots. A deep, waterlogged container is not a productive store; it is a rot risk.
A greenhouse changes the weather around the foliage, not the potato’s basic needs. Its advantage is precision: the roof keeps rainfall off the crop, containers can be filled with clean medium, and vents remove humid air after watering. Temperatures rise quickly under cover, however. Avoid sharp swings between hot, dry medium at midday, saturated soil in the evening and still, humid air overnight.
Chapter II · Input ledger
Start with planting stock you can trust.
Healthy starting material is the first disease-control measure, not an unnecessary luxury. Shop potatoes may have been treated to inhibit sprouting and can carry problems that remain invisible at planting. Where possible, use certified seed potatoes from a specialist supplier. This is especially worthwhile in a small, intensively used greenhouse, where losses are difficult to compensate for.
01
Choose the purpose
Early · waxy · suitable for storage
For a limited greenhouse window, early varieties are usually the best choice. They use the protected start and clear the bed before summer heat and main crops take over. Choose for your kitchen too: waxy varieties suit young boiled potatoes, all-purpose types are versatile, and floury potatoes suit mash. Cooking texture describes use, however; it does not guarantee a high yield.
02
Select seed tubers
Plant small ones whole · divide large ones only if needed
Seed potatoes about the size of a hen’s egg can be planted whole in a home garden. They contain several eyes and a dependable nutrient reserve. Very large tubers need not be cut. If cutting, use only sound, healthy tubers and a clean knife. Each piece must retain several intact eyes. Exposed cut surfaces raise the risk of rot and call for especially careful handling.
03
Allow cut surfaces to heal
Store briefly, dry and protected
Lay cut pieces in a single layer in a dry, airy place out of direct sun until the cut surfaces have dried. Never plant freshly cut tubers in cold, waterlogged medium. In these conditions, their stored reserves may rot before roots form instead of supporting strong growth.
04
Keep a growing record
Variety · source · planting date
Record the variety, supplier, planting date, emergence, first earthing-up and any unusual symptoms. This small record becomes valuable in the second year: you will see which variety was genuinely early, stayed healthy, gave the texture you wanted and stored well. Note too which bag dried quickly or which position became too warm.
Chapter III · Before planting
Chit for short, sturdy shoots rather than pale threads.
Chitting allows seed potatoes to develop compact shoots before planting. It is optional, but can bring an early harvest forward and lets you inspect every tuber. Stand them with the eyes upward in shallow trays or egg cartons. The Bavarian Garden Academy recommends a bright place out of full sun at about 15 to 20 °C. Look for firm, pale-green shoots rather than long, brittle growth caused by dark storage.
01 · Sort
Firm and healthy
02 · Position
Eyes facing up
03 · Wait
Short, sturdy shoots
04 · Plant
Ready for loose soil
- Sort Discard soft, mouldy, badly shrivelled or noticeably damaged tubers before they enter the growing area.
- Position Arrange tubers in one layer with space between them. Bright indirect light encourages short, resilient rather than long, glassy shoots.
- Wait Firm shoots one to two centimetres long are enough. Handle each shoot carefully so it does not break during planting.
- Plant For divided seed potatoes, check that cut surfaces are dry and healed before planting. Soil should be fresh, never waterlogged.
Chapter IV · The protective ridge
Start deep. Add soil in stages afterwards.
Plant chitted potatoes in a greenhouse bed around 10 to 15 cm deep and usually 30 to 40 cm apart, with shoots pointing upward. In a large lightproof container, begin with a well-drained base layer rather than filling the whole volume immediately. This preserves the essential reserve: enough room for later earthing up.
Stage 1 · Plant
Cover the seed tuber lightly
Stage 2 · First ridge
Foliage reaches 20 to 30 cm
Stage 3 · Final ridge
Keep every tuber dark
- Planting Use loose, humus-rich soil with reliable drainage. Do not tread down bed soil; in containers use stable growing medium rather than heavy, sodden garden soil.
- First ridge Draw loose soil gently around the stems to cover their lower section. Leave a healthy crown of foliage free. Work without firm pressing, root damage or snapped shoots.
- Final ridge Top up once more as growth continues. The finished ridge must keep all developing tubers dark without compacting the root zone.
Plant spacing also affects the distribution of tuber sizes. Plants set too closely compete for light, water and nutrients. For a home greenhouse, 30 to 40 cm between plants is a sensible starting point. Leave a walkable path beside the row so you can inspect foliage, water at soil level and add soil without compacting the growing area.
Chapter V · Space account
Choose a system with enough reserve.
Visible floor area is not the only consideration. Include usable soil volume and the free space that can later become a protective ridge.
In a spacious greenhouse, a ground bed gives an even root zone and makes earthing up easier. In smaller structures, a few large containers make the lower level productive without committing the whole area permanently. They can be cleared after the early potato harvest. Whatever system you use, free drainage, light protection for tubers and an accessible watering route are essential.
When planning a dedicated growing space, consider the usable floor area and ventilation options of the Classic Aluminium Greenhouse. Roof vents, doors and a clearly arranged interior support the controlled climate potatoes need during changeable cool-season weather.
| Growing system | Space per plant | Soil reserve | Checkpoint |
|---|---|---|---|
| Ground bed | 30 to 40 cm spacing | Loose planting zone | Access and rotation |
| Grow bag | From about 40 l, one plant | Leave space at top | Fast-drying outer edges |
| Large pot | About 35 to 45 l, one plant | Fill in stages | Drainage and density |
- Greenhouse bed row. It gives several plants the most even root zone. Soil reserved beside the bed can be drawn easily around the stems. Keep a working path clear and plan crop rotation: do not grow potatoes directly after tomatoes, peppers, aubergines or potatoes again in the same soil.
- Grow bag. A sturdy, permeable bag is movable and also suits paved greenhouse floors. Allow at least about 40 l for one seed potato. Larger bags can hold two plants where spacing and water supply are correct. On sunny days, pay particular attention to the outer areas that dry quickly.
- Large lightproof pot. Use drainage holes and normally one plant per container. Pots organise small spaces neatly and can be refilled with clean medium. Several seed potatoes in a small pot instead produce competing foliage, uneven moisture and many small rather than fewer well-developed tubers.
For one plant, about 35 to 45 l of medium is a practical guide; a grow bag should hold at least about 40 l. Lightproof sides are not merely a design detail: when light reaches tubers, they turn green. Drainage holes must remain clear, and saucers must not stand full of water.
Chapter VI · Keeping the balance even
Water the soil, ventilate and avoid excess.
Moisture
Potatoes are sensitive to strong swings between dry and wet. Keep the medium evenly moist while tubers set and grow, without keeping it permanently saturated. Check with a finger about 5 to 8 cm deep in the morning. When the root zone starts drying, water slowly and deeply; where the medium is very dry, use two passes. Let surplus water drain away completely.
Nutrients
Before planting, incorporate mature compost or a moderate dose of organic vegetable fertiliser. Potatoes need nutrients, but too much readily available nitrogen encourages lush foliage at the expense of timely tuber formation. Feed again only if the plants remain visibly weak and the growing season is still at an early stage. In permanently used beds, a soil test helps prevent oversupply.
Ventilation and heat
Open doors and roof vents early on bright days, before heat builds inside. Extra shading helps during hot spells; keep containers away from heated glass or walls. Potatoes do not suit a closed, steamy summer greenhouse. A well-aerated root zone and moving air matter more than maximum warmth. Automatic vent openers can assist with daily control.
Dry foliage
Water directly into the growing zone using a watering can, drip line or gently directed hose. Avoid overhead watering late in the day so foliage does not remain wet overnight. Air movement helps dry condensation and prevents harmful humid stagnation. Remove yellowing or suspect leaves with clean tools, and keep paths and containers clear of plant debris.
A high-quality greenhouse is especially useful when its features support this steady care routine. Explore the Classic Aluminium Greenhouse and consider ventilation, shading, standing space and accessible paths in your plan. For other designs and sizes, explore Aluminium Greenhouses as a starting point for container crops, ground beds and a deliberately organised seasonal plan.
Chapter VII · Risk register
Act early, before unseen yield is lost.
A greenhouse protects the crop, but poor ventilation and unsuitable watering can hold moisture on the foliage. Inspect plants at least twice a week: upper and lower leaf surfaces, stem bases and the medium surface. When symptoms appear, check the cause before acting. Is the root zone too wet or too dry? Has the greenhouse overheated? Could it be nutrient shortage, pest feeding or disease?
Case file 01 · Late blight
Water-soaked leaf patches that quickly turn brown
Late blight can affect potatoes and tomatoes and spreads quickly when foliage stays wet. Start with certified seed potatoes, avoid watering over leaves and ventilate consistently. Remove suspect leaves immediately with clean tools. Do not compost heavily infected material. Where symptoms are clear, an early harvest may be wiser than hoping for tubers suitable for storage.
Case file 02 · Rot affecting seed tubers and stems
Weak emergence, dark stem base, collapse
Cold, waterlogged soil and compromised planting stock are typical causes of early losses. Use healthy seed potatoes, let cut surfaces heal and do not plant into slimy, cold soil. Do not reuse questionable medium. Remove collapsing plants promptly from healthy specimens.
Case file 03 · Potato scab
Corky marks on otherwise firm tubers
Scab is primarily a soil-related problem. Healthy planting stock, clean container medium, suitable varieties and thoughtful rotation are more effective than late rescue attempts. In permanent greenhouse beds, potatoes and other nightshades should not repeatedly occupy the same growing zone. Keep moisture even without waterlogging the soil.
Case file 04 · Pests and viruses
Chewing damage, aphid colonies or curled leaves
Check leaf undersides for aphids and watch for mosaic-like pale markings or weak, uneven shoots. Small aphid colonies can be rubbed off early or rinsed away with a directed jet of water, while avoiding soaking the entire crop. Isolate or remove suspicious plants. At the end of the crop, clear all plant remains so neither pests nor possible pathogens remain in the greenhouse.
Case file 05 · Heat and irregular watering
Wilted leaves, uneven or misshapen tubers
These signs often indicate stress rather than one specific pest. Tuber set and growth react sensitively to heat and severe moisture swings. Ventilate and shade in good time. Do not let containers become dust-dry only to flood them suddenly. A consistent morning check is more effective than frantic corrections.
Case file 06 · Green tubers
Green skin or exposed tuber shoulders
Light exposure causes greening and indicates increased solanine formation. Cover visible tubers at once with loose soil and check after heavy watering whether the medium has settled. Keep harvested potatoes protected from light too. Small green areas can be cut away generously; strongly green, bitter or heavily sprouted potatoes should not be eaten.
Chapter VIII · Closing the account
Harvest in stages and allow the skins to set.
Early and storage potatoes are two different outcomes from the same crop. Young potatoes are lifted with tender skins and eaten soon afterwards. For storage, leave tubers in the soil until the foliage dies back and their skins are firm. This ripening period belongs to the harvest. Cutting it short produces delicate tubers that bruise more easily and store much less successfully.
1 · Early harvest phase
First young potatoes
2 · Foliage dies back
Let ripeness become visible
3 · Skin firms
Harvest dry and gently
4 · Storage
Keep cool, dark and airy
- First young potatoes With early varieties, you can carefully reach into the side of the ridge and remove individual tubers at the size you want. Close the opening again so remaining potatoes stay dark. This thin-skinned harvest should not be stored but eaten within a few days.
- Dying foliage For potatoes intended for storage, wait until foliage yellows and dies back. Reduce watering as the crop finishes. Depending on variety and soil, it can then take two to five weeks for the skin to become firm enough. The thumb test shows whether it still rubs away easily.
- Harvesting Lift potatoes carefully in dry weather with a garden fork, or empty containers onto a sheet. Brush off soil gently; do not wash. Sort out cut, bruised or soft tubers and use these first in the kitchen if sound.
- Storage place Store only healthy, undamaged, unwashed tubers in breathable crates. The place should be dark, frost-free and cool; about 5 °C is a useful guide for home growing. Check the crop regularly and remove soft or rotting potatoes. Do not store apples beside them because their ethylene encourages sprouting.
Chapter IX · South African seasonal framework
Use protected cool-season windows deliberately.
In many South African regions, an unheated greenhouse can suit chitted potatoes during the cooler months, provided the soil is crumbly rather than cold and saturated. The right planting week depends on local climate, altitude, weather, greenhouse conditions and soil temperature. Coastal and inland conditions can differ greatly, while frost-prone areas need additional protection for young foliage. Use local seasonal conditions, rather than a fixed calendar date, to decide when to plant.
Do not treat a greenhouse as an invitation to force potatoes through every season. A cool-season crop that finishes before intense summer heat often works best. The space can then be released for warmth-loving crops such as cucumbers or basil. Autumn planting is worthwhile only where the temperature window fits; without heating and supplementary light, winter growth may be unreliable in darker or colder locations.
Crop rotation note
Plan not only around potatoes but around their plant family. Tomatoes, peppers and aubergines are also nightshades and share several disease risks. Avoid putting potatoes directly after these crops in the same soil. In large greenhouses, zones can be rotated; in small ones, containers simplify rotation because medium and position can be changed more deliberately.
For a carefully planned seasonal start, take a look at the Classic Aluminium Greenhouse. If you want to organise beds, containers, paths and the following summer crop around a larger footprint, the range of Aluminium Greenhouses shows different sizes and designs for functional, long-term crop planning.
Season principle: Greenhouse potatoes thrive on consistency, not intensity. The best harvest rarely comes from the hottest house, the strongest feeding or the highest later soil ridge. It comes from regular observation and calm, timely adjustments.
Potato clinic
Questions from the greenhouse.
Can I grow potatoes in a greenhouse all year round?
Usually not in a standard unheated hobby greenhouse. Potatoes are primarily a cool-season crop. Use the structure to start earlier during suitable local conditions, protect young growth from cold wind and manage rainfall. It can become too hot in midsummer, while winter may lack adequate warmth and light without heating and supplementary lighting.
How many potato plants fit in a 40-l container?
One plant is the most reliable starting point. A lightproof container with about 35 to 45 l of medium, clear drainage holes and sufficient height provides one seed potato with root room and space for topping up. Two tubers can grow in a clearly larger bag if spacing and moisture management are right. Overcrowding makes watering difficult and often produces many small tubers.
Can I use supermarket potatoes as planting stock?
It is better not to. Eating potatoes may be treated to inhibit sprouting and have an unknown plant-health history. Introduced diseases can be especially troublesome in a small greenhouse crop. Certified seed potatoes from a specialist supplier offer a more reliable, hygienic start.
How often should I water greenhouse potatoes?
Water according to the condition of the root zone, not a rigid calendar. Check about 5 to 8 cm deep each morning. When the medium begins to dry, water slowly and deeply. Even moisture is particularly important during tuber set and growth. Pots and bags need more frequent checks on sunny days. The aim is fresh, freely draining soil — never a permanently wet pot.
Why are my greenhouse potatoes turning green?
The tubers have been exposed to light. Cover them promptly with loose soil and check whether the medium settles after watering. Keep harvested potatoes dark too. Strongly green, bitter or heavily sprouted potatoes do not belong on the plate.
Sources and further guidance
Specialist information behind this guide.
More from Bloomcabin: Setting up a greenhouse: layout, plants and care · Water-wise gardening in the greenhouse · Summer greenhouse care
- LWG Bavaria — Chit potatoes for an earlier harvest
- Germany’s agriculture information portal — Why potatoes are earthed up
- LWG Bavaria — Pre-sprouting potatoes and sweet potatoes
- Berlin Plant Protection Office — Late blight in potatoes
- LWG Bavaria — Potatoes for gardens and balconies
- North Rhine-Westphalia Chamber of Agriculture — Potato harvest and storage
- Organic Farming NRW — Growing notes for organic potatoes
Open the lower level
Plan yields beneath the visible canopy.
A good greenhouse offers serious home gardeners more than a sheltered spot for plants. It creates an ordered growing space for overlooked harvests: with loose soil beds, generous containers, accessible watering routes, controlled ventilation and a ridge beneath which the next meal develops out of sight.
Classic Aluminium GreenhouseClassic Aluminium Greenhouse