
Raised Planters and a Pergola: Getting the Layout Right
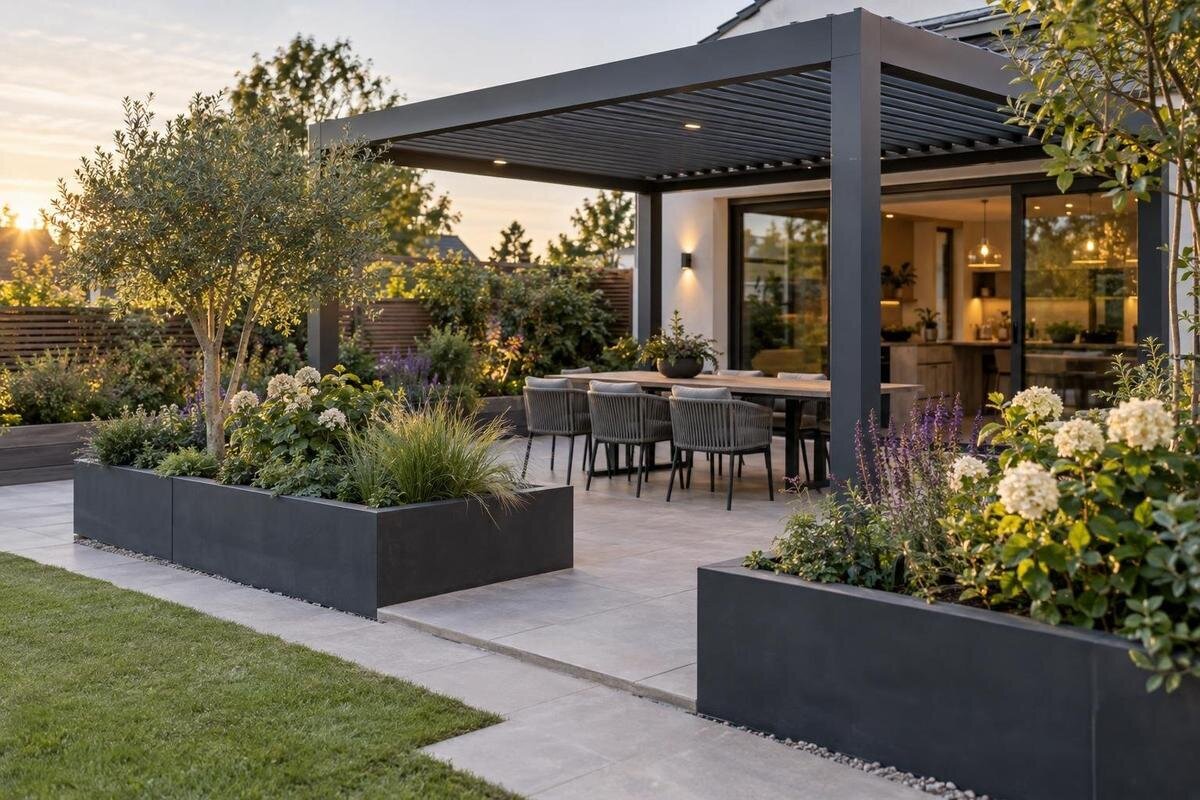
Garden layout guide
Combining a pergola and raised planters works best when the planting beds are planned as separate garden elements, not as extensions of the frame. Set out their footprints, root volume, drainage and care access alongside the pergola supports and paths. A dimensioned plan helps you see whether the plants can be tended and the structure can be reached before either position becomes permanent.

01
Draw separate footprints for the pergola and planters
Begin with two separate outlines on the same scaled plan. For the pergola, use the dimensioned drawing for the exact configuration and mark the outside edge, every support position and any areas reserved for installation or access. For each planter, draw its external footprint as well as the internal growing area; the walls take up space, so usable root area is not the same as the bed’s outside measurement. Show paths and furniture as separate shapes rather than treating leftover space as automatically usable. Add fixed features such as walls and drains, and use a consistent scale so overlaps are visible before paving, soil or supports are in place.
Do not infer a usable plan from a product photograph or a single area figure. The Bloomcabin Pergola listing states a range from 9 to 24 m², but an area does not identify the selected configuration’s exact length, width, support positions or surrounding working space. Match the relevant dimensioned drawing to the site plan, then overlay the planters and walking routes. Record which measurements belong to the structure and which belong to the beds; keeping these layers distinct helps the supplier, landscaper and installer spot a clash. Confirm that the drawing is for the version being considered, not merely a similar-looking image.
Size planter root space for the chosen plants
Choose a bed by what will grow in it, not by what fits beside a post. Root depth and spread vary with plant type, mature size and planting density, and the same bed can offer very different usable root volume depending on its internal dimensions and clear soil depth. Check the intended plants’ growing requirements before fixing bed height or width. A broad rim can hide a narrow growing space, while an internal brace, liner or false base can reduce the space available to roots. Record internal length, width and soil depth on the plan, rather than relying only on outside measurements or nominal capacity. In a shared bed, make sure the space suits all the plants, not only the smallest.
Think about the planting combination over time. A row of compact herbs, leafy plants and larger perennials can have different needs for root room, water and access, even if their nursery pots look similar. Use reliable horticultural guidance for the chosen plants and note the required depth, spacing and moisture conditions. If requirements are uncertain, ask a nursery or horticultural professional rather than choosing a volume by appearance. This information can be checked independently from the pergola drawing, so a change in plant choice need not alter the structural footprint. Recheck the internal dimensions if you change the planter design.
02
Keep planter walls clear of pergola supports
Mark each post or support base as an unavailable zone, even if the planter appears to fit neatly around it. A soil-filled bed can hide a support, restrict access to components that need attention, or make debris harder to remove. Do not place a planter wall against a structural member or use the pergola as a retaining edge unless the design documentation explicitly allows that arrangement. Keep the base and any installation or inspection clearance shown in the drawings visible on the plan. There is no universal gap to prescribe: retain the access required by the specific structure. Set the bed position around the support locations instead of moving those locations to suit a landscape edge.
Wall-mounted designs need a separate check at the building edge. A Bloomcabin Wall-Mounted Pergola is identified as a wall-mounted model, but its product name does not establish where fixings sit or how much access installation requires. Use dimensioned information for the selected model to locate the wall connection, and include windows, doors, downpipes, taps and existing services on the same drawing. A raised bed can then be positioned without covering an access point or making the wall behind it difficult to maintain. Ask the structure’s installer to resolve uncertainty about the building interface before the bed is made permanent.
Reserve a route for movement and plant care
Treat the route between the garden entrance, seating area and each planter as a designed space, not the remainder after the frame and beds are drawn. People need room to pass, pause, carry a watering can and tend the bed without brushing against the pergola or stepping into soil. The useful width depends on how the area will be used, who needs to move through it, and what furniture or tools are present; there is no single clearance for every layout. Mark a continuous path on the plan and check that gates, doorways and chair positions do not pinch it. Allow space to bring in soil or compost when the bed is first filled.
Where a planter is accessible from only one long side, leave enough standing room there for planting, weeding and harvesting. A narrow strip behind a bed may be impossible to use for pruning or cleaning, even if it looks open on paper. Overlay the regular pergola option using its actual chosen dimensions, then check the working space beside each planter against the furniture and walking routes already marked. Mark the outlines temporarily and walk the route carrying the tools you normally use. If a wheelbarrow cannot pass or the standing area feels cramped, adjust the bed before finalising the frame position.

03
Plan planter drainage separately from roof runoff
Give the planter’s drainage its own route, separate from water falling or running off the pergola. Confirm how the chosen container and planting design let excess water leave the root zone, where it discharges and whether the outlet can still be reached after the bed is filled. Do not direct discharge onto a walking surface, against a post base or into a corner that cannot be checked. On paving, note existing joints, channels and drains, but do not assume they can accept additional water without review. If the outlet route is unclear, or water could collect beside the bed, ask a landscape professional to assess the arrangement before installation.
Do not count on pergola runoff as controlled irrigation, or assume it will fall in a convenient place for a planter. For the Bloomcabin Bioclimatic Pergola, as for any model, confirm the selected configuration’s documented water collection and discharge arrangements rather than inferring them from the product name or a picture. Show the route on the plan and consider where overflow would go if the normal route were obstructed. A bed near a discharge point may receive concentrated water, while a bed that blocks an outlet can make it difficult to inspect. Agree on the route with the people responsible for the pergola and drainage before fixing the layout.
Leave access for cleaning around the frame
Leave room to reach the parts of the pergola that need attention and to remove leaves, spilled growing medium and weeds from the ground around it. A planter set hard against a post or beside a narrow rear strip can make a quick sweep awkward; it may also conceal debris or make a visible base difficult to inspect. Decide what cleaning tools will be used and where someone can stand to use them. If rinsing is part of the maintenance routine, make sure water can drain without crossing a busy path or sitting at the planter edge. Set the maintenance gap from the product’s documented requirements and the site’s cleaning method, not from a universal measurement.
Measure the working area from the outside face of the planter, not from the point where its soil begins. Include access to each side that needs attention, and check that the bed will not obstruct areas identified for installation or maintenance. When considering the Bloomcabin Pergola model, use its maintenance requirements alongside the site layout to identify where someone will stand and how they will reach each area. Where a side is close to a wall or boundary, decide how leaves and soil will be removed before building. If the only way to reach it is to move a full planter, reconsider its position.
04
Route watering lines without blocking access
Draw the route for a garden hose, watering can access or irrigation pipe as carefully as the walking route. A tap that can be reached without stepping through the planting bed makes routine watering simpler, while a hose stretched through the entrance or seating area can become an obstacle. If pipework runs behind a planter, mark its position and keep access to any serviceable point; do not bury a connection where a leak could go unnoticed. Match irrigation zones to the plants’ needs, since a group with very different water requirements may be harder to manage through one arrangement. Check that the chosen planter and watering method work together before installation.
Keep watering lines out of the space needed to reach posts, clean the ground and inspect drainage outlets. Hoses and pipework can be hidden behind a bed until a blocked outlet or damaged line needs attention. A plan that includes a bioclimatic pergola option should still show irrigation as its own route, separate from the frame outline and any water-discharge path. Do not use a roof runoff line as a substitute for a planned watering system. If a route crosses paving or passes near a structure, ask the appropriate installer or irrigation professional to confirm a safe, serviceable arrangement for the site.
Allow for mature plant growth
Plan for plants at their mature size, not only on the day the bed is installed. Leaves and branches may spread beyond the planter wall, and a gap that begins clear can disappear as the plants grow. Use the mature height and spread given for the selected plants to check whether they could cover a frame edge, grow into a path or hide a drainage outlet. Include room for pruning and removing dead material, particularly on the side facing the pergola. If a plant is likely to outgrow that space, choose another position or a more suitable plant rather than relying on frequent hard cutting to restore access. Recheck the plan if the planting list changes.
Consider how often each planting area needs attention and whether it can be reached without leaning across another bed or stepping into the planting. Decide whether taller growth belongs at the rear or in a separate boundary bed, so it does not occupy a working strip. If the bioclimatic model is being considered, compare the expected spread of mature foliage with the structure drawing, including any areas that must remain accessible. Do not assume plants can be trained onto or supported by the frame unless that use is explicitly approved for the model. Check the planting and structure plans together to identify where future growth could obstruct a path, outlet or maintenance area.

05
Test the layout on site at full size
Before ordering materials or setting posts, lay out the proposed shapes at full size on the ground. Use string, chalk or temporary markers for the pergola outline, its supports, planter walls, pathways and cleaning spaces. Walk through as you would on an ordinary day: carry a watering can, open any gates or doors, stand where you would tend the beds and check how you would reach the rear edge. Place a chair or table only if it is part of the real plan. A paper plan can hide awkward turns; a full-size trial shows whether a planter narrows an entrance or leaves a working strip where no one can stand.
Use the trial to test changes, not to override product drawings. For a wall-mounted pergola layout, check the actual wall line and nearby openings, services and downpipes alongside the proposed beds. Tape out each bed’s outside dimensions, then compare its usable internal growing space with the planting requirements; one does not prove the other. Move the temporary marker if it blocks access, and record the revised measurements so the supplier and landscaper use the same version. If levels, drains or existing paving complicate the route, have the relevant professional review the plan before anything is permanently fixed.
Coordinate the landscape and pergola drawings
Bring the information into one dimensioned drawing before the pergola and raised beds are installed. Show the exact pergola model and configuration, frame and support positions from its drawings, external and internal planter dimensions, usable soil depth, movement and cleaning routes, and intended drainage and irrigation lines. Add fixed site features such as walls, doors, taps, downpipes and existing drains, and identify areas that must remain accessible. Attach a planting list with documented root-space requirements rather than a note such as herbs or shrubs. A supplier, installer and landscaper can then review the same plan instead of trying to resolve conflicts from separate sketches. Label any assumptions that still need confirmation.
Agree on the installation sequence with the people responsible for the structure, paving and planting. Support locations, building connections, drainage levels and below-ground services are site-specific; a general layout guide cannot confirm them. Ask the pergola installer or another qualified professional to verify structural interfaces and installation clearances, and have the drainage arrangement reviewed where water cannot discharge freely. Keep a final copy of the drawing on site, including agreed changes, so a planter is not moved later across an access zone. The result should give plants the root space they need while leaving the pergola reachable for maintenance.
Frequently asked questions
Should a raised planter touch a pergola post?
Plan the planter separately and keep posts, bases and any required access clear. A bed can hide parts that need to be inspected or maintained. Only place a planter against or around a structural member if the documentation for the specific design explicitly allows it.
How much root space does a raised planter need?
There is no single depth or volume that suits every plant. Check reliable growing guidance for the chosen plants, then compare those requirements with the planter’s internal length, width and usable soil depth. Outside measurements alone do not show how much root space is available.
Can I use pergola runoff to water a planter?
Do not assume that runoff is collected or discharged where a planter needs it. Confirm the arrangement for the selected pergola and plan the bed’s own drainage separately. Concentrated water may leave the planter difficult to manage, and its route should not block paths or access.
How wide should the cleaning gap be?
There is no universal gap. Use the access and maintenance information for the chosen pergola, then consider the tools and space needed to clear leaves, spilled soil and weeds. Mark the gap on the plan and test whether someone can reach it before fixing the planter position.
Does a pergola’s area figure tell me whether a planter will fit?
No. An area figure does not show the selected configuration’s exact outline, support positions or the free space left for paths and gardening. Compare a dimensioned drawing with the planter’s outside footprint and the space needed to tend and clean around both.
A practical layout keeps the pergola frame, planting volume and working space visible as separate parts of one plan. Give each bed the internal soil depth its plants need, define where excess water will go, and keep routes for movement, watering and cleaning open. Confirm the selected model’s dimensions and access requirements alongside documented planting needs before fixing positions. If the two plans conflict, revise the bed or planting choice rather than hiding a support or losing access behind a full planter.
