
Reducing Pergola Light Glare from Seated Positions
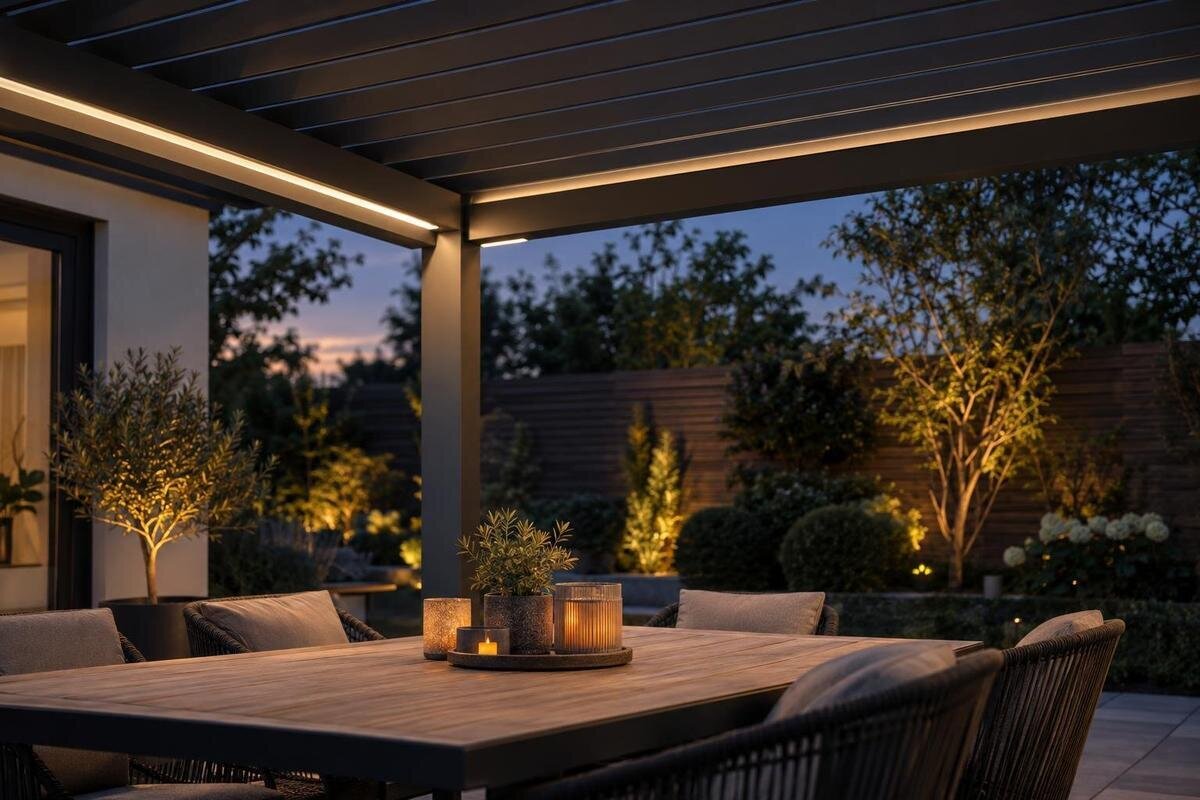
Pergola lighting
A pergola light can seem unobtrusive when you look up while standing, then become distracting as soon as you sit down. The difference is often the viewing angle, not simply the light output. Before asking for a shield or a new fitting position, mark the places people use, check which bright sources are visible from each seat, and separate direct glare from reflections on nearby surfaces. A simple plan and side sketch can turn a vague complaint into a clear brief for a supplier or qualified electrician.

Why a fitting can feel brighter when you are seated
Glare is not simply a synonym for a high light level. A small, exposed source can command attention when it is much brighter than the roof, posts, garden or table around it, especially when the rest of the scene is dim. Position matters as much as output: from standing height, a fitting may sit above the usual view; from a chair, it can line up with the eyes or fall just beside them. Someone leaning back or turning to speak may see it differently again. That is why a light that seems discreet during installation can feel intrusive over dinner. Judge it from the posture in which the space is used, not just from the installer’s viewpoint.
Identify the source before deciding what to change. From each usual seat, note whether the bright lamp or luminous face is directly visible, whether it sits near the natural line of sight, and whether a small change in head position makes it disappear. If the discomfort remains as a bright patch on the table, glazing or another surface, record it as a possible reflection instead. Do not stare into a bright fitting for a prolonged test; an ordinary seated observation is enough to describe the problem. This distinction matters because a shield may block one view, while a reflection can need a different response. Note whether the whole area feels bright or only one point draws attention.
Draw the sightlines from each seat
Draw a simple plan and a side view; a top-down sketch on its own misses eye height. On the plan, mark the pergola outline, support posts, each existing or proposed light, and the furniture in its normal arrangement. On the side view, show approximate seated eye height and the fitting position. Precision surveying is not the aim. From every regular chair, trace a line towards any visible light. This can reveal alignments hidden by an overhead plan, such as a bright source above a diner or close to the direction in which people face. Label each line with the seat it represents.
Give seats separate labels rather than placing one dot in the middle of the dining area. Include end chairs, lounge seats, benches and any other places where people regularly sit facing across the structure. If you are considering a Bloomcabin Wall-Mounted Pergola, draw its proposed location against the actual wall, openings and furniture; do not copy sightlines from a product image. Use matching labels in the plan and side view so that the installer can follow a particular seat’s sightline in both drawings. Where several lines cross, make a separate side sketch for the affected chair rather than squeezing everything into one diagram. Distinguish existing lights from proposed positions, and note which views you have checked on site and which are still proposals. The drawing need not look professional: it needs to show clearly where the person sits, where they look and which source they can see.
Test the view after dark
Carry out the check after dark, when the lights will actually be used. Daylight can hide how much a fitting stands out against a darker background, so make observations in the ordinary evening setting rather than under unusually bright temporary lighting. Use normal controls to assess one fitting at a time, if that is possible without changing the installation, and note whether the source, a reflection or the general area changes. Write down the seat and head position as well as the result. “Glare at the end chair when leaning back” is more useful than “too bright”.
Test the places people really occupy: upright at the table, leaning back in a lounge chair, and turned towards another person. Check the view from a few points within each seat rather than one exact head position; people do not sit perfectly still. A phone photograph can help identify which fitting is involved, but automatic exposure may make bright and dim areas look unlike what you saw, so do not use a photo as a brightness measurement. When planning a layout for the Bloomcabin Pergola, assess the furniture positions on site or in a drawing, not from the catalogue view. Keep your notes simple: seat label, posture, lights switched on and what drew your attention. Record a comfortable position as well as an uncomfortable one, so the comparison includes the parts of the arrangement you want to preserve.
Separate direct glare from reflected light
Direct glare comes from seeing the bright source; reflected glare arrives after light bounces off a surface. A glossy table, glass door, polished floor or wet surface can return a distinct bright image towards a seated person. Check whether that image shifts when you move your head slightly, and trace its likely route from fitting to surface to eye. A reflection may be most obvious from one chair even though the fitting itself is not in that person’s direct line of sight. At night, light reflected in glazing can also be confused with a source outside, so note where the bright image appears.
To test a suspected reflection, change only the viewing conditions temporarily: shift the chair a little, move a glossy object, or compare the same area with a matt sample on the receiving surface, where appropriate. Do not cover or alter the fitting as a test. If the reflected spot changes but the lamp remains comfortable to view directly, discuss the surface or seating angle before relocating the light. If both the source and its reflection are uncomfortable, record both; one adjustment may not address each route. This avoids treating every bright patch as a problem with the fitting itself.

Position lights with seated sightlines in mind
Once the sources are plotted, look for positions that overlap the normal viewing directions from the seats. The aim is not to hide every light, but to keep an exposed bright face out of the most common direct sightlines while still lighting the area people use. A position to one side of a seated person may be less intrusive than one directly ahead, but the result depends on the fitting’s light distribution, the roof, nearby surfaces and furniture. There is no single offset that works for every pergola. Draw possible alternatives and check them against all the marked seats, not just the one where the complaint was first noticed.
Check function as well as symmetry. Even spacing can look tidy on a plan yet put a fitting directly in the view from an end chair. Moving it away from that chair may also leave a darker area where people need to see. If the Bloomcabin Bioclimatic Pergola is under consideration, ask which fitting positions are approved for the exact configuration, then plot those against the seats rather than assuming a generic arrangement. Compare proposed positions on separate copies of the same drawing, keeping the furniture in place. For each option, note which troublesome sightline it addresses and which other seats still need checking. This gives the supplier a clear placement question to resolve, rather than a request to move the light somewhere less noticeable.
What shielding can and cannot do
Shielding works only for the angles and fitting it was designed for. A suitable hood, louvre or baffle can screen a bright face from some directions, but it can also block useful light or leave the source visible from a lower or reclined angle. A diffuser changes how light leaves a fitting; it may spread the output across a larger luminous area, but that area could still be in direct view. These are different approaches, not interchangeable accessories. The outcome depends on the fitting’s design, so assess the proposed component against its instructions and an actual seated sightline.
Do not improvise with tape, foil, paint, drilled holes or an unapproved cover. An alteration can affect the fitting’s specified enclosure, heat management, outdoor rating or mounting arrangement, and suitability cannot be inferred from appearance alone. Ask for the exact fitting model and its instructions; have a qualified professional confirm that any shield and attachment are approved for that fitting and installation. For a wall-mounted pergola option, show the supplier the sightline you want the proposed shield to block. Include both upright and reclined views where relevant, so the discussion concerns the actual viewing angles rather than the appearance of the accessory alone.
Check dining and lounge seating separately
Dining positions can expose different sightlines from lounge seating. A person at the end of the table may face along the pergola, while someone on the long side sees across it; a fitting above one chair can be prominent to another. Mark the chairs separately and include the way people normally lean back or turn to talk. Also account for chairs being pulled out: a small change in position may bring a source into the centre of someone’s view. Check the layout as it will be used, rather than choosing a final fitting position from a perfectly centred plan.
Lounge seating needs its own sketch because a reclined person looks at a different angle from someone sitting upright. People also look around the space rather than towards one fixed point, so check views towards conversation partners, the garden and any doorway used to enter the pergola. When planning furniture for a Bloomcabin Wall-Mounted Pergola model, include the actual chair orientation in the site drawing, not just the outline of the lounge area. Note whether a chair is normally upright or reclined and whether it is regularly turned towards the table. Include extra chairs brought out for guests if they form part of a recurring arrangement. You do not need to map every possible movement; concentrate on the positions people settle into. Keep these lounge observations separate from the dining notes so that an improvement for one group of seats is not mistaken for a solution for both.
Recheck sightlines when the setup changes
One sketch may not cover every arrangement. If the proposed design includes movable roof parts or a changeable side treatment, assess the positions people will actually use when the lights are on; a different setting can alter what is visible and how surfaces return light. Do not assume an adjustable part, screen or fitting position is available for a particular model. Confirm supported configurations in the relevant product and accessory documentation, then note which setup you used for each glare check. This keeps the conclusion tied to an actual arrangement rather than a generic illustration.
Surroundings can change the view too. An open doorway, glazing, a wall finish or a moved table can introduce another reflection or place someone in a different line of sight to the fitting. If there are two common seating layouts, mark both rather than averaging them into one. When reviewing the Bloomcabin Pergola listing, ask which parts can be adjusted or accessorised before treating a roof position or side element as part of the glare solution. Give each arrangement a short, descriptive label on the drawing, such as the furniture layout and the position of any confirmed movable parts. Use that same label in your evening observations. This makes it clear whether a proposed change addresses the everyday setup, an occasional arrangement or both.

Confirm fitting and mounting compatibility
Before asking to move a fitting, gather the information an installer needs: the exact make and model, current mounting point, proposed position, outdoor rating, instructions and the surface or structure the fitting is approved to attach to. A pergola roof does not by itself establish that every fitting or cover is suitable outdoors or permitted on that mounting point. Ask a qualified electrician to assess electrical changes and a supplier or installer to confirm documented mounting approval. Do not rely on a photo or generic product description where compatibility depends on the exact combination.
Turn the drawing into a short brief: label the problem seat, mark the direct source or reflected spot, describe whether the person is upright or reclining, and list any tests already made. For the bioclimatic pergola listing, ask which lighting and mounting options are verified for the exact model and configuration before treating an idea as available. Request the relevant fitting instructions, outdoor rating and mounting approval for any proposed option. Separate your observations from the proposed solution: you can identify an exposed source without deciding how the fitting should be altered. Ask the supplier or installer to identify the compatible option against that brief and explain which marked sightlines it is intended to address. That keeps the discussion focused on the particular glare issue rather than the product category.
Retest every regular seat after a change
After a change has been approved and completed, repeat the same seated checks in comparable evening conditions. Use the same chair positions, roof or side settings, and normal light controls; check the former trouble spot as well as the other seats. A shield can remove one direct view while leaving a reflected point elsewhere, and moving a fitting can trade glare for a poorly lit activity area. Ask the people who use the space to assess their usual positions, then record both comfort and practical visibility rather than judging only whether the source is hidden from one chair.
If one position still catches a bright source, return to the sketch and identify the remaining route: direct view, reflection or a different seating angle. Discuss a further approved adjustment with the responsible professional instead of adding improvised covers. Keep the final drawing and approved fitting details with the project record. If you select the Bloomcabin model under consideration, update the proposed layout to show the actual, confirmed installation. Mark which positions were retested and whether any concern remains, rather than simply labelling the whole plan as complete. Retain the earlier seat labels so you can compare the original complaint with the result. A useful record shows what changed and how it affected the people using the space; it is more informative than a photograph of the finished pergola alone.
Frequently asked questions
How can I tell whether pergola light glare is direct or reflected?
From the affected seat, check whether the bright fitting itself is visible. If the bright spot appears on a table, window or other surface and shifts when you move your head, it may be reflected light. Mark the source and the reflection separately on your sketch.
Should I move a light or add a shield first?
First identify which seats have a direct view of the source and whether reflections are also involved. Then compare placement and shielding options that are approved for the exact fitting. Neither approach is automatically right for every pergola or seating layout.
Will a diffuser stop glare?
Not necessarily. A diffuser changes how light leaves a fitting, but it may not hide a bright surface from a seated person. Ask whether the proposed diffuser is compatible with the exact fitting, then assess it from the actual seating positions.
What should I include in a seated sightline drawing?
Mark the pergola outline, fitting positions, posts, furniture and each regular seat. Add a side view showing approximate seated eye height, then note whether the problem is a directly visible source or a reflection. Include reclining positions and any setup changes that affect the view.
Can I cover an outdoor light fitting myself to reduce glare?
Do not improvise with tape, foil, paint or an unapproved cover. An alteration can affect the fitting’s specified use, outdoor rating or mounting arrangement. Check the exact instructions and have a qualified professional confirm any proposed shield and attachment.
Comfort under a pergola is best judged from the seats, not only while standing beneath the lights. A plan view paired with a side sketch makes each exposed source and reflection easier to trace, while an evening test shows which positions matter in real use. Once the cause is clear, compare only compatible, approved shielding or placement changes and recheck every regular seat. That keeps the fix specific: less glare without losing the light needed for the space.
