
Can a Pergola Fit Beneath Low Eaves or Roof Overhangs?
Pergola planning guide
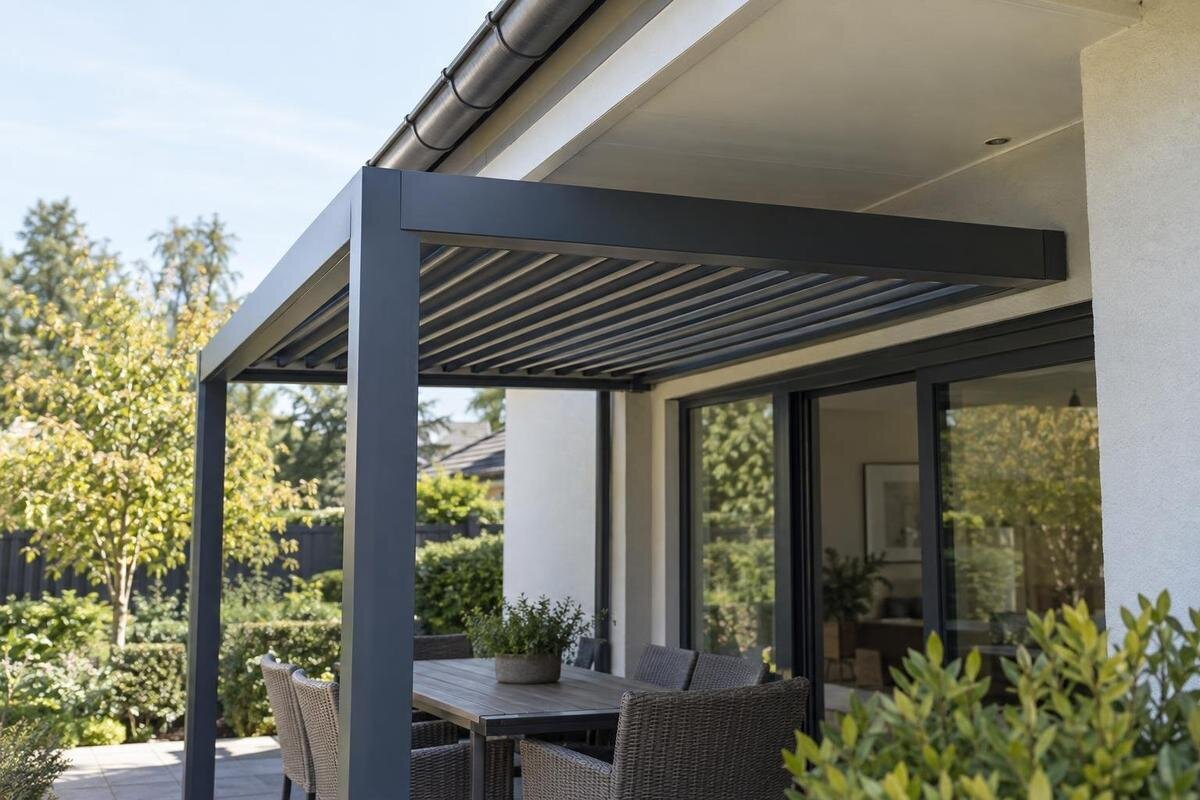
An eave can make an otherwise suitable patio awkward: its lowest point may sit over the walking route, while the gutter or roof edge projects farther than the wall. A pergola can fit beneath an overhang only if its full height and footprint clear those features, any moving roof can operate as intended, and routine gutter work remains possible. The answer depends on the selected model and the exact site, not on a generic eave-height rule.

01
Can a pergola fit under low eaves?
Sometimes, but “under the eaves” is not a single measurement. The roof overhang projects beyond the wall, while a gutter, fascia or downpipe may sit lower or farther out. A pergola close to the house must clear the building in both elevation and plan. It may look as though there is room from the garden, yet a beam can meet the gutter or roof projection once the posts are set out. Check the whole edge the proposed structure would pass beneath, rather than measuring only from the wall. Where only part of the frame sits below the overhang, check that crossing point too; the open centre of the patio may not reflect the clearance beside the house.
Treat fit as three separate questions: does the structure occupy the proposed space without touching the house; is the clear space beneath its lowest beam usable; and can the house roofline and pergola still be maintained? A yes to the first does not answer the others. No single clearance suits every eave, model and household. The relevant dimensions have to come from the chosen model’s drawings and a survey of the actual site. A photograph, catalogue image or one approximate height measurement cannot confirm the combination. A roofline that is high enough at one end can still obstruct a frame elsewhere.
Measure the eave, gutter and pergola footprint
Begin by marking the proposed footprint on the patio and measuring from the finished surface, not from bare ground. Record the vertical clearance to the underside of the soffit, fascia, gutter and any other low projection at the wall, along the gutter edge and where beams would cross. Also measure how far the roof edge, gutter and downpipe project from the wall. Include lights, vents, opening windows or other fixed fittings if they occupy the same space. Take readings at more than one point: the roofline and patio may not be level, so the lowest point can change across the frame. Write down the reference surface for each measurement, so a floor-to-gutter figure is not later compared with a floor-to-beam figure.
Put these site measurements beside a dimensioned plan and elevation for the exact pergola configuration. Compare the overall top height, underside of beams, post positions, brackets and any roof parts shown; the plan reveals horizontal overlap with the overhang, while the elevation reveals vertical clearance. If you are considering the Bloomcabin Pergola, use its product page as the starting point for requesting the relevant drawings. Keep the site measurements and model dimensions together so that each possible obstruction can be checked against the corresponding part of the frame. Include any operating or installation clearance specified for that configuration, rather than treating a no-contact measurement as enough.
02
Separate overall height from usable headroom
Overall height and usable headroom are different figures. Overall height describes the highest part of the frame; headroom depends on the underside of the lowest beam, cross-member or other component above a route. A design can clear the eave at the top and still feel low beneath its structure. Check the route from the door across the patio, including where people walk around furniture or carry items. If a beam crosses the natural route, compare its projected underside with the people who use the space rather than relying on a single comfort figure. There is no universal number that substitutes for that practical check.
Check how external doors and windows operate in the same area. A door that opens outwards, an awning window or a service hatch may need room that disappears when a post or beam is added. Decide where chairs will be pulled out and where people will stand; a clear opening on the plan can feel cramped once a table or seating group is placed beneath it. Mark the proposed beam line at the site and walk the intended route, including the turn into or out of the seating area. That tests comfort only; it does not establish structural clearance or confirm the model dimensions.
Allow for roof movement and clearance
Establish whether the selected roof is fixed or includes parts that open, tilt, slide or retract; these features vary by model and configuration. If anything moves, the clearance is not just the gap in its closed position. Ask for a drawing or written confirmation showing the full operating path, including positions where parts approach the eaves, gutter or fascia. Check whether the mechanism needs space to operate or to be serviced, and whether any part must be removed for maintenance. The word used for a product family, or a photograph showing one position, is not enough to infer its travel or the space it needs. If the operating envelope is not shown, treat it as an open question before finalising the layout.
Also avoid designing the pergola so that it bears against the house roof, soffit or gutter. A building and a separately supported pergola may respond differently to temperature, weather and site conditions; a gap that looks adequate on installation day is not a substitute for an allowance set by the designer for both structures. When considering a Bloomcabin Bioclimatic Pergola, include this separation in the clearance discussion alongside any space needed for roof operation. These are distinct requirements: room for a mechanism to move does not establish the allowance between the two structures. Do not use the eave as a brace unless a project-specific design explicitly verifies the connection.

03
Keep gutters accessible for maintenance
Keep gutter maintenance in the layout, not as an afterthought. Someone must be able to inspect and clear the gutter, reach its outlets and downpipe, and arrange repairs without the pergola blocking the usual access. Check the working space alongside the overhang as well as the gap directly below it. If maintenance normally uses a ladder or a contractor’s access equipment, confirm that it can be positioned without leaning on the pergola or treating its roof as a work platform. A frame that technically clears the gutter may still make routine work impractical. The same applies at the gutter end: a post can obstruct access even when the space below a straight run is open.
Observe where water from the existing roof goes, especially near gutter ends and downpipes. If water can fall onto or behind a proposed pergola roof, mark that route on the layout being reviewed. For a layout involving the standard Bloomcabin Pergola model, establish which roof and drainage components belong to the selected configuration before assessing their interaction with the house gutter. Check where water would leave those components and whether that route conflicts with the existing downpipe or maintenance space. Show the building’s drainage route and any pergola drainage arrangement separately on the drawings, rather than assuming that one can be connected to the other.
Check wall connections against the structure
A wall-mounted pergola may avoid placing posts at the house side, but it does not make every spot below an eave suitable. The intended fixing height and any supporting rail or bracket must clear the soffit and gutter, while the connection must transfer loads into a substrate assessed for the design. The visible finish is not proof of what lies behind it: cladding, trim and fascia are not automatically structural fixing points. Do not use a gutter, fascia or soffit as a convenient support unless a project-specific design explicitly verifies that detail.
For an option such as the Bloomcabin Wall-Mounted Pergola, have the actual wall construction, condition and proposed anchor positions checked against approved anchoring drawings and substrate evidence. Confirm where the connection sits relative to the roof edge and whether it leaves access for repairs. Moving a fixing lower to miss the eave is not automatically acceptable; the connection position must still match the design. Keep the proposed bracket position visible on the elevation so that its relationship to both the wall and the overhang is clear. If the wall cannot provide the specified support or the bracket conflicts with the eave, revise the layout rather than improvising a different fixing.
04
Include paving levels and support positions
Use the planned finished patio level as the bottom of the height measurement. Existing paving may fall away, have a step at the door or rise to a threshold; any of these changes the distance to the eaves across the footprint. If paving, decking or a surface overlay is still planned, include its final height now. Measure at each proposed support position and along the beam line, and note drains, steps and joints that affect where the frame can sit. This prevents a frame that fits at the wall end from losing clearance or usable height farther along.
Compare the resulting set-out with the model’s plan, not merely its advertised floor area. The post positions, overall footprint and intended wall line need to fit together without shifting a support into a drain or moving a beam beneath a lower part of the eave. For the wall-mounted model under consideration, include both the wall connection and the patio support positions in this comparison. Check planned bases or anchor points against paving edges, joints and channels, and identify the supporting material for assessment. A frame can clear the roofline while its supports do not suit the surface; resolving one conflict should not simply move the problem to another part of the layout.
Compare the exact model drawing with the site
Use drawings for the exact model, size and configuration you intend to order. Ask for a plan and side elevation that show overall dimensions, height to the underside of the lowest structural member, the wall connection if applicable, and any moving roof parts in their operating positions. If a dimension or required clearance is absent, get it confirmed before deciding the layout. A product name, area range or image angle cannot be converted into a reliable eave clearance; a footprint that suits the patio may still be too high.
Check that all documents refer to the same configuration. When comparing options on the Bioclimatic Pergola product page, note the exact size and fixing arrangement associated with each drawing so that details from different versions are not mixed. A drawing for another configuration may give the wrong post positions or height. Mark the house wall, eave edge, gutter and downpipe on the same plan, then compare their elevations and horizontal projections with the pergola drawing. Keep any confirmed operating and maintenance clearances on that marked-up layout too. This gives everyone reviewing the proposal the same reference, rather than leaving important gaps to be interpreted from separate images.

05
What to change if there is not enough space
If the proposed frame intersects the overhang or leaves too little headroom, first test a different position or orientation. Moving the frame farther from the wall may take it beyond the gutter projection, but can also affect circulation, drainage and support locations, so redraw the whole footprint and recheck it. A smaller footprint is not necessarily a lower structure; a different configuration only helps if its actual height and roof movement suit the measured envelope. Do not assume that a narrower unit solves a vertical conflict.
Do not force a fit by cutting posts or beams, removing roof parts, bending brackets or altering the gutter. Such changes can invalidate the model drawing and connection design. A purpose-designed lower configuration, a different position or another shade solution may be more realistic. If reconsidering options on the Bloomcabin Pergola product page, compare the revised configuration’s height and support requirements with the original proposal, not just its floor area. Record which obstruction the change resolves and check that it does not create a new conflict elsewhere. Altering the existing eaves or drainage is a separate project that needs its own competent assessment, rather than an incidental adjustment to make the pergola fit.
When to request a site assessment
A site assessment is particularly valuable when the eave is irregular, the wall construction is uncertain, the patio slopes, the gutter is hard to access or the pergola needs a wall connection. Provide the assessor with measurements, photographs from several angles, the intended footprint, door and window locations, and the exact model drawing. Ask for a project-specific review of height, movement clearance, drainage access, the supporting substrate and the anchoring detail. Generic fixing advice or a suggested footing size cannot establish suitability across different surfaces and structures.
For an enquiry about your selected Bioclimatic Pergola configuration, bring together the marked-up layout and any questions that remain unresolved. Identify whether each question concerns the roofline, usable headroom, gutter access or support details, so the assessor can address the actual conflict rather than a general concern about fit. Before treating the layout as ready, make sure those answers relate to the version you intend to order. If the proposal still depends on the eave acting as a support, an unverified wall surface or a guessed gap, keep it open for revision. The useful outcome is a layout whose clearances and connections are understood together, not simply confirmation that the frame fits within the patio area.
Frequently asked questions
Is there a standard clearance to leave below the eaves?
There is no single figure that suits every pergola, roofline and household. Compare the site measurements with the selected model’s dimensioned drawings and any clearance requirements confirmed by the manufacturer or designer. Check usable headroom as well as the gap above the frame.
Can I attach a pergola to the fascia or gutter?
Do not assume that a fascia, soffit or gutter can support a pergola. The wall connection needs to suit the actual supporting structure and have project-specific anchoring details. A qualified professional can assess the substrate and proposed fixing points.
Will a wall-mounted pergola solve a low-eave problem?
Not automatically. The intended wall connection and pergola frame still need to clear the eaves and gutter, and the wall must be suitable for the design. A wall-mounted model name does not confirm that a particular wall or fixing height will work.
Is a small gap between the pergola and roof edge enough?
A gap that looks adequate at installation may not allow for the movement or operating space specified for the two structures. Use the model’s drawings and a project-specific assessment to confirm the required clearance; do not rely on contact with the house roof as support.
What if the pergola would block access to the gutter?
Reconsider the position, orientation or configuration before proceeding. Routine inspection, cleaning and repair access should remain practical. Do not treat the pergola as a platform for gutter work; if the access route is still unclear, include it in the site assessment.
Low eaves do not automatically rule out a pergola, but they make the roofline part of the layout. A sound choice clears the building in every relevant position, leaves the gutter serviceable and has wall or ground connections supported by evidence for the actual site. If any of those points is still a guess, the fit has not yet been established.
