
Designing an Outdoor Courtyard Around a Pergola
Garden planning
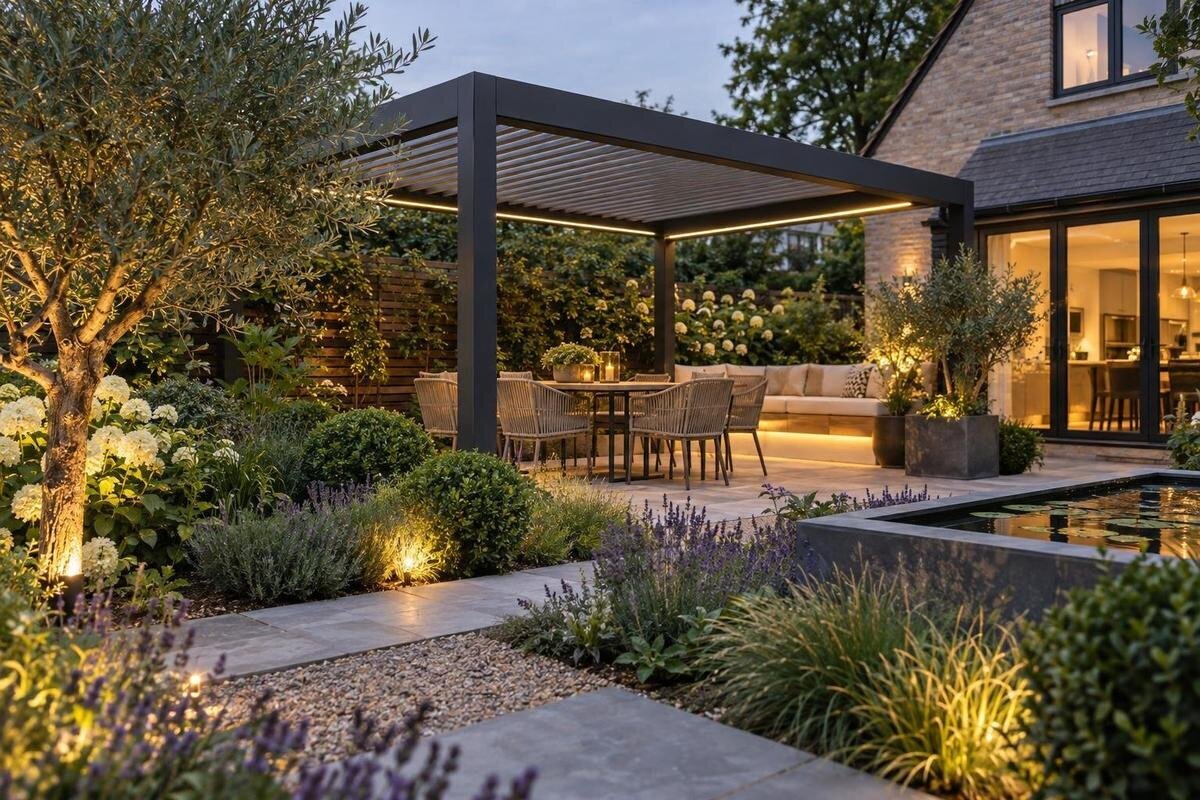
A pergola can give a courtyard a clear centre, but the surrounding ground plan determines whether it feels like a usable outdoor room or an obstacle between house and garden. Start with the route people already take, where water moves after rain, and how planting, paving and furniture will fit around the structure. Then decide where the edges should feel open, sheltered or private. A measured plan makes it easier to see conflicts before paving or plants are in place.

Begin with how you will use the courtyard
List what the courtyard needs to support before choosing the pergola’s position: a quiet seating area, a place to pause near the house, or a destination among the garden beds. Separate everyday uses from occasional ones. A route used to carry tools or reach the washing line should not run through a chair group simply because it is the shortest line on a sketch. Use the list to decide which area needs overhead cover, which parts should remain open to the sky, and which views matter from the house and the seats. If the courtyard also links two parts of the garden, count that route as a main use rather than a line to squeeze in later.
Record fixed features before drawing options: doors and windows, steps, taps, drains, trees, existing paving and changes in level. Note which doors and windows need room to open fully and where people enter the garden. Mark which features could move, so a plan does not quietly depend on removing something you intend to keep. Photographs from inside the house and from the garden can show which view a pergola will frame and which might disappear behind a future hedge. Observe the area at different times of day, but do not assume a screen or pergola will make conditions uniform throughout the year. A useful courtyard plan responds to the plot and household routines, not just an image of an outdoor room.
Place the pergola in relation to the house and garden
An attached position can make the pergola feel close to an indoor room, while a separate position can establish a destination elsewhere in the garden. Neither is automatically the better choice. Compare the route from the nearest door with access to other parts of the garden, and note how much existing patio or lawn each option would use. Check views from indoors as well as from beneath the structure: a strong focal point outside may occupy a large part of a window view. If two positions seem possible, draw them at the same scale and compare how each connects to the house and garden. Keep doors, windows and paths on the plan rather than treating them as leftover space.
For a wall-mounted proposal, have a suitably qualified installer assess whether the particular building and proposed connection suit the product documentation; do not assume every wall or facade is suitable. The Bloomcabin Wall-Mounted Pergola listing identifies a wall-mounted model, but its name does not confirm fit or fixing requirements at your home. A freestanding pergola offers more choice about where the courtyard’s centre sits, but still needs a site-specific layout and assessment. In either case, draw the full footprint and support positions from the chosen model’s current documentation, then check approaches, door clearance, drainage and planting space before settling on a position.
Set the pergola footprint before designing the beds
Draw the pergola at its actual outside dimensions, not as a symbolic square. Include supports and any parts projecting beyond them, using the current technical drawing for the exact configuration. The usable space under the structure is not the whole area it occupies: people still need to pass around supports, pull chairs out, reach planted edges and maintain surfaces. Measure paving edges, steps and obstacles on the ground rather than relying on memory; an inaccurate base can make a generous-looking bed too narrow in the finished layout. Mark the proposed footprint with string or temporary markers, then view it from the house and garden. This can reveal a pinched route or hard-to-reach bed before paving and planting make changes difficult.
Area figures help narrow a shortlist, but do not show proportions or the precise set-out. The Bloomcabin Bioclimatic Pergola listing gives an area range from 9 to 24 m²; compare the selected configuration’s documented dimensions with the measured courtyard before deciding where paving or beds should end. Add seating and side tables as separate shapes on the plan, with enough room to move them and walk past. Do not use a stated area as a substitute for exact dimensions, support positions or a site review; obtain the information for the particular configuration you are considering.
Keep everyday routes clear
Draw the routes between places people use: the house door, pergola, garden gate, lawn, shed and beds that need regular attention. Make the main line direct and easy to read. A path that winds around furniture may look attractive on a drawing but becomes awkward when carrying a tray, garden basket or tools. Include routes used only when moving a wheelbarrow or mower if these need to pass through the courtyard. Distinguish a through-route from the spot where people stop. If the two cross within the pergola area, decide whether the path runs behind the seats or through them, then position the furniture and planted edges accordingly.
Test the layout with chairs, open doors and pots drawn to scale, or use temporary markers outdoors to check the walking space left around them. Check turning points at entrances and whether a pot or chair would sit on a narrow part of the path. Keep access to taps, hose connections, drain covers and storage; these are easy to overlook once the courtyard is furnished. The Bloomcabin Pergola is one model to compare against that plan, but a product’s stated area does not tell you how much clear walking space remains after furniture and planting are placed. Revisit the route after adding each fixed feature, rather than assuming that a clear line on an empty plan will remain clear in use.

Plan paving and drainage together
Plan water flow before selecting a paving finish. After rain, note where water runs, pools or leaves the courtyard, where downpipes discharge, and whether drains or areas of compacted ground are present. If possible, observe the area after rainfall rather than relying only on a dry-day impression. New paving and raised bed edges can redirect water even when a change in height seems small. The proposed layout should not channel runoff towards the house or into a low point where it can collect against a structure. If you cannot tell how the ground falls, or if the work will change where water goes, ask a landscape professional or drainage specialist to assess the site before construction.
Show finished surfaces, existing levels, planted beds, drain points and thresholds on the same plan instead of treating them as separate decisions. A gravel strip or porous-looking surface is not proof that the soil can absorb all the water; slope, compaction and ground conditions matter. Keep inspection points reachable and avoid putting permanent planters over drains. For a courtyard planned around Bloomcabin’s wall-mounted model, show the relationship between the building edge, paving and planted areas clearly. Resolve questions about water flow before finalising those boundaries, using current installation information and qualified advice where needed.
Use planting to define the courtyard’s edges
Planting can soften the edge of a courtyard without closing every view. Put taller plants where screening is wanted and lower or more open planting where seats should look out into the garden. Repeating a few forms or colours can make a border feel deliberate, while planned gaps keep movement, light and views in mind. A planted edge need not form a complete ring: an opening can connect the pergola to the lawn, path or beds beyond. A gap or change in paving can also signal where to enter. Decide which boundaries should read as the outdoor room’s edges and which should remain visually open before buying plants.
Choose plants by mature height and spread rather than by the size of the nursery pot. Record their expected growing conditions, root space, water needs and maintenance, then confirm requirements with a local nursery or landscape professional familiar with the site. Leave enough room to prune without stepping into beds or reaching awkwardly over furniture. Plan where watering equipment will be kept, and keep planting clear of drains, access covers and any clearances named in the pergola’s installation instructions. These checks help avoid a border that becomes too dense, difficult to maintain or hard to reach as it grows.
Match plants to light and maintenance needs
Record how much direct sun each proposed bed receives through the day and whether the pergola or existing trees will change that pattern. Conditions beside a support, near a wall and in the centre of the courtyard may differ. Choose plants for the conditions they will actually receive, not for their appearance in a catalogue photograph. If plants with different light needs would otherwise share one narrow bed, split the border into smaller zones or choose a group with compatible requirements. A simple note on the plan for each bed is more useful than assuming the whole courtyard has one uniform growing condition.
Make watering and upkeep fit the way you use the space. Put plants that need regular attention where they can be reached without dragging a hose across the main route, and avoid a dense screen if frequent trimming would be unwelcome. Ask for written care and spacing guidance, including mature size, and consider whether roots or foliage could affect nearby paving. If Bloomcabin’s bioclimatic option is on the shortlist, use the proposed layout and relevant product information to review the beds beneath and around it. Match plant choices to the light expected in each bed rather than treating all planting around the pergola as one group.
Balance privacy with views into the garden
Decide which sightlines should remain open from the seats and from inside the house. A low planted edge may mark the courtyard without enclosing it; taller planting can screen a selected direction where privacy matters. Mark the views you want to preserve on the plan, then check them outdoors from seated and standing positions before committing to permanent planting. Where a wall already encloses one side, you may not need equally tall planting along every edge. Avoid putting dense foliage where it blocks a useful view of a gate or creates an obscured corner on a regular route. Privacy and openness can be handled edge by edge rather than with one continuous barrier.
Consider what the pergola frames as someone approaches: a tree, a feature bed, a view across the garden or the house itself. Layered planting can add depth, but only when mature sizes and maintenance access are understood. When considering the model on the Bloomcabin Pergola listing, mark its documented footprint on the plan and compare how the surrounding planting would frame the approach. Keep a deliberate opening where you want the courtyard to connect with the wider garden, and recheck the outlook from the usual seating position before ordering plants.

Fit furniture around the structure and service access
Furniture determines how much of the pergola footprint remains usable. Draw each chair, bench and side table to scale, including room to pull a seat back or turn it for conversation. Try several arrangements before building a permanent planter or low wall, because a fixed edge can limit later changes. Orient seats towards a view or towards one another according to how you expect to use the courtyard. If furniture or cushions are stored elsewhere, include that carrying route too. The aim is to make the space comfortable for regular use, not to fill every paved corner with furniture or decorative pots.
Leave practical access behind furniture and around pots for sweeping, pruning and checking drains. A wall-mounted layout does not remove the need to reach the wall-side edge or inspect the adjacent surface. If the Bloomcabin wall-mounted option is being considered, add its documented footprint and any applicable access requirements to the furniture plan rather than drawing only the open floor. Keep movable pots out of the main route, and do not place permanent furniture where it blocks service points. Review the arrangement with typical chairs in place, not just abstract boxes.
Bring the landscape choices onto one measured plan
Bring the pergola, paving, levels, drainage routes, paths, beds and furniture onto one dimensioned drawing. Mark fixed features and existing levels, then add proposed surfaces and plant positions using written guidance on mature sizes. A simple key can distinguish existing features from proposed work. This is where overlaps become visible: a support in a path, a bed with no maintenance access, or paving that directs water towards a low point. Use the drawing to compare alternatives before work begins, but label it as a concept if levels, construction details or product dimensions have not yet been professionally verified.
Before ordering, compare the specific pergola configuration, not just its model name, with its current documented dimensions and installation requirements. The Bloomcabin Bioclimatic Pergola range is one option to check against the site plan; its listed area range from 9 to 24 m² does not identify the right size for every courtyard. Confirm planting requirements separately, and ask a qualified professional to review questions about foundations, wall connections or drainage design. A design consultation can help reconcile the structure and landscape plan, but the final layout still needs to reflect the actual site.
Frequently asked questions
How much space should I leave around a pergola?
There is no single clearance that suits every courtyard. Start with the specific pergola’s outside dimensions and support positions, then add the space needed for paths, furniture, planting and maintenance. Mark the layout on the ground to check that the routes still work.
Can I plant directly around a pergola?
Planting can define the courtyard’s edges, provided the beds leave access to drains, paving and the structure. Choose plants for their mature size, root space, light and water needs. Check the pergola’s documented planting and clearance requirements before placing plants close to it.
Is a wall-mounted pergola right for every courtyard beside a house?
No. Compare how each proposed position connects to the house and garden, and have a qualified installer assess the specific wall and connection. A model’s name does not confirm that a particular building is suitable.
How can I reduce water pooling on courtyard paving?
Record where water runs and collects after rain, and include existing levels, drains and proposed surfaces on one plan. Paving can change water flow, so ask a drainage specialist or landscape professional to assess the site if the route is unclear or will change.
How can planting add privacy without closing off the garden?
Decide which views to screen from the seats and house, then use taller planting only along the relevant edges. Keep openings on routes and where you want a view into the garden. Check mature plant sizes before choosing a screen.
A courtyard feels settled when the pergola, garden edges and open routes belong to one plan. Use the structure to locate the main gathering area, but let the pathways, existing views, planting needs and water flow determine what fits around it. Before surface work begins, test the footprint on site and check a dimensioned plan against the specific product information and planting requirements. Deliberate gaps in paving, planting and boundaries can serve the space better than filling every edge. That balance keeps the courtyard connected to the garden and practical to use over time.
