
Planning Pergola Lighting for Dining, Reading and Ambience
Pergola lighting
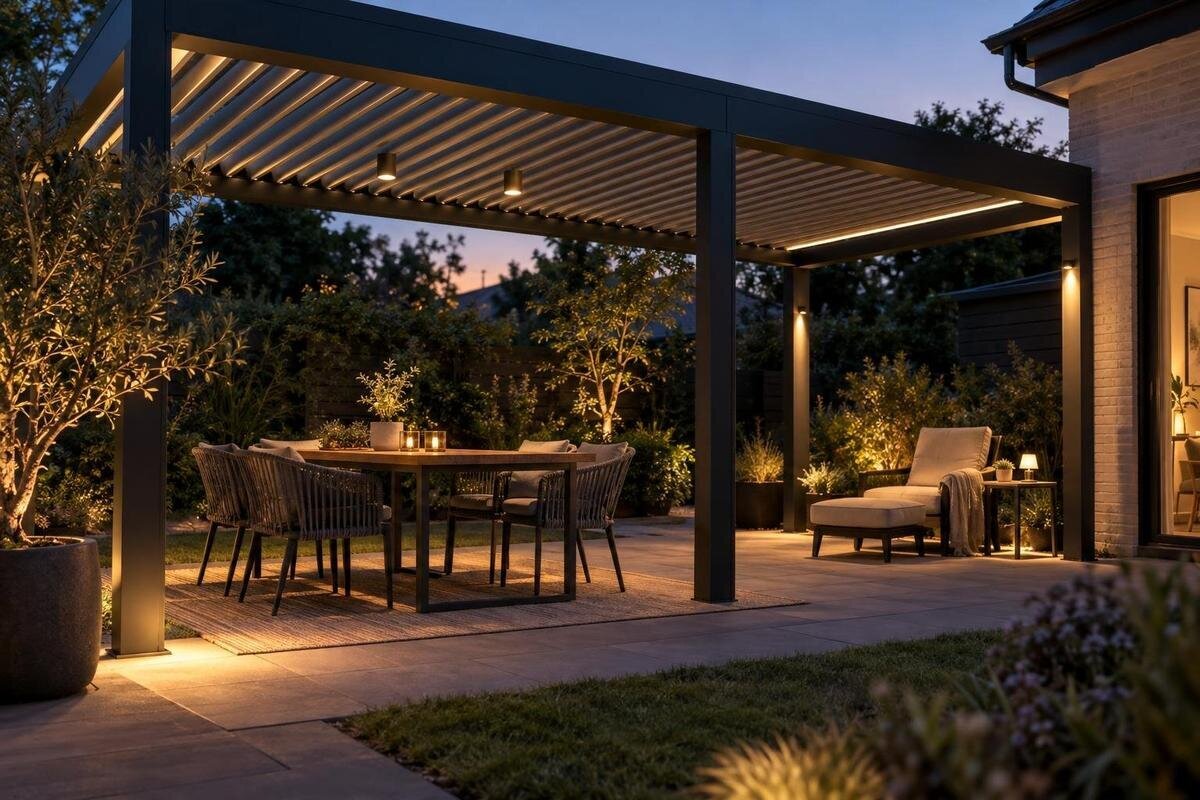
Good pergola lighting is planned around what people need to see, not the number of fittings in a catalogue image. A supper table needs clear, comfortable light; a reading chair needs a focused task layer; conversation benefits from a softer background. Start with a measured furniture plan, separate the jobs, then check brightness and glare from each seat. The aim is practical outdoor lighting that lets you eat, read and relax without flooding the whole garden.

Map the activities that happen after dark
Before choosing fittings, list what happens in the pergola after dark and mark each activity on a simple plan: eating, reading, talking, serving and moving between the house and seating. Draw the table, chairs, reading seat, doors, steps and fixed obstructions to scale, so proposed light zones relate to real use. A single label such as entertaining hides different visual tasks. Mark where people sit and stand, because eye position affects whether a source is in view. Decide which activities happen at the same time; a reading chair occupied during supper calls for a different arrangement from a table that is cleared for reading later. Note which uses matter most if every layer cannot be controlled separately.
Then outline the footprint you are considering instead of laying out a generic grid. If the Bloomcabin Bioclimatic Pergola is on your shortlist, sketch the zones against the exact size you are evaluating rather than relying on a catalogue photograph. Divide the plan into dining, reading and circulation, and annotate what needs clear light, what can remain subdued and where people will walk. This first pass may show that one source in the centre misses a corner, shines across a guest’s eyes or leaves the route back indoors dark. Mark chairs pulled out from the table as well as their tucked-in positions; that changes both a sightline and the walking space. The plan gives the electrician a brief about purpose, not a decorative picture with arbitrary points.
Plan comfortable light for dining
Dining light should make plates, cutlery and serving dishes easy to see without turning the tabletop into the only bright spot. Place the task zone around the table’s actual position and size, not the centre of the pergola by default. If light arrives from only one direction, someone serving or leaning forward can cast a shadow over food. Consider how seated guests face one another: a downward source may illuminate the meal, yet a direct view of a bright fitting can make conversation uncomfortable. Check from every chair, not just from the house or while standing under the roof. If the table is moved or extended, plan around its usual position and recheck the alternative; also note whether faces remain comfortably lit.
Where the table sits relative to a wall, doorway and route to the house also matters. A bright source along the route may be in diners’ direct view, while light reflected from a nearby surface can change the balance on the tabletop. If a wall-mounted structure is being considered, the Bloomcabin Wall-Mounted Pergola belongs in the same discussion as the furniture plan; ask for the approved fitting positions for the exact configuration instead of assuming a convenient edge is a suitable fixing point. Decide whether serving and lingering over supper need different settings. Separate switching or dimming may offer that flexibility only when it is supported by the selected fittings and controls, so include it in the brief rather than expecting it by default.
Give the reading seat its own task light
Reading needs useful light on the page, but the source should not sit in a direct sightline or cast the reader’s own shadow across the book. On your plan, mark the usual seated posture, the book position and which hand turns the pages; a side table or a neighbouring guest can change where a useful beam falls. A fitting that seems well placed while you are standing may feel intrusive from the chair, so assess the view at seated eye level. Keep the reading task separate from the ambient layer where the intended controls allow it. That way, the rest of the pergola need not become equally bright whenever someone opens a book.
Test more than one chair orientation if the seat can move. A light coming from the side may reduce a hand’s shadow on the page, but the useful position depends on the actual beam, the reader’s posture and other people nearby. Discuss a proposed sample or drawing with the supplier or electrician rather than guessing from an overhead plan. When comparing the Bloomcabin Pergola, use the dimensions for the version under consideration and mark where the chair, book and side table sit; a catalogue image alone does not show whether a reading zone will feel cramped. Keep a clear way past the seat and consider where a cup or phone will go, so the chosen beam serves the reader without shining towards a guest.
Use ambient light to balance the space
Ambient light is the background layer that helps people see the broader space and recognise one another when they are not directly under a task light. It can soften the contrast between a brighter dining table and darker surroundings without competing with the meal or a book. Think about the whole view: roof line, nearby walls, planting and the route back indoors. Several visible points can still feel harsh if each sits in direct view; a restrained, well-distributed layer can support orientation without demanding attention. The aim is enough visual balance, not equal brightness at every point or illumination across the entire garden. Areas without a task can stay subdued.
Use the plan to show what should be gently lit and what can remain unlit; lighting every garden edge may draw attention away from the seating, while a very dark route may be hard to follow. Nearby surfaces affect the result: a pale wall returns more light than a dark one, so the same fitting can appear stronger or change the contrast. Choose a consistent colour appearance for sources seen together, then check how it relates to furniture, planting and the view through the house. If light may reflect in glazing, look at that view from indoors as well. Any proposed reflected or indirect position still needs to be permitted by the exact structure and fitting instructions.

Choose lighting scenes for each activity
Think in simple scenes, rather than giving every fitting its own control. A dining setting might keep the tabletop clear while leaving the rest of the pergola gently lit; a reading setting can provide more light at the chair; conversation may need only a softer general layer. A separate entry or route setting can help when people move between the house and seating after dark. Write down which layers should work together and whether the activities will happen concurrently. This makes the desired result clear before anyone specifies switches, dimmers or other controls. It also exposes a practical compromise: if reading and dining happen together, a single all-on or all-off setting may not suit both.
If you are considering the Wall-Mounted Pergola, include the actual wall, entrance and furniture positions in the drawing; the model name alone cannot establish whether your preferred control arrangement is supported. Ask about compatibility between the exact fittings, dimmer or switch, and any control system, including whether task and ambient layers can be managed independently. Put controls where the main user can reach them on entry, but not behind a chair or table once the pergola is furnished. Keep operation intuitive for guests as well as the household. A complicated scene system is of limited use if people cannot easily find a comfortable setting, so decide whether a few clear choices are more practical than many finely divided ones.
Check fitting positions against the pergola structure
Your furniture plan becomes a fitting plan only after it is checked against the actual structure. Use the exact pergola drawing to identify permitted mounting positions, service access and any parts that move or need clearance. A beam that looks convenient in a lifestyle photograph is not automatically an approved fixing point. If the chosen structure has adjustable or moving elements, ask how the proposed positions avoid interference throughout their intended movement; get the answer from product information and documented mounting approval, not appearance. Also mark where fittings or controls could obstruct doors, screens, stored furniture or regular access, if those are part of the design.
For the bioclimatic pergola model, request confirmation of supported lighting options, approved mounting locations and any required clearance before treating the furniture plan as final. Note those details next to the table, chair, controls and service-access points on one drawing. Compare the permitted positions with the places where task light is needed. If they do not align, discuss whether to adjust the furniture layout or consider another supported fitting arrangement, rather than retaining a light position that no longer serves the activity. Leave electrical routes and connections to a qualified electrician working from the confirmed details. Keep proposed positions distinct from confirmed ones so everyone working on the plan can see which choices remain open.
Check glare from every seat
Glare depends on where people look, not only on how bright a fitting appears in a catalogue photograph. On the plan, mark eye positions at every dining chair, the reading seat, the usual approach from the house and any standing serving point. From each, trace the view towards every proposed source and note whether the lamp is visible directly or reflected in glazing, a polished tabletop or another shiny surface. A source that feels unobtrusive when you stand underneath it may become distracting when you sit back. Review fittings together: one bright point can dominate a scene even when the rest of the area is dim. Include the view from the house if its windows face the pergola.
Before finalising positions, mark them on a drawing or simple mock-up and review the sightlines at dusk from the actual seats. This tests placement, not the brightness or comfort of the final fitting, so do not treat a mark as proof. Ask for information on the exact product and discuss a shielded position or different angle only if the mounting instructions permit it. Recheck with chairs pulled back and someone seated opposite; an overhead drawing misses those sightlines. If the source is directly in view, revise the proposed position or ask for an approved alternative. A small adjustment during planning is easier than discovering after installation that a dining or reading seat faces a bright lamp.
Balance brightness and colour
Do not compare brightness by wattage alone or by counting fittings. What matters for a task is how much light reaches the table or page, how widely it spreads and whether the level can be changed to suit the activity. Ask for the exact fitting’s output and beam information, plus confirmation of dimmability if a lower evening setting is part of the plan. Broad distribution may help with general use; a more concentrated beam may suit a reading area, but either can cause discomfort if it points into someone’s view. Avoid choosing a numerical brightness target without a task- and product-specific assessment.
Surface colour also changes the perceived balance: a dark overhead surface or boundary may absorb more light, while a pale wall can reflect it towards the seating. Compare the colour appearance of fittings that will be seen together, preferably in a sample or setting similar to yours; avoid an accidental mix that makes one side of the table look noticeably different. The regular pergola model is listed in sizes from 9 to 24 m², so assess distribution against the footprint you are considering rather than a catalogue image. A control that reduces output may help shift from setting the table to lingering afterwards, but only if the exact fitting and control are compatible. Dimming is a preference, not a remedy for poor placement.

Check outdoor suitability and maintenance
Outdoor fittings should be selected for the exposure at the actual position. A label or product category alone does not tell you whether a fitting is suitable for every spot under a pergola; ask the manufacturer or a qualified electrician to confirm the exact fitting’s outdoor rating, permitted orientation and mounting. Rain, splash, windblown dust and sheltered positions can create different exposures; do not assume the roof protects all locations equally. For Bloomcabin’s bioclimatic model, request information for the exact configuration and mounting point rather than inferring approval from a photograph. The fitting manual and documented approval for its position on the structure should agree.
Plan maintenance as part of the layout. Mark whether each fitting can be reached for cleaning, inspection or component replacement, and note any furniture that would need to be moved for access. Ask how a failed component is serviced and whether the light source is replaceable; these are product-specific details, not something to infer from a photograph. Distinguish routine cleaning access from work that requires removal of a fitting or another component, so the layout accounts for both. Keep access clear of stored cushions and furniture where practical. If a service task requires work at height or near electrical components, leave the method to a qualified professional.
Prepare a clear brief for the electrician
Before electrical work is specified, prepare one page showing the pergola footprint, table and reading seat, proposed lighting zones, desired scenes, glare sightlines and the intended route from the house. Add the product references and exact manuals for the structure and fittings, plus any written approval for the proposed mounting positions. Mark unresolved decisions clearly instead of drawing assumptions as facts. A qualified electrician can assess the supply, controls, cable routing and outdoor suitability for the real products and site. This is a planning brief, not a wiring diagram or permission to modify a pergola.
If the Bloomcabin Wall-Mounted Pergola option is under consideration, show its position against the wall, access points and any model-specific mounting information in the brief. Agree who will confirm the fitting choice, who will verify mounting approval and who will review the electrical design, so the structure and electrical information reach the same people. Keep a record of the final layout and manuals for later maintenance. Treat an added light or control as a fresh compatibility question rather than assuming that a position, circuit or control can be reused. With a clear brief, the electrician can assess the lighting needed for dining, reading and conversation rather than work from a vague request for brighter outdoor lighting.
Frequently asked questions
How many lights does a pergola need?
There is no fixed number. It depends on the area, the activities, the fittings’ output and beam, their approved positions, and whether you can control different layers separately. Map the dining, reading and circulation zones first, then assess the actual fittings rather than adding lights simply to fill the roof.
Can one light serve both dining and reading?
It may work if the activities happen at different times and the light suits both tasks. When people eat and read at the same time, one setting can leave the page too dim or make the whole area brighter than needed. Check the view and light at both the table and chair; a separate controllable task layer may be more practical.
How can I check a proposed position for glare?
Mark the proposed source on a plan and check the view from every dining chair, the reading seat and the usual approach. Look for a direct view of the fitting and reflections in glazing or glossy surfaces. A plan or mock-up checks sightlines, not the final brightness, so assess the exact fitting before positions are approved.
Does a pergola roof make any light fitting suitable for outdoor use?
No. A covered position is not proof that a fitting is suitable for every exposure. Check the exact fitting’s outdoor rating, permitted orientation and mounting instructions for the intended position, and confirm that the proposed mounting is approved for the selected pergola.
What should I give an electrician before the lighting is planned?
Provide the pergola drawing, furniture plan, proposed light zones, preferred scenes, glare sightlines and the exact fitting and structure manuals. Include any documented mounting approval and mark decisions that are still open. A qualified electrician can then assess the electrical plan for the products and site.
A useful pergola lighting layout begins with the furniture and the activities, then brings dining and reading light together with a softer background. Check proposed positions from the seats people will actually use, and keep mounting approval, outdoor ratings and control compatibility tied to the exact products. The best result is not the brightest possible space; it is light that makes the meal, page and faces easy to see without distracting from the evening.
