
Pergola and Outdoor Fireplace: Planning Separation and Heat
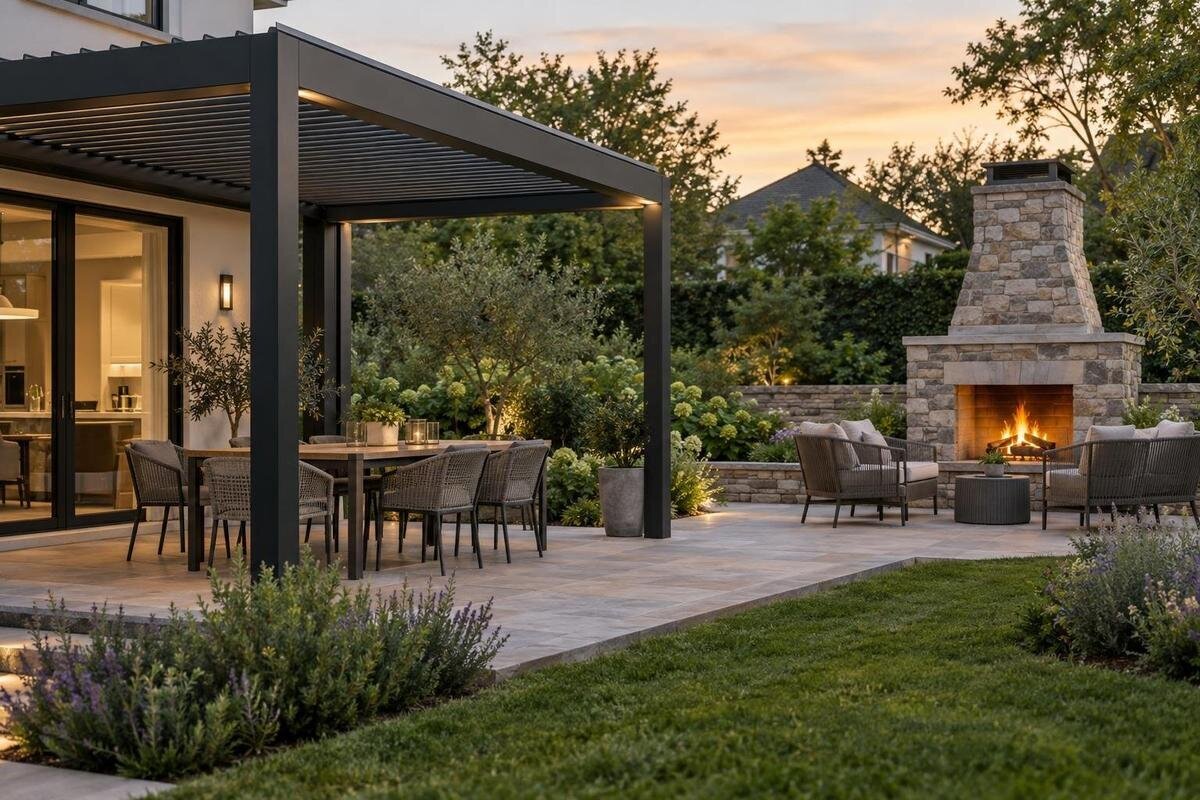
Pergola and fireplace planning
An outdoor fireplace beside a pergola raises more than a question of how many metres to leave between two structures. Fire can expose the frame, roof, fittings, furniture and planting to radiant heat, sparks or a hot exhaust plume; smoke can affect doors, seating and neighbouring spaces. The safe layout depends on the exact fireplace, fuel, flue arrangement, pergola model and site. Treat the two as separate products until their documentation and a qualified fire professional confirm that the proposed arrangement is acceptable.

The fireplace and pergola need separate specifications
Identify the fireplace before drawing the pergola around it. Record the manufacturer and exact model, fuel, whether the firebox is open-fronted or enclosed, whether it is freestanding or built in, and the specified flue or exhaust arrangement. Ask for the installation manual and the clearances it gives, including any conditions that change near a wall or overhead structure. Find out whether the manufacturer permits the intended outdoor setting; do not infer this from a general product description. If the fireplace is still being selected, shortlist an exact unit first and plan from its current documents rather than a photograph or generic guide.
Treat the pergola as a separate structure with its own documentation. An ordinary pergola is not automatically a fire-rated enclosure, a flue support or an approved place for an enclosed combustion appliance. Open sides, overhead gaps, moving roof elements or a sturdy-looking frame do not by themselves establish suitability. Check the exact arrangement with both manufacturers and a qualified fire professional. Similar-looking products can have different conditions, so do not transfer clearances from another model. If the manuals are silent, disagree or cover a different installation, put the design on hold rather than infer permission; the fireplace may need its own open-air position.
Where heat, sparks and exhaust can travel
Heat does not travel only as a visible flame. Depending on its design and fuel, an appliance may expose nearby objects to radiant heat at the opening, hot surfaces, sparks or embers, and rising exhaust. Mark the firebox opening, its sides and the flue outlet on the plan, then identify what lies in each direction: posts, beams, roof parts, wall finishes, glazing, screens, cushions and dry planting. The relevant exposure can be above or behind the appliance as well as across the floor. A gap measured between two posts therefore tells only part of the story, and the absence of direct flame does not settle the question.
Draw a plan and a simple side elevation rather than relying on a perspective sketch. Show the nearest points of the fireplace and pergola, overhead members, nearby walls, seating and the intended exhaust route, with dimensions for the installer to assess. If you are reviewing Bloomcabin Pergola, ask for the relevant technical information for the exact model; its name or a lifestyle image cannot establish heat tolerance. Record materials and finishes from product documentation, not appearance. A metal-looking part, for example, does not answer whether its coating, joints or adjoining components can tolerate the proposed exposure.
Manufacturer clearances set the separation
Clearance is specific to the appliance and its installation, not a universal number that can safely be copied from another fireplace. Ask the installer to identify the required separation on every relevant side and above the firebox and exhaust route, and to state the measurement points. These may include a roof edge, beam, post, wall finish or another nearby item. Requirements can depend on the specified adjacent construction, so give the installer accurate information instead of classifying a surface by appearance. Have the requirements shown on the dimensioned drawing, with the operating position and service access included.
Do not reduce a stated clearance because the structure looks open or because a roof section can move; any permitted configuration must come from the actual instructions. Ask the manufacturer and installer to resolve conflicting or incomplete information before paving or footings are fixed. When considering Bloomcabin Bioclimatic Pergola, put the selected model and proposed roof configuration on the drawing so the installer can assess the arrangement you intend to buy. If the required separation cannot be achieved in the intended spot, revise the layout or equipment rather than treating an unverified gap as acceptable.
The flue and pergola roof must be assessed together
Plan the flue or exhaust outlet with the roof, not as an afterthought. The fireplace documentation should specify the permitted components, route, outlet position and clearances; a qualified installer must assess how nearby beams, eaves or roof panels affect that arrangement. Hot exhaust and smoke may be directed back towards the structure or seating if the route is poorly coordinated. Do not rest a flue on, fasten it to or pass it through pergola components unless the manufacturers document that exact installation and the installer confirms it. The route near walls and roof edges should be part of the initial drawing, not a site adjustment made after construction.
A roof that opens or has gaps is not a substitute for the fireplace’s specified exhaust system. If the chosen structure has adjustable sections, ask the installer to assess every position in which it may be used, including closed, partly open and open positions where applicable. Leave the access needed to inspect and maintain the flue without moving structural parts or working over the firebox. For the bioclimatic Bloomcabin model, request technical information covering the roof configuration and access requirements. Keep this with the fireplace’s flue requirements so both installers can review the same layout before work begins.

Smoke movement affects the best location
Smoke and heat create different siting questions. A position that meets the stated heat clearances can still send smoke towards a doorway, open window, seating area or neighbouring property. Buildings and pergola roofs can affect air movement; wind direction can change during the day, and a flue does not guarantee that smoke will always travel as intended. Mark doors, windows, boundaries and the usual places people sit on the same plan as the fire feature. Consider how the space is used when doors are open, not only when the house is closed and the patio is empty.
Walk the garden at different times and note gusty corners or places where smoke tends to linger, but treat these observations as context rather than confirmation that the proposed location is suitable. Ask the fireplace installer to assess the intended outlet and likely smoke path at the actual site, including nearby walls and roof edges. Do not rely on a single calm-day observation or assume that a particular wind direction will keep smoke away. If the assessment indicates that smoke is likely to enter the house or drift towards a shared boundary, compare another orientation or a separate fireplace zone before fixed construction begins.
People, furniture and service routes need room
Draw people and furniture into the layout before approving the separation. Allow for the fireplace’s stated operating clearances and for people to approach it, tend it and move away without squeezing between a hot appliance and a post. Keep the main route from the house to the garden clear of the firebox opening; it should not depend on moving chairs to pass through. Mark the normal positions of dining seats, loungers and loose screens, then test the arrangement as it will be used, including people carrying food or tending the fire. Furniture shifts, so an empty patio plan is not enough.
Service access matters too. Depending on the appliance, the installer may need access to the firebox, controls, flue or clean-out points, and the owner will need a practical route for tasks specified in the manual. Plan fuel storage and ash handling, where applicable, only as the instructions allow and outside specified clearances. If considering Bloomcabin Wall-Mounted Pergola, show its wall line alongside doors, windows and service access for assessment. Include the space needed to reach those points without blocking a doorway or moving furniture into the fireplace’s clearance area.
Groundworks and services affect the siting plan
Check the surface and what lies below it, not just what is visible above the paving. The appliance may have requirements for its base, support or surrounding surface; heat, falling embers, water and cleaning can also affect nearby finishes. Ask the fireplace supplier or installer to specify the conditions for the exact model, then have the appropriate building professional assess the existing patio or proposed base. Do not assume paving is adequate because it looks solid, and do not improvise a raised plinth or enclosure to solve a clearance problem. Keep any surface requirements in the same drawing as the pergola footprint.
Coordinate pergola supports, fireplace foundations, drainage, irrigation and underground services before excavation. A dimensioned site drawing should show where posts and bases meet the paved area, which areas need installation access, and any pipes or cables identified by the relevant trades. For the Bloomcabin pergola model, request and use the exact installation information when locating supports; do not assume an apparently clear patch can accommodate both sets of work. Ask the qualified installers to resolve the interface, particularly where the fireplace, wall or pergola would share a foundation or compete for the same space.
A separate fireplace zone may be easier to coordinate
Compare layouts before committing to either product. One option is to keep the pergola over dining or lounge seating and put the fireplace in a separate open-air zone; another is to reposition one element so its verified clearances and smoke path work. The choice depends on the selected fireplace and the site, not on a rule that a pergola must enclose a fireplace. Sketch the footprints and circulation routes at full dimensions, then rule out combinations that cannot meet the equipment instructions or leave a usable route. A visually connected garden can still have two distinct functional areas.
A wall-mounted pergola raises different questions from a freestanding layout: the facade, openings, eaves, services and any flue route need to be considered together. That does not make one arrangement safer by default. If looking at the wall-mounted Bloomcabin option, show its proposed mounting position on the wall elevation alongside the fireplace and flue. Ask the pergola supplier about the actual mounting requirements and the fireplace professional about the proposed appliance location. If their plans conflict, revise the layout before installation rather than adapting either product on site.

Planting and accessories can change the clearances
Landscape details can change after installation. Shrubs grow, branches extend, vines spread and dry leaves gather beneath or beside structures; a clear space in the first-year drawing may be narrowed later. Plot existing trunks, mature canopy and intended planting areas, then follow the fireplace maker’s requirements for vegetation and combustible materials. Avoid placing trellises, hanging baskets or dense planting where they could enter a documented clearance area, obstruct access or collect embers. Plan for the mature size of plants rather than judging only the small specimens going into the ground, and include routine pruning in the maintenance plan.
Accessories deserve their own check. Shade cloths, curtains, screens, lighting, heaters, speakers and decorative items can introduce heat-sensitive materials or services close to the fireplace, and may alter access or ventilation. Do not attach or add them simply because there is room on a drawing; confirm their location against the product instructions and with the relevant installer. If Bloomcabin’s pergola option is included in a planting plan, show mature plant sizes and maintenance access against the actual footprint. Revisit the layout when planting or accessories change instead of relying on the original empty-site plan.
What the final site drawing should show
Bring the documents together before construction: the fireplace model and fuel, its installation instructions, the pergola’s exact model and technical information, a dimensioned plan and side elevation, identified materials, the proposed flue route, nearby openings, furniture and planting. Ask the fireplace installer to mark the required clearances and exhaust route, and the pergola supplier to identify any relevant conditions in its documentation. Have a qualified fire professional assess the combined arrangement on site. Check applicable approvals or local requirements with the relevant authority or a qualified professional; do not rely on a generic online distance.
Ask for a clear written outcome: whether this exact arrangement is supported, what clearances and operating conditions apply, and how smoke movement and service access were considered. Record any features that must remain unchanged, such as the approved flue route or the location of nearby planting. If a manufacturer cannot confirm the proposed use, or the professionals identify a conflict, move the fireplace, move the pergola, select another appliance or keep the zones separate. For Bloomcabin’s bioclimatic pergola, record the selected configuration alongside the fireplace details so the written outcome refers to both products.
Frequently asked questions
Can I install an outdoor fireplace under a pergola?
Only if the current documents for the exact fireplace and pergola allow the proposed arrangement, and a qualified fire professional confirms it for the site. Open sides or an adjustable roof do not automatically make a pergola suitable. If the instructions do not cover that location, treat compatibility as unconfirmed and consider placing the fireplace in a separate zone.
How much separation should there be between a fireplace and a pergola?
There is no universal gap that applies to every fireplace and pergola. The required separation depends on the exact appliance, fuel, flue arrangement, adjacent construction and installation conditions. Ask the installer to identify the measurement points and show the required clearances on a dimensioned plan, including overhead parts and the flue route.
Is a metal pergola automatically safe beside a fireplace?
No. Material alone does not establish that a structure is suitable for the heat or exhaust from a particular fireplace. Finishes, joints, connected parts and nearby surfaces also matter. Use the actual product documentation and have the complete arrangement assessed; do not infer heat tolerance from appearance.
Will opening the pergola roof prevent smoke or heat problems?
Not necessarily. Moving a roof section does not establish the required clearance or replace the fireplace’s specified flue and exhaust arrangement. If the roof has adjustable parts, ask the installer to assess the exact model in the positions in which it will be used. Smoke movement also depends on the site and wind.
What information should I give the installer?
Provide the exact fireplace model and fuel, its installation manual, the pergola model and available technical information, and a measured site plan with a side elevation. Mark walls, doors, windows, seating, planting, services and the intended flue route. Include any proposed screens or accessories so the installer can assess the complete layout.
The final drawing needs to show more than two footprints: it should explain where heat and exhaust go, how smoke may move, who needs access and what can change as plants grow or accessories are added. When a fireplace’s clearance or flue route conflicts with the pergola, a separate zone is often the clearer design choice than trying to make one structure serve as an unverified enclosure. Settle the location and documented requirements before foundations, paving and planting make changes harder.
