
Planning Pergola Outlets to Avoid Runoff towards a Neighbour
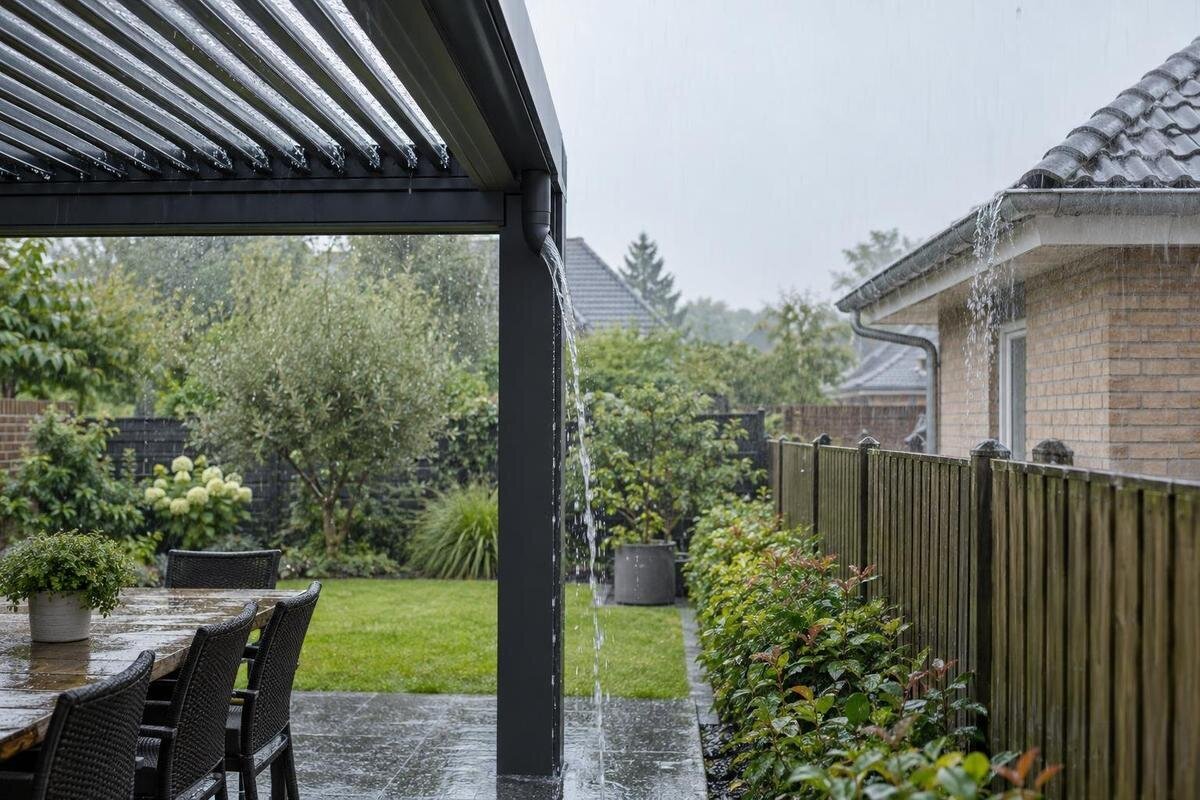
Pergola drainage
Managing pergola rainwater does not end at the outlet. Water also needs a safe route across the site and a receiving point that will not send concentrated flow towards a neighbour's property. Map how the pergola collects water, where each outlet discharges, how the ground falls, and which local project requirements apply before fixing its position.

Trace the water beyond the pergola
A pergola drainage plan is a continuous route, not a point marked under the structure. Trace it in order: the surface that sheds rain, any collection channel or gutter shown for the chosen configuration, the outlet, the path water takes after leaving the structure, and the final receiving point. The names and positions of these parts depend on the specific design; do not assume every pergola drains in the same way. Ask for the relevant diagram and use it to identify where water actually emerges. If there is more than one outlet, mark each separately rather than drawing a single arrow from the middle of the structure.
Then separate the pergola's drainage from broader site drainage. Rain from nearby roofs, paving and higher ground may already flow through the same area, but that does not mean an outlet should be added to an existing pipe or allowed to spread across a neighbour's land. Mark each source separately on a simple site sketch. This shows whether the pergola introduces concentrated flow at a place that previously received only general rainfall, and whether a different orientation or route needs professional review. Note which parts of the route are confirmed by a supplier's drawing, already exist on site, or still need to be designed.
Map boundaries, buildings and existing flow
Before choosing a location, sketch the house, pergola footprint, boundary, fences, paved areas, garden beds, retaining edges, doorways, drains, existing downpipes and visible low points. Include fixed items that could block a proposed route, such as a path or raised planter. The plan need not calculate water volumes; its purpose is to show relationships and questions for the installer or drainage professional. If the boundary or levels are uncertain, do not estimate them from a fence alone. Have relevant positions confirmed by an appropriate survey professional before the layout relies on a narrow strip beside a neighbour. Mark approximate distances as estimates unless they have been measured.
Look at the site after rainfall if that can be done safely and from your own property. Note where water travels, where it pauses, and whether an existing route runs towards or away from the boundary. One observation is not a drainage survey: ground conditions and rainfall vary, and a dry-weather inspection cannot show every low point. If you are considering the Bloomcabin Bioclimatic Pergola, use the site sketch to discuss its proposed position with the supplier. Ask for configuration-specific drainage information so you can mark the outlets on the sketch rather than infer their positions from product photographs.
Check ground levels along the whole route
The general direction of fall across a garden can be misleading. A small hollow, paving threshold, raised lawn edge, wall or compacted strip can divert water near the pergola even when the ground slopes away elsewhere. Check the immediate area where the outlet is expected to discharge, then follow the route all the way to its intended destination. Pay special attention to the final stretch before the boundary; a shallow dip or hard edge can change the direction of surface flow. Note which parts are paved, planted or gravelled, and photograph visible changes in level after rain where it is safe to do so.
Use a measured level survey or advice from a drainage professional where the route is close to a boundary, passes between buildings, or depends on a subtle change in level. Photographs and notes about pooling are useful observations, but they do not replace measured levels when the design depends on them. When reviewing the Bloomcabin Wall-Mounted Pergola details, draw the building edge as well as the ground: nearby roof drainage, thresholds and paving may affect where water goes. Do not treat a wall line as a guaranteed route. Nor should an unpaved bed be assumed to absorb all discharge; soil condition, compaction and previous wet weather matter.
Choose an outlet by working back from its destination
Start with a receiving point that is suitable for the site and can be reached by a route confirmed for the project; work backwards from it to the pergola. That sequence can reveal a problem that is hard to see when choosing the structure first. An outlet aimed at a convenient corner may discharge onto paving that falls towards the neighbour, a low spot, an entrance or an area that cannot safely carry concentrated flow. A route that looks short on a plan is not necessarily sound on the ground, especially where it crosses from one surface to another.
Only then compare possible pergola positions and orientations. Consider where an outlet would sit relative to the proposed route, boundary, doors, paths and existing drainage, without assuming that a model's outlets can be moved. If there is more than one outlet, check each route, including whether flows would meet in a narrow area. If no clear route works, discuss a different position, a designed conveyance route or another receiving point with the supplier and a drainage professional. When considering the Bloomcabin Pergola, request the drainage drawing for your chosen configuration before finalising the footprint.

Coordinate drainage beside a house
For a pergola beside a house, include the building's existing water paths in the plan rather than focusing on the new structure alone. Roof gutters and downpipes, eaves, door thresholds, paved strips and nearby ground levels may all affect where water goes. Keep the pergola's outlet route identifiable on the drawing, and note any places where two flows could meet. This helps the installer see whether water might be concentrated at a doorway, against the building or along a narrow side passage. Check that the route remains reachable for inspection instead of being hidden behind fixed equipment.
Do not assume an existing downpipe or drain has spare capacity, or that connecting the pergola to it is appropriate. A qualified drainage professional should assess the specific system and proposed connection, with any relevant authority requirements or project documents checked where needed. If you are considering the Bloomcabin Wall-Mounted Pergola, ask where water leaves the chosen configuration and how it would reach the proposed receiving point. Keep the pergola's water path distinct from the house's roof drainage until the connection has been assessed. The owner and installer should agree who is responsible for any separate drainage work.
Account for paving, soil and low spots
Surface type affects how runoff behaves after it leaves the pergola. Paving and other hard surfaces can carry water along their fall, while planted ground may absorb some water but can also become saturated, compacted or uneven. Gravel or a garden bed is not automatically a drainage solution; its performance depends on the ground below and on how water is directed into it. Label each section of the route as paved, planted, gravelled or otherwise, rather than showing one uninterrupted arrow across the garden. Consider the finished surface, not just the ground as it looks before landscaping.
Look for edges that steer water: kerbs, steps, retaining walls, raised beds, narrow gaps between buildings and changes in paving height. A low spot may hold water locally; an edge can redirect it towards a neighbour even if the pergola outlet is on your side of the boundary. Where pergola rainwater is directed through defined outlets, its contribution can differ from rainfall spread over the whole garden. A qualified designer can assess the actual collection area and route; do not estimate capacity by eye. Have any proposed soakaway, channel or subsurface route assessed rather than assuming it will work from appearance alone. Revisit the plan if later paving or planting will change the route.
Read the drainage documents for the exact configuration
Ask for documents for the exact model and configuration being considered, not a generic picture of a pergola. A useful drainage diagram should let you identify collection points, the intended outlet location, any stated discharge arrangement and the components that form part of that path. If the drawing does not show where water leaves the structure, request clarification in writing before deciding its position. Keep a copy with the site plan so the supplier's information and the proposed ground route can be checked together. If the drawing and the planned orientation appear inconsistent, resolve that before work proceeds.
Weather-performance information answers a different question from site drainage. Model-specific limits and controlled observations are not a universal guarantee for every storm, and they do not establish that water will be safely managed after it reaches the ground. For the bioclimatic pergola listing, ask which documents apply to the selected configuration and what operating or maintenance conditions affect drainage. Also establish whether a chosen enclosure configuration changes the proposed water route; do not assume that adding or changing an enclosure leaves every drainage detail unchanged. Record any exclusions or conditions, and have discrepancies resolved before installation rather than relying on verbal interpretations.
Give every outlet a clear receiving point
A receiving point is where the outlet's water is meant to end up, not simply the place where it first touches the ground. It could be part of a professionally designed drainage arrangement or another destination suitable for the project, but its suitability must be judged on the actual site. The route should not rely on water crossing a boundary, running along a shared passage without agreement, or disappearing into ground whose behaviour is unknown. Identify the destination on the drawing and show what happens if the intended route is blocked or cannot carry the flow.
Where an outlet connects to a tank, channel, pipe or existing stormwater system, confirm that the components and overflow route are suitable for the chosen setup with a competent professional. Do not leave overflow to run towards a neighbour simply because the normal collection route appears to work. When discussing a wall-mounted pergola with the supplier, include both the normal discharge route and the proposed overflow path on the site plan. Distance from the boundary alone does not prove that a destination is safe, because ground fall determines where water travels. Keep maintenance access clear so blockages or damage can be identified without redirecting water across the boundary.

Check the project's local stormwater requirements
Drainage expectations depend on the site and proposed route, so check them before work is fixed in place. Ask the relevant municipality or local authority what project-specific stormwater requirements apply, and whether plans or approvals are needed for the proposed outlet, changes to surface levels, or a connection to an existing system. Where a property has shared drainage, servitudes, body corporate rules or other recorded conditions, have the applicable documents reviewed rather than assuming a route is acceptable because it lies within the garden. If a neighbour could be affected, raise that concern during planning rather than after discharge starts.
An appropriately qualified stormwater or civil drainage professional can assess levels, capacity and receiving points; an installer can confirm the selected pergola's documented outlet arrangement; a surveyor can resolve uncertain boundaries or levels. Ask everyone to work from the same plan and to identify assumptions. If the regular Bloomcabin Pergola is your preferred option, have its configuration-specific drainage drawing reviewed alongside the site proposal before settling on the layout. Keep written responses with the final plan, especially where discharge is near a boundary or a shared route is involved. Make clear who will maintain the outlet and route after installation.
Record and verify the agreed route
Before installation, turn the plan into a simple site record: mark the pergola footprint, every outlet shown in the model documentation, the proposed route, the receiving point and any overflow path. Add arrows for observed ground fall and note areas where levels are unknown or a professional's design is required. Take clear photographs of the relevant surfaces and boundary from your property. This gives the installer, supplier and drainage professional a common reference and makes it easier to spot a mismatch between the structure drawing and the site proposal. Save the model-specific documents alongside it.
After installation, check the visible discharge route under suitable conditions, without deliberately flooding the area or improvising a test that could cause damage. Note whether water follows the agreed path, whether ponding appears at a new location, and whether any flow is directed towards neighbouring land. If the outcome differs from the plan, have the installer or drainage professional review the cause rather than treating it as a landscaping issue. Keep outlet access clear and update the plan if paving, planting or other site work changes the route. For a bioclimatic pergola from Bloomcabin, keep the selected configuration's drainage drawing with this record so later changes can be compared with the agreed arrangement.
Frequently asked questions
Does placing an outlet close to the boundary make drainage easier?
Not necessarily. A shorter route can still direct water towards a neighbour if the ground falls that way or a hard surface carries the flow across the boundary. Choose the destination first, then confirm the whole route and its levels for the site.
Can a garden bed absorb all the pergola runoff?
Do not assume so. Soil, compaction, previous rainfall and the way water enters the bed all affect what happens. Ask a qualified drainage professional to assess a proposed infiltration area rather than relying on its appearance or on the fact that it is planted.
Can I connect the pergola outlet to an existing downpipe or drain?
Only after the specific system and proposed connection have been assessed. Confirm capacity, compatibility and any project requirements with a qualified drainage professional and the relevant authority where needed. Do not assume an existing pipe can accept additional water.
What should I ask the pergola supplier for?
Request drainage information for the exact model and configuration, including a diagram that identifies the collection points and where water leaves the structure. Also ask which weather-performance documents and operating or maintenance conditions apply. Keep these with the site plan.
Who should review a route near a neighbouring property?
A suitably qualified stormwater or civil drainage professional can assess the route and receiving point. Ask the local authority about project-specific requirements, and involve a surveyor if the boundary or levels are uncertain. Give everyone the same site plan to review.
Keeping runoff away from a neighbour is not solved by choosing a convenient corner or moving an outlet without checking the ground. A sound plan shows the collection and discharge points, measured levels where they matter, a continuous route to a suitable destination, and what happens if that route is interrupted. When the product documents, site levels and local requirements are considered together, the pergola can be positioned without relying on neighbouring land as an unplanned outlet. Keep the record current if paving, planting or other work changes the route.
