
Planning a Pergola for an Extendable Dining Table
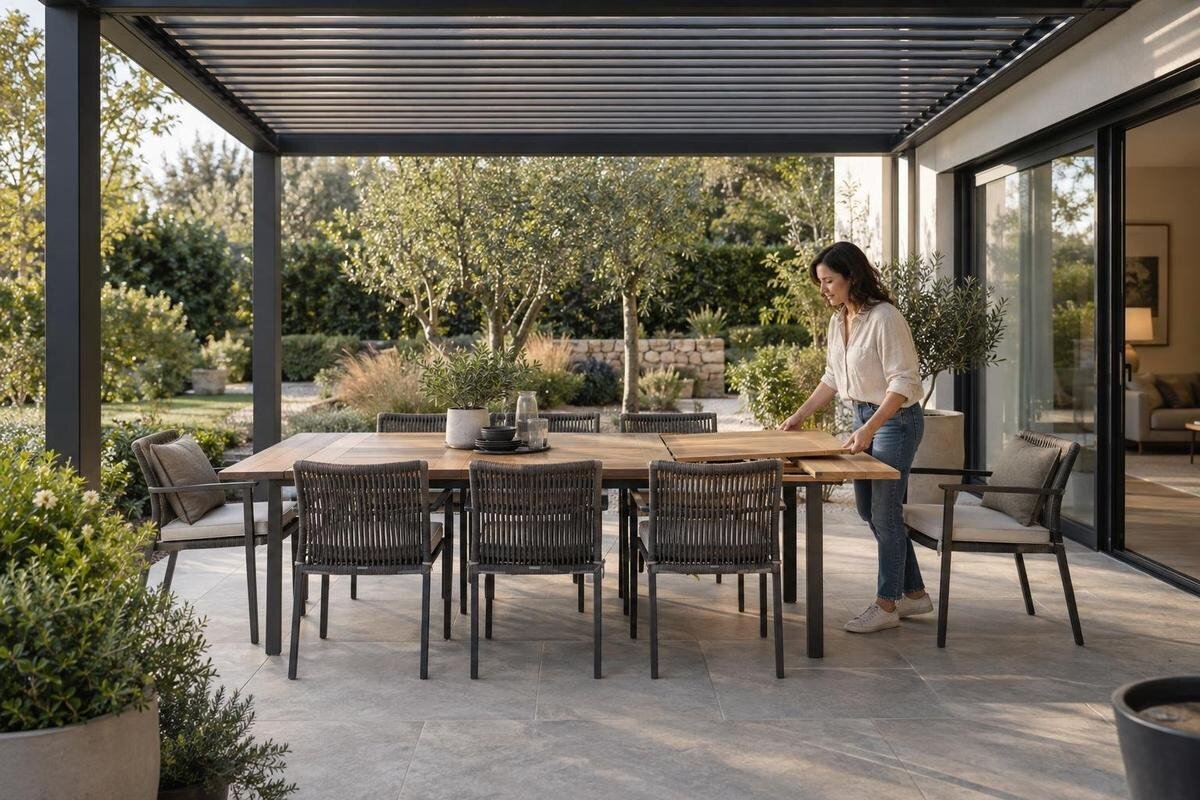
Outdoor dining layout
An extendable dining table has more than one footprint: the compact setup used for an ordinary meal and the larger arrangement with its leaves fully open. A pergola plan needs room for both, plus chairs pulled out for use and a clear route for carrying food. Mapping those separate movements before comparing configurations makes it easier to see whether the intended dining area works in practice.

Plan around the fully extended table
An extendable table calls for two plans: the short everyday arrangement and the full-length version used for larger meals. Begin with how the patio is used now: where the table normally sits, which seats stay in place and how people reach it from the house or serving point. Then treat the extended table as a second, larger setup. The pergola layout must be tested against both, because chairs, supports and routes can become awkward only after the table is extended. Planning for that busier arrangement does not mean filling every part of the floor; it means allowing room to use every chair and move around the fully extended table. Keep the everyday sketch too, so an occasional gathering does not dictate a cramped day-to-day layout.
Do not use the tabletop outline as the entire dining footprint. It shows where the furniture sits, but not how the extension opens, how far chairs move or where someone carrying dishes will pass. Draw the closed and open outlines separately, and label which one is usual. If the table has to move to open it, show that changed position as well; a plan that assumes the table stays centred may miss an end that shifts towards a support or doorway. The aim is to make conflicts visible before choosing an overhead structure. Treat any sketch as a planning layout, not a promise of usable clearance.
Measure the table closed and extended
Measure the table at its widest outside edges when closed and again when fully extended, including leaf corners and any part of the frame that projects beyond the top. Record both length and width, and note whether the extension grows from the centre, one end or both ends. That detail determines how much open space is needed at each end. Also note where the table legs or base sit: enough space around the tabletop does not guarantee that every chair will fit comfortably between the legs. Use the actual furniture or its verified drawing, not a rough estimate from a product photograph. If there is a removable leaf, record where it is stored and whether setting it up needs access along one or both sides.
Include the action of opening the table, not just its final size. Some designs need a person to separate the halves, lift a leaf or reach the centre; others extend differently. Measure the space your table needs to move through and mark it with a dashed line or temporary tape outline. If you are considering the Bloomcabin Wall-Mounted Pergola, mark the wall and the selected configuration’s support positions on the plan, then check that neither obstructs the table as it opens. Show whether a chair has to move before the table opens and where that displaced chair will go.
Draw the chair pull-out zones
An empty chair pushed under the top takes up less room than a chair in use. Measure each chair that will be part of the setup, including the widest point of its back or arms, then place it at the table as it is used: pulled out far enough for someone to sit down and stand up. Do this for side chairs and end chairs, since the table ends often need separate treatment. A bench, broad armchair and narrow dining chair do not occupy the same working space, even if they fit beneath the same tabletop. If chairs differ, draw each type rather than copying one footprint around the table.
Mark the zone from the table edge to the furthest point of each chair as someone sits down, remains seated and stands up, rather than measuring only the seat. Where people must walk behind occupied chairs, add a separate passage band; chair movement and through-traffic need to be considered separately. Test the arrangement with the actual chairs, because a neat rectangle on paper will not reveal a back that catches a wall or another chair that has to be shifted each time someone sits down. Note whether all the intended seats can be used at once without pushing a chair into a doorway. Once you have recorded these chair-use zones, check whether they fit within the clear space of the Bloomcabin Pergola configuration you are considering.
Keep a clear serving route
Draw the route a meal actually takes, from the kitchen door, outdoor preparation surface or serving point to the table. Represent it as a band rather than a thin line: someone carrying a tray needs room for the tray, hands and turning at corners. Use the route you expect to take most often and mark any door or gate that has to open along it. If the route changes when the table is extended, draw both versions; a convenient path past the short table may lead directly behind an occupied chair in the larger setup. The point is not to prescribe one standard width, but to test the actual task in the actual space.
Walk the route with the tray or serving basket you normally use while another person sits in the chair nearest the path. Notice whether you have to turn sideways, reach across a guest or ask somebody to move a chair. If food comes from two directions, mark both approaches and identify the routine one. A path around one end may work better than a narrow gap behind several chairs, but it must still meet the door and table without crossing the space needed to open the extension. Keep the route continuous, not merely clear beside the table. This rehearsal catches trouble that a total square-metre figure cannot show.

Measure the patio and pergola footprint
Make a base plan of the patio before placing furniture. Measure the usable length and width between fixed edges, and mark walls, steps, thresholds, doorways, built-in benches, planters or other features that will remain. Note whether each object is fixed or movable; a pot that can be shifted is a different constraint from a wall or column. If the patio narrows or changes shape, record the change rather than rounding it to a rectangle. Where the edges are not parallel, take measurements at more than one point. An approximate outline can hide a pinch point at exactly the end where the table extension needs room.
Plot the pergola’s outer outline and its clear internal space separately, using the dimensions for the exact configuration you are considering. Put support locations on the drawing rather than treating the whole roof area as open floor. For a candidate such as the wall-mounted Bloomcabin model, obtain the configuration dimensions and overlay them on the site map, including the wall edge and support positions. If those details are not clear, request them instead of estimating from a product image. Keep the patio boundary and roof perimeter as separate lines; the roof outline alone does not show how much clear floor space remains for the dining arrangement.
Check doors, supports and table-opening access
Overlay door movement and the table’s opening movement on the same plan. Show the full path of a hinged door, not only its closed edge; for a sliding opening, mark the access line and any threshold people cross while carrying food. Keep a chair’s pull-out zone from colliding with the way in or out. At a narrow edge, a table may fit when no one is seated but leave no practical way to open the door or get around a chair. Include gates or screens if they are part of everyday access. Treat these moving parts as part of the layout, not details to consider only after the pergola is chosen.
Then compare the furniture plan with the supports and fixed edges shown for the chosen pergola configuration. Mark the actual footprint of each support, not just a dot at its centre, and check whether it obstructs the serving path, chair movement or the extended table. For a Bloomcabin Bioclimatic Pergola under consideration, obtain the exact configuration drawing and use it in this overlay; the product category alone does not establish where supports sit. A conflict is a reason to adjust the furniture orientation or shortlist a different layout, not to assume a support can be moved. Ask the supplier to confirm any dimensions that are not shown.
Test everyday meals and larger gatherings
Test the everyday arrangement and the largest gathering arrangement as separate layouts. For each, write down how many chairs are actually in use, where each one goes and whether all seats can be reached without lifting a chair over another. Do not assume the extension automatically adds a particular number of usable seats; set the chairs out and check their spacing against the table and route. If spare chairs need to be stored elsewhere, keep them out of the clear dining footprint unless they will be brought into the pergola during a meal. This prevents a tidy drawing from promising more seating than the furniture allows.
Use chalk, masking tape or movable markers to represent the closed table, full extension, chairs and serving path on the patio. Walk through a normal meal and then a larger gathering: open the table, place the chairs, carry a tray and let people pass. Note each point where someone needs to pull furniture out of the route. Use those results when comparing a configuration from the Bloomcabin Pergola range with both layouts, not just the everyday footprint. If the gathering version works only when chairs are moved into the route, the drawing needs a change before the pergola size is settled. Mark which arrangement is used most often so a rare full-table meal does not compromise daily access.
Match the pergola footprint to the full layout
Once both furniture layouts work, outline the largest required dining envelope: table open, chairs in use and a continuous route. As a first sketch, extend the measured table length by the chair-use space needed at its ends, and extend its width by the chair-use space needed along each side. Then draw the serving route where people will actually walk. Do not simply add every clearance into one total: the plan’s shape and the way zones meet matter, and a route may share space only where it does not clash with a pulled-out chair. Compare that outline with the pergola’s clear dimensions and supports. Area alone is not enough: two rectangles with the same area can have different proportions, so a long table may need more length while chairs and the route need space across the width. Orientation matters too. A layout that fits on paper in one direction may fail when a door, fixed seat or patio edge fixes the table’s position. Keep the intended covered zone in mind if you want the full serving route under the roof.
Use any advertised area as a shortlist filter, not as the answer. The wall-mounted pergola listing gives an area range from 9 to 24 m², but that number does not reveal the usable dimensions or clearances in a selected configuration. Compare the exact width, depth, support positions and roof outline with your drawing, then decide whether the largest arrangement is comfortable or merely possible. Note any assumption, such as a chair being pulled outside the roof outline, so it is clear what the plan has not confirmed. Do not choose a larger area on paper without checking that its shape fits the patio.

Check shade and table operation beneath the roof
Check where the intended table position sits beneath the roof at the times you tend to eat. The sun moves through the day and year, so one observation or a midday sketch cannot tell you whether the table will be shaded at breakfast or late afternoon. Note the direction from which sunlight reaches the patio and compare the table and chair zones at relevant times. If shade is important to your choice, verify what the exact pergola configuration is specified to do; do not infer coverage or rain performance from a model category alone. Before choosing a configuration from the Bloomcabin Pergola product page, compare its specifications with the area you want shaded.
Also include the physical movement of the extension. Some tables need room above the top while a leaf is lifted or turned, and a folded leaf may project beyond the final tabletop for a moment. Check the action with the actual table, then compare it with any overhead parts and the pergola’s clear height for the selected configuration. Finally, see whether chairs outside the roof outline are still where you want them. A plan can fit furniture beneath a drawn perimeter while leaving a key seat, leaf movement or route outside the intended covered area; decide whether that trade-off works for your meals before finalising the layout.
Prepare a measured concept plan
Make a clean plan that another person can read without guessing. Label patio boundaries, the pergola outline, clear space between supports, closed and extended table positions, every chair-use zone, door swings and the serving route. Add actual measurements and identify which objects are fixed. Use distinct line styles or colours for the two table positions. If the drawing uses sample furniture sizes or unverified dimensions, label it clearly as a concept plan; do not present an illustrative sketch as a measured fit. Keeping assumptions visible makes it easier to replace them with exact furniture and configuration details before purchasing.
Use that same plan to ask for the exact dimensions and support positions of any pergola configuration under consideration, including the Bloomcabin bioclimatic model. Ask which dimensions describe the outside size and which describe the clear floor space, then compare them with the largest dining setup. If a route, chair zone or table-opening movement has to be sacrificed, try rotating the table, shifting the serving approach or changing the furniture arrangement before treating a bigger nominal area as the solution. Keep the drawing with the furniture measurements so revisions stay consistent. The final choice should work for an ordinary meal and an extended one without relying on a guess.
Frequently asked questions
How much clearance should I leave behind dining chairs?
There is no single clearance that suits every table and chair. Measure how far your actual chair moves when someone sits down and stands up, then add a separate passing route if people need to walk behind it. Test the arrangement on the patio.
Should I plan for the table open or closed?
Plan for the fully extended arrangement if you intend to use it beneath the pergola, and check the closed everyday setup as well. A layout for a larger gathering should not make ordinary access awkward. Show any table movement needed to open it.
Can chairs sit outside the pergola’s roof outline?
They can, if that suits the way you plan to dine. Draw the roof outline alongside the chairs and decide whether those seats need to be beneath the intended covered area. Check the exact configuration rather than assuming the roof covers the whole patio.
How do I plan a serving route?
Draw a continuous path from the kitchen door or serving point to the table, including turns and door movement. Walk it with the tray or basket you normally use while someone is seated in the nearest chair. Revise the layout if the route depends on moving furniture.
Is a pergola’s area enough to confirm that the table will fit?
No. Area does not show the shape of the usable space, the support positions or the room needed for pulled-out chairs and a serving route. Compare your measured layout with the exact dimensions of the configuration you are considering.
A successful pergola layout is not defined by the table alone. It is the combination of the closed and extended table, chairs in use, door access and a serving path that remains practical. Measure the furniture you own, test the larger arrangement on the patio and compare it with the clear dimensions of the selected configuration. If the only workable version depends on moving a chair into the route or assuming space not shown on a drawing, revise the layout before committing to the pergola footprint.
