
Planning a Pergola Before Your Patio Is Built
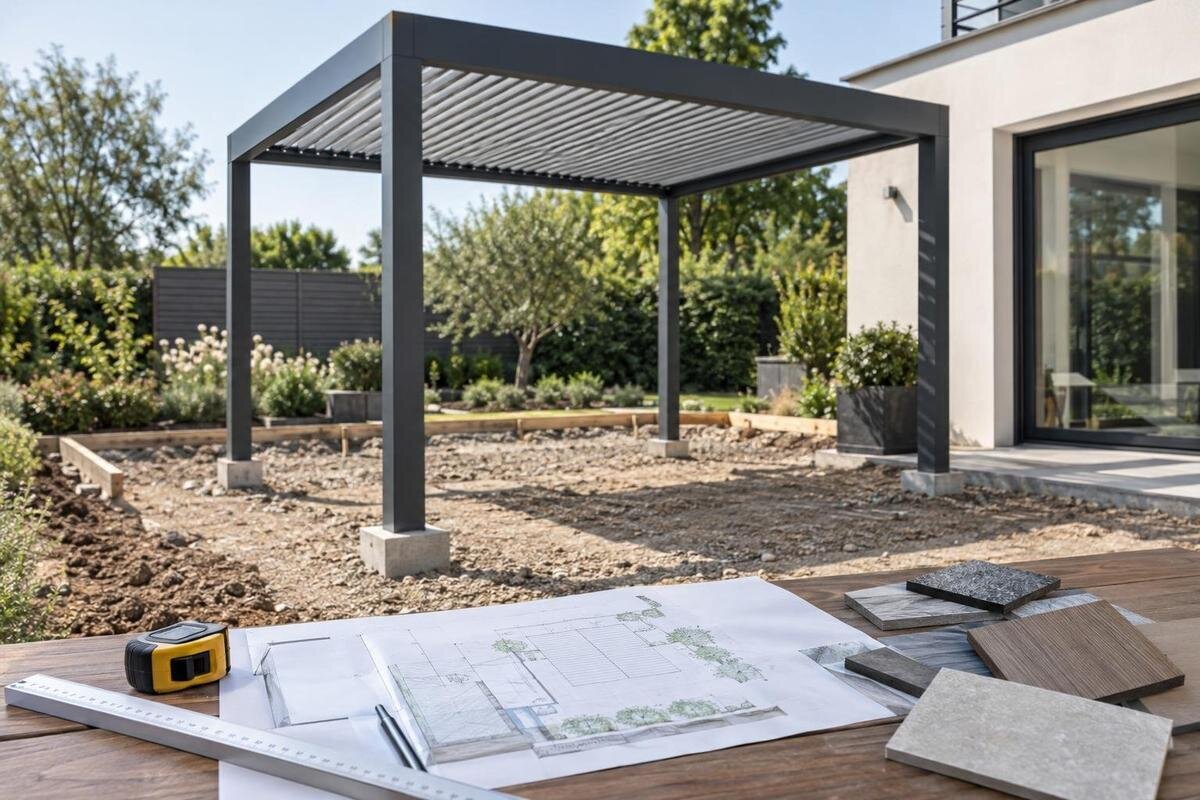
Pergola planning guide
Choosing a pergola while the patio is still on the drawing board gives you a chance to coordinate its footprint, support points, drainage and service routes before the finished surface fixes those choices. The main risk is not simply choosing the wrong area; it is allowing the paving, supports and pergola installation to be designed as separate jobs. Settle the configuration, obtain a usable drawing and allocate each interface to a named contractor. This guide explains what to decide before groundworks, what to check against site conditions and what to document for handover.

The pergola configuration and patio plan
Choosing a pergola while the patio is still being designed lets you plan the structure and patio layout together. Decide the intended covered area, whether it will stand independently or connect to the house, and how people will move between the doorway, seating and garden. These choices affect the patio even if you have not chosen the paving colour. You do not necessarily have to take delivery before construction, but the groundworks team needs a settled configuration and current, dimensioned information before fixing support locations or covering service routes. Keep an early preference separate from an approved layout: one is a brief, while the other is a construction reference.
Make a written list of what is confirmed and what remains open: product type, size, attachment approach, finishes and any electrical options you are considering. The Bloomcabin Bioclimatic Pergola listing shows an area range from 9 to 24 m². That can help with an initial scale comparison, but it does not show the exact outer dimensions, support positions or services for a selected configuration. Ask for the current drawing and check that it relates to the configuration under consideration. Record the drawing revision, unresolved questions and who will answer them, so the patio contractor is not left to infer details from an image.
The full footprint on the site plan
Set out the actual footprint, not just the shaded area shown in a brochure or plan. Ask for the overall width and projection, the position of every ground support shown, and any dimensions that distinguish the roof edge from a support line. Confirm the height or level reference as well, and check whether dimensions apply to the selected configuration or a standard version. Use the Bloomcabin Pergola listing to identify the product range, then obtain configuration-specific dimensions before asking the patio contractor to mark it out. Never derive support positions by dividing an advertised area or scaling a photograph.
Overlay the drawing on a measured site plan that includes the house wall, door openings, thresholds, windows, downpipes, drains, steps, retaining edges and routes to the garden. Add space for chairs to be pulled out and for people to pass; a frame can fit on paper yet make a door or walkway awkward in daily use. Measure from agreed fixed points rather than a temporary fence, and show existing and proposed levels separately if the patio has not yet been built. Use consistent units and note which measurements were taken on site. A chalk or tape outline can help you picture the footprint, but it does not replace approved dimensions.
Support points and groundworks
Support points determine what must be ready below the finished surface. Obtain the selected pergola’s installation or foundation drawing and ask the supplier or installer which parts the groundworks contractor must provide. The catalogue also identifies a wall-mounted pergola model, but that label only describes the product category; it does not establish that a particular wall or patio foundation can accept the connection or support arrangement. Have a suitably qualified professional assess any structural interface and specify the required substrate and preparation for the actual building and site. Do not let one trade assume another has designed the support.
Before excavation or a concrete pour, transfer each confirmed support location to the same plan as buried services, drains, movement joints and slab edges. The designer or qualified installer should determine any required clearances and support details; there are no engineering dimensions that can safely be applied to every pergola and ground condition. If a support conflicts with a service or an edge, pause and obtain a revised detail rather than shifting it by eye. Record the approved change on the plan and send it to every contractor who relies on the drawing. A changed position can affect the frame, paving pattern and nearby access.
Patio finishes and the support interface
Choose the patio finish with its support interface in mind. Concrete, individual pavers and decking create different joints, thicknesses and access conditions, so do not assume the finished surface itself is the permitted fixing base. Ask the pergola supplier and installer what substrate the chosen system requires, what they expect to find when they arrive, and whether any preparation falls outside their scope. When discussing the Bloomcabin Pergola with the supplier, send the proposed surface build-up as well as the plan; the model name alone cannot resolve that interface. Give the patio contractor the same written requirement.
Record the level of the completed surface, not only the depth of excavation. Bedding layers, paving thickness, deck boards and changes in slope can affect threshold transitions, frame height and clearances. Agree a reference datum that the builder and pergola installer can both use, and show how the finish meets the support locations without obstructing installation or later inspection access. If the paving pattern is being designed around support points, coordinate the grid before materials are laid. Ask whether any support areas need to remain accessible. The precise detail should come from the selected system and the relevant trades.

Drainage for the pergola and patio
Decide where water from the pergola and patio is meant to go before paving fixes the ground levels. A selected roof configuration may collect, redirect or shed water in different ways; obtain the supplier’s drawing or written explanation of its discharge points and which drainage components are included. The bioclimatic model listing identifies a product type, not a site-specific runoff arrangement, so do not infer outlet positions from its name or a photograph. Ask the installer to show the proposed discharge route on the patio plan and confirm how the finish and drainage design will accommodate it.
Add existing downpipes, channel drains, gullies, inspection covers, outdoor taps and low points to the same drawing. Coordinate the proposed patio fall and any drain connection with a drainage professional, who can assess the levels and a suitable outlet for the site. Keep access to covers and maintenance points clear, and check that water will not be directed towards a doorway or another place where it could create a nuisance. Ask the professional to consider the overflow route as well as normal discharge. The plan should name who supplies, installs and checks each drainage component; a general note saying drainage included is not precise enough for a trade handover.
Electrical and other service routes
List services only after deciding what you actually want to power. If the project includes lighting, powered operation or another electrical accessory, check that it is available for the selected configuration and ask for its connection and control requirements. Do not assume that a product image shows supplied electrical equipment, or that an electrician can conveniently reach every preferred location once paving is complete. Mark intended lights, switches, outlets or control points on the layout as provisional until the supplier and electrician confirm them. If an option remains undecided, label any proposed route as provisional too, so it is not mistaken for a finished design.
Ask a suitably qualified electrician to specify the electrical provision, including the route, termination points and any requirements that affect the groundworks. The pergola installer, builder and electrician should agree who marks, installs and records each part; no one should cut into a completed surface on the assumption that a cable is already there. If water or data services cross the patio, have the relevant trade locate and coordinate them before work starts. Record approved concealed routes and service points before they are covered, then store that information with the final plan. A photograph is useful for future reference, but it does not replace a professional check.
Wall, door and boundary clearances
For a wall-mounted design, check the whole wall interface, not just the apparent position of the frame. Confirm which wall the configuration is intended to meet and ask a building professional to assess the actual construction, condition and connection. Coordinate with the person responsible for the façade so the fixing detail does not conflict with cladding, insulation, waterproofing, windows or existing roof drainage. Bloomcabin Wall-Mounted Pergola is identified as a wall-mounted product; the catalogue name cannot confirm that your house wall is suitable or settle the weatherproofing detail. Get the proposed interface agreed before finishes conceal the relevant structure.
For a freestanding layout, check the clear space around the entire structure. Include door and gate swings, windows that open, access to gutters and drains, paths, outdoor taps and existing posts or boundary features. Consider height as well as position on the plan: a fitting, eave or opening can create a clash even when the area looks clear from above. If the project may need consent or could affect insurance conditions, confirm requirements with the relevant local authority and insurer before committing. Ask each professional to record assumptions about wall, boundary and access conditions, including any space needed for maintenance.
Responsibilities across the trades
Create a simple responsibility schedule before accepting a quote. Name who supplies the pergola, produces or approves its set-out, prepares the substrate, provides support work, installs the frame, handles electrical and drainage work, lays the finish and makes good any disturbed area. Mark each item as included, excluded or to be confirmed, and identify who checks dimensions on site. Compare a quote for the regular pergola configuration with other quotes covering the same scope of work, rather than comparing model names alone. Ask what arrangements you need to make for delivery access, unloading, protection and waste removal, and record the answers rather than assuming these services are standard inclusions.
Pay special attention to the handover between trades. The paving contractor needs an agreed support plan and finished level; the pergola installer needs to know who prepared each support and what condition it must be in; the electrician needs confirmed service points; and the drainage contractor needs defined routes and outlets. Put those dependencies beside the responsible person’s name, identify who can approve changes and nominate a contact for on-site questions. If the site differs from the drawing, refer the change to the responsible designer or supplier before affected work continues. Clear written inclusions prevent a gap from being mistaken for someone else’s task.

The drawing set for a reliable handover
Give the supplier enough site information to check the proposal against reality. A useful enquiry pack can include a measured plan, proposed patio surface and finished level, wall and threshold photographs, known service locations, existing drainage points, access constraints and relevant sections or architect’s drawings. Label photos with the direction they face and note where measurements were taken. If levels change along the house wall, ask whether a side view would help explain them. Ask what additional measurements or images are needed for the chosen configuration rather than guessing from a wide-angle picture. Include questions about support, water and service interfaces in the same enquiry.
Keep the approved product drawing, patio plan, drainage sketch, electrical plan and contract scope together, with dates and revision numbers. When a drawing changes, check what changed and send the new version to the builder and other affected trades; do not leave an earlier printout on site as a competing instruction. The Bloomcabin Bioclimatic Pergola product page can help identify the product line in an enquiry, but the final set-out must relate to the quoted configuration and current supplier documentation. Before ordering or authorising irreversible work, compare the configuration description, dimensions, finish and stated inclusions with the documents you intend to build from.
Construction sequence and sign-off points
Agree decision points rather than relying on a vague promise to coordinate later. Before groundworks, confirm the selected configuration, measured footprint, support detail, surface level and known service routes. Before excavation, check the setting-out against buried services and the latest drawing. Before a pour or other permanent covering, have the responsible trades confirm that the required supports, routes and drainage provisions are in the intended locations. The exact order depends on the selected system and how the patio is built, so the supplier, designer and contractors should set the sequence together. Record who releases each stage and what information they need.
At handover, compare the completed patio with the approved plan and walk the route between the house, pergola and garden. Check visible support positions, access to doors and drainage points, the agreed discharge route, and the locations of any service terminations; have technical checks completed by the relevant professional. Record approved variations and concealed service routes, and give the latest drawings to the owner and relevant contractors. If finished levels, support positions or the wall interface differ from what was approved, resolve the discrepancy before treating the patio as ready for pergola installation. A clear record now is more useful than reconstructing decisions after the surface is in place.
Frequently asked questions
Do I have to order the pergola before patio work starts?
Not necessarily. The important milestone is to confirm the configuration early enough for the supplier or installer to provide usable dimensions and support details before the relevant groundworks are fixed. If you plan to order later, ask the builder which decisions cannot be left open, and do not authorise a permanent base or finished surface on assumptions. Ordering and delivery are separate from agreeing the site plan.
Can the patio be poured before I choose a pergola model?
Only if the base and any service provisions are designed for the eventual pergola, rather than an assumed size. The right interface depends on the selected product and site conditions. Ask the prospective supplier and a qualified professional what must be settled first. If the model is not final, record any proposed allowance as provisional and get the relevant design confirmed before irreversible work proceeds.
Does a 9–24 m² product range show where the supports go?
No. An area range does not give the selected configuration’s width, projection, support locations, total outer dimensions or height. Ask for a current, dimensioned drawing that relates to the exact configuration being considered. Use that drawing, not an area figure or a scaled product image, to coordinate the patio footprint and groundworks.
Can a wall-mounted pergola be fixed to any house wall?
No. Wall-mounted describes the product arrangement; it does not confirm that a particular wall is suitable or show how the connection should work with its construction and finishes. Have the relevant professional assess the actual wall and agree the connection details with the supplier or installer before those parts are concealed.
Who should handle drainage and electrical preparation?
There is no universal allocation: it depends on the project and what each contractor has agreed to do. Name the person responsible for specifying, supplying, installing and checking each part. Have a suitable drainage professional assess water routes and a qualified electrician specify electrical provision, with the pergola supplier or installer confirming the product interface.
Treat the pergola as part of the patio design, not as a fitting to choose after the surface is complete. The useful pre-build result is a current plan showing the actual footprint, agreed support arrangement, finished level, drainage and service routes, together with a written scope for each trade. Confirm uncertainties with the supplier and relevant professionals before excavation, pouring or covering the work. When everyone is working from the same revision, the patio can be finished around a defined installation rather than a guess.
