
How to Add Pergola Privacy While Keeping It Breezy
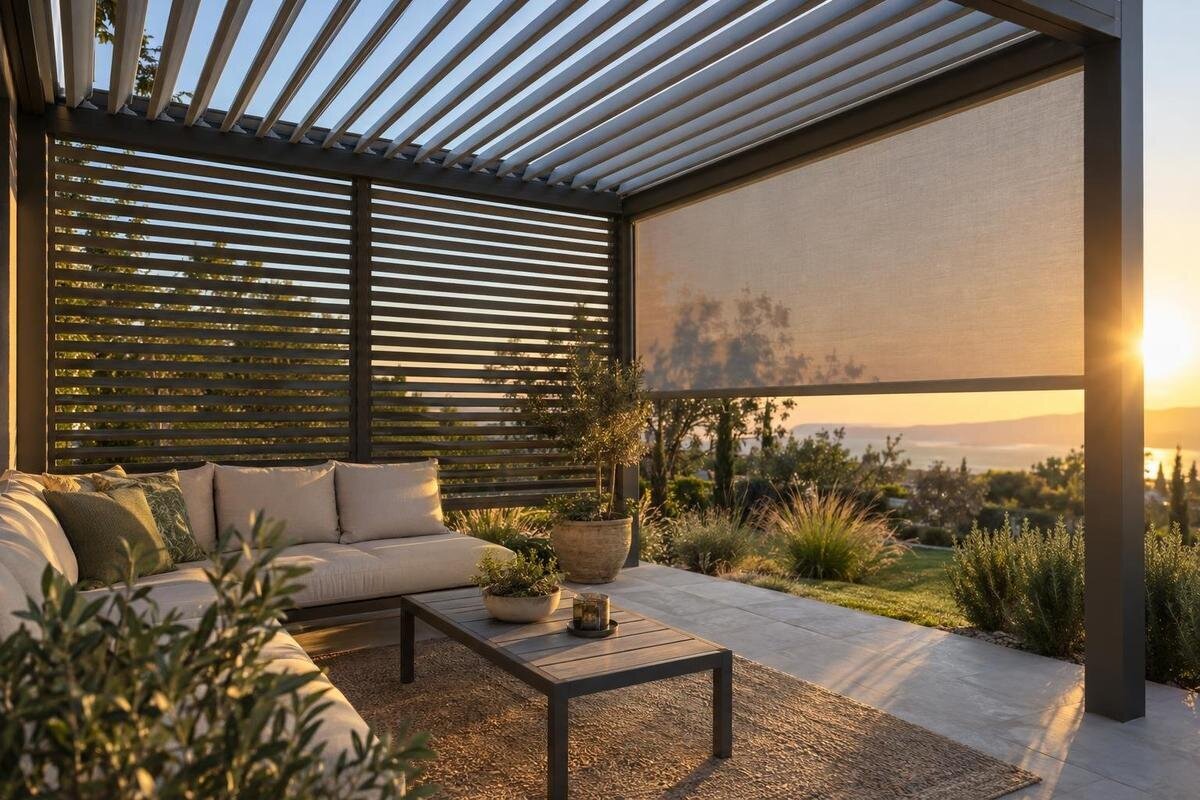
Pergola privacy and airflow
Privacy around a pergola is usually a placement problem before it is a product problem. A screen can hide the seating from one window or path while leaving another side open; put it across a useful breeze, though, and the space may feel enclosed. The aim is to cover the view that matters without blocking the route air takes through the occupied area. A quick sketch of seats, outside viewpoints and likely breeze directions helps you plan the gaps as deliberately as the screen.

Privacy and airflow are separate design questions
Privacy and airflow meet at a pergola’s sides, but they are separate design questions. A screen interrupts a particular view from a neighbour’s window, a path or a nearby outdoor area; air movement depends on the openings left around it and the direction of the breeze. An open roof does not automatically keep air moving at chair height. If a side panel blocks the route by which a useful breeze reaches the seats, overhead ventilation may not make that zone feel airy. Air moving above a roof and air crossing the seating area are different routes, so do not use one as proof of the other.
That distinction helps avoid a common planning mistake: adding panels until the seating looks private on a plan, then finding that the outdoor space feels closed in. Decide which view needs to be obscured and where people should still be able to feel air passing through. Privacy may come from covering one narrow angle or turning a chair, rather than enclosing every edge. Set a clear priority for each part of the layout: where visual cover is essential, where an unobstructed opening matters, and where either arrangement would be acceptable.
Map the viewpoints that expose the seating
Begin with the people and views, not a catalogue image. Mark the usual seat positions, then note the places from which someone can see them: a neighbouring window, a shared path, a gate or another part of the garden. Consider the view while seated and standing, because eye level changes what needs to be covered. Draw a line from each relevant viewpoint to the part of the seating you want to shield. If the view is diagonal, mark the angle as well as the direction; a panel that hides a straight-on view may leave a clear view around its end. Rank the viewpoints by when the pergola is used, rather than treating every possible angle as equally important.
Draw the proposed pergola outline, then place chairs, a table and the route people use to enter. The catalogue lists the Bloomcabin Pergola model from 9 to 24 m²; that is an area range, not a measurement of each side or screen position. Use the exact footprint for the option being considered and mark where a panel would sit. This helps show whether a screen would intercept the important view without spanning the side that needs to stay open. Add doors and everyday walking routes too, so the privacy line does not crowd a practical entrance.
Observe the breeze at seating height
Observe air at the height and position where people will sit. A general forecast or the usual wind direction for an area is only a starting point: nearby buildings, walls, fences and trees can alter what reaches a particular patio. Spend time at the proposed seats on more than one occasion, especially at the times the pergola is normally used. A light ribbon held by someone can indicate direction for a moment, but it cannot represent every day or season. Note the time, conditions and whether the air reaches the seating comfortably, so a single observation does not become a firm assumption.
On your sketch, mark the side where useful air arrives and the openings through which it can continue past the seats. If the breeze changes direction, note that too; a screen that works in one condition may lie across another useful route. The Bloomcabin Bioclimatic Pergola is listed as a model from 9 to 24 m², but its area range cannot predict airflow at a specific home. Use the footprint being considered to place your observations on the plan. Record which seats receive a breeze, rather than marking the whole pergola as breezy because air reaches one corner. Distinguish between a direction you have observed several times and one you have only noticed briefly; both are useful notes, but they should not carry the same weight in your layout.
Place a screen across the actual sightline
Use the sightlines on your sketch to decide where screening would interrupt the view. Position matters in height as well as along the pergola edge: check which part of the seating is visible from each viewpoint before deciding how much coverage is needed. If the exposed view comes from one neighbouring window, a panel on that side may be enough; a screen on a different edge may offer shade but do little for privacy. Check from the actual seat position, including a usual turned or reclined position, rather than only from the centre of the floor. A helper at the viewing point can describe what remains visible while you compare the proposed screen position with the line on your plan.
An oblique view can travel around the end of a panel, so compare a longer screen or a short return with simply shifting the chair. Each extension also changes the available opening for air, which is why the view and breeze should be marked on the same plan. Leave a comfortable route in and out; privacy should not depend on blocking a doorway or the main approach. For a wall-mounted layout, the Bloomcabin Wall-Mounted Pergola is a model reference; confirm the intended side configuration and approved components before assuming a screen will fit.

Keep air paths open through the seating area
Think of airflow as a route, not a count of open sides. Air needs a way to reach the pergola and a way to continue past the seating; a large opening may be less useful if a solid screen closes the only onward path. Openings do not always have to be directly opposite one another, because a breeze can approach at an angle and surrounding walls may redirect it. What matters for planning is whether the occupied zone remains connected to open air. A narrow gap behind a chair is not the same as a clear route across the space.
Draw an arrow from the likely entry opening through the seating area towards another opening, then check the route against panels, posts, furniture and planting. If the breeze changes direction, avoid relying on just one narrow gap. When considering the Bioclimatic Pergola listing, use the selected configuration to sketch the openings around the seats rather than inferring airflow from the product name or area. Compare the layout with chairs in use, not just tucked under the table. Mark any point where the route narrows or passes behind a screen, and consider whether moving furniture would leave a clearer passage. The arrow is a planning aid, not a prediction of exactly how air will move; it helps reveal obstructions worth checking on site.
Match screen openness to the privacy required
The screen’s openness affects both what it conceals and what it allows through. A solid surface blocks a direct view across the area it covers, but also restricts air and light there. Slats, mesh or perforations may let some air through while leaving gaps through which a person or movement can still be seen. The result depends on the pattern, viewing angle and distance, so a description such as “privacy screen” does not tell you how much privacy it will provide from a particular seat.
Decide what you need to hide: a clear view of faces, the whole seating area or only movement at a certain angle. Then assess a sample or mock-up from both the pergola and the outside viewpoint, at the height that matters. Look specifically for the view you want to obscure, rather than judging only whether the material looks attractive against the garden. For the regular Bloomcabin pergola model, ask which compatible side components could provide that coverage. Do not assume the pergola listing includes a screen. If a sample leaves the important view exposed, note whether the problem is its open pattern or its position; choosing a denser material and moving a screen are different changes, with different implications for the openings you want to retain.
Use furniture and planting as secondary screening
Before adding another screen, check whether the seating can be turned or moved to reduce the exposed view. A small change in chair direction may make a direct line less noticeable while preserving a broad opening for air. Furniture can also provide some visual cover at seated height, but it will not hide a view from an elevated window. Include the table, chairs and normal walking routes in the plan: a layout that only works when furniture is pushed aside may not be practical for everyday use.
Planting can soften a view or add a layer of screening, but dense foliage close to an opening may also restrict the air route you are trying to keep. Allow for how plants will fill out over time and how much space is needed to tend them. If considering the wall-mounted Bloomcabin model, map the nearby wall, door and approach before placing furniture or planting around the pergola. Show planting separately from permanent screens so that the plan makes clear which element provides each part of the privacy. Avoid judging the arrangement only with chairs empty: check that people can sit down, get up and move past the planting without shifting pots into the opening intended for air.
Review sightlines and airflow at different times
Privacy and airflow can feel different as conditions change, so do not evaluate the layout in a single quick visit. A breeze may be weaker, stronger or arrive from another direction at a different time. Observe the site when you expect to use the pergola and note which sides are open. If the setting changes by season, check it at more than one point in the year before treating one pattern as permanent. Also note when adjoining outdoor areas are in use, since people moving through them may change which views matter.
Sightlines can feel different as sun and shadows change too: a patterned screen may look more open from one angle or side than another. Walk to each relevant viewpoint and check the proposed coverage from both sides of the material. Do not assume that mesh or slats provide equal privacy in every light. If you mainly need screening during a particular part of the day, use that period as your main test, while keeping other conditions in view so the layout does not block a useful breeze at another time.

Confirm compatibility and access before choosing components
A screen that suits the plan still needs to be compatible with the exact pergola model and side configuration. Ask the supplier which side components are approved for that model, where they can be used and what the proposed setup includes. Check the actual dimensions and the openings that will remain, rather than relying on a photograph of a different installation. A third-party screen is not automatically compatible because it appears to have the right shape or fits the same general purpose.
Also check that screening will not obstruct doors, the main approach or access needed around the seating area. If a component is to be fixed to the pergola, ask the supplier or a qualified installer to confirm that its attachment is intended for the specific model and location; do not improvise a fixing. The Wall-Mounted Pergola model page identifies the product, but does not by itself establish which accessories are included in your proposed setup. Have the quotation identify the screened sides and the components allowed for on each one. Compare that arrangement with your plan so that a discussion about privacy results in a clearly described configuration, rather than an assumption that every side shown in an illustration is included.
Test the proposed screen position on site
Before settling on a screen position, test it at full scale using movable chairs and a simple visual marker. A helper can hold a piece of cardboard at the proposed position while you sit where the seating will be; another person can check from the outside viewpoint. Use the marker to represent a particular part of the proposed screen, and keep track of its edges rather than treating a small piece as full coverage. Compare the original position with one alternative at a time. This makes it easier to see whether moving the screen, extending its coverage or shifting a chair addresses the exposed view. A mock-up helps assess sightlines, but it does not prove that a permanent component will fit or perform as expected.
Use the confirmed footprint for the selected model, rather than estimating from a product photograph. If you are considering the Bioclimatic Pergola product page, transfer the dimensions of your chosen option to the test layout. Keep the furniture in the same positions when comparing screen arrangements, unless moving it is the change you are testing. For each arrangement, note the view that is covered, the openings left around the seating and whether the entrance remains clear. Keep the sightline result separate from the airflow observation: a visual marker cannot establish how the finished screen will affect a breeze. If the preferred layout only feels private when every side is closed, revisit the seating or screen position before accepting that trade-off.
Frequently asked questions
Will an open pergola roof keep the seating breezy if the sides are screened?
Not necessarily. An open roof and a clear route through the seating area are different things. A side panel can interrupt a breeze before it reaches chair height, while nearby walls or planting may redirect the air. Check the side openings and observe conditions where people sit rather than relying on the roof alone.
How many sides of a pergola should I screen?
There is no universal number. Start with the views that expose the seating and the directions from which useful breezes arrive. Screen only where needed, then preserve openings that allow air to reach and pass the occupied area. The right balance depends on the site and the way the pergola is used.
Can a privacy screen block views and still let air through?
Some screen designs allow air through their gaps, but those openings may also leave partial views. A more solid surface can block a direct view across its covered area while restricting air there. Check the actual screen from both sides and at the relevant seating height; labels alone do not show how private or breezy it will feel.
Should a screen sit beside the seating or along the edge of the pergola?
Place it where it interrupts the important sightline, then check how that position affects the route for air and the way people enter. A screen along an entire edge may cover more than necessary. A plan or simple on-site mock-up can help you compare positions before settling on one.
How can I check whether a screen is compatible with my pergola?
Ask the supplier to confirm that the proposed side component is approved for the exact model and configuration. Check which side it can be used on and whether it is included in the quoted setup. Do not assume a screen shown elsewhere, or one that looks similar, will fit your pergola.
A comfortable layout does not have to screen every side. Identify the views that expose the seating, preserve a route for air through the occupied area, and check both at the times the pergola is usually used. If privacy and airflow conflict at one angle, try changing the chair or screen position before adding more coverage. A deliberate opening can keep the space feeling open while the targeted screen provides the privacy the seating needs.
