
Why Rain Splashes Onto Seating Beneath a Pergola
Pergola planning guide
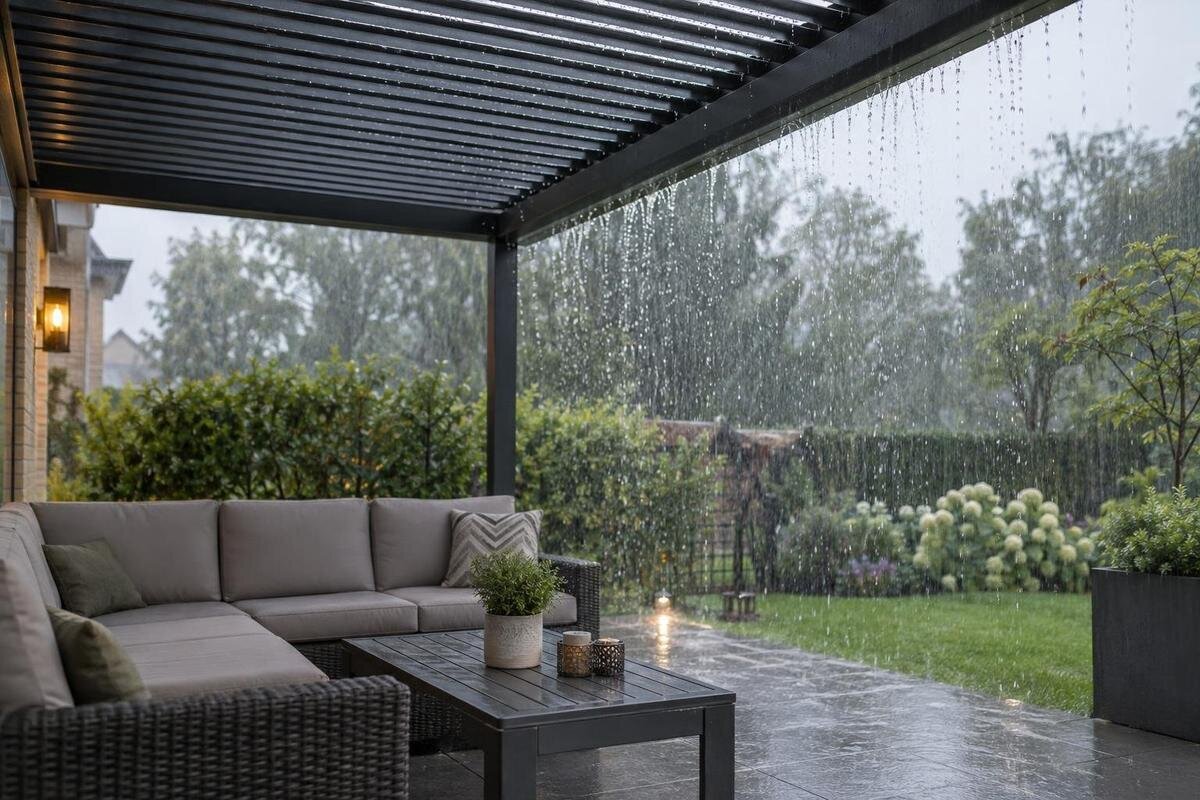
When rain reaches a patio, the roof is only one part of the wetting pattern. Drops that strike paving, a step or exposed soil around a pergola can rebound into the seating area; surface water can also run across the floor and carry spray with it. That is why cushions may get wet even when the roof appears to be doing its job. The useful response is to trace the water at ground level, then adjust the exposed surface, runoff route, furniture position or a suitable side element to match what actually happens.

How rain splashes back from the ground
Rain splashback is water that reaches furniture after droplets hit the ground first. A raindrop striking paving breaks into smaller droplets; some can rebound above the surface. Hard, continuous areas such as paving or a step can produce visible spray, especially where rain falls steadily on the same patch. Exposed or disturbed soil can also splash, while planted ground behaves differently according to its cover and condition. There is no single splash distance for every patio: drop size, wind, surface, impact angle, and the height and position of furniture all affect where droplets travel. Chair legs and the lower edge of cushions may show marks even if a tabletop stays dry. The same chair may remain dry in one shower and become speckled in another if the wind shifts the impact zone. Treat wet marks as evidence of a path, not a fixed radius.
When rain falls outside the covered footprint, an open side leaves that ground exposed. Wind may carry rain farther beneath the roof, where drops land and rebound towards seats. A second route is sheet flow or small streams from adjoining paving, a step, a planter, or higher garden ground; moving water can strike an edge or obstacle and throw droplets sideways. These routes often overlap. A roof can reduce direct exposure from above only within its design limits, but it does not stop water already on the patio from running towards chairs. Keeping the diagnosis at ground level helps avoid the assumption that every wet cushion points to a roof fault.
Tracing the source during rainfall
Choose a time when the patio is wet but conditions are safe to observe; there is no need to stand in exposed or slippery conditions. From a sheltered position, note where drops first hit, which direction surface water moves, and where the first puddles or splash marks form. Look for a route from an outside edge, step, planter or low spot towards the furniture. Afterwards, compare damp marks on paving with wet chair legs, seat fronts and cushions. Photos taken soon after a shower can help distinguish the original wet zone from water spread by people walking through it. Record the wind direction and time so later observations can be compared.
Use the pattern as a clue rather than a diagnosis by itself. A spray of small marks low on one side of a chair is consistent with a ground-level source; water appearing on a seat directly beneath one point may instead have arrived from above. Wetness concentrated near an open edge can point to wind-driven rain, while a damp trail across the paving suggests runoff. If both patterns appear, note each separately rather than trying to solve them with one change. Note whether the wet patch starts at a paving joint or where flowing water meets an edge; those details can help distinguish rebound from runoff. This guide concerns water rebounding from or moving across the ground. If the main issue is drops falling from the pergola roof, check the exact model’s weather information and roof behaviour separately.
Paving levels and surface falls
Start with the direction the paved surface sends water. A patio may look level in dry weather but still have a fall towards the pergola, a chair cluster or an edge where water collects. During rain, watch whether water drains away from the seating area or travels towards it; note depressions, raised thresholds and changes in level that interrupt its path. Even a shallow flow can feed a splash if it meets a step, border, furniture foot or rough joint. A puddle is useful evidence, but its absence does not rule out a fast, thin run of water. Look at the full route, from where drops land to where water finally leaves the area, including the boundary between paving and planted ground. Check whether it reaches an outlet, runs into a bed or remains trapped against a raised border.
Map that wet route against the actual covered footprint and intended seating footprint, rather than assuming the roof outline marks a dry boundary. The Bloomcabin Pergola page lists sizes from 9 to 24 m²; compare a chosen covered area with paving that still receives rain. The listed area does not describe the fall of your patio or a guaranteed splash-free perimeter. If surface water is directed towards a structure, doorway or neighbouring area, have a suitably qualified drainage or paving professional assess a proposed change. Do not improvise a new channel that simply moves the problem elsewhere.
Surface texture and joints change the spray pattern
Surface material matters, but there is no simple rule that one patio finish will stay dry. Smooth, hard paving can let water travel readily and may rebound droplets; irregular surfaces can interrupt flow but create pockets where water sits. Joints and paver edges can channel a narrow stream, while a change from one surface to another can concentrate it. Bare soil can splash when rain hits it directly; ground cover may change the pattern, depending on its condition. Inspect the surface when wet rather than choosing a remedy from the material name alone. Look for worn joints, settled pavers, soil wash or a distinct line of spray. Broad wetting and isolated marks at one joint suggest different routes. Observing the surface in rain can tell you more about splash behaviour than looking at a dry sample.
When comparing the Bloomcabin Bioclimatic Pergola with your patio layout, mark the proposed footprint on a plan of the existing surfaces. Note any joints, surface changes or garden edges beside the seats, including those outside the covered area. This separates the choice of roof from the question of how water moves across the floor. If resurfacing is being considered, discuss those wet-weather observations with a paving professional. Pay particular attention to where a new finish would meet a wall, threshold or existing drain, rather than selecting a material on appearance alone.

Runoff from nearby paving and garden ground
The splash may start beyond the pergola’s footprint. A higher patio, path, step, sloping lawn or garden bed can send water towards the seating; a narrow edge may turn that flow along the side and into the covered area. Check after rain where the flow first meets the structure, not only where a puddle remains. Soil carried onto paving can alter its surface and obstruct joints, leaving water to spread in a new direction over time. Repeat the check after clearing leaves or loose soil, since debris can alter the visible route. A damp strip beside a post does not by itself prove water is entering from above; an outside flow may reach the same point at ground level. Mark the higher side of the route too: clearing a blockage below the seats may not stop water arriving from uphill.
If your layout is beside a building, include the ground along that wall in the survey. Use the Bloomcabin Wall-Mounted Pergola page to identify the model being considered, then compare its intended position with the runoff route. Note where paving meets the building and whether water crosses the patio or collects at a threshold. A wall-mounted arrangement should not be assumed to seal the sides or redirect rain away from seats. Include these junctions in any discussion of changes to surface levels or drainage, so the assessment covers the building edge as well as the open garden side.
Positioning seats outside the wet path
Arrange seating around the observed splash zone, not around the pergola posts alone. A chair just inside the roof line may still sit beside paving that receives wind-driven rain; a seat near an exposed edge can also lie in the path of water crossing the floor. Shift furniture away from wet marks, and move a table or planter only if it does not obstruct access or redirect flowing water towards the seats. Leave room to pull chairs out without dragging them through puddles. Test a flexible layout with movable furniture before fixing a permanent arrangement. Consider the whole occupied zone: people need a clear route to sit, stand and pass, and cushions often extend beyond the chair frame. When the area is not in use, keep cushions and light items out of the wet zone you have observed.
When comparing layout options for the regular pergola model, mark the seats and their surrounding access space, not just the table or overall floor area. Compare the position of each chair with the wet edge, including the space it occupies when pulled out. A layout that fits between the posts may still place the front of a cushion or the route to a seat in the splash zone. Keep the furniture arrangement adjustable until you have checked these positions in use. This helps distinguish a problem affecting one seat from a wet route that crosses the whole seating area.
Side screens and the direction of incoming rain
A side screen or other compatible enclosure can intercept rain arriving from a particular direction, potentially reducing direct wetting and the drops that would otherwise hit the ground near seating. Its usefulness depends on where rain enters, how the sides are configured and whether wind carries water around an edge. A panel will not by itself stop rain that has already landed on exposed paving or water flowing across the floor. It may also change where wind-driven water falls, so check the strip along its base as well as the furniture. Assess a trial arrangement in the wind direction that brings the troublesome rain, not only in still conditions. Treat screening as a response to an observed route, not a universal fix for every wet seat.
Before choosing side elements, verify which arrangements are offered and what weather limits apply to the exact model. The bioclimatic pergola model page identifies the model, but its name does not establish whether a particular screen is available or how much rain it excludes. Ask for the model-specific enclosure configuration and associated weather information, including limits at open edges. If one side needs to remain accessible, weigh that practical need against splash exposure. A closed side is not automatically the answer when water starts at the paving or arrives from another direction.
When the surrounding ground needs attention
The extent of the wet area helps determine whether moving furniture is enough or whether the ground needs attention. An isolated splash zone beside one chair calls for a different response from runoff crossing the whole seating area. If rain consistently runs from a higher path, across a low section and towards the seats, the lasting solution may involve correcting levels, adding a suitable drain or changing where runoff is received. Each option affects the wider paved area: a new fall can direct water towards a doorway, wall, planting bed or another part of the patio. Avoid covering a wet patch with a surface layer that hides the water’s route rather than addressing it. The choice depends on the site, not a standard slope value.
For a layout using the wall-mounted pergola, include the building edge in the proposed drainage plan. Have a paving or drainage professional review any regrading, channels or drainage connection, and explain how the new flow will behave around the structure and surrounding ground. The plan should show a clear route from the collection point to its intended outlet, rather than simply state that water will be moved away. Check where that route passes in relation to seats, access paths and thresholds. If the source is runoff from elsewhere, include that incoming flow in the assessment; a local drain beside a chair may not address the source.

Model-specific weather limits and drawings
Model-specific weather information helps distinguish water managed by the pergola from water moving across the patio. Check the stated weather limits and permitted enclosure configuration, then look for drawings showing how rain is managed in that arrangement. If documentation reports a test or controlled observation, note the configuration and conditions it describes. A drainage diagram can help identify the intended route for roof water, but it does not establish the fall of your patio unless the site is included. Keep the two routes separate on your sketch so a roof detail is not mistaken for a solution to surface runoff.
For the bioclimatic pergola listing, check that the supporting information applies to the roof and side configuration you are considering. A drawing for one side treatment may not describe another, particularly at an open edge where rain can reach the paving. If the material uses a broad term such as rain-resistant, ask what conditions and arrangement that description covers. Focus any supplier questions on the gap between the drawing and your planned layout: which sides remain open, where rain may reach the ground and which limits apply. This makes the information useful without treating it as a site-specific drainage assessment.
Testing the planned seating layout
Where possible, mock up the intended arrangement with movable chairs and a table, then observe it during ordinary rainfall from a safe place. Mark the spots that get hit directly, the areas where spray rebounds and the lines water follows across the patio. Repeat if the wind shifts; one shower may expose a side that another leaves dry. Check the route after the rain stops too, because puddles and sediment can reveal low areas that were hard to see while drops were falling. A simple site sketch can show the pergola outline, furniture positions, wet patches, changes in level and nearby beds. Avoid treating one unusually light or windless shower as a complete test, and note whether wet marks could have been made by people walking through the area.
Place the sketch alongside the regular Bloomcabin pergola listing when comparing options. The listed range of 9 to 24 m² provides an initial area comparison; use the drawings for the exact option to relate the footprint to your furniture positions. Include the ground left exposed around the structure, rather than comparing the covered area with the table alone. The practical question is whether the arrangement leaves usable seating and access space outside the observed wet path. If that path cuts through the proposed layout, distinguish between a furniture adjustment and ground work before settling on the arrangement.
Frequently asked questions
Why do chairs get wet beneath a covered pergola?
Rain can reach paving or soil near the seating and rebound upwards. Surface water may also run in from a path, step or higher part of the garden. Wet furniture does not automatically mean that water is coming through the roof.
Will a larger pergola roof prevent splashback?
Not necessarily. More covered area may reduce direct exposure from above, but it does not control water already moving across the surrounding ground. Check where the wet path begins and compare it with the planned seating area.
Can a side screen stop rain splashing onto seats?
A compatible screen may intercept rain arriving from a particular direction, but it will not solve every ground-level source. Check the exact model’s available enclosure configuration, and look for water collecting or changing direction along the screen’s base.
How far should seating be from the pergola’s edge?
There is no universal distance. The wet area depends on the paving, wind, rain and nearby surfaces. Observe the splash zone, then test a movable seating layout before settling on a permanent position.
Should I regrade the patio to stop splashback?
That may help if rain repeatedly runs towards the seating, but changing levels can redirect water elsewhere. Ask a suitably qualified paving or drainage professional to assess the whole route before making a permanent alteration.
Rain splashback is a ground-level planning issue, even when a pergola roof is part of the picture. Identify whether droplets are rebounding, runoff is arriving from outside or rain is entering at an exposed edge; each leaves a different pattern. Use those observations to position seats beyond the wet zone and decide whether a surface change or compatible side screen addresses the actual route. A plan based on where water travels is more useful than relying on the roof footprint alone.
