
Low Evening Sun: Which Pergola Side Needs Screening?
Pergola planning
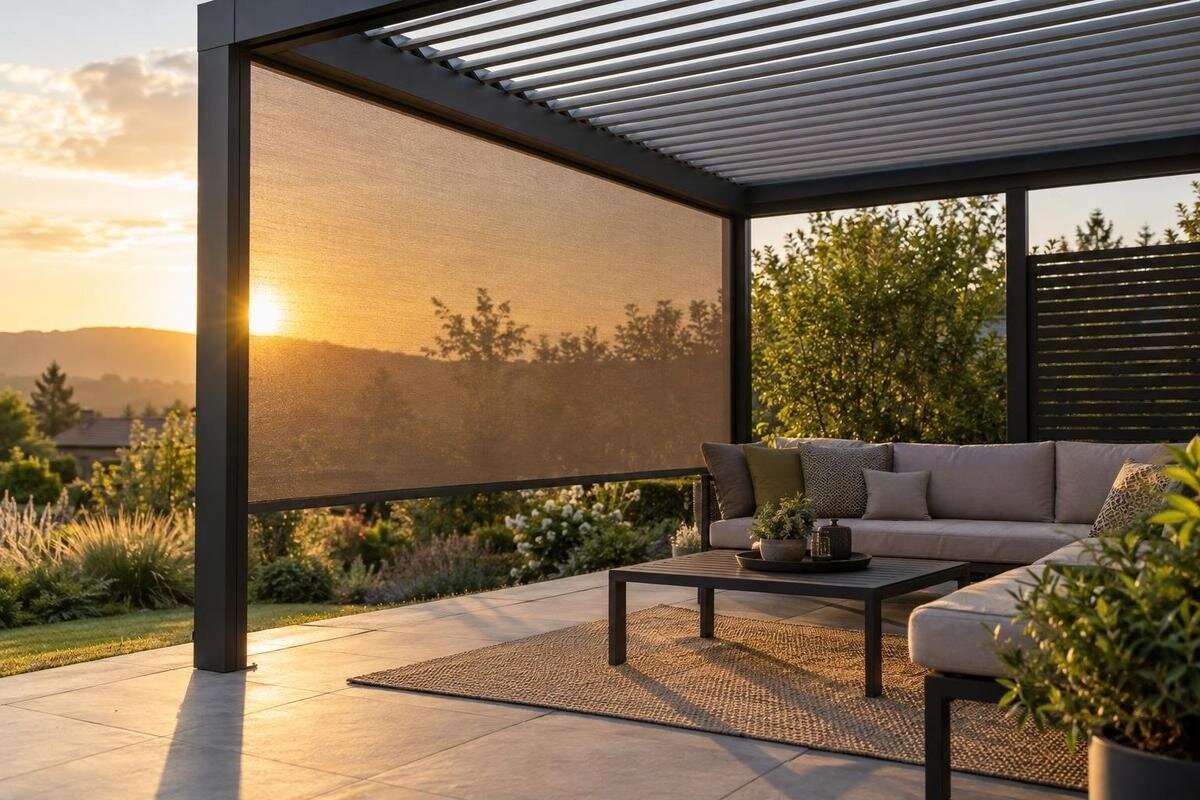
An overhead pergola can shade a midday table and still leave the seats in glare when the sun drops towards the horizon. For an evening meal, the useful screen is usually on the open side from which the last direct rays enter—not automatically the side facing the house or the longest edge. Trace the light at the time you use the space.

01
Which side should be screened first?
Begin with the bearing of the incoming sun during the hours you actually use the pergola. If the beam comes from the west, or from a nearby north-western or south-western angle, inspect the open boundary facing that direction first. Low rays travel almost horizontally beneath the roof, so an overhead canopy that shades the table at midday may not intercept them. The relevant side is where the sun enters, not where the beam finally lands on paving, the table or a wall. On an angled approach, the ray may meet one face before slipping around a corner. If the pergola sits diagonally to the house, use its actual openings rather than assigning a compass direction to the longest edge.
Treat west as a starting clue rather than a fixed answer. A house wall, boundary wall, tree or neighbouring building may already stop the light; an angled ray may enter through a corner instead. From the seat that gets the glare, use the shadows and surrounding features to identify the opening through which the light enters, without looking directly at the sun. Use Bloomcabin Pergola as a product reference when asking which approved side-screen arrangement, if any, suits the exact model and configuration. The product name alone does not establish accessory availability or fit. Mark the chosen edge on a plan so it is clear which side you are asking about.
Observe the light from your usual seats
Use an evening meal as your reference: the table is set before everyone sits down, and people remain there as the sun gets lower. Put the table and chairs where they normally sit and turn the chairs as people usually use them. Observe the light while setting the table, when everyone would be seated and towards the end of the meal. Note when the first direct beam becomes bothersome, which chair is affected and whether glare reaches faces, the tabletop or both. Keep these observations tied to the same meal rather than mixing unrelated times of day. Watch from the seating position and use shadows to judge the direction, rather than looking straight towards the sun.
Draw the pergola outline on a simple plan and mark the table, affected chairs, house wall and open edges. Add an arrow for the sun at each observation, with its date and time; the bearing can shift during the year. A photo taken from seated eye level can help you remember where the light entered, but camera exposure may make a bright area look different from what you saw. Include a fixed reference, such as a post or house corner, so you can compare pictures. When reviewing Bloomcabin Bioclimatic Pergola, use the sketch to ask about approved side options for the exact configuration; do not infer screen provision from the model name.
02
Identify where the sunlight enters
Separate the source of the beam from the surface it lights. A bright strip on the paving at the far side may begin at an opening on the near side and travel diagonally across the pergola. If you choose a screen by looking only at the bright patch, you may cover the wrong edge and leave the direct ray untouched. Using your observations from the affected chair, draw the light's path across the plan to identify the entry side. The plan shows which opening to examine, but not the height at which the light passes through it. Check that separately at seated eye level or tabletop height; a shadow on the paving alone may not show where sunlight reaches people.
Check whether the effect is direct or reflected. Pale paving, glass, a glossy table or water, if present, may brighten the seating area even after a direct beam has been blocked. Reflected light follows a different path, so a side screen may not remove every highlight. Note what the light hits first and whether an existing wall already interrupts the direct route. In a layout using Bloomcabin Wall-Mounted Pergola, include the wall and all remaining open sides in the sketch, then confirm approved placements for the exact setup. A glow that remains is not, by itself, proof that another full side needs covering.
Allow for the sun's changing angle
The sun's bearing changes with the date and the time of evening, so one observation can point to the wrong side for other parts of the year. A screen that catches rays arriving squarely at one face may leave a gap when the sun shifts towards the adjoining corner. Record the periods when the pergola is actually used; there is little value in designing solely for a time when no one is seated there. If the space is used across several seasons, compare observations from those periods rather than assuming sunset is due west. Keep the dates with your notes so you know which evenings the layout is intended to address.
Compare the arrows from your notes. If they all cross one opening, that face is a strong candidate. If a later arrow passes around the end of a proposed screen, consider whether a second face is genuinely needed or whether moving the affected seat would solve the problem with less coverage. On a sketch for the regular Bloomcabin pergola, distinguish the first entry point from the later one and label the corner between them. This makes it easier to explain whether you need coverage across one opening or around two adjoining sides. Keep the separate times visible rather than drawing a single broad arrow that conceals the change.

03
Decide what the screen needs to cover
Decide what needs relief before choosing how much of a side to cover. A beam may strike one chair at eye level while leaving other seats comfortable; in another layout it may wash across the whole table. Mark the usual positions of people, the table edge and any place where glare makes eating or conversation difficult. Check the seats used most often, not just the centre of the floor. Then compare those points with the incoming ray at different times. This helps distinguish a narrow, time-specific issue from a side that stays exposed throughout the meal.
Coverage that misses the ray by a small amount can be ineffective, especially when the angle changes or the light enters obliquely. Conversely, screening every opening may be more enclosure than the evening problem requires. Use the mapped beam to describe the side, the area and the time window you want to address. When enquiring about the bioclimatic Bloomcabin model, distinguish between shading the whole table and protecting particular seats: these are different coverage requirements. Ask what a compatible screen would cover in the proposed position, including its edges. If partial coverage is proposed, compare its outline with the earliest and latest rays you recorded, not just the beam at the middle of the meal.
Check the proposed screen position
A screen needs to sit across the path between the low sun and the occupied area. On your drawing, mark its proposed position and check whether the ray reaches the table or seat before it meets that line. A screen placed too far along the side, or ending short of the corner, can leave an angled route open. Its height and width also matter, so do not assume that any screen on the right side will block the beam. Use an elevation or side-on sketch as well as a plan if the ray passes close to the roof line or a seated person's eye line.
Compare the sketch with the actual frame: note where supports and side openings are, and whether a door, window or wall interrupts the intended position. Do not assume a generic screen can be fixed wherever the drawing suggests; attachment points and approved combinations must match the specific pergola. If you are considering the wall-mounted Bloomcabin model, check how its actual layout defines the open boundary and have the supplier or a qualified installer confirm a compatible screen position before ordering. A sketch helps the discussion; it is not an installation specification.
04
Views and airflow around the screened side
Consider what else changes when you screen the sun-facing side. Depending on its material and coverage, a screen can alter the garden view, the sense of openness and the way air moves through the seating area. If you rely on a breeze through the pergola, note where it usually comes from and whether the proposed screen would sit across that route. Ask about the relevant product details rather than assuming all screens are equally transparent or permeable. If the sun only causes a problem for part of the evening, also check whether the approved arrangement can be opened or moved out of the way afterwards.
Consider the arrangement both while the screen is in use and afterwards. A view you are happy to give up during a meal may matter more when you sit outside later, while another opening may remain useful throughout the evening. For Bloomcabin’s bioclimatic pergola, ask how the specific screen arrangement would operate, whether it can be partly opened and where it sits when not in use. These are questions about the proposed accessory, not features established by the pergola's name. Compare the answers with the view and airflow you want to retain so that solving a short period of glare does not create an unwanted permanent enclosure.
Confirm compatibility with the exact model
Confirm accessory compatibility against the exact pergola model and configuration before finalising the layout. A product page or model name identifies the pergola; it does not, on its own, confirm which screens are included, optional or approved. Review the Bloomcabin Pergola model and ask which side can accept a screen, whether the proposed arrangement covers one face or a corner, and what operating space it needs. If a particular screen material or finish matters, ask for the relevant product information rather than assuming it from a photograph.
Keep the answer with your plan, including the model, selected configuration and side you intend to cover. A screen may suit one arrangement and not another, so confirm fit for the actual selection rather than inferring it from a general illustration. If compatibility is not confirmed, treat the side layout as provisional. This avoids positioning the table, route or pergola around an accessory that later proves unsuitable. Including a sketch and photos of the proposed screen side can make a product enquiry more specific than a broad request for evening shade.

05
Check nearby features and everyday access
Look at fixed features around the pergola before adding screening. A house eave, balcony, mature tree, wall or neighbouring structure may already shade the seat for part of the evening. Record whether that obstruction is permanent or seasonal; foliage and movable items can produce different results over time. Note windows and doors that open onto the terrace, steps, the garden gate and any route used to carry food or move chairs. The proposed screen line should not conflict with ordinary access or depend on an obstruction that may not always provide shade.
View the proposed side from outside as well as from the chair. A screen can block a favourite outlook while leaving a separate sightline from a neighbour unchanged. If privacy matters, draw that sightline separately from the sun arrows and decide which one matters most during the hours you use the space. Where the proposed arrangement involves attachment near a building or changes to an existing structure, have the configuration and installation method checked by a suitably qualified professional. A shade sketch is useful for planning, but it is not an installation approval.
Check the layout during an evening meal
Before settling on the layout, use the pergola for the meal you planned around. Pay attention to what happens beyond the first moment of glare: someone pulls a chair back, turns to speak or moves to another seat. Note whether these ordinary changes put people back in the beam despite the proposed coverage. Check the screen line on your drawing against the occupied chairs, not just their tucked-in positions. Include anyone seated at the end of the table, where the light may enter at a different angle. This final check is about whether the proposed shaded area suits the meal, rather than simply whether it contains the furniture.
Keep a short decision record showing the entry side, affected seats, relevant time window and any later corner entry. Beside it, record what you chose to leave open and why: a clear route to the kitchen, a garden view or an opening that lets a breeze through. Compare the finished layout with the compatible accessory options for the exact pergola. If one screened face addresses the observed rays, there is no need to add another merely for symmetry. If two sides are needed, identify the separate period or seat each one protects. That gives every proposed screen a specific purpose and makes the final choice easier to explain.
Frequently asked questions
Is the west side always the right side to screen?
No. West is a useful place to begin when checking late sun, but the sun's position changes with the date, and the relevant opening depends on your pergola's layout. Observe the light from the seats you use. Screen the opening the rays cross before reaching those seats, which may be at an angle or near a corner.
Can the pergola roof block low evening sun on its own?
It may shade the area at some times, but a low beam can travel beneath the roof and enter through an open side. Check the table and seats at the hours you use them; overhead shade and side screening address different paths of sunlight.
What if the sun reaches the seating area around a corner?
Record the direction at the start and later in the evening. If the later ray passes around the end of a screen, check whether an adjoining side needs coverage too. Confirm that the proposed combination is compatible with your exact pergola configuration before deciding.
Do I need to screen the whole side?
Only if your observations show that the whole side needs coverage. Check which part of the opening the sun crosses and ask what coverage an approved screen provides. A partial solution is useful only if it intercepts the rays that reach the places you want shaded.
Are side screens included with every pergola model?
Do not assume they are. The product names identify pergola models, but they do not establish whether a screen is included, optional or compatible. Confirm the details for the exact model and configuration before placing an order.
The side that needs screening is the one through which low sunlight reaches the seats you use during your evening meal. Identify that opening, then check whether the later angle exposes another seat or allows light around a corner. One screened face may be enough; additional coverage should address a separate, observed need. Keep the table layout, useful views and access routes in mind, and match the proposed coverage to compatible accessories for the chosen pergola. The result should suit the whole meal, not just the first few minutes of shade.
