
Shading a Pergola Seating Area Without Losing the Garden View
Pergola planning guide
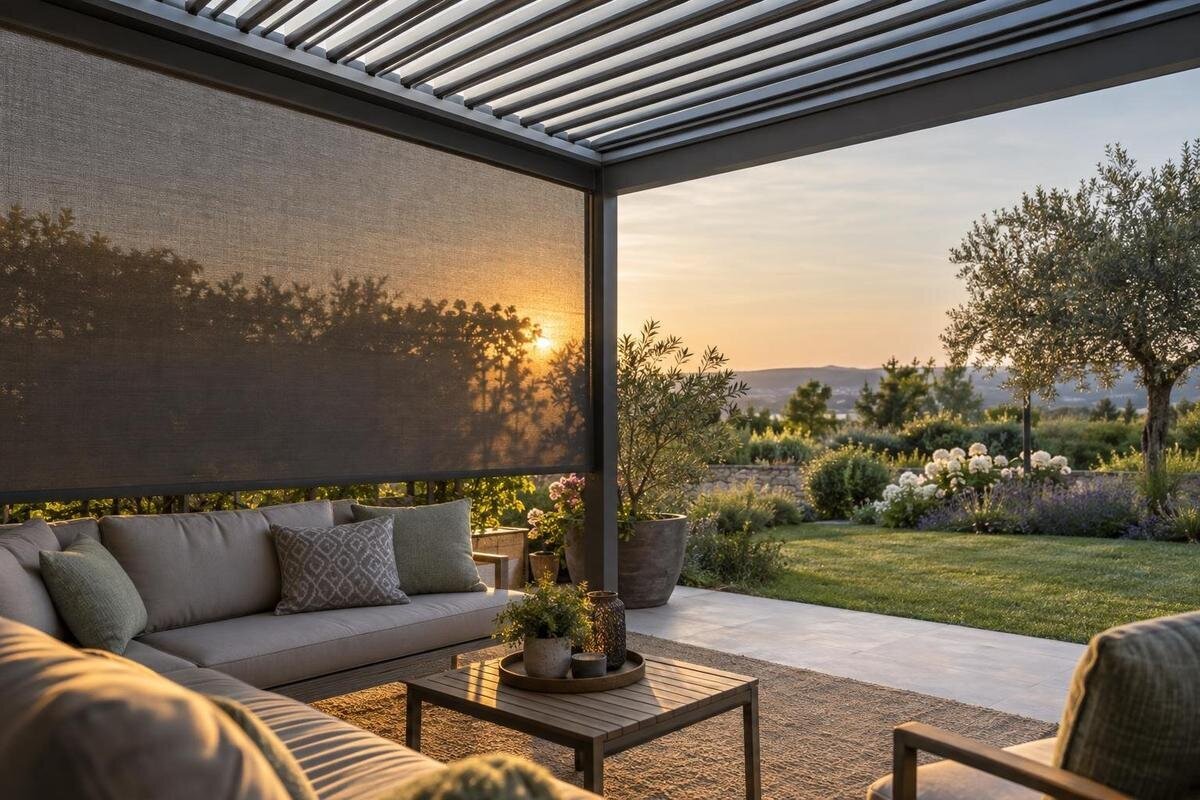
A pergola shade plan can improve comfort while keeping a favourite garden outlook, but it needs to be judged from the seat rather than from a standing position. A side screen that cuts low sun may also cross the exact line of sight you want to retain. Map the usual chair, the view target and the times when glare arrives. Then compare overhead shade with a carefully placed side treatment, checking each from seated eye height.

01
The view from the usual seat
Start with the view from the chair you use most, not a standing view across the patio. Sit in the usual position and choose a feature or opening you want to keep visible: a tree, a planting bed, a stretch of lawn or a gap beyond the boundary. Name that target on your sketch. “Garden view” is too broad to guide screen placement; a specific target shows which part of the outlook must stay open. If you value the garden’s breadth rather than one feature, mark the left and right edges of that view as they appear from the seat, as well as a central point.
Record the chair’s position, facing direction and whether you normally sit upright or recline. If the space serves meals and lounging, mark both arrangements; their seated eye heights and angles can differ enough for a screen to suit one and interrupt the other. Rank the outlooks as essential, useful or optional. This makes a partial compromise easier to judge: perhaps the main axis stays clear while a secondary corner is shaded. Note where people turn or move chairs in ordinary use, so the plan reflects the way the space is used rather than a carefully posed photograph. If the preferred outlook only works with chairs facing one way, record that orientation.
Seated eye height and garden sightlines
Measure from the actual seat. Sit as you normally would, with cushions in place, and note the height of your eyes above the finished patio, paving or deck surface. This includes both chair height and posture; using a generic standing eye level can put a screen edge in the wrong place. On a side-view sketch, mark that eye height and draw a line towards the chosen garden target. In plan view, record the seat’s position and direction. Together, the drawings show where a proposed side screen would cross the view, while the surface reference lets you compare the sketch with a future layout drawing.
Repeat this for each seat that matters, especially if a dining chair, bench and lounge chair will all be used. Eye height is not fixed for every posture, so note a natural upright position and any regular recline rather than trying to cover every possible movement. If different people use the same seat, record the range of usual positions. When enquiring about Bloomcabin Wall-Mounted Pergola, include the labelled plan and identify the primary seat. Keep each eye-height measurement beside its corresponding chair position, so the person reading the drawing can distinguish a low lounge-chair view from an upright dining-chair view.
02
When and where low sun reaches the seating
Observe direct sun at the hours when the pergola will be used. Note the date and time, where the sun is relative to the seating, whether it reaches the chair or table and what it does to the view: a bright patch may cause discomfort even when the table remains shaded. Check more than one point in the day, and repeat at another time of year if the area must work year-round. One observation is a snapshot, not a full record of the changing sun path. If cloud cover interrupts the check, distinguish those observations from the shadows recorded in direct sunlight.
On a simple site plan, add an arrow showing the direction from which the troublesome rays reach the seat, with fixed references such as the house wall, fence or a large tree. This avoids relying on a broad rule like “the afternoon side” when nearby buildings and the way the chairs face change actual exposure. Mark periods when glare is minor as well as severe; those notes help set a proportionate shade area instead of closing a whole side for a short, specific problem. Also record whether rays reach the eyes directly or mainly brighten the tabletop: these are different shade requirements.
Overhead shade and low-angle glare
Shade from above and shade at the side solve different parts of the problem. When the sun is high, a roof may cast shade over the seating, depending on its design and position. When sunlight arrives at a low angle, it can pass beneath an open side and reach a face, table or view even when the space above is shaded. A vertical screen can intercept that path, but its height, width and position also determine how much garden it covers from the seat. Treat the roof and side as separate parts of one plan; neither is a universal answer to every sun angle.
Draw the chair and table first, then mark the area that needs shade at the problem time. Compare that footprint with the arrow on your sun sketch: screening the side from which rays arrive may help, while screening the opposite edge may do little. The direction can change through the day, so note which time matters most instead of covering every side by default. For Bloomcabin Pergola, use the recorded sun direction when asking about the exact configuration; do not assume that overhead shade alone will address low-angle glare. Keep the target view line on the same drawing, and distinguish shade for a face from shade for a tabletop.

03
Screen height and width against the view
Use a side elevation to test the screen’s upper and lower edges against the line from your eyes to the garden target. If the proposed panel cuts through that line, it will interrupt the chosen view; if it stops short, the garden may stay visible but the same opening may admit the sun you are trying to reduce. There is no universally correct screen height: its position depends on the seat, ray direction and view you value. A narrower panel can protect one seat without creating a continuous visual barrier, but it may leave another chair exposed.
Test width as well as height. A panel covering the full side may shade more seats, but it can also conceal the breadth of the garden. On the sketch, mark the screen’s position, its endpoints and every priority sightline it crosses. Note whether the key view lies directly ahead or to one side, since a panel beside the main outlook can still interrupt the wider garden view. If considering side treatments for the wall-mounted Bloomcabin model, ask for an outline of the proposed accessory in its intended position. Compare both ends of the panel with the edges of the view you marked, rather than checking only the central target.
Sightlines from every regular seat
A plan that works for one chair can fail when people sit around a dining table or turn their seats towards one another. Draw the regular chair positions, not every temporary arrangement, and add an arrow from each important seat to the view it should retain. Use a solid line for the view that must stay clear and a dashed line for secondary outlooks. This exposes crossing sightlines: a screen outside the main seat’s view may stand in front of the person opposite. Decide whether the goal is one protected outlook or a central garden view that remains open from several seats.
Include table edges and the space needed to pull chairs back. A person sitting upright, leaning back or speaking across the table may look in a different direction, so assess normal positions rather than assuming everyone faces straight out. For a long table, mark both ends and any seats directly facing the sun; the screen width needed for one end may not protect the other. If all seats cannot keep the same view, state which one has priority and what trade-off is acceptable. When comparing Bloomcabin’s Pergola model, send this labelled plan with the shade direction; a request for “a screen that does not block the view” is too vague unless the view and relevant seats are identified.
04
Visual openness and shade are separate tests
Visual openness is not the same as a completely unobstructed view. A solid panel closes the outlook where it crosses it; a more open material may still soften detail, add a visible pattern or alter contrast against foliage. The result depends on the screen, the distance from the chair, light behind it and the detail you want to see. Shade and clarity can pull in opposite directions: denser coverage may reduce more direct light but also conceal more, while an open weave may leave some glare. Do not assume that a material described as see-through will disappear from a seated viewpoint.
Where possible, look at the actual material sample outdoors at the height and distance planned, rather than judging a close-up photograph. Compare it with the sun behind the screen and with light falling across it, then check the garden detail you care about. For Bloomcabin Bioclimatic Pergola, ask what sample or drawing is available for the proposed side treatment. Assess the material being offered rather than inferring its appearance from the pergola’s model name. If clear detail of one feature matters, assess that target specifically; if the breadth of the garden matters, judge the full width of the view.
A full-scale test of the screen position
Before finalising, recreate the proposed screen plane at full scale if the site allows. Sit in each regular chair and have someone hold a lightweight outline or strings at the planned top, bottom and side edges, without fixing anything to the pergola. A reduced drawing can hide perspective: a narrow-looking band on paper may cross much of the seated view when placed at the correct distance. Check the target through, above and around the proposed outline, and note precisely which part of the garden is lost. Compare a partial-width option with a wider one if both are being considered.
Run the check at the time glare occurs, then again in ordinary daylight, with the chair in its normal position. A cardboard outline is useful for testing obstruction but does not reproduce a real screen’s light transmission or shade; test an actual sample separately if one is available. If using a Bloomcabin wall-mounted pergola, base the mock-up on the position and dimensions confirmed for the exact model. Keep the outline at that distance from the chair throughout the comparison, rather than moving it closer for convenience. A photograph from the same seated position can help compare alternatives, but judge the result from the chair itself.

05
Access routes and views beyond the main seat
Check the plan from more than the main chair. Walk the route between house, seating and garden; confirm the proposed screen will not sit across a doorway, gate or regular path, and view the garden from each approach. A treatment that leaves one favourite axis clear can still make the garden feel closed from the kitchen door or far side of the patio. If the pergola is near a window, check the outlook through that opening from indoors as well. The indoor and outdoor sightlines are different, so a screen that works for a seated person may still cross a view from inside.
Draw doors, steps, gates, planting beds and frequently used routes on the same plan as the shade boundary. Note where a screen might cast shade beyond the seating and whether that changes an area used for something else. A broad side treatment can also affect how air moves through the space, so visual screening and shade should not be assessed in isolation. When considering the regular Bloomcabin pergola, include these routes and viewpoints in your model enquiry; a gallery image cannot show their relationship to your site. This wider check may reveal that a shorter screen or a different seating angle preserves more of the garden.
Pergola model and side-accessory compatibility
Turn the sketches into a concise buyer brief: exact pergola model, intended seat positions, the garden target to preserve, times of glare and the side or roof area being considered for shade. Ask the supplier to confirm, for the exact model and configuration, which side accessories are approved, whether they are included or optional, and where their edges sit on a drawing. A third-party shade cloth or screen should not be treated as part of the pergola package or assumed compatible simply because it appears to fit. Make clear if the view must remain open when shade is not required.
Request a drawing of the proposed arrangement with the screen’s actual position, then check its upper and lower edges against your seated sightline. Confirm any opening or adjustment you expect to use and whether it changes the garden view when shade is not needed. For the Bioclimatic Pergola from Bloomcabin, identify the exact model in the enquiry; the label alone does not verify compatible side treatments. Keep the final drawing with your order details so the configuration discussed is the one supplied. Where attachment or support requirements are involved, have a qualified professional verify site suitability rather than relying on a sketch or product photograph.
Frequently asked questions
Can a side screen block low sun and keep the garden visible?
Sometimes. The result depends on the direction of the sun, the seated sightline and the screen’s position. A partial panel may intercept rays from one angle while leaving a priority view open, but it could leave other seats exposed. Plot both the sun direction and view line, then test the proposed position from the chair.
Should I use standing eye height to plan a pergola screen?
No. Measure from the seat you normally use: standing eye height changes the view and can make a screen seem less intrusive than it will be when you are seated. Check other regular seats or postures too if the area has several uses.
Will overhead shade stop late-afternoon glare?
Not necessarily. A roof may shade the seating from above, while low-angle rays can enter through an open side. Note when and from which direction glare arrives, then assess whether overhead shade, a side treatment or a combination is appropriate for the site.
Are side screens included with a pergola?
Do not assume they are included or that a third-party screen is supported. Check the current package information for the exact model and ask whether the proposed accessory is compatible or supplied separately. Request its planned position so you can assess the view as well.
How can I test a sightline before choosing a screen?
Put the usual chair in place, mark the garden target and eye line, then recreate the proposed screen edges at full scale with a temporary outline held independently. Check at the time of glare and in ordinary daylight. An outline shows obstruction, but not how the actual material transmits light.
A balanced layout brings the seat, sun direction and garden view onto the same plan. The shade should address the rays that matter, while the screen edge stays outside the priority sightline as far as the chosen configuration allows. Keep the preferred seat and view target explicit in the final drawing, and judge any compromise from that seat rather than from a standing position. That way, adding shade does not automatically mean giving up the garden outlook that makes the seating area worth using.
