
Designing an Outdoor Workout Area Beneath a Pergola
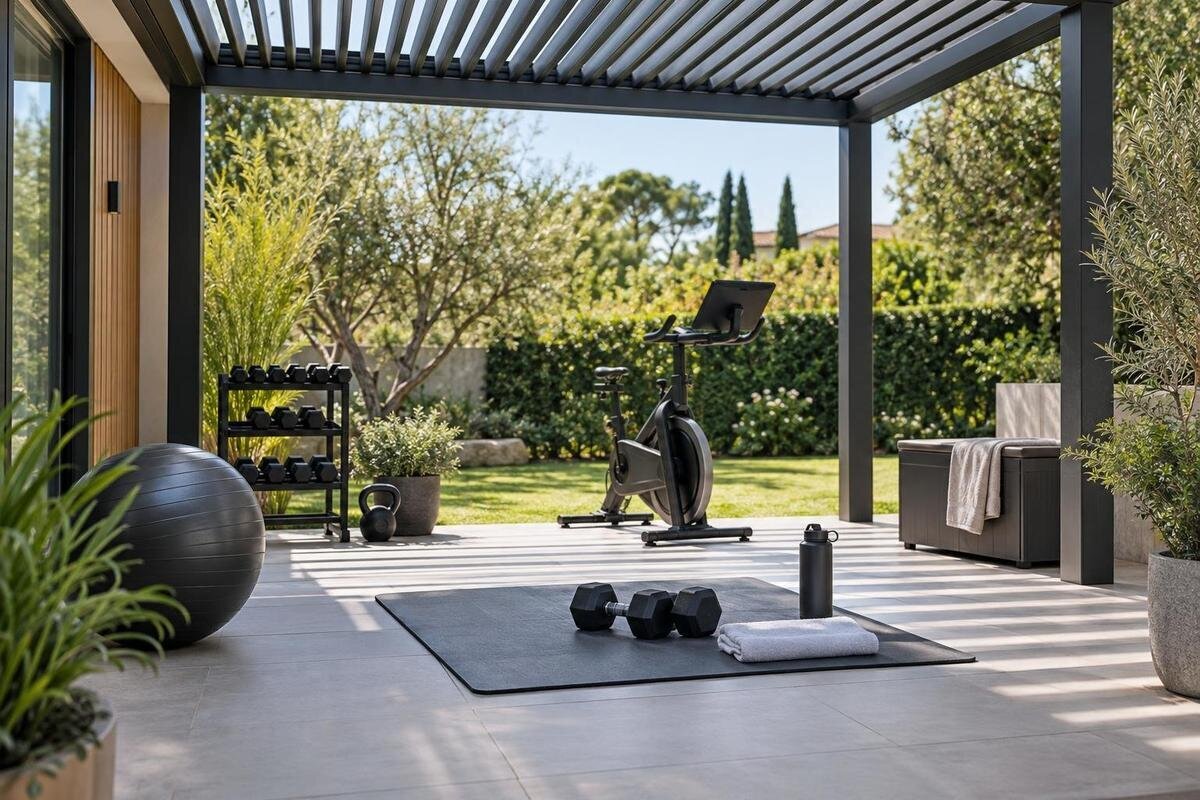
Pergola planning
An outdoor workout area beneath a pergola needs more than enough room for a mat or bench. The useful measurement is the whole zone occupied by each movement, plus access around equipment, floor grip under changing conditions and clear height below the structure. Open sides leave the space exposed to sun, wind and rain, so a shaded-looking spot is not automatically weather-protected. Plan around your actual routine and site measurements, treating any sketch as a concept rather than a construction drawing. Most importantly, do not hang straps, rings or other suspended equipment from the pergola unless a qualified professional has approved the exact structure and attachment.

List the activities and equipment first
Write down the activities you expect to do, who will use the area and what equipment must stay there. A mat, bench, pair of hand weights or skipping rope each occupies space differently, and the movement around it matters more than the object’s outline. Record both the working position and where each item will be stored. Separate portable equipment from anything fixed; note routines with side steps, wide arm reaches, changes between standing and floor work, or overhead movement. If two people may use the pergola together, draw two zones and the shared gap between them rather than simply doubling one person’s footprint. Include other patio uses that must continue, and note what can be moved between sessions.
Use that inventory before comparing structures. The listing for Bloomcabin Bioclimatic Pergola identifies a pergola model, but the model name does not establish that it suits a particular routine, supports an exercise attachment or provides the weather cover you need. Work out which parts of the ground must remain empty during use, then compare exact dimensions and stated configuration details with your measurements. Keep the manufacturer’s clearance guidance for each piece of equipment separate from the pergola’s area, and do not treat a product photograph as a scale plan.
Measure the full movement area
Measure each movement envelope separately. Begin with the equipment itself—a mat, bench or machine—then add the furthest step, arm sweep and change of position in the routine. Measure horizontally and vertically: clear floor can still be inadequate if an overhead reach meets a beam, light or other obstruction. Measure from the equipment’s position in use, not just its storage spot, and include room to get into position and set it down. If equipment has adjustable positions, map the most extended setup and the space needed to change it. No single clearance number covers every person, activity and item, so avoid choosing a pergola size from a generic square-metre rule.
Mark the maximum zone on the paving with removable chalk or tape where suitable, or outline it on a measured sketch if marking the surface is not appropriate. Trace the route through each planned movement, including any accessories at ground level; do not mark only the mat rectangle. The listing for Bloomcabin Pergola gives a range of 9 to 24 m², but an area figure alone cannot show how much space is free after supports or what headroom is available. Confirm dimensions and support positions for the exact option, then compare them with the measured zones. A layout mark is a planning aid, not an installation drawing.
Check the pergola footprint against the site
Measure the site before settling on a pergola size. On a simple plan, show the house wall, existing columns, paving edges, doors and their opening arcs, steps, drains, downpipes and planted areas. Record the boundary of the surface you can actually use, not just the whole terrace or garden; then plot the proposed pergola footprint and keep access to windows, services and outdoor taps. Include the movement zone and the clear route around the structure. If the surface has uneven levels or changes in material, mark those too, as they may affect where the activity area can sit.
An area number is useful for an initial comparison only: the same square metres can leave different usable shapes. When comparing the bioclimatic model listing with your site plan, consider where the structure would sit relative to paving edges, changes in level and existing features. A footprint that fits within the terrace boundary may still leave an awkward corner or interrupt access to a drain. Ask for confirmed plan dimensions, support positions, lowest clear height and installation requirements for the chosen configuration. Label your measured sketch as a concept, not a construction or structural drawing; an installer should confirm installation details.
Keep movement clear of doors and pathways
Movement space should not double as the main route through the garden. Draw the paths people use from the house, gate, washing line or storage, and show the full swing of doors and gates. Keep those routes out of the active zone where the site allows; a path crossing the workout area can cut across someone’s movement or leave equipment blocking access. Put weights and bottles away from the entry side, and make sure a door handle, outdoor tap or frequently used window remains reachable without stepping through the marked area. For a shared patio, include furniture in its usual position rather than drawing an empty terrace.
For a site alongside a house, the Bloomcabin Wall-Mounted Pergola is one wall-mounted configuration to compare. Plot the route from the house doorway to the workout area, including where someone would carry a mat, bench or weights. Check whether another person could still reach the garden while the equipment is in use. A clear doorway is not enough if the route beyond it crosses the exercise zone. Where the patio serves several purposes, show both the workout arrangement and the everyday furniture arrangement on your plan, so neither depends on blocking an entrance.

Choose a floor with dependable grip
Footing is a design requirement, not a finishing detail. Inspect the actual surface under the mat and equipment for loose paving, lifted edges, gaps, uneven joins and places where water or grit collects. Check how it feels under the footwear normally used, and how it behaves in dry and damp conditions; do not exercise on a surface that feels slippery. A mat can move or curl at the edges, so include the mat and the clear space around it in your assessment. Check the whole route into the exercise area as well as the spot directly beneath the main equipment.
Different activities place different demands on the floor. Floor-based work needs a flat, stable patch beneath the mat, while standing steps need predictable grip and no loose covering that bunches underfoot. Roughness alone is not a reliable test; the combination of surface, footwear, dust, leaves and moisture matters. If one corner stays damp or shaded, assess that patch rather than assuming a dry section represents the whole area. If you are changing the terrace finish, ask a flooring professional about outdoor suitability, drainage and upkeep, and test a sample in its intended position if one is available.
Plan for sun, rain and wind
An overhead structure changes how direct sun reaches the floor, but its shadow shifts through the day and open sides remain exposed. Check the proposed workout position at the times you expect to use it, then repeat at another season if year-round use matters. Note low-angle sun from the side, glare from pale walls or paving, and areas reached by wind-driven rain. Mark where water already reaches the floor and how the area dries. Do not assume that the word pergola or an attractive product image means full shade, rain cover or shelter from wind.
Before comparing configurations, name the exposure you need to manage: sun on the mat, rain reaching stored equipment and wind affecting comfort are different questions. The regular pergola listing is a catalogue reference, not proof of a particular cover level. Check the written information for the exact configuration and ask the supplier or installer what its stated limits mean at your site; do not infer them from the model name. Plan where equipment will go when not in use, following its care instructions. A pergola should not be treated as a dry storage area.
Get approval before hanging exercise equipment
Straps, rings, suspension trainers and punching bags are different from equipment that rests on the floor. The forces on a hanging item can change as a user moves or the equipment swings, so a beam that looks substantial—or a structure that carries its own roof—cannot be assumed suitable. Do not attach training equipment to a beam, post or roof member simply because a clamp or hook fits. Treat each proposed attachment as a structural question covering the exact pergola, attachment point, installation and equipment, rather than as a general yes-or-no about pergolas.
Obtain confirmation from the pergola manufacturer or a qualified structural professional for the exact installed configuration and proposed use before buying or attaching suspended equipment. Approval of the structure itself, or of a different fitting, is not approval for exercise use. Do not drill, clamp, tie or hang anything until that confirmation is clear. If approval is not available, choose equipment designed to stand independently and follow its manufacturer’s setup and clearance requirements; do not move the same attachment to a house wall, fence or tree without separate approval.
Keep storage outside the movement zone
Keep equipment out of the movement envelope without letting storage take over circulation space. Give mats, towels, weights and small accessories a defined location, with enough room to pick up and return each item without stepping through another marked zone. Include the lid or door swing and retrieval space of any cabinet or storage bench; its footprint alone understates how much room it needs in use. Keep storage clear of both the exercise area and the route through it. Items left on a paving edge, step or beside a doorway can become obstacles, so show their location on the plan before ordering the pergola.
Compare the storage plan with an exact configuration such as the listed bioclimatic model by checking confirmed outer dimensions and support positions; do not assume there is room for a cabinet or that an accessory is supplied or approved. Confirm in writing what is included or optional rather than building an assumption into the layout. Keep weather-sensitive items in a place suited to their own care instructions, and plan a route between storage and the workout zone. If the patio has another regular use, decide which furniture must move and where it will go.

Check headroom and wall-side access
Floor area alone does not account for headroom. Measure clear height to the lowest beam or fitting above the proposed zone, then compare it with the equipment and movement in your plan. A standing reach or lifted item may need more space than a mat-based session; check where temporary lights, fans, plant hangers or other overhead objects sit too. If an existing fitting or service crosses the space, include it on the sketch. Do not shift fittings or attach new items to the structure without the relevant professional’s approval.
At the house side, keep windows, gutters, downpipes, vents and maintenance access visible on the plan. The wall-mounted model listing gives a product category to compare, not confirmation that a particular wall, cladding or adjacent service is suitable. Ask the supplier and a qualified installer to confirm the exact projection, height, wall requirements and access clearances for the selected setup. If those details are uncertain, leave the workout zone away from the affected opening rather than assuming a plan view shows enough room.
Review a full-size concept before ordering
Before ordering, review the measured concept on site using full-size outlines. Draw the proposed structure and equipment zones on your sketch, then transfer the important outlines to the actual ground with removable markers where suitable. Label the drawing “concept only—not a construction or structural plan”. Show the movement envelope, storage, door swings, access routes, supports, floor transitions and headroom notes together; separate diagrams can hide conflicts when each is viewed alone. Draw equipment to scale rather than marking its position with a label alone. Review the layout at the time of day you intend to use the area, particularly where moving shade changes which part of the floor is exposed.
Compare that concept with one exact option, such as the regular pergola configuration, using the selected dimensions and configuration details rather than its overall area or model name. Check the proposed support positions against your ground markings, and note any changes needed to the equipment layout. If an item has to move, check its full movement area again rather than shifting only its outline on the sketch. Resolve any structural question before purchasing suspended equipment. The final plan should give every item a defined position, allow room for each planned movement and preserve normal access to the rest of the property.
Frequently asked questions
How much space do I need beneath a pergola for exercise?
There is no single size that suits every routine. Measure the equipment in use, the full area occupied by each movement and the space needed to get in and out. Mark those zones on the ground, then check them against the clear floor area, supports and access routes.
Is my existing patio floor suitable for exercise?
Check that the surface is stable, even and has predictable grip in the footwear you normally use. Look for loose paving, raised edges, damp patches and mats that shift or curl. If you are changing the surface, ask a flooring professional about outdoor suitability and maintenance.
Can I hang a resistance trainer or punching bag from a pergola?
Only if the exact structure and proposed attachment have been approved for that use by the manufacturer or a qualified structural professional. Do not infer approval from the pergola’s appearance or its general product information. If approval is not available, consider equipment designed to stand independently.
Will a pergola keep my exercise equipment dry?
Do not assume that it will. Sun, rain and wind can reach an outdoor area from the sides, and the floor may still get wet. Check the written information for the selected configuration and store equipment according to its manufacturer’s care instructions.
How should I assess a wall-mounted pergola for an exercise area?
Compare its confirmed dimensions with your measured layout, then have the wall, connection requirements and access around doors, windows and services checked for the exact installation. The model name alone does not confirm that a particular wall or site is suitable.
A practical pergola workout layout is a measured activity zone within a larger outdoor setting: room for movement, clear passage and equipment kept out of the way. Floor grip and changing weather matter alongside the pergola’s footprint, while suspended attachments require approval for the exact structure. When a concept plan includes the real equipment, overhead clearance and routes people use, the available configurations can be compared against a genuine set of requirements rather than an empty patch of paving.
