
Where to Position a Heater Under a Pergola
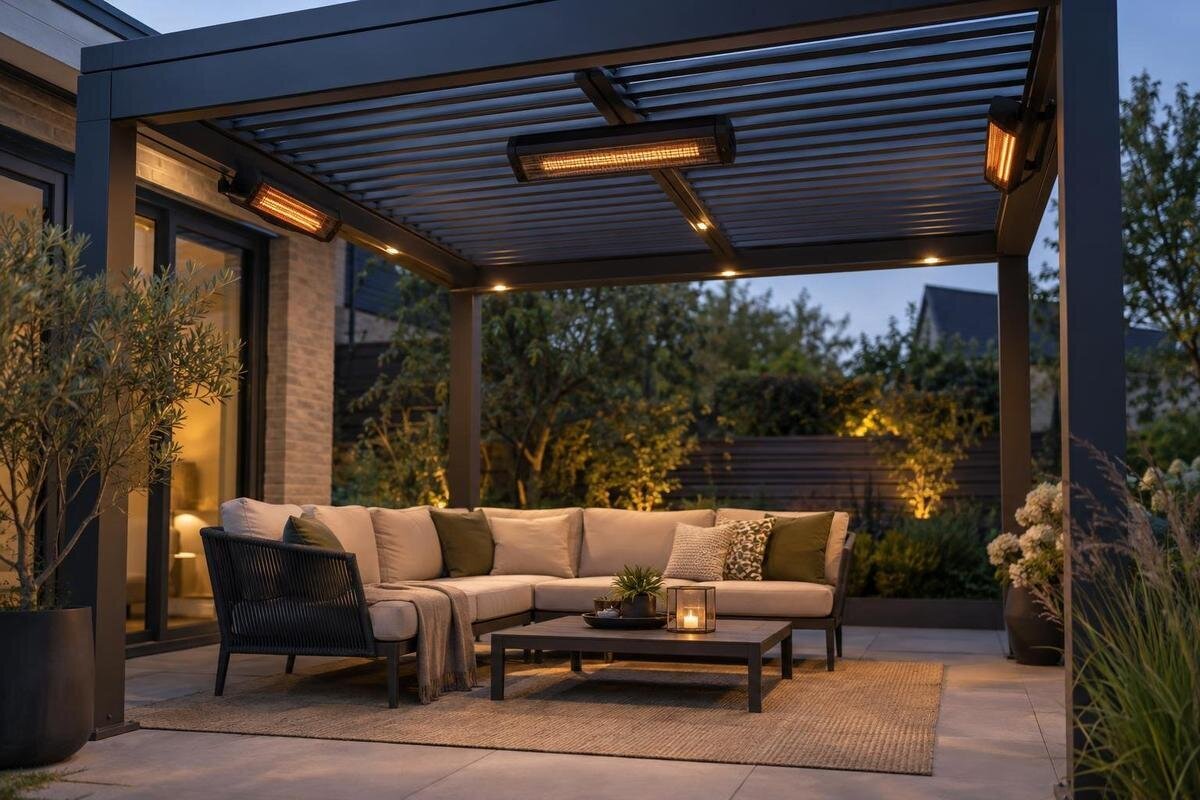
Pergola heating
Position a heater under a pergola by starting with the seats, not with a convenient-looking beam. Mark where people sit and move, match that occupied zone to the exact heater’s stated direction and coverage, then check clearances, weather exposure and a mounting point approved for both the heater and the pergola. The centre of the frame may work, but it is not automatically the best or permitted location.

Map the seating and circulation area
Sketch the pergola footprint and mark every seat, table, doorway, step and usual walking route. Include chairs near the edges as well as those in the centre, then note where people spend the longest stretches sitting and where they tend to stand and talk. The gathering area may be off-centre or split between dining and lounge furniture, even when the roof plan looks symmetrical. Prioritise the space used most often rather than trying to warm every open part. If dining and lounging happen at different times, decide whether the heater should serve one activity or both. Use the actual footprint and furniture arrangement, not a perspective photograph, which cannot show distances from a proposed heater.
Draw furniture in its usual position and one likely alternative, such as extra chairs or a table moved for entertaining. This reveals whether a candidate position serves only an occasional seat but misses everyday use, or becomes awkward when the layout changes. If planning around the Bloomcabin Pergola, work from the confirmed plan for the exact configuration you intend to select; do not scale from a product image. Mark priority seats and places where people stand as separate points. These become references for checking direction, coverage and clearance. If furniture often changes, keep both layouts on the sketch and assess the more demanding one rather than designing around a single ideal arrangement.
Match the heater’s heat pattern to the seats
Identify how the exact heater is intended to deliver warmth before deciding where it belongs. A radiant heater directs heat towards people or surfaces in its specified zone; it does not promise to raise the air temperature evenly throughout an open-sided pergola. Other designs may rely more on warming surrounding air, and some combine methods. Use the heater’s own instructions to understand its pattern. If warmth is directional, the priority is the occupied area within the permitted orientation and stated reach, not an unused patch of roof. In an open space, do not assume the heater will behave like one used in an enclosed room.
Look for the manufacturer’s diagram or wording on direction, operating orientation and coverage. Compare it with the distance between the proposed point and priority seats, including places where guests stand. If the manual gives no coverage estimate for the intended setting, ask rather than drawing an arbitrary heat zone. When planning heating for the Bloomcabin Bioclimatic Pergola, assess the heater’s reach separately from the pergola’s dimensions. Neither the pergola area nor a heater’s power rating establishes how warmth will reach the seats. Use the exact heater instructions and ask the supplier or manufacturer if they do not address the outdoor arrangement.
Choose a position for the occupied zone
The geometric centre is only one candidate. A centrally placed heater may be too far from perimeter seats, while a position above the table may serve diners but miss lounge chairs. Plot a few possible points on the plan and show the permitted direction for each, then compare the occupied seats with the heater’s stated pattern. If the appliance is directional, an offset may suit the group better, but only if the manuals approve that mounting point and angle. Do not choose a position solely because it looks balanced from below; check both the nearest and farthest priority seats.
For a layout using the Bloomcabin Wall-Mounted Pergola, work from the exact plan for your chosen configuration; the model name does not tell you where a heater can be fixed or how far its heat will reach. If no approved point serves the priority seats within the manufacturer’s limits, ask whether a different position, a revised furniture plan or another approved heater arrangement is appropriate. Do not tilt or shift a unit beyond its documented orientation to stretch its coverage. Nor should you assume that adding another heater is automatically compatible; each proposed position needs its own clearance and mounting checks.
Apply the exact clearance instructions
Use the clearance instructions for the exact heater model, including specified distances above, below, to the sides and from combustible surfaces where those are addressed. Requirements can depend on the unit and its orientation, so a figure copied from another brand or a general online guide is not a substitute. Check the nearest roof panel, beam, screen, curtain, shade material, plant and stored item against the manufacturer’s stated limits. A structure may look open yet still have a surface close enough to matter, especially around its edges or accessories. Follow the manual’s definition of where each distance is measured from.
Apply those distances to every normal furniture arrangement, not just when chairs are neatly pushed back. Dining chairs, cushions, side tables and movable screens can shift the nearest object closer to a heater; include anything likely to be moved while it is operating. Mark the boundaries on a drawing or ask the installer to plot them from the manual. If a seat, furnishing or roof surface falls within an exclusion area, change the layout or proposed position and obtain professional guidance. Do not reduce a stated clearance to make the plan fit or fill gaps in the instructions with a guessed distance.

Confirm the pergola’s approved mounting point
A beam, post, louvre or decorative trim is not an approved mounting point just because it looks substantial. Confirm that the pergola manufacturer permits the exact heater and bracket at the specific point proposed, and that the heater manufacturer allows that bracket and orientation in the setting. Both checks need to refer to the actual models, not simply to a generic pergola frame and heater category. Ask the manufacturer or authorised installer to identify permitted attachment locations in writing. If approval is not documented, treat the point as unverified and pause the layout rather than choosing hardware by appearance. Approval for a different frame member or heater is not interchangeable.
When discussing heater placement on Bloomcabin’s bioclimatic pergola, state the intended heater model, proposed position and exact pergola configuration. A general question about whether a heater can go on a pergola may not resolve whether that particular support point and attachment are allowed. Ask about the specific arrangement shown on your plan, including the bracket and orientation. Keep any response with the manuals and installation plan so the person fitting the unit can check the same arrangement. If the manufacturers’ instructions disagree or leave a gap, have the installer obtain clarification before confirming the position.
Check roof movement and attached accessories
If the pergola has an adjustable roof, sliding screen, retractable shade or other moving part, check the heater position through every normal operating position. The unit or bracket must not conflict with documented movement, and a moving part must not enter a clearance area in another position. Ask whether the heater can remain in place when the roof is open, closed or being adjusted, as applicable. A position that works only when an accessory is parked one way may not suit everyday use. Have the installer confirm the clearances throughout the movement, not only at one point.
Check fixed and optional fittings too: lights, fans, curtains, decorative screens and plants can occupy space around the proposed heater or change what is nearest to it. The heater’s clearance instructions, not a visual guess, determine what can share the overhead area. Where parts are motorised or repositioned, have the pergola supplier or installer confirm the arrangement for the exact configuration and intended operating states. If an accessory is added or moved later, review the heater position again rather than assuming the original clearance check still applies. Leave enough access for equipment to be inspected and maintained as instructed.
Assess wind and rain exposure
An outdoor pergola is not necessarily a weather enclosure. Wind-driven rain can reach a sheltered-looking position, and open sides expose a heater to conditions around the structure. Check the exact heater’s outdoor rating and operating instructions against the proposed location, including any stated limits on rain, moisture or wind exposure. Do not assume that being under a roof makes a heater suitable for outdoor use, or that a corner is protected merely because it is less exposed than the centre. Weather suitability depends on the heater model and the conditions at the actual site.
For a project involving a wall-mounted pergola option from Bloomcabin, assess exposure at the intended heater point rather than treating the structure type as proof of protection. Consider the direction from which rain and wind reach the space, whether the sides remain open and whether screens or panels will be in their usual position. A product description cannot substitute for the heater’s rating. If the proposed spot is close to an edge or has variable exposure, ask the heater manufacturer or a qualified installer whether that use is permitted. Do not move the heater into an unapproved position simply to avoid weather.
Coordinate the power route with the heater position
Set the heater’s position from the seating, coverage and safety checks first, then ask a qualified electrician to plan the supply and controls for that approved location. The nearest existing outlet or easiest-looking cable route should not decide where the heater goes. A route that crosses a doorway, walking line or moving roof component can undermine an otherwise suitable position. Tell the electrician which roof and screen positions are used, where controls need to be reached, and which routes must remain clear. Do not alter wiring or improvise a connection to preserve a preferred heater position.
Include the exact pergola identity when discussing the route. A product page such as Bloomcabin’s wall-mounted model can identify the structure under consideration, but do not infer from its name that wiring, a heater circuit or a particular cable path is included or approved. Ask which electrical details are confirmed for the selected configuration, then have the electrician coordinate with the heater instructions and pergola documentation. Keep cables, controls and service access within the professional’s plan; a tidy appearance alone is not enough if it places wiring near a moving component or an area exposed to weather.

Keep controls and walkways accessible
Check the heater location against how people move, not only where they sit. Keep entrances, steps, doors and the main route through the pergola usable, and check that standing to serve food or pull out a chair does not put someone in a restricted area identified by the heater instructions. Controls should be reachable in the manner the manufacturer intends, without making someone climb on furniture or reach past a hot unit. Consider children and guests unfamiliar with the layout: normal movement through the space should not bring them into accidental contact with the heater. Check access to the controls from both seated and standing positions.
Review the drawing with all furniture and fittings that will remain in place. If you are choosing a regular Bloomcabin Pergola, include its proposed location in your garden plan, with the actual furniture, light fittings, cords and other overhead equipment marked around it. Check for overlapping instructions or maintenance needs, particularly where another fixture competes for the same clear area. If shifting a heater to clear a route creates a new clearance or mounting conflict, revisit the layout with the installer instead of choosing whichever compromise looks neatest. Where the furniture is often rearranged, make sure the alternative setup is considered too.
Review the full layout before installation
Put the checks together on one drawing before installation: priority seats, heater direction and documented coverage, clearance boundaries, approved mounting point, weather exposure, moving components and planned power route. This makes trade-offs visible. A point may serve the seating but still be unsuitable because the manual’s clearance cannot be met or the pergola manufacturer has not approved that attachment. Mark the actual heater position and use coverage information from its instructions rather than sketching an assumed heat zone. Ask the qualified installer and electrician to review the same drawing and the exact appliance and pergola documents.
Keep a record of the exact heater model, pergola configuration, relevant manuals and written mounting confirmation with the final plan. For example, identify the intended frame as the bioclimatic pergola model from Bloomcabin when asking which documents apply; a product category is not an approval. If the frame, accessories, heater or seating layout changes later, check whether mounting, clearances, exposure and the cable route remain valid. Where the proposed point works only by ignoring an instruction, revise the plan and seek a compatible, documented arrangement before use.
Frequently asked questions
Is the centre of the pergola the best place for a heater?
Not necessarily. The centre may be too far from perimeter seats or place the heat over a table rather than the people. Plot the occupied area, then check the centre against the heater’s stated coverage, clearances and approved mounting points. A different position may serve the seats better, provided it is documented as permissible.
Which way should a radiant heater point?
Direct it towards the people using the space, following the exact model’s guidance on orientation and reach. Do not change its angle beyond the permitted range to try to extend coverage. In an open-sided pergola, radiant comfort is not the same as heating all the air under the roof.
Can I attach a heater to any beam, post or louvre?
No. A frame member may look suitable without being approved for that heater and bracket. Check the pergola manufacturer’s documentation and the heater instructions for the exact model, attachment and position; obtain written confirmation where needed. If there is no documented approved point, ask the manufacturer or a qualified installer before proceeding.
Will the pergola roof keep an outdoor heater dry?
Not automatically. A roof does not prove that a heater is rated for outdoor exposure or protected from wind-driven rain. Check the exact heater’s outdoor rating and operating instructions against the proposed position and the sides or screens you use. Ask the manufacturer if the intended level of shelter is unclear.
How much clearance should I leave around a pergola heater?
There is no single clearance figure for every heater. Use the exact model’s instructions for distances above, below, beside and from relevant surfaces in the permitted orientation. If the documents are missing or do not cover the proposed setup, do not estimate from another heater; ask the manufacturer and a qualified installer.
The best position serves the main seating while meeting the heater’s documented coverage, clearance and exposure requirements, with a mounting point explicitly approved for the pergola. If one of those checks fails, do not improvise with an angle or fixing. Rework the furniture plan or seek a different documented arrangement. The final position needs to provide warmth where people sit without compromising the installation requirements.
