
How to Plan a Pergola on a Sloping Patio
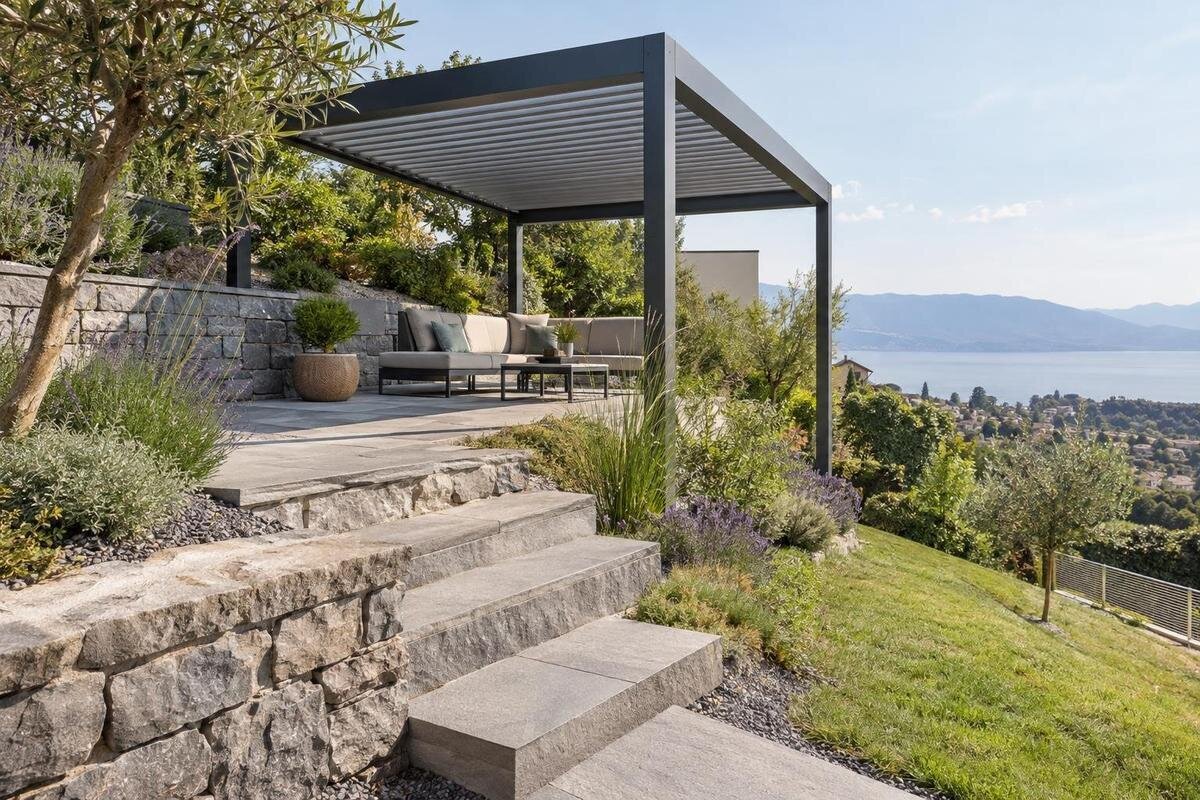
Pergola planning
A sloping patio does not automatically rule out a pergola, but it changes what needs to be resolved before you choose a model. The paving’s fall directs surface water; it does not, by itself, set the pergola’s roof line or approve a particular post arrangement. Map the high and low points, choose the roof level and clearance the space needs, then compare each proposed support position with the chosen model’s drawings and the structure beneath the paving. This helps establish whether the proposed layout accommodates the actual changes in level.

01
Survey the patio’s levels, not just its slope
Begin with a simple site plan and one consistent height reference. Record the patio’s dimensions and the levels at every proposed post position, at the corners and wherever the surface changes. Note whether the fall runs along the patio, across it, or both. A reading from one end to the other can miss a crossfall or local dip. If the surface slopes in two directions, each support can sit at a different height even when the plan looks rectangular. Use a suitable levelling method and write each reading beside its point on the sketch. If the measurements will determine a structural layout, ask a competent site professional to verify them. Mark the highest and lowest edges clearly.
Include more than the paving boundary. Mark drains, steps, door thresholds, walls, surface joints, retaining edges, nearby ground and visible services or other obstacles. Measure the usable footprint in plan, not along the sloping surface alone, and label the reference point used for all heights. Add photographs from both ends and from the side where a change in level is visible. This record helps distinguish a steady fall from a twist or step, and stops a drawing from treating the whole terrace as one plane. Do not average different support-point heights into a single assumed level; the actual readings matter where the posts are proposed.
Keep the patio fall separate from the pergola roof line
Treat the patio fall and roof line as two separate pieces of geometry. The fall belongs to the finished surface and its drainage; the pergola roof has its own required position, height and rainwater arrangements, as defined for the chosen model. Do not copy the paving angle onto the roof automatically, and do not assume every roof must be perfectly horizontal. The relevant model drawings should establish what geometry and post arrangement are permitted. Put the intended roof level on an elevation drawing alongside the measured patio heights. Consider clearance near the house and at the patio’s lower edge as well as the appearance from indoors. This makes a clear comparison possible instead of relying on a photograph or a guess about the slope.
If the roof is held at one elevation, the clearance above the paving changes as the surface rises or falls: the higher edge has less space beneath it. If a model allows another arrangement, its documentation—not an improvised set of unequal post heights—must define it. Check clearance at the high side, low side and intermediate points, and identify the reference used for the roof level. If the Bloomcabin Bioclimatic Pergola is on your shortlist, use its exact model name when asking for drawings that apply to the intended configuration. The product’s identity alone does not establish whether your patio levels suit it.
02
Plot the footprint and each proposed post
Choose the footprint before judging whether the posts can land in suitable places. Use the selected model’s plan drawing to mark each support point relative to the patio edges, house wall, access route and drains. A product photograph is not a reliable way to locate posts, and a stated overall area is not a post-spacing plan. On a sloping surface, the plan positions remain important horizontally while each point may have a different ground height. Record both facts: where each support sits on the patio and its measured elevation. That gives the installer a basis for comparing the real site with the approved arrangement, rather than shifting a post by eye. Check the outline against the actual paved area, not just the intended roof coverage.
Check the whole outline against doors, steps and the routes people use between the house and garden. Include projections only where they are shown on the model drawing; do not estimate their extent from an image. The Bloomcabin Pergola listing gives options from 9 to 24 m², which can help identify the area under consideration, but area alone does not show whether a particular post layout will fit a slope. Ask for the plan that matches the selected size and configuration, then compare its support points with your site sketch. A smaller footprint is not automatically better if it places a post on an unsuitable spot or narrows a route that needs to stay clear.
Check clearance at the high and low edges
Check usable height at both ends, not just the distance between the roof and paving near the house. Mark door and window openings, exterior lights, vents, gutters, eaves and fixed equipment that could meet the frame or obstruct access. Also show the height of the paving at each point where people pass under the pergola. If the roof is level while the patio rises, headroom reduces towards the higher side. A section view showing the wall, roof line and ground profile together makes this conflict visible before posts are positioned. Keep measurements tied to the same height reference used on the plan, and check the space around openings as well as the space directly under the proposed roof.
Where a wall-mounted pergola is being considered, the wall connection adds a height and substrate question; it does not remove the need to assess the patio-side supports. Record the wall, openings and eaves, then ask which connection heights and conditions the exact model drawings approve. Do not select an attachment height just because it clears a gutter or looks convenient. The Bloomcabin Wall-Mounted Pergola page identifies a wall-mounted model, but its product name is not evidence that a particular wall, height or patio fall is compatible. A competent assessment must address the actual wall and support layout, including the clearance available where people need to move through.

03
Plan surface drainage and roof runoff together
Map how water already moves across the patio. Note the low edge, channels, grates, downpipes, door thresholds and places where water has collected or left marks; observe the surface after rain if practical. A fall may lead towards a drain, a garden or the house, and each route affects where supports and walking areas can sensibly sit. Do not assume that water disappears simply because the paving is sloped, or that a proposed post can cover a drain without consequence. The aim is not to redesign drainage yourself, but to give the installer a clear picture of the existing route, any known pooling and points where water crosses the proposed footprint.
A pergola roof introduces a second water path that needs to be considered alongside the paving’s fall. Confirm from the chosen model’s technical information how rainwater is handled and where it may be discharged; do not infer a drainage method from a product name or image. When discussing the Bioclimatic Pergola listing, ask whether the proposed discharge point works with existing drains and whether water could collect near a support or doorway. Show surface flow and roof runoff separately on the plan, so it is clear which route belongs to the patio and which depends on the pergola.
Find out what lies beneath the paving
Visible paving tells you about the finish, not necessarily what can take an anchor below it. A sloping patio might be built over different layers or a structural base, and its appearance alone cannot establish what is present at each proposed post. Look for construction records, repair details or other reliable evidence, and note cracks, loose units or signs of movement without trying to diagnose them. If the build-up is unknown, mark it as unknown in the site information. A competent assessor may need to verify the material and condition at the actual support points; one detail elsewhere on the patio may not describe every location. Avoid assuming that two areas with the same finish have the same construction beneath them.
Match this evidence to the selected model’s approved anchoring drawings. The drawings and a structural assessment should establish whether the existing substrate and proposed post positions are suitable; a surface tile, paving unit or thin finish is not proof of anchorage. Footing type and dimensions depend on the assessed site and model, so there is no single footing size that can be prescribed for every sloping patio. Note buried services and drainage before any work is planned. The Wall-Mounted Pergola product page can identify the option in an enquiry, but it does not replace evidence about the wall, paving build-up or ground at the supports. The assessment should relate to the actual positions shown on the plan.
04
Map steps and changes in slope separately
A simple, steady fall is different from a patio that twists across its width or changes level at a step. Mark every break in slope and show which surfaces are on each plane; do not draw a single line from high to low if the ground does not follow one. Check the elevation at each proposed support, including near edges and transitions. An average level can hide a support point that is higher or lower than the others, while a perspective photograph can make separate planes hard to judge. A plan and one or more side elevations give the assessor a more reliable basis for discussing the frame. If paving has been renewed in stages, check whether the change in finish also marks a change in level.
Compare those individual heights with the model’s permitted arrangement rather than assuming that a roof can bridge every irregularity. If the approved drawing does not show a configuration for the patio’s steps or crossfall, ask whether another documented layout is available or whether a site-specific design is needed. For an option on the Bloomcabin Pergola product listing, identify the selected size when requesting this assessment. The professional reviewing the site needs to establish whether the proposed support points and desired roof line can work together. Label each change in level on the drawings rather than describing the whole patio simply as uneven ground.
Use the exact model’s approved post arrangement
Use drawings for the exact model and configuration to verify post positions, frame orientation and any permitted height adjustment. Keep the product name, selected size, plan view and site measurements together when requesting information, so there is no confusion between models or sizes. If you are considering an option on the Bioclimatic Pergola model listing, check that the drawing supplied matches that selection. A drawing for another layout is not a substitute, even if the overall appearance is similar. When comparing alternatives, keep each model’s drawing with its own site notes so that permitted arrangements are not mistakenly carried over from one option to another.
Do not plan to move posts to avoid a drain, edge or service, change their height, or alter their bases unless the model documentation and a competent professional approve that exact solution. An adjustment that makes the roof look level in an elevation may fall outside the approved arrangement. Only the responsible technical assessment can determine whether a proposed change is acceptable. The same caution applies to assuming that shims, packing or a modified footing will compensate for different ground levels. If the proposed locations conflict with the approved plan, treat that as a design issue to resolve, not as a small installation convenience. Ask for the amended arrangement to be documented before relying on it.

05
What to include in a site-assessment pack
A useful site-assessment pack combines measurements with context. Supply a dimensioned plan, height readings at the proposed supports, marked high and low edges, changes in slope, and a section showing the desired roof level. Add photographs of the wall and nearby obstacles, along with whatever is known about paving construction, drains, services, repairs and the route water currently takes. Clearly separate measured facts from estimates and unknowns; do not present a visual guess as a confirmed level. Identify the exact pergola model and size being considered. This lets an installer or structural professional respond to the actual patio rather than a generic question about whether pergolas can stand on slopes.
Ask for specific answers: do the measured levels match an approved post arrangement, what evidence is needed about the substrate, and what roof height preserves the required clearances? Ask how the model’s roof-water route relates to the patio drainage, and who will assess the wall or ground where supports are proposed. Request the relevant drawings and the basis for any site-specific anchoring recommendation; avoid accepting a generic footing suggestion without evidence about the substrate. If comparing an attached option, name it clearly—for example, the Bloomcabin Wall-Mounted Pergola listing. A clear assessment is more useful than guessing whether the visible slope is too steep.
When a standard layout does not fit the site
A sloping patio is not automatically unsuitable, and a gentle-looking surface is not automatically suitable. The decision turns on whether the chosen model’s roof geometry, clearances and approved post positions can be reconciled with measured levels and verified support conditions. Pause for further assessment if the patio has several planes, a sudden step at a proposed post, uncertain construction below the finish, drainage that would be obstructed or insufficient clearance where the roof is planned. These are reasons to investigate, not universal pass-or-fail limits. The assessor can establish whether the intended arrangement is feasible or whether another layout is needed. A site with a steady fall still needs the same evidence as a more visibly irregular one.
Before treating the plan as ready, the site levels, model drawing and anchoring evidence should agree. Where they conflict, identify the unresolved point: the footprint, desired clearance, drainage route, support conditions or model choice. Discuss that specific issue with the responsible installer or structural professional, and have any revised arrangement documented. Footing requirements must follow the assessment for that location rather than a standard dimension copied from another patio. Resolving discrepancies on paper makes the slope a known part of the design instead of an issue discovered after installation begins.
Frequently asked questions
Can a pergola be installed on any sloping patio?
There is no universal slope limit that makes every patio suitable or unsuitable. The measured levels must be compared with the selected model’s approved post arrangement, roof geometry and anchoring requirements. A structural assessment and evidence of the supporting surface are needed to establish whether the proposed layout works at that site.
Should the pergola roof follow the patio’s slope?
Not automatically. The patio fall helps direct surface water, while the roof position and geometry need to match the chosen model’s drawings and the clearance required below it. Set these out separately on a plan and elevation, then check how the roof’s own rainwater arrangements relate to the existing drainage.
Can the posts be different heights to compensate for the slope?
Only if the drawings for the exact model and configuration allow that arrangement. Do not assume that trimming, raising or repositioning a post will solve a level difference. Any proposed change should be assessed by a competent professional and confirmed as compatible with the approved design.
Can I anchor the pergola to the existing paving?
The paving finish alone does not show what lies beneath it or establish that it can take an anchor. Find out what the supporting surface is at each proposed post position, and compare that evidence with the model’s approved anchoring drawings. If the construction is unknown, arrange a site assessment.
How should I plan drainage around a pergola on a slope?
Map the route water already takes across the patio, including drains, low points and areas where it collects. Separately confirm how the selected model handles roof water and where it can be discharged. Consider both routes together so the layout does not obstruct drainage or create a new problem near a doorway or support.
The useful plan shows two things clearly: the patio’s measured levels and the roof and post arrangement approved for the chosen model. Check them together with the required clearances, water routes and evidence about the supporting surface. If the site readings do not fit the drawing, do not correct the mismatch by moving posts or guessing at their heights. A site-specific assessment can establish whether the slope works with the intended layout or whether the plan needs to change.
