
What to Plan for Pergola Footings Under Porcelain Paving
PERGOLA FOUNDATIONS
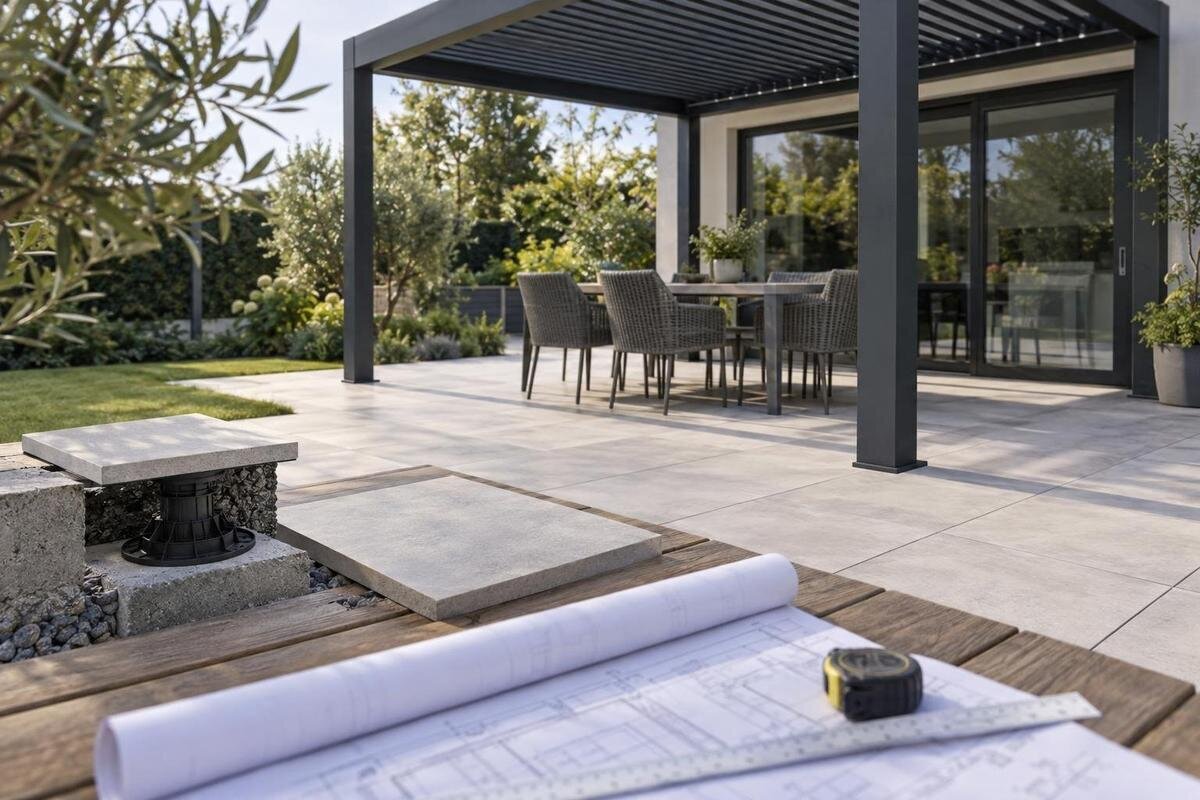
Porcelain paving makes a patio look finished, but it should not be treated as the support for a pergola. When posts need footings beneath the paved area, the structural layout, tile cuts, drainage and final levels must be coordinated before work starts. The key is to keep the load path clear: each post connects to a designed footing or another assessed structure, while porcelain finishes around that connection. This guide explains which drawings and site facts to bring together, and which decisions need a structural professional rather than a rule of thumb.

Site checks before installation 1
How pergola posts connect through porcelain paving
Porcelain paving is the visible finish, not a footing. A tile can be hard and well laid, but that does not show whether the layer beneath it can receive a pergola anchor. The structure’s loads need to pass from each post through a designed connection into a support assessed for that purpose. Depending on the site, that support might be a separate footing below the paving or, under a different design, an existing structural slab assessed for the chosen anchors. Those are not interchangeable assumptions. Treat the tile, bedding, screed, membrane, slab and soil as separate layers when you discuss the patio.
Where a footing is planned below the paving, the main interface is where the post connects to that support and the tile finishes around it. The arrangement must come from the applicable anchoring drawing and site assessment, not from the appearance or thickness of a tile. Soil conditions, existing concrete, edge constraints and the selected pergola detail all influence the design. Ask who is responsible for specifying the footing and confirming the substrate, and what evidence they need before work starts. Do not assume a tile can act as a packer beneath a post or base plate. The useful early decision is how the structural detail and paving layout will be coordinated, not a guessed footing dimension.
Set out post centres before the paving grid
Make a measured site plan before you settle on a tile pattern. Start with the post centre points and structure outline shown in the relevant model drawing, then relate them to fixed features such as the house wall, patio edges, door openings, steps, drains, downpipes and existing movement joints. Mark areas that must stay clear for access and maintenance, and note any level changes rather than assuming the paving is flat. This plan should expose conflicts early: a proposed post might coincide with a drain, sit close to an edge or create an awkward tile cut. Write measurements from a fixed reference, not from a loose tile edge that may not be straight.
Confirm the exact model and configuration before anyone marks the ground. If you are planning around the Bloomcabin Pergola, obtain the applicable approved drawing for its post centres and anchoring details. Give the same drawing to the structural professional and paving contractor, and agree a common reference line and height datum so their measurements can be compared directly. If the chosen configuration changes after a quote, update the set-out instead of carrying earlier coordinates into the paving plan. A rendering or apparent roof size is not a reliable way to locate post centres.
Site checks before installation 2
Plan tile cuts around the structural layout
Porcelain paving has its own tile sizes, joint spacing and edge cuts, but those visual lines should be coordinated with—not used to set—the structure. Overlay the tile layout with the approved post centres before ordering or cutting material. A grout joint may line up neatly with a post, but it does not make a fixing point; moving a post to centre it on a tile can also change the approved anchoring arrangement. If the grids clash, have the designer check whether a revised paving pattern or a permitted structural adjustment resolves it. Do not leave the installer to decide on the day, when materials may already have been cut.
Plan the opening or finish detail around the actual connection, not just the visible upright. The approved design may call for a base plate or another fixing arrangement, so confirm its footprint and required clearance from the relevant drawing instead of inferring them from a product image. Agree the shape and position of each tile cut in advance; this helps avoid narrow pieces or improvised notches. The drawing should also clarify how tile joints relate to the post connection. Grout or a decorative cover should not be treated as the structural fixing. For the Bloomcabin Bioclimatic Pergola, as for any selected model, use the applicable post and anchoring drawing before finalising cuts.
Find out what lies below the paving
Establish what supports the tile before deciding where or how a footing can be formed. A paved terrace may include porcelain, bedding or screed, a membrane, a slab and prepared ground, but appearance alone does not confirm which layers are present, how deep they are or what condition they are in. Use original construction records where available and have the relevant professional assess the proposed post locations. A sound-looking surface does not prove that the buried layer can receive a pergola anchor. Nor does a slab beneath the tiles automatically qualify: its condition and the chosen anchoring arrangement still need to be assessed.
Concealed services and drainage are part of the same investigation. Before tiles are lifted or ground is disturbed, establish the position of pipes, cables, drainage channels and any waterproofing that could be affected. Agree with a qualified site professional what inspection is appropriate at the proposed footing locations. If you are considering the Bloomcabin Wall-Mounted Pergola, include both the wall and the patio supports in the assessment. Keep the findings tied to the actual post positions on the plan, rather than assuming that conditions beneath one part of the terrace apply throughout.

Site checks before installation 3
Coordinate finished levels and footing height
Set heights against the finished surface, not just the excavation or slab top. Porcelain thickness and bedding change the build-up, while a sloping patio can have different finished levels across the pergola footprint. The drawing should relate the footing or anchoring point, the post and the final paving surface at each location. Record a common height datum and measure the existing surface near every post, rather than assuming one level from a single point. This lets the foundation detail be checked against the intended paving build-up before work begins. No single exposed or recessed height will suit every anchoring detail.
The junction must provide the space required to install and inspect the connection as specified, while allowing the surrounding surface to drain as designed. Do not leave the tile installer to guess whether paving should finish flush with a post base, be held clear or meet a cover; those are detail-specific decisions. If a height adjustment is proposed, ask the designer to confirm that it does not alter the approved anchoring arrangement. When planning a Bloomcabin Bioclimatic Pergola, keep the finished-level notes alongside the applicable model drawing and site plan, with each level clearly assigned to its post position.
Keep drainage and movement joints working
Map the patio’s drainage route before placing footings. Surface falls, channel drains, outlets and door thresholds can all be affected by a post or a raised finish detail. Do not assume water will drain through tile joints or simply pass around a new obstruction. Ask the paving professional to show how water will move around each post and remain connected to the existing drainage route. Check the low points against the proposed finished levels, including where water reaches a threshold. The aim is to avoid a detail that creates a dam or a place where water collects after the surrounding paving is complete.
Existing movement joints need the same attention as drains. A footing or post detail that crosses or restrains a paving joint can create a conflict between the structure and the surface; the design needs to show how the two are separated or accommodated. If a membrane or other waterproofing is present, any post penetration, tile cut or change in level needs a compatible detail from the responsible specialist. Do not assume grout or sealant replaces the specified anchoring or waterproofing treatment. Show joints, drains and membranes on the coordination drawing so they are not lost when the finished paving hides the layers below.
Site checks before installation 4
Coordinate the footing and paving work
Agree the work sequence with the structural and paving teams before the site is booked. On a new patio, footing positions and anchoring components need to be settled before tile cuts can be laid out accurately; on an existing terrace, access may require a planned local opening. The specified method and any required inspection or curing period control when the next trade can proceed. Do not cover a detail simply because the paving team is ready to continue. Include time in the programme to check the set-out and resolve discrepancies before they become hidden or expensive to correct.
Use one coordination drawing to show post centres, the footing and anchoring detail reference, paving grid, finished levels, joints, drains and responsibility for each junction. Mark revisions and give the current version to everyone working on site. Separate sketches using different reference points can leave post positions out of alignment with completed drainage or paving work. For a project using the Bloomcabin Pergola model, record the selected configuration on that drawing so it can be matched to the applicable model documents. Decide in advance who can approve changes to post positions and how those changes will reach both teams.
What to check on an existing paved patio
For an existing patio, collect any records of the slab, paving build-up, drainage and past repairs before deciding where to make an opening. If records are missing, the structural professional or site contractor can decide what investigation is appropriate and where it should take place. Do not remove tiles or drill exploratory holes casually: concealed services and waterproofing may be below them. Visible cracks, uneven joints or previous repairs are useful observations to report, but they do not establish what the substrate can support. Separate what is documented from what is assumed, and settle the remaining questions before fixing the pergola position.
If a post centre conflicts with a drain, movement joint, edge or threshold, resolve the conflict before the patio is cut. Moving a post for a cleaner repair may take it outside the approved layout, while keeping the original position may require a different cut or support detail. Considering the wall-mounted pergola option does not remove the need to assess the patio supports, and the wall needs its own assessment. Confirm the position and support detail for every post that remains on the patio, then incorporate any agreed changes into the retrofit plan before repairs are priced or tile cuts are finalised.

Site checks before installation 5
Drawings and evidence to have before work starts
Before materials are ordered or tiles are cut, bring together the model-specific post layout, applicable anchoring drawing, footing design and a structural assessment of the proposed support. The site information should make clear what is known about the substrate and what evidence is still needed. The professional responsible for the design must specify the footing and anchoring arrangement for the actual site; a standard size copied from another patio is not a substitute. A catalogue image or product name can identify what is being considered, but it cannot establish the ground conditions or suitability of a hidden slab.
Prepare a site pack with a measured plan, post centre references, paving grid, finished-level notes, drainage and movement-joint locations, and any available construction records. Add the drawing revision being used so the structural and paving teams are not working from different versions. If the bioclimatic pergola model is on your shortlist, keep its documents clearly separate from those for other configurations, then confirm which set applies to the final selection. Ask the responsible professional to identify the detail for each post and the inspection points that must be reached before the work is covered.
Final set-out checks and handover records
Before irreversible work, compare the approved drawing with the measured site and mark each post centre with the contractors. Check that the marks match the agreed structural positions and paving layout, and that no post conflicts with a drain, joint, threshold or access route. If measurements or site conditions differ from the drawing, stop and refer the discrepancy to the responsible designer before the footing is formed or tiles are cut. Do not let a convenient tile line become the reason for shifting a support without an approved change.
At completion, keep a record of the installed post positions, applicable anchoring detail, approved changes and the work concealed beneath the paving. For a Bloomcabin Pergola installation, retain the selected model and configuration details with that site record so the correct drawings can be identified for future maintenance. Compare the finished junctions with the agreed detail, including tile clearances, joints and any specified access for inspection. Check that drains remain open and that water does not collect around posts. The handover record should distinguish the finished paving from the structural support hidden beneath it.
Frequently asked questions
Can porcelain paving carry pergola posts?
No. Porcelain is a finished surface, and the tile’s appearance does not show whether the layer below can carry the structure or accept its anchors. The load must reach a footing or another substrate assessed for the chosen pergola detail. A slab beneath the tile may be considered only after its condition and anchoring arrangement have been checked.
Can I move a post to avoid cutting a tile?
Not without confirming that the revised position is acceptable for the structure. Post centres follow the approved layout; aligning a post with a grout joint is not a structural reason to move it. Have the responsible designer check any proposed change, then update the footing and paving drawings before work proceeds.
Should the top of a footing be flush with the paving?
There is no universal flush, recessed or raised height. It depends on the approved connection, tile build-up, finished levels, drainage and any access needed for fixing or inspection. Record the finished paving level at each post and have the design specify how the junction should be formed.
Is an existing slab under the tiles enough for anchoring?
Not automatically. A hard, level appearance does not confirm the slab’s thickness, condition, reinforcement, edge position or suitability for the chosen anchors. Use construction records where available and arrange a site assessment. If information is missing, the responsible professional should decide what investigation is appropriate.
Should the paving or the footings be done first?
Coordinate both before either is finalised. Post centres and anchoring details affect the tile cuts, while the paving build-up and finished levels affect the connection. The sequence may differ between a new patio and a retrofit, so agree the set-out and inspection points with the structural and paving teams.
Porcelain paving and pergola footings can sit neatly together when the structural layout, tile cuts and finished levels are resolved as one coordinated plan. Keep the tiles out of the load path, base decisions on a site assessment and applicable anchoring drawings, and carry the same post centres, drainage and joint details through installation. A clear record of what supports each post matters as much as the finished cut around it: it helps prevent the paving from being mistaken for the foundation later.
