
Pergola Privacy From Upstairs Neighbours: Plan Sightlines
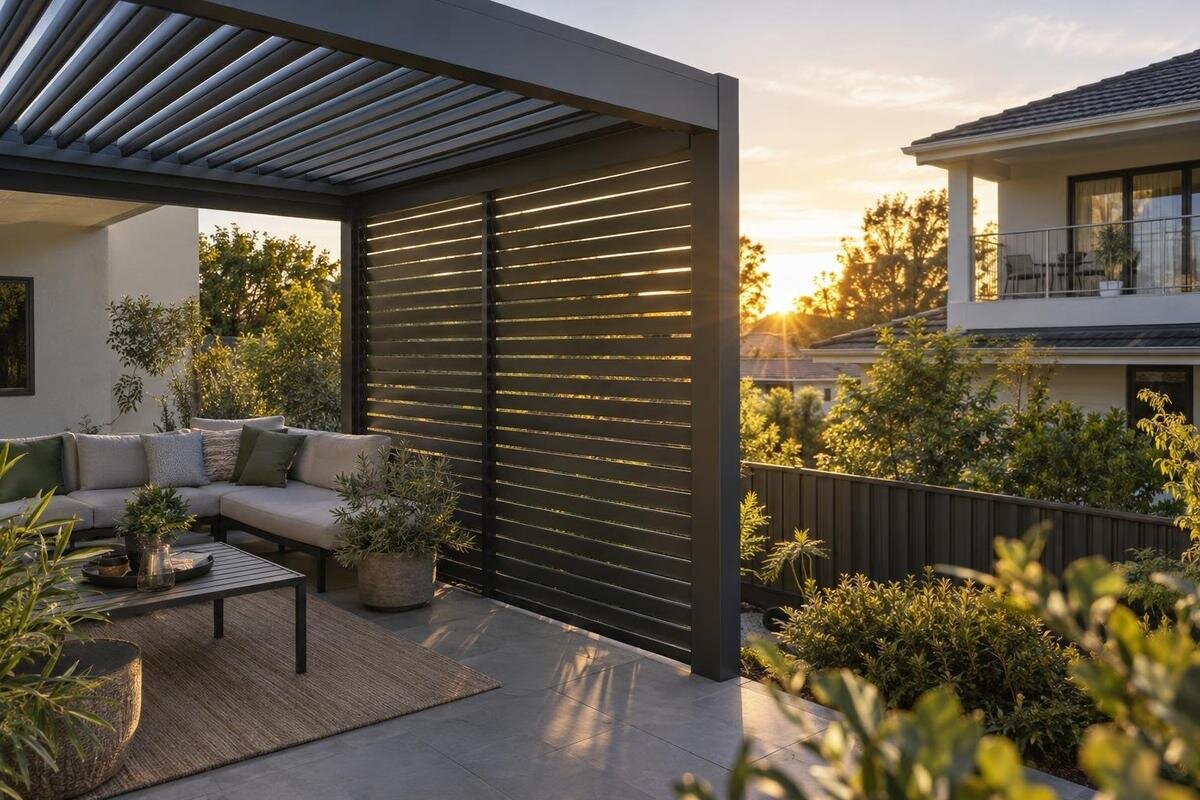
Pergola privacy planning
Views from an upstairs window or balcony can reach a pergola even when a fence screens it at ground level. The useful test is a sightline from the actual overlooking position to the places where people sit or stand. A side screen and an overhead roof interrupt different angles, so planning them as one generic privacy problem can lead to unnecessary enclosure—or leave the important view untouched. A simple plan and side elevation make the choice clearer before you settle on a layout.

Why ground-level screening may not block upstairs views
At ground level, a fence, hedge or neighbouring wall may hide a seat; from above, a viewer may look down across its top. The same difference applies to a pergola: a side treatment that interrupts a horizontal view may not interrupt a steeper line from an upstairs room. Height and horizontal distance work together, so neither boundary height nor roof height alone tells you whether a seated person is visible. Two windows in the same building can also look across the space at different angles, and the occupant’s position inside each room may change the view.
Define the private zone before planning a barrier. It may be one chair, the dining table or a path beside the house; it need not be the entire footprint. Decide whether privacy matters while someone is seated, standing or moving between those points. Seeing paving or the roof may be acceptable even if a direct view to the main seat is not. Write down the specific concern, such as a clear view to the table from one upstairs window, then test it against that use. A single line is only one case; repeat it for the positions people actually use.
Map each upstairs viewing position
List plausible viewing points: a room window where somebody spends time, a balcony opening or an upper landing overlooking the terrace. Mark each separately on a rough plan, along with the pergola outline, nearby walls, fence, doors and main seating positions. If the exact eye height is unknown, label it as an estimate rather than using false precision; the purpose is to understand where the view arrives from. A measured sketch can refine the outline later, but a photograph taken from the garden on its own cannot show the vertical angle.
Draw a side elevation as well as a top-down plan. On the plan, show whether the viewer is to the left, right or directly beyond the seating area; in elevation, show the relative levels and horizontal gaps. A balcony may extend closer to the pergola than a window above it, creating a different line to test. Note which openings are routinely used rather than treating every possible window as equally relevant. If more than one neighbouring property overlooks the space, label each viewpoint separately so you can compare the angles rather than treating the whole boundary as one source of views.
Draw the line from the window to the seat
Choose one viewpoint and one occupied spot. On an elevation, mark the approximate eye position at the upstairs window or balcony and the height of a person at the pergola; connect them with a straight line. This is a visual check, not an engineering drawing. If the proposed side screen ends below that line or stops before it crosses the relevant angle, it cannot screen that particular view. Repeat the test for a seated person and someone standing where both postures matter. Use the same ground reference for the heights so the sketch remains easy to compare.
Add the proposed roof and any screen to the sketch in their intended positions. A line that passes through a gap, around an edge or above a screen remains a possible sightline; do not treat an outline as an opaque barrier unless the specified surface really blocks the view. Use rough measurements consistently, then check uncertain details on site. The Bloomcabin Pergola product details can identify a model for discussion, but the product name alone does not establish its roof arrangement or any included privacy accessories.
How roof cover affects a downward sightline
An overhead cover can affect an upstairs view where the viewing line meets a surface that actually interrupts it. A high, oblique line may cross the roof; a view arriving from beyond an edge may pass underneath it towards a person. Openings, the roof material and its operating position can all change what remains visible. Do not assume that the word roof means a continuous visual screen, or that shade proves a view is blocked. Ask for a model-specific drawing or description of the roof arrangement that corresponds to the sightline you have sketched.
Test each viewing point against more than the centre of the footprint. Someone seated close to an outer edge may be visible through an open side even if a more vertical line to a central seat meets the roof. A view may also be interrupted from one upstairs position but remain clear from a balcony to one side. When considering the Bloomcabin Bioclimatic Pergola product details, use these different seat positions to frame your questions about roof cover. Ask how the proposed arrangement relates to each line, rather than relying on a general impression of how sheltered the central area looks.

Place side screening across the actual angle
A screen can block an upstairs view if it lies across the drawn path and extends far enough in the relevant direction. Height alone is not the whole test: the viewer may look over its top, past an end or through gaps, depending on where the window and seat are. Show the screen in both plan and elevation, including which side it occupies and where it ends. A panel that shields the boundary from eye level may leave the same chair exposed to a diagonal view from above. Check each important window-and-seat pairing instead of choosing a side by looking only at the ground-level boundary.
More enclosure is not automatically a better result. Screening may change daylight, airflow or access on that side, so consider those effects alongside privacy. Do not assume a separate mesh, curtain or panel is supplied with a pergola, or that a third-party item can be attached to it. If you are considering the Bloomcabin Wall-Mounted Pergola product page, use it to identify the model, then ask which side options or accessories are approved for that exact configuration and whether a proposed screen would cross the view you have drawn.
Check privacy alongside sun and daylight
The sun and an upstairs view can arrive from different directions. The sun’s direction changes over the day and year, while an upstairs sightline depends on the viewer’s position. Note when you usually use the pergola, then check the sun’s position and the relevant sightlines for those times. A roof or side screen that helps with one angle may also cast shade where you want daylight. Do not assume that a screen will have the same effect throughout the day; its position and the sun’s angle matter. Observations at your usual times of use are more useful than judging the layout at one convenient moment.
Include nearby house windows in the daylight check, especially if a screen would sit close to them. Privacy from an upstairs neighbour and daylight inside your own home are separate considerations, so record both instead of treating one as proof of the other. When discussing a layout for the Bioclimatic Pergola listing, identify which house windows you want to keep unobstructed and which upstairs views concern you. Put both on the same plan so the competing needs are visible. Compare the proposed arrangement with the actual openings and use of your outdoor area before deciding how much of a side needs to be covered.
Use furniture layout to define the private area
Mark the usual positions of chairs, a table and any other furniture on the plan. A seat that is only a short distance from the main group may sit on a different line from an upstairs window, so test the real places people use rather than a single point at the centre. Try the sketch with seated and standing occupants, and include the route between the house and the seating area if it is important to keep that route private. This helps distinguish a view to a space you use from a view to an area that can remain open.
Moving a chair or turning a table may take an occupant out of a direct line, although furniture should not be treated as a dependable screen. Check that a revised layout still leaves room to approach seats and use the table comfortably. When considering the Bloomcabin Pergola model listing, compare the proposed footprint with your furniture plan rather than judging its suitability from area alone. Include the space needed to pull chairs out, not just the table and chair outlines. Then see whether a smaller change in arrangement addresses the sightline before planning a wider screen around the seating area.
Keep airflow and access in the layout
A screen that closes a whole side may affect airflow and make access less convenient. Mark the everyday route into the pergola, places where chairs are pulled out and any doorway that needs to remain clear. If only one diagonal view reaches the table, covering every side may be unnecessary. A partial or repositioned screen can be considered as a planning idea, but its practical result depends on whether it intersects the view and whether it is available and compatible for the selected model. Do not infer that a particular screen can be fitted just because it appears in a sketch.
Think about how the area will be used when a screen is in place, not only how it looks on a plan. Consider whether people can enter without moving furniture and whether the proposed arrangement leaves the open sides you want. For a layout based on the Bloomcabin Wall-Mounted Pergola listing, show the route from the house doorway to the seating area as well as the screened side. Before attaching anything to a wall or pergola, ask the supplier or a qualified installer to confirm the permitted configuration and any relevant clearances. Keep attachment details separate from the sightline sketch; do not improvise fixings.

Verify the exact model and accessory
Once the sightlines are clear, ask about the exact model and the side configuration being considered. Useful questions include which side an accessory fits, where it sits, what area it covers, whether it is included or separate, and whether compatibility has been confirmed for that model. Request a drawing or written description that lets you compare the proposed screen with your plan and elevation. A general image may help you picture an outdoor setting, but it is not enough to establish accessory compatibility or show that a specific upstairs view will be blocked.
The supplied listings identify the Regular, Bioclimatic and Wall-Mounted pergola models and state areas from 9 to 24 m². That area range does not show roof openings, screen positions, accessory availability or sightline performance. The Bloomcabin Bioclimatic Pergola model page can help identify the product being discussed, but check the relevant configuration separately rather than inferring its privacy features from the model name or area. Keep any confirmation tied to the exact product and proposed accessory, so a detail for one arrangement is not assumed to apply to another.
Compare the same sightlines across layouts
Make two or three sketches using the same upstairs points and occupied spots. One can show the current furniture layout, another a changed seat position, and another a proposed roof or side screen. These are comparison options, not evidence that each arrangement is available for every pergola. Mark where each line meets a proposed surface, where it passes around an edge and which areas remain visible. Using the same viewpoints for every sketch makes it easier to see whether a change solves the original concern or merely shifts it to another seat.
Compare each option for privacy, daylight, airflow and access, then note any detail that still needs confirmation. If one window is the only source of concern, focus the discussion on that line rather than assuming the whole perimeter needs treatment. When discussing the Regular pergola product page, present the preferred layout alongside an alternative and explain why you favour it. This keeps the comparison focused on your priorities rather than simply the amount of screening. Choose the arrangement that addresses the views that matter while preserving the way you want to use the space.
Frequently asked questions
Can a pergola roof block a view from an upstairs window?
Sometimes. The viewing line must meet a surface that actually interrupts it, and the roof’s openings, material and position all matter. Check the specific angle and roof configuration; shade alone does not show that a view is blocked.
Will a side screen provide privacy from above?
Only if it crosses the line between the upstairs viewing point and the place you want to screen. A line may pass over the screen, around its end or through gaps, so test the height, width and position against your sketch.
What should I include in a sightline sketch?
Mark the upstairs window or balcony, the pergola outline, and the seats or routes you want screened. Draw a top-down plan for direction and a side elevation for height, then test seated and standing positions where relevant.
Do all sides of a pergola need screening?
Usually, the useful first question is which specific views reach the places you use. A screen on one relevant side, a change to the seating layout or another confirmed arrangement may address the issue without enclosing every side.
Are privacy screens included with Bloomcabin pergola models?
The supplied product information identifies the model names and area ranges; it does not establish which privacy accessories are included or compatible. Check the details for the exact model and configuration before planning around a screen.
Good privacy planning is a geometry exercise before it becomes a product choice. A line from each relevant upstairs viewpoint to each key seat shows whether the issue is overhead, lateral or both. Use that map to focus questions about roof cover and side screening, then compare the result with daylight, airflow and access. The aim is not to close every edge; it is to address the sightlines that expose the places you actually use.
