
Making a Pergola the Visual Anchor of a Long Garden
Garden design guide
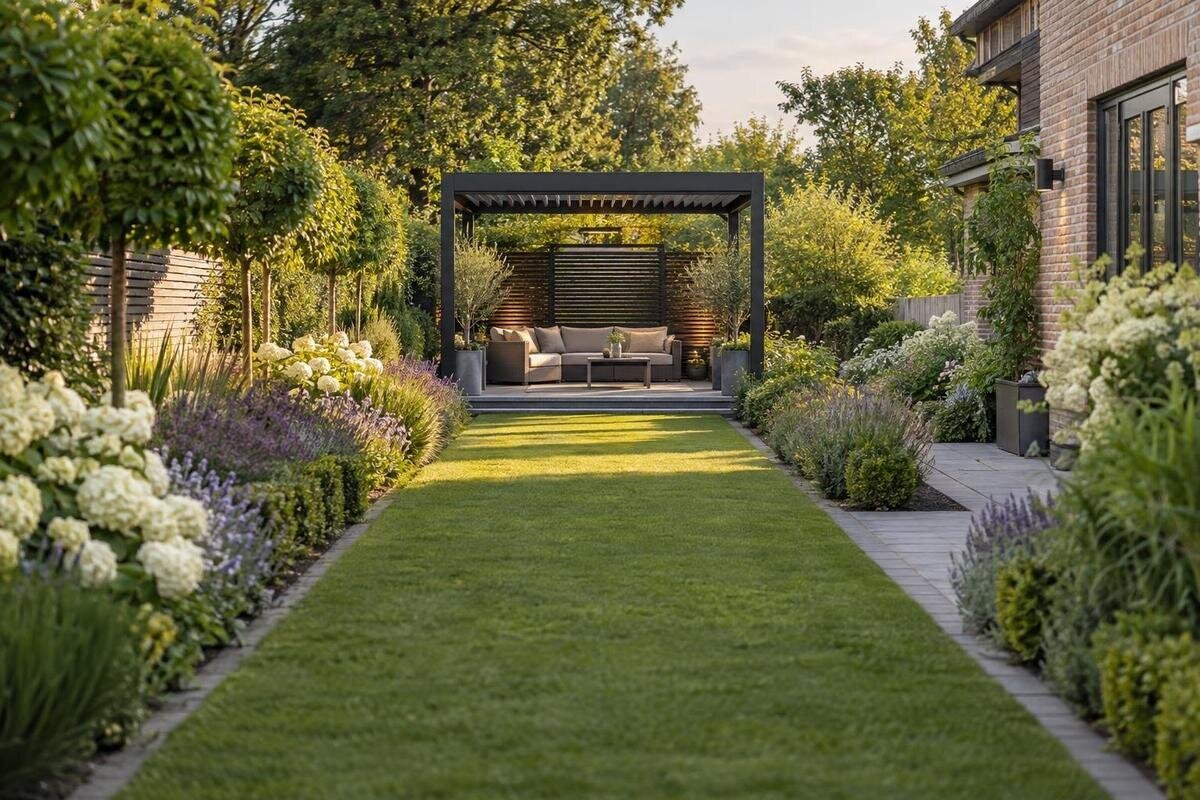
In a long garden, a pergola can give the eye a place to settle and make the far end feel connected to the house. Its effect depends less on placing it at the boundary than on how it meets the main view, the route through the plot and the planting around it. Treat the structure as one part of a sequence: a view from the house, an approach, a clear arrival and something to look beyond or around. That sequence gives the garden depth without turning its length into a corridor.

Before you choose 1
Views from the house, path and gate
Begin with the views people actually use, rather than a plan that shows only the boundaries. Note what can be seen from the main living area, the door to the garden, a usual sitting spot and the entrance gate. On a scaled sketch, mark the house, walls, existing trees, paths, changes in level and anything that cannot be moved. Add sightlines from these viewpoints towards the far end, and note where each view narrows or opens. This reveals whether a proposed pergola would be visible from indoors, hidden behind planting or seen only from one narrow angle. It also shows which existing feature already draws attention.
Walk the full length and look back towards the house as well as ahead. A position that appears balanced from the door might interrupt a useful cross-view from the lawn or leave the far section feeling cut off. Photographing the same viewpoints can help compare alternatives, but keep the site plan as the record of dimensions and fixed features. Mark which view should be strongest: through the pergola, towards it or past it. Then test two or three possible footprints against that priority, including what is visible beyond each one. This makes the structure’s role clear before planting or paving decisions make a particular position harder to change.
The pergola as a garden destination
Putting a pergola at the far end can draw attention down the garden, but it is not automatically the best choice. A structure in the middle can break a long view into two linked spaces; a position closer to the house may make it part of the everyday outdoor route while leaving a planted view beyond. Decide whether the garden needs a destination, a pause along the way or a foreground frame from indoors. Consider what will be visible beyond it, such as open lawn, tree canopy, a boundary wall or a softer planting backdrop, and whether that view will feel finished from both directions. The destination should feel intentional, not like an obstruction placed at the end of a path.
Think about how that position connects to the house without making mounting style the whole decision. For a wall-mounted option such as the Bloomcabin Wall-Mounted Pergola, show its relationship to doors and windows on the plan. Consider whether the view from indoors will look through the structure or towards it, and how that relates to the view further down the garden. A separate structure needs the same visual connection to the house, even though it stands elsewhere in the plot. Compare both arrangements from inside and outside: the strongest destination from the garden gate may not be the most useful focal point from the living area.
Before you choose 2
Perspective and the garden’s main axis
A long plot already creates a strong direction, so lining every feature up on its centre can exaggerate the corridor effect. Try the pergola in a few positions: square to the garden boundaries, slightly offset from the central view or aligned with a path that approaches from one side. Each changes how much of the garden remains visible beyond the frame. An off-centre structure can make a view feel less rigid, but it should not leave one edge pinched or put a post in the middle of a key sightline. Compare the options from the house and main approach, not just on a top-down plan; check whether the alignment still works from the usual sitting place.
Decide whether the pergola should act as a frame to look through or as a marker to look towards. For a view through it, preserve an open line between its supports and choose a background that gives the eye a clear next point. For a view towards it, a modest shift in alignment can reveal the structure gradually from the house or gate. Mark posts and the roof outline in plan and elevation; a single rectangle on paper can conceal a post that would interrupt the view. This is a visual test, not a reason to assume a particular style will solve the site’s proportions. Include a line of sight from the path as well as from the house.
The route to the pergola and arrival space
The approach is part of the composition: a path can lead directly to the pergola, pass beside it or arrive at one corner. Mark the route from the door or gate, then show where it meets existing paths and where people need to turn. A direct line makes the destination legible from a distance; a gentle change in direction can reveal it gradually, provided the structure does not disappear behind a hedge or wall. Keep a continuous walking line clear of planting edges, furniture zones and the pergola’s supports. Do not let the route narrow to an awkward gap, and make clear whether it continues beyond the pergola or ends there. This affects whether the structure reads as a stop or a landmark along the way.
At the pergola, allow for arriving and moving through, not merely reaching the first post. If it is intended for sitting, draw the furniture footprint and the space needed to move around it. Show how someone can enter and leave without making the whole garden’s circulation pass through the seating area. When considering the Bloomcabin Pergola for your layout, use its exact side lengths and post positions to assess the entrance rather than relying on the listed area. Check gates, door openings and access to other garden areas at the same time. The route should remain convenient whether people are stopping at the pergola or walking past it.

Before you choose 3
Pergola proportions in a long garden
In a long garden, a compact frame may be lost against the full view, while an oversized footprint can divide the plot and leave too little space around it. Judge it against the width at the proposed location, the visible distance from the house and the area needed for a clear path. Draw its actual length and width at scale, with posts in their proper positions. Do not use a square-area figure as a substitute for proportions: two footprints with similar areas can have different relationships to the garden. Include enough surrounding ground on the drawing to see whether planting and circulation still have room, and whether the pergola sits naturally within that section of the garden.
Product pages can help identify which model you are considering, but the drawing must answer the spatial questions. For example, the Bloomcabin Bioclimatic Pergola listing gives an area range of 9 to 24 m². Ask for the relevant dimensioned plan and check the footprint, post positions, projection and any required clearances against the site. Then test the proportions from the main viewpoints: does the pergola read as a deliberate landmark, or does it overpower the view? A scaled drawing can expose that mismatch before you commit to surrounding paths or planting. Avoid scaling from a photograph, since perspective can make the structure appear larger or smaller than it is.
Planting depth: foreground, middle distance and background
Planting can shorten the visual distance without making a long garden feel crowded. Use the foreground, middle distance and background deliberately: a low edge near the viewpoint, a more substantial group beside or just beyond the pergola, and a taller feature further back. The layers need not form a continuous hedge. Gaps let the eye travel between groups and keep the structure visible; variations in height and spacing give the view more than one plane. Map existing trees and mature plant outlines first, so new planting fills a real visual gap rather than duplicating a feature already doing that work. A repeated plant form can link distant areas without making them look identical.
Choose plants for their documented mature spread, height, water needs and local growing conditions, with advice from a suitable nursery or landscape professional where needed. A small plant in a pot is not the size it will occupy in the finished view. On a drawing that includes a candidate such as the wall-mounted pergola from Bloomcabin, distinguish the planting close to the house from the groups further along the garden. Keep the main sightline open at mature plant size, but allow other groups to overlap in the view where they help establish depth. Show the gaps between layers as carefully as the planting beds themselves.
Before you choose 4
Keeping the pergola visible through planting
Use planting to guide the eye towards the frame, not to conceal its shape. A group set to one side of the approach can create a reveal; paired groups can frame a view if they leave a clear opening between them. Avoid a continuous screen at the end of the garden unless hiding the boundary is the intention, because it can make the pergola appear as a stop rather than a destination. Check the view from more than one angle: planting that frames the house view may completely cover the structure from the side path as it fills out. The planting line can also steer movement, but must not make the route appear narrower than it is.
Keep access for pruning and general garden maintenance in the planting plan, alongside the space needed for sitting and walking. Where a bed runs beside a support, show its mature edge and the remaining gap rather than drawing planting as a thin line. If the Bloomcabin Pergola model is on your shortlist, plot its supports against those edges to see where access could become awkward. Distinguish an opening intended only to preserve a view from one that people will walk through. Both can look clear on an uncluttered sketch, but a walking route must also remain usable once the surrounding plants have filled out.
Path layout and surface choices
Surface choices can reinforce the direction of a long garden. A path with a consistent edge can lead towards the pergola, while a change of paving or a small terrace beneath it can signal arrival. Use transitions with care: several competing borders, patterns or material changes can fragment the view into short strips. If the route passes beside the structure, continue one visual line beyond it so the pergola does not read as a barrier across the garden. On a plan, show path edges, seating area and planting beds together rather than designing each as a separate strip. Repeating one surface detail at the far end can also link that destination to the house.
Also show slopes, existing surface levels and where water currently moves; do not assume a new paved area can be added without affecting drainage. These details may affect where the structure and route can sensibly sit. Have an appropriately qualified professional review them if the ground or supporting works need assessment. When plotting an option from the Bioclimatic Pergola product page, coordinate its footprint with the paving layout and the surrounding levels. Show where the approach meets the area beneath the pergola and where it continues beyond. This brings the surface design and the route together without allowing an attractive paving pattern to obscure practical site constraints.

Before you choose 5
The view at different times of day
Look at the proposed position at different times of day, because shadows and glare can alter which elements stand out. The goal is not to calculate a universal orientation; it is to notice whether the frame is clear from the house and path, whether a bright background makes it hard to read, and whether planting casts a competing outline across it. A series of observations can reveal a view that looks balanced at midday but disappears in low-angle light. If trees are deciduous, consider how the view changes when they carry leaves and when they do not. Record the conditions, not just a single favourable photograph.
Mark these observations on the plan so you can compare the same viewpoints under different conditions. Temporary markers at the proposed corners can help you judge the footprint in the garden, although they will not show the effect of the full frame and roof. Remove them after the test. If you are considering the Bloomcabin wall-mounted option, compare its proposed outline with the building elevation as well as the ground plan. Inspect the view from the seated and standing positions people commonly use indoors. Together, these checks help you distinguish a position that looks good in one photograph from one that remains visually clear during everyday use.
What a dimensioned landscape plan should show
Bring the view, route and planting into one drawing before selecting a final footprint. Include boundaries, doors, gates, existing trees, paths, level changes, the proposed pergola outline, post positions, major sightlines and expected mature plant spreads. Dimension the gaps that matter: the route beside the structure, the open view beyond it and the space between it and existing features. That plan makes it possible to compare a wall-mounted option with a freestanding one in the context of this garden, rather than as isolated product photographs. It also gives a designer a clear brief to test alternatives without losing the reason the pergola is being considered.
Use product-specific dimensions and documented planting requirements to complete the comparison, and have the layout reviewed where structural suitability, ground conditions or services are uncertain. A design consultation is most useful when the drawing makes your priorities clear: the intended use, the main view and the route people will take. If the Bloomcabin Pergola listing is one of your shortlisted options, identify it on the drawing so the discussion concerns that model rather than a generic rectangle. The finished plan should explain not only where the pergola sits, but why the view, planting and path work around it.
Frequently asked questions
Where should a pergola sit in a long garden?
Choose a position that works from the views you use most and gives the garden a clear destination. The far end can draw the eye, while a middle position can divide a long view into two linked areas. Check what lies beyond the pergola and how the route reaches it.
Does the pergola need to be centred?
No. A central position can reinforce a corridor effect in a long plot. Compare a few alignments from the house and the approach path, checking that posts do not interrupt important views and that the remaining space still feels balanced.
How can planting add depth without hiding the pergola?
Plan planting in foreground, middle-distance and background layers, with deliberate gaps in the main view. Use mature plant sizes on the drawing, not just the size of plants when bought, and check visibility from more than one viewpoint.
How do I check that a pergola will fit?
Use a dimensioned plan showing the footprint, post positions and required clearances. A listed area, such as 9 to 24 m², does not give the exact length and width or show how much room the approach needs.
What should a landscape plan show?
Include boundaries, doors and gates, existing trees, paths, level changes, the pergola footprint, key sightlines and mature planting outlines. Dimension important gaps around the structure and show where the route arrives and continues.
A pergola becomes a visual anchor when its position makes sense from the house and along the route, not simply because it occupies the far end of the plot. Let the sightline, arrival space and planting layers work together, with enough open ground to see both the structure and what lies beyond it. A dimensioned plan helps reveal whether the garden reads as a sequence of connected places rather than one long passage. When the view and movement feel clear from more than one angle, the pergola has a considered place in the whole garden.
