
Retractable Pergola Screens: Planning Housing, Guides and Access
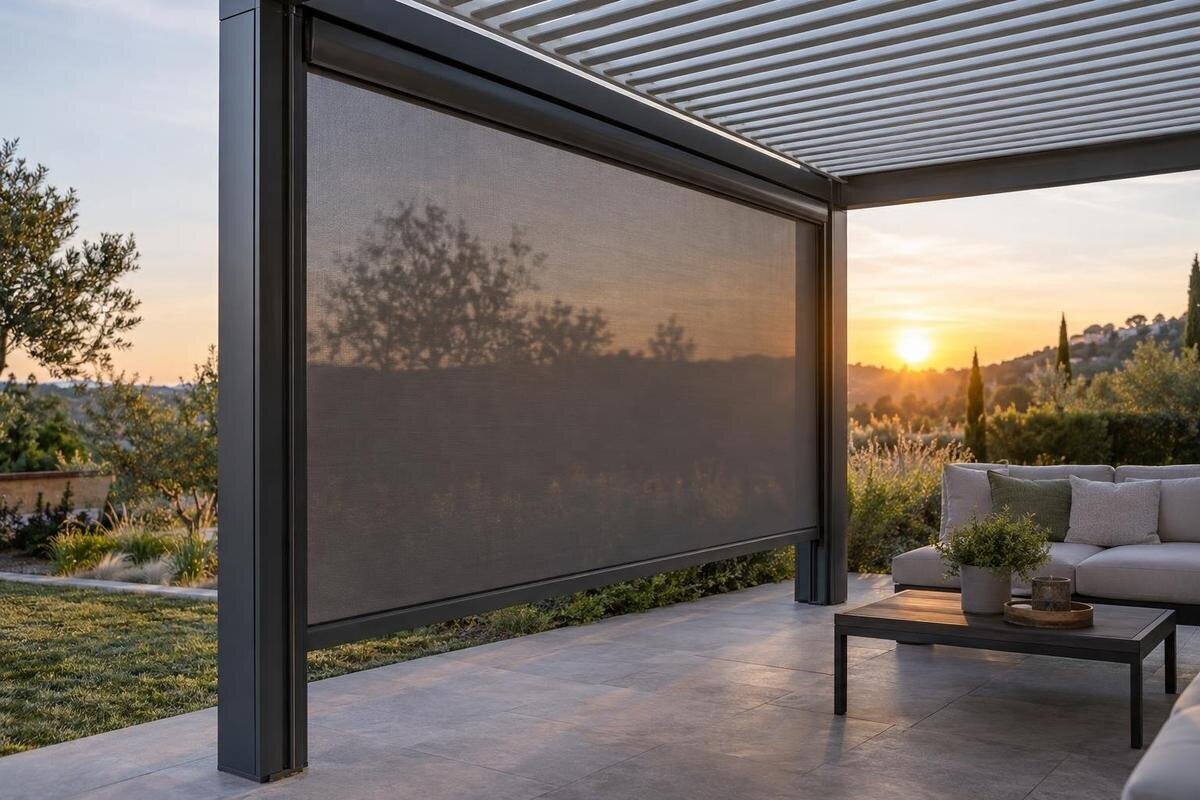
Pergola screen planning
A retractable pergola screen needs somewhere to go when it is not covering the opening. The housing, side guides and moving edge can still take up room, affect a doorway or block access to another fitting, even when the fabric is raised. Those details are easy to miss if you measure only the clear opening. Plan the screen in both its deployed and retracted positions, then confirm that the proposed design is supported for the exact pergola model and site.

The screen in both positions
A retractable side screen needs space both when it covers the opening and when it is retracted. In a roll-up system, fabric commonly winds into a housing; other supported designs may gather or move differently. In either case, the screen does not disappear. Guides, brackets, a bottom bar where fitted, and operating controls may remain on or beside the pergola. Before choosing a position, decide which side needs screening, how the screen will move and what must stay accessible when it is fully retracted. Ask for the actual mechanism and a drawing rather than assuming every design uses a top cassette.
Measure the opening and sketch the assembly in both its deployed and retracted positions. Show its relationship to posts, beams, wall faces, doors and paving, and distinguish the nominal opening from the space the screen system occupies. On a plan that includes the Bloomcabin Pergola, use the exact model name in your enquiry and ask separately whether a supported screen arrangement is available for that configuration. The pergola listing does not, by itself, show that a screen is included or that an unlisted screen will fit. Label the two positions clearly so a line representing the fabric is not mistaken for a permanent guide or bracket. This also makes it easier to compare proposals that cover the same opening but store the screen in different places.
Where the housing can sit
A housing receives or stores the screen when it is retracted, but its form depends on the system. Many vertical roll-up designs have a cassette along the top of the opening; other products may park the screen differently. Ask for the housing’s full outside dimensions, including brackets or end pieces where specified, rather than just the clear fabric width. Confirm whether it sits above the opening, below a beam or beyond a post line, and how much remains visible from each side. The housing envelope and the clear opening are different measurements.
Show the proposed position on a plan and elevation, with the fascia, roof edge, wall return and nearby fittings marked. Downpipes, lights or an existing fan can obstruct the housing or access to it, so do not assume a neat-looking cover can conceal the assembly. If you are comparing the Bloomcabin Bioclimatic Pergola, state the exact model and opening in your enquiry, then ask where a compatible screen can be mounted. Mark the housing’s proposed outline on the elevation viewed from the seating area and from the garden. This separates questions about its appearance from questions about whether it fits. Where a cover or fascia is proposed, show it as a separate element rather than drawing over the housing. Leave its relationship to the service access clear enough for the supplier to assess.
Side guides and fixing lines
Side guides may be rails, channels, cables or another retention arrangement, depending on the screen design. Do not assume that a preferred profile, a slim appearance or a post face automatically suits a particular system. Ask for the guide type, its overall width and projection, its fixing line, and whether it sits on the inner or outer face of the opening. These details affect usable clear width and access for cleaning. A perspective image may show the finish, but a dimensioned section is more useful for checking how far the assembly enters the opening.
Measure the opening at the top, middle and bottom, and its height at both sides. Note any out-of-square frame, uneven wall or change in paving level, and send photographs that show the surfaces at each end of the span. A straight-on image can hide a projecting sill or wall return that changes the guide position. Ask the supplier to state reference faces and fit tolerances, then have the installer confirm the finished site. For the Bloomcabin Wall-Mounted Pergola, show the wall-side return and opening in the same drawing. Label each measurement with the faces it runs between: an inside post measurement is not the same as the distance between proposed guide fixing lines. Keep those labels consistent across the plan, elevation and photographs so the installer can identify which dimensions still need confirmation.
The screen’s full travel path
Mark the screen’s full movement, not only its outline when closed. If it travels vertically, include the path of the bottom bar; if it gathers or slides, show the space needed for the panel or stack. Keep that envelope clear of door handles, window sashes, wall lights, planters, outdoor furniture and items stored beside the pergola. Distinguish things that can be moved easily from fixed fittings, and decide whether moving furniture every time would be practical. Draw chairs in their usual pulled-out position as well as tucked in; a table that fits on paper may obstruct the screen during everyday use.
Check how the screen relates to doors and windows in both positions. An outward-opening door, projecting handle or frequently used window can cross a guide line or the route of a moving edge. Make sure the person operating the screen can reach its handle or control and preserve the access needed to use and latch the door. The furniture plan for the regular Bloomcabin Pergola model should show the screen’s travel path as well as the seating layout; do not infer screen movement from the pergola footprint alone. Walk through the usual sequence on the plan: open the door, step outside, reach the control and deploy the screen. Repeat it in reverse. If a chair or planter must move, note where it will go rather than merely marking it as movable.

Bottom-edge and threshold clearance
The bottom edge deserves its own measurement. Record the finished paving level, any slope, threshold, step, drainage channel, door sill and permanent mat or grate across the screen line. The bottom bar or edge needs a clear route, and its intended landing position depends on the design. Do not assume it will run over a raised threshold, sit flush with paving or seal a gap. Ask for the required clearance and confirm whether the screen is intended to meet the floor, stop above it or use another detail. Keep existing drainage routes visible on the drawing.
Measure the clear passage through the opening when the screen is retracted, then check what remains when it is down, including guide projection and the bottom edge. If people carry trays, push a pram or use a mobility aid through that route, state the required passage width and check it with the installer; do not judge accessibility from a photograph. For an enquiry about the bioclimatic Bloomcabin model, include the finished floor level and threshold detail rather than estimating the gap from an image. Add any planned paving or floor finishes to the measurement notes. Where the surface level changes along the opening, identify the measurement points on the drawing instead of supplying one unexplained height. Ask the supplier to show the intended bottom-edge position against those levels, so the proposed clearance is understandable across the full width.
Fixing surfaces and existing structure
Identify where the housing and each guide can be fixed before the screen is specified. The screen supplier should show the bracket positions and required mounting surfaces; a flat-looking fascia, trim, cladding or roof panel is not proof that it is an approved fixing point. Have a qualified installer check the actual structure and proposed fixing method for the selected system. Do not drill, add a backing piece or alter a pergola member simply to make an early sketch fit. Confirm that any proposed enclosure or trim will not block operation, service access or existing water-management details.
If the design is wall-mounted, draw the pergola, wall and side opening together rather than as separate elevations. With the wall-mounted Bloomcabin model, identify the exact model and site surfaces, then ask which side-screen arrangement, if any, is supported for that configuration. Mark seams, downpipes, vents, exterior lights, doors and visible service runs so the supplier and installer can resolve clashes from the actual site, not from a similar-looking example. Distinguish the proposed bracket positions from confirmed fixing locations; an early layout should not look like an approved installation drawing. Where a fixing surface is concealed by an existing finish, label that uncertainty for the installer to assess. Keep a note of any agreed change to the housing or guide position, because moving one component may require the rest of the layout to be checked again.
Access for cleaning
Cleaning access should be considered while the housing is still visible on the drawing. Outdoor dust, leaves, pollen and cobwebs can collect along a housing or guide, particularly where the assembly sits beside a wall or beneath a roof edge. Allow practical access to the full guide length and to the parts the manufacturer identifies as cleanable. A permanent planter, boxed-in casing or tight return can make routine care difficult. Consider the access equipment needed at the installed height; do not plan to reach the screen by standing on loose furniture.
Ask which cleaning method is suitable for the screen material, housing and guides, and which components require a technician rather than routine user care. Do not assume the fabric can be removed, the cassette opened or a cleaning product is appropriate; follow the specific maintenance instructions. With the regular pergola from Bloomcabin, request screen-specific care details separately, because the pergola model does not identify a screen fabric or its cleaning needs. Leave room to reach the ends of the housing and lower guide fixings without dismantling permanent finishes. On the layout, distinguish access available with the screen raised from access available with it lowered. Ask the supplier which position is required for each cleaning task. This helps reveal whether a proposed bench, planter or decorative cover would prevent routine care, even though it leaves the moving screen unobstructed.
Operation and routine inspection
After installation, observe a complete open-and-close cycle in the way the manufacturer specifies. The screen should travel through its intended path without a visible snag, rub or collision; check that its edge remains aligned and that the housing and guides do not interfere with doors or fittings. A new scrape, uneven movement, loose-looking part or repeated stopping is a reason to pause and consult the installer, not to force the screen or adjust a mechanism by guesswork. Keep the operating instructions accessible to everyone who uses the space, and show any manual control or switch position on the handover drawing.
Routine inspection also means knowing when the screen should be retracted. Ask the screen supplier for its operating limits and instructions for wind or unsettled weather, including any restrictions on leaving it extended while the pergola is unattended. Do not infer wind performance or weather protection from the pergola model or the screen’s appearance. For Bloomcabin’s Bioclimatic Pergola, confirm these details against the proposed screen package. Check the manual for inspection intervals and signs that need attention, rather than setting a universal maintenance schedule. At handover, ask the installer to explain the normal operating sequence and what to do if movement stops before the screen reaches its intended position. Record the relevant instruction or manual reference with the screen details, so another household member does not have to guess whether to continue operating it or seek assistance.

What the screen package includes
Before approving a quotation, ask for a written schedule that names the pergola model and screen design, states which side or sides are covered, and shows housing and guide positions. The drawing should identify the retracted and deployed positions, travel direction, clear opening after installation and any required service access. Confirm whether operation is manual or powered, where the control is intended to sit, and what equipment is included. Keep the screen, brackets, guides, covers and controls itemised so a proposed third-party product is not mistaken for an included pergola feature.
If the screen is powered, confirm who specifies and coordinates the controls and any electrical work; use an appropriately qualified professional for that work and follow the equipment instructions. Ask who takes final site measurements, who resolves differences between the drawing and the built opening, and what aftercare documents are supplied. If two designs are being compared, check them against the same measurements and use requirements rather than comparing images alone. A written compatibility confirmation should identify the exact pergola configuration and screen, not just a general product family.
A drawing for final approval
Prepare a simple plan and elevation before dimensions are signed off. Mark the clear opening, widths measured at several points, finished floor level, doors and nearby fittings; add the housing’s outer limits, guide fixing lines and full travel envelope from the supplier’s drawing. Include a side view where a wall return, beam or projecting sill affects depth. Label which parts already exist and which are proposed, and attach photographs that show both ends of the opening. If paving, cladding or other finishes are incomplete, state the intended final level rather than presenting an unfinished measurement as final.
Review the drawing with the screen raised and lowered. At each position, check whether you can use the door, reach the controls, move around the furniture, keep the intended view and access the housing and guides for maintenance. Mark any uncertain fixing, clearance or operating rule as an item to resolve before ordering. If dimensions or site conditions change, revise the drawing so the screen supplier and installer are working from the same version. This is more dependable than relying on a single opening measurement or a visual mock-up.
Frequently asked questions
What is a screen housing?
It is the part of a retractable screen system that contains or stores the screen when it is retracted. Its shape and position depend on the design. Ask for its full outside dimensions, including any brackets or end pieces specified by the supplier, rather than measuring only the fabric.
Do all retractable pergola screens use side guides?
No. Some designs use rails or channels, while others use a different method to guide or retain the screen. Request a drawing of the specific design, showing its fixing lines and how far any guides project into the opening.
How much space should I leave around a retracted screen?
There is no single clearance that suits every system. The housing, brackets, operating parts and storage position all affect the space required. Use the supplier’s dimensioned drawing for the proposed screen and check it against the pergola and site, rather than relying on a general gap.
Can a screen be added to any pergola?
Do not assume so. The screen design must be supported for the exact pergola configuration and have suitable fixing locations. Ask the supplier to confirm compatibility and state what is included. A pergola listing or model name alone does not confirm that a screen is part of the package.
How should I plan for cleaning access?
Allow a practical way to reach the housing and the full length of the guides, including their ends. Ask which parts can be cleaned by the owner and what method is suitable for the screen materials. Follow the specific maintenance instructions, and do not assume a housing can be opened or a screen removed.
Judge the proposed screen in both its working and retracted positions: the opening may be clear of fabric while the housing and guides remain in view. A useful drawing shows the housing envelope, guide fixing lines, the moving edge and a practical route to clean and inspect each part. With those dimensions checked against the actual pergola and site, the screen’s fit is much easier to assess before finishes or furniture lock in the layout.
